
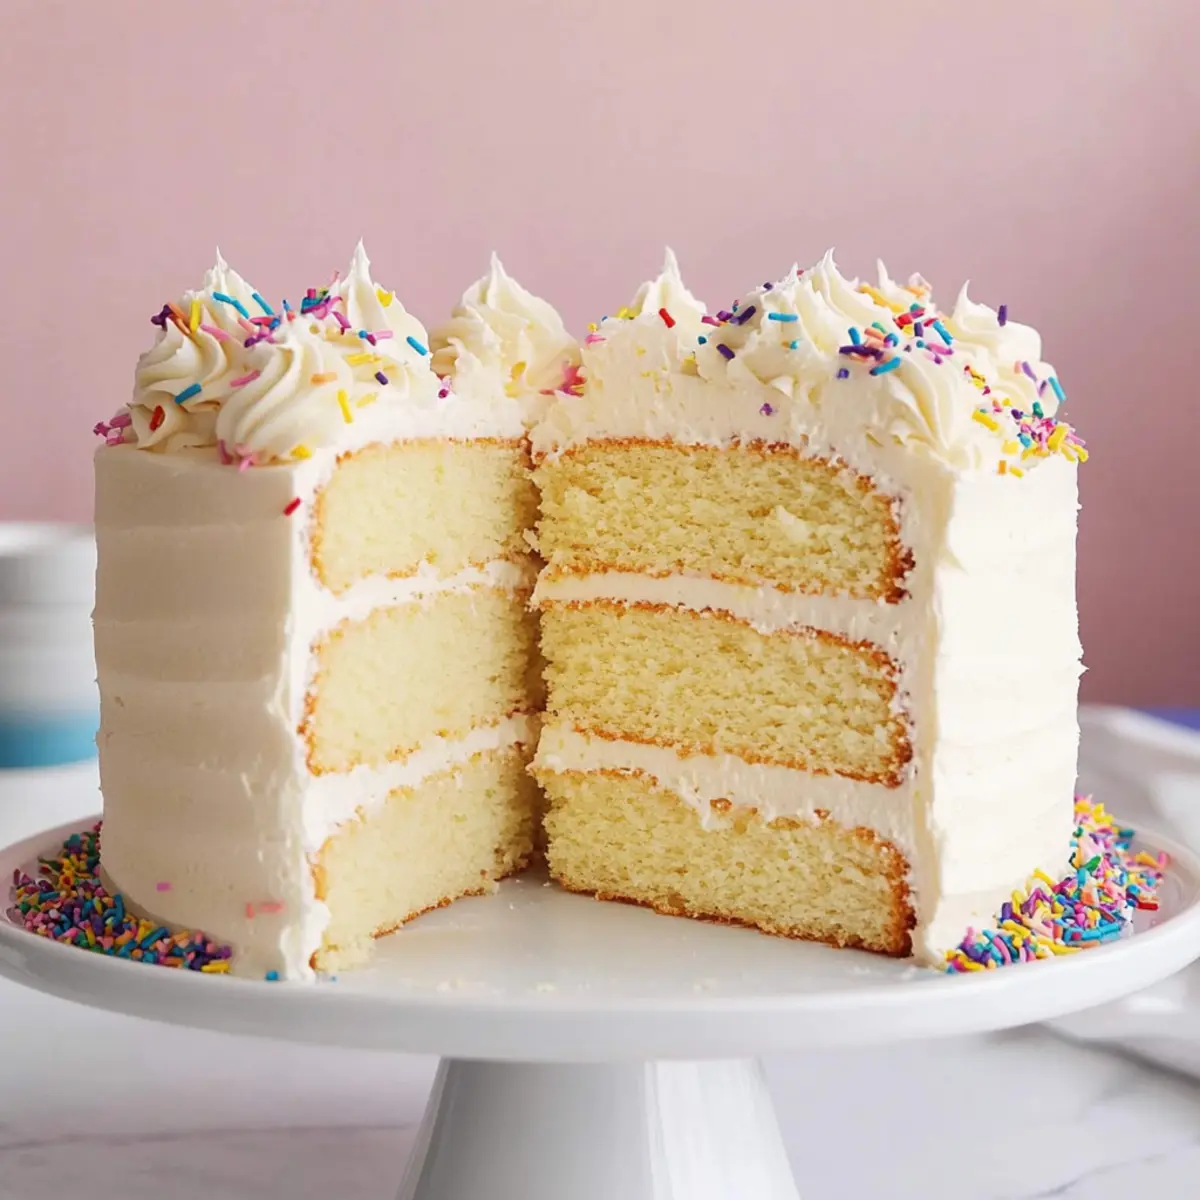
The aroma of vanilla wafts through the air, conjuring images of joyous celebrations and sweet memories. There’s something incredibly special about baking a Vanilla Cake from scratch; it transforms a simple gathering into a cherished occasion. This Perfectly Moist Vanilla Cake is not just a treat for the taste buds, but also a canvas for your creativity—whether you choose to adorn it with velvety Vanilla Buttercream or indulge in playful variations like a Chocolate Vanilla Swirl. With its tender, fluffy texture and rich flavor, this cake proves to be a beloved crowd-pleaser while being surprisingly easy to whip up at home. Plus, it’s versatile enough for any dietary needs, offering gluten-free adaptations and ingredient substitutions that fit your kitchen pantry perfectly. Are you ready to embrace the joys of homemade baking? Let’s dive into crafting this delightful creation together!
Why Choose This Vanilla Cake Recipe?
Unmatched Flavor: The rich vanilla aroma fills your kitchen, bringing warmth and delight – perfect for any celebration or cozy gathering.
Versatile Base: This cake is an ideal canvas for creativity; pair it with a melt-in-your-mouth Vanilla Buttercream frosting or experiment with chocolate swirls for a fun twist.
Diet Friendly: Easily adaptable to various diets, this recipe allows for gluten-free options and simple ingredient substitutions, making it approachable to everyone.
Effortless Baking: With straightforward steps, it’s perfect for both novice and experienced bakers, showing that made-from-scratch doesn’t have to be complex.
Freshness Guaranteed: This cake stays moist and flavorful for days, making it easy to prepare ahead of time. You might just find yourself whipped away by the satisfaction of homemade desserts!
Vanilla Cake Ingredients
• Here’s what you need to create this delightful Vanilla Cake from scratch!
For the Cake
• Cake Flour – Provides a soft, tender crumb; consider making your own if it’s not available.
• Baking Powder – Acts as a leavening agent for rise; ensure it’s fresh for the best results.
• Baking Soda – Works with baking powder to help the cake rise; check for expiration.
• Salt – Enhances flavor; adjust based on your taste preference for the perfect balance.
• Unsalted Butter – Contributes richness and moisture; bring it to room temperature for easy creaming.
• Granulated White Sugar – Sweetens the cake and affects texture; feel free to use caster sugar if desired.
• Eggs – Provide structure and moisture; using room temperature eggs will integrate better into the batter.
• Sour Cream – Adds moisture; substitute with plain Greek yogurt or buttermilk if needed.
• Vanilla Extract – Infuses intense vanilla flavor; feel free to adjust if using vanilla bean.
• Whole Milk – Adds additional moisture; buttermilk can be a richer substitute.
For the Frosting
• Vanilla Buttercream – A classic pairing for our Vanilla Cake; fluffy, sweet, and perfect for decorating.
Variations
• Chocolate Cocoa Powder – If you’re looking to make a Chocolate Vanilla Swirl, add cocoa powder to balance the flour.
• Gluten-Free Flour – For gluten-free options, try using a 1:1 gluten-free flour blend.
With these ingredients ready to go, you’re all set to bring this delicious Vanilla Cake to life!
Step‑by‑Step Instructions for Perfectly Moist Vanilla Cake
Step 1: Preheat and Prepare
Preheat your oven to 350°F (175°C) and prepare your cake pans by greasing them with butter or non-stick spray. Line the bottoms with parchment paper for easy release. This ensures your Perfectly Moist Vanilla Cake will come out beautifully without sticking, paving the way for a flawless baking experience.
Step 2: Combine Dry Ingredients
In a medium bowl, whisk together 2 cups of cake flour, 1 tablespoon of baking powder, ½ teaspoon of baking soda, and ½ teaspoon of salt until well combined. This step is key to aerate your flour mixture, helping your cake rise evenly and achieve that light, fluffy texture that everyone loves in a homemade vanilla cake.
Step 3: Cream the Butter and Sugar
In a stand mixer, beat ½ cup of unsalted butter at room temperature until creamy and light. Gradually add in 1 cup of granulated sugar, continuing to mix until the mixture is fluffy and pale. This process takes about 3-5 minutes and is crucial for incorporating air into your batter, contributing to the cake’s tender crumb.
Step 4: Add Eggs and Flavor
Add 2 room temperature eggs to the creamed butter and sugar, mixing one at a time to ensure they’re fully incorporated. Follow with ½ cup of sour cream and 1 tablespoon of vanilla extract, blending well. You’ll know it’s ready when the batter is smooth and glossy, infusing your Perfectly Moist Vanilla Cake with rich flavor and moisture.
Step 5: Mix Dry and Wet Ingredients
Gradually incorporate the dry ingredients from Step 2 into your wet mixture, alternating with ½ cup of whole milk. Start and end with the flour mixture, mixing until just combined. Be careful not to over-mix; your batter should be slightly thick but smooth, ensuring your cake remains light and fluffy.
Step 6: Bake the Cake
Divide the batter evenly between the prepared cake pans, smoothing the tops with a spatula. Bake in the preheated oven for 30-35 minutes, or until a toothpick inserted in the center comes out clean and the cake springs back lightly when touched. This visual cue indicates your Perfectly Moist Vanilla Cake is perfectly baked.
Step 7: Cool the Cake
Once baked, allow the cakes to cool in the pans for about 5 minutes. After that, carefully turn them out onto a wire rack to cool completely. This step is essential; letting your cake cool prevents it from becoming too dense, ensuring you enjoy that wonderful fluffiness in every bite before frosting.
What to Serve with Perfectly Moist Vanilla Cake?
Nothing pairs better with a delightful slice of vanilla cake than the perfect accompaniments to enhance each blissful bite.
-
Fresh Berries: Adds a burst of tartness and color that beautifully complements the sweetness of the vanilla cake.
-
Rich Chocolate Ganache: Drizzled over the cake, it creates a beautiful contrast of flavors and rich texture that chocolate lovers will crave.
-
Creamy Whipped Cream: Light and airy, it provides a luscious texture that balances the cake’s moist crumb – perfect for a festive touch.
-
Coconut Ice Cream: The tropical sweetness pairs wonderfully, and the creamy texture elevates the cake to new indulgent heights.
-
Citrus Salad: A refreshing mix of orange and grapefruit segments brightens the palate, cutting through the cake’s sweetness and adding zing.
-
Homemade Vanilla Buttercream: Serving slices with a dollop of this classic frosting makes every bite even more decadent and celebratory.
-
Earl Grey Tea: The subtle floral notes bring an elegant touch, making for a delightful afternoon treat that feels cozy yet sophisticated.
-
Chocolate Chip Cookies: The classic pairing of cake and cookies provides a fun contrast of textures and flavors—who could resist?
-
Sparkling Lemonade: A refreshing drink that adds a zingy brightness—perfect for outdoor celebrations or picnics alongside the cake.
Make Ahead Options
These Perfectly Moist Vanilla Cakes are ideal for busy home cooks looking to save time without sacrificing flavor! You can bake the cake layers up to 3 days in advance. After they cool completely, wrap them tightly in plastic wrap and refrigerate to maintain their moistness. For longer storage, they can be frozen for up to 3 months; just make sure to double-wrap them to prevent freezer burn. When you’re ready to serve, simply thaw the layers in the refrigerator overnight, then frost with your choice of Vanilla Buttercream before serving. This preparation keeps the cake just as delicious and fluffy as when freshly baked!
Expert Tips for the Best Vanilla Cake
• Room Temperature Ingredients: Always use room temperature ingredients like butter, eggs, and milk. This helps achieve a uniform batter, preventing curdling or density.
• Don’t Overmix: After combining wet and dry ingredients, mix just until incorporated. Overmixing can lead to a dense texture instead of the light fluffiness of a perfect vanilla cake.
• Measuring Flour Properly: Spoon and level your flour when measuring. Too much flour can make the cake dry; precision is key to that moist finish!
• Check for Doneness: Use a toothpick to test your cake’s doneness. It should come out clean or with a few moist crumbs, indicating the cake is baked to perfection.
• Cool Properly: Allow your cakes to cool in the pans for only about 5 minutes before transferring to a wire rack. This prevents sogginess and keeps your vanilla cake light and airy.
How to Store and Freeze Vanilla Cake
Room Temperature: Place the cooled Vanilla Cake in an airtight container at room temperature for up to 2 days. This keeps it moist and fresh, making it perfect for immediate enjoyment.
Fridge: If you plan to enjoy it over a few days, store the cake in the fridge wrapped tightly in plastic wrap. It can be kept for up to 5 days; just be sure to bring it back to room temperature before serving for the best flavor.
Freezer: For longer storage, wrap the cooled Vanilla Cake tightly in plastic wrap and place it in a freezer-safe container. It can be frozen for up to 3 months. When you’re ready to indulge, thaw it in the fridge overnight or at room temperature for a few hours.
Reheating: If the cake has been frozen, allow it to thaw completely before serving. For enhanced warmth, you can gently warm individual slices in the microwave for about 10-15 seconds. Enjoy every flavorful bite of your homemade Vanilla Cake!
Vanilla Cake Variations & Substitutions
Customize your Vanilla Cake to fit your tastes and dietary needs, making each bite a unique experience!
- Buttermilk: Use buttermilk instead of whole milk to enhance moisture and flavor. It adds a subtle tang that complements the sweetness beautifully.
- Chocolate Twist: Swap out a portion of flour for cocoa powder to create a delightful Chocolate Vanilla Swirl. Try 1/3 cup cocoa for a perfect balance.
- Gluten-Free: Substitute with a 1:1 gluten-free flour blend for a gluten-friendly version that everyone can enjoy. Remember, make sure to check for cross-contamination!
- Dairy-Free: Replace the butter with coconut oil and the milk with almond or oat milk for a delicious dairy-free adaptation the whole family will love.
- Sour Cream Alternative: If you’re out of sour cream, plain Greek yogurt or buttermilk can step in seamlessly, providing similar moisture and richness.
- Flavor Infusion: Experiment with extracts! A splash of almond extract alongside vanilla provides a delightful flavor twist. Both work beautifully in cakes.
- Fruit Add-ins: Toss in some fresh berries or chocolate chips into the batter for an exciting texture twist. Blueberries and chocolate are a match made in heaven!
- Frosting Alternatives: For a lighter option, consider icing your cake with a refreshing whipped cream or a silky cream cheese frosting that pairs perfectly with vanilla.
Feel free to explore these enticing variations that can elevate your cooking experience! If you’re in the mood for something a little different, check out my High Protein Pancake recipe or these delicious Cheesecake Stuffed Chocolate Chip Cookies for a fun treat!
Perfectly Moist Vanilla Cake Recipe FAQs
How do I choose the right ripeness of ingredients for baking?
Absolutely! For this vanilla cake, ensure your butter is at room temperature, which means it should be soft but not melted—think of the consistency of mayonnaise. Eggs should also be room temperature for better incorporation into the batter. The ideal sour cream or Greek yogurt should be fresh with no signs of spoilage; avoid any that have dark spots or an off smell.
What’s the best way to store leftover vanilla cake?
Very! Store your cooled Vanilla Cake in an airtight container at room temperature for up to 2 days to maintain its moistness. If you have more left, wrap the cake tightly in plastic wrap and keep it in the fridge for up to 5 days. For the best flavor, allow it to come back to room temperature before serving.
Can I freeze my vanilla cake for later enjoyment?
Absolutely, you can! To freeze your Perfectly Moist Vanilla Cake, wrap it tightly in plastic wrap and place it in a freezer-safe bag or container. It will keep well for up to 3 months. When you’re ready to enjoy it again, thaw it overnight in the fridge or at room temperature for a few hours. This method preserves its delicious flavor and crumb structure beautifully.
What should I do if my cake doesn’t rise properly?
Oh no! If your cake doesn’t rise, it could be due to expired baking powder or baking soda. Make sure to check the expiration date on these leavening agents before baking. Also, ensure you didn’t overmix the batter after adding dry ingredients, as this can lead to a dense texture. If it still doesn’t rise, consider checking your oven temperature with an oven thermometer, just to be certain it’s baking at the right heat.
Is this vanilla cake recipe safe for gluten-free diets?
Very! To adapt this recipe for gluten-free needs, simply replace the cake flour with a 1:1 gluten-free flour blend. Choose a blend that contains xanthan gum, which mimics the structure from gluten—this will help create that light, fluffy texture we all love. Just be sure to double-check that all your other ingredients are gluten-free, especially any pre-packaged items.
Can my pets enjoy any part of this vanilla cake?
Not really! While this vanilla cake is delightful for us, it’s best to keep it away from your furry friends. Ingredients like sugar and chocolate (if added) can be harmful to pets. If you want to share a treat with them, consider making a special dog-friendly cake using pet-safe ingredients.
Heavenly Vanilla Cake That Melts in Your Mouth
Ingredients
Equipment
Method
- Preheat your oven to 350°F (175°C) and prepare your cake pans by greasing them with butter or non-stick spray. Line with parchment paper for easy release.
- In a medium bowl, whisk together flour, baking powder, baking soda, and salt until well combined.
- In a stand mixer, beat butter until creamy and light. Gradually add sugar, mixing until fluffy and pale.
- Add eggs one at a time, mixing well after each. Then add sour cream and vanilla extract, blending until smooth.
- Gradually incorporate the dry ingredients, alternating with whole milk. Mix until just combined.
- Divide the batter evenly between prepared cake pans and bake for 30-35 minutes, or until a toothpick comes out clean.
- Allow the cakes to cool in the pans for about 5 minutes before transferring to a wire rack to cool completely.