
As the sweet, warm aroma of freshly made dough envelops my kitchen, I can’t help but feel a wave of nostalgia. There’s something irresistibly comforting about Stovetop Custard Cream Buns, each bite of these delightful creations wrapping a luscious custard filling in soft, fluffy goodness. Not only are they egg-free and gluten-free with a simple tweak, but these buns also allow for endless custard variations—you can easily whip up a homemade custard or use your favorite store-bought one! The beauty of this stovetop cooking method means you don’t have to turn on the oven, making it a quick and fuss-free treat that’s perfect for breakfast or as a snack. So, whether you’re gathering around the table with family over tea or indulging in a solo sweet moment, these buns promise to elevate your day. Ready to dive into the world of custard-filled wonders? Let’s get started!
Why are Stovetop Custard Cream Buns irresistible?
Soft, Fluffy Texture: The stovetop method results in buns that are beautifully soft and fluffy, providing a perfect bite with every mouthful.
Versatile Fillings: You can customize the custard fillings to suit your taste—whether you choose a creamy homemade custard, a rich chocolate version, or a store-bought option, each bun is a delightful surprise.
Quick Cooking: No need for oven time! Simply cook these buns in a skillet, saving you time for more moments of enjoyment.
Egg-Free & Gluten-Free Options: With simple substitutions, everyone can savor these buns, making them a wonderful treat for those with dietary restrictions.
Crowd-Pleasing Delight: Perfect for family brunches or as a sweet snack during the day, these buns are bound to impress anyone fortunate enough to enjoy them! For a refreshing side, consider trying a Cucumber Salad Bacon for a delightful meal pairing.
Stovetop Custard Cream Buns Ingredients
For the Dough
• All-purpose/cake flour – Provides structure and a soft texture; for a lighter bun, cake flour works wonders.
• Instant dry yeast – Acts as a leavening agent, yielding fluffy buns; substitute with regular active dry yeast if needed.
• Sugar – Sweetens the dough and aids in browning; castor sugar can be used as an alternative.
• Salt – Enhances flavor and strengthens the dough, essential for a balanced taste.
• Warm water – Activates the yeast and hydrates the dough; ensure it’s warm (not hot) for optimal results.
• Milk – Adds richness and moisture; plant-based milk makes a fantastic dairy-free substitute.
• Oil (canola or sunflower) – Contributes to the bun’s tenderness; any neutral oil can work in a pinch.
For the Custard Filling
• Custard powder (homemade or store-bought) – Offers a quick and easy filling option for these Stovetop Custard Cream Buns; experiment with flavors!
• Egg-based custard (optional) – For a traditional twist, you can opt for custard made with eggs for a rich, creamy filling.
Optional Topping
• Powdered sugar – Dust on top before serving for a sweet finishing touch that enhances the buns’ appeal.
Step‑by‑Step Instructions for Stovetop Custard Cream Buns
Step 1: Make Dough
In a large mixing bowl, combine 3 cups of all-purpose flour, 2 teaspoons of instant dry yeast, ¼ cup of sugar, and 1 teaspoon of salt. In a separate jug, whisk together 1 cup of warm water, ½ cup of milk, and 2 tablespoons of oil. Gradually pour the wet mixture into the dry ingredients, mixing until combined, then knead for about 5 minutes until the dough is smooth and elastic.
Step 2: Rise
Cover the dough with a clean kitchen towel or plastic wrap and place it in a warm, draft-free area. Allow it to rise for about 1 hour, or until it has doubled in size. Look for the dough to puff up significantly and become airy, indicating it’s ready for the next step in making your Stovetop Custard Cream Buns.
Step 3: Prepare Custard
While the dough rises, prepare your custard filling. You can opt for store-bought custard, a homemade version using custard powder, or an egg-based custard if preferred. Follow the instructions on your chosen custard method, ensuring it reaches a creamy consistency and set aside to cool slightly as you shape the buns.
Step 4: Shape Buns
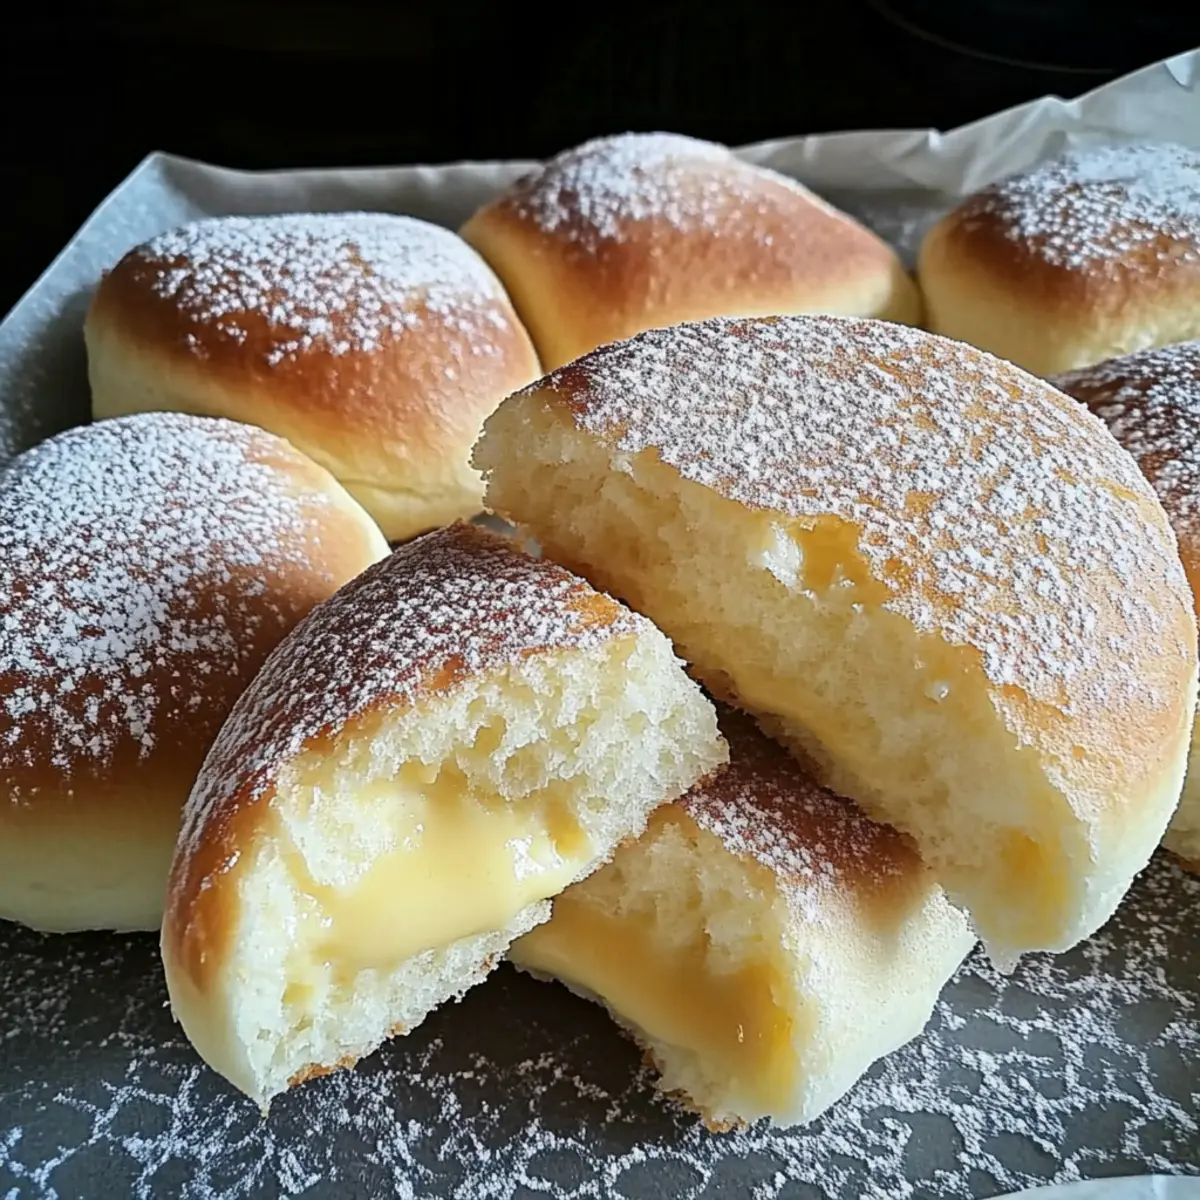
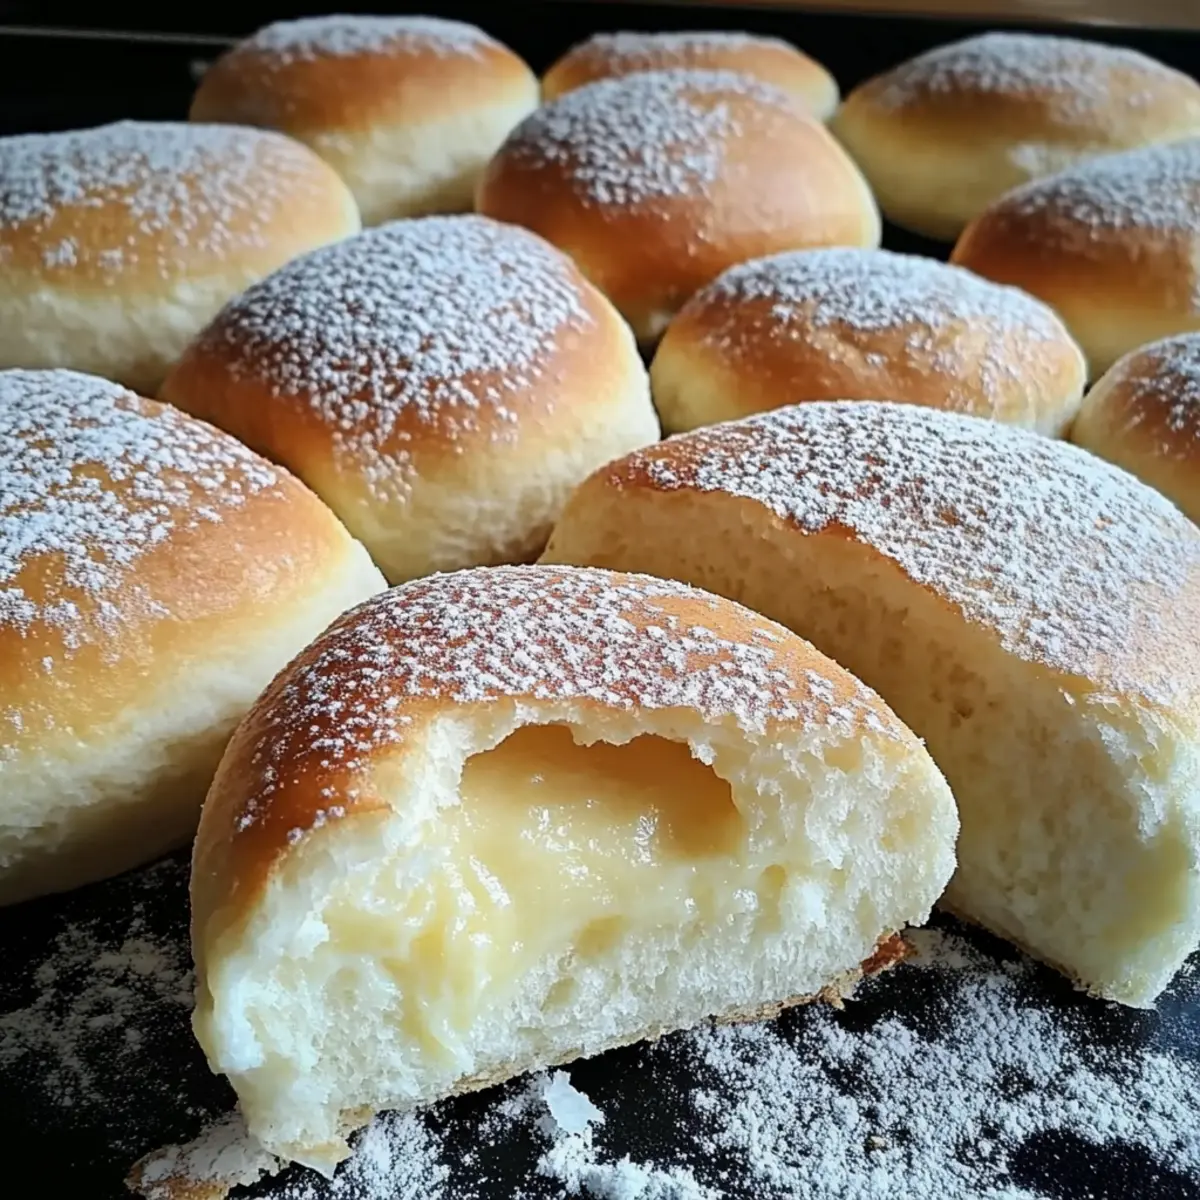
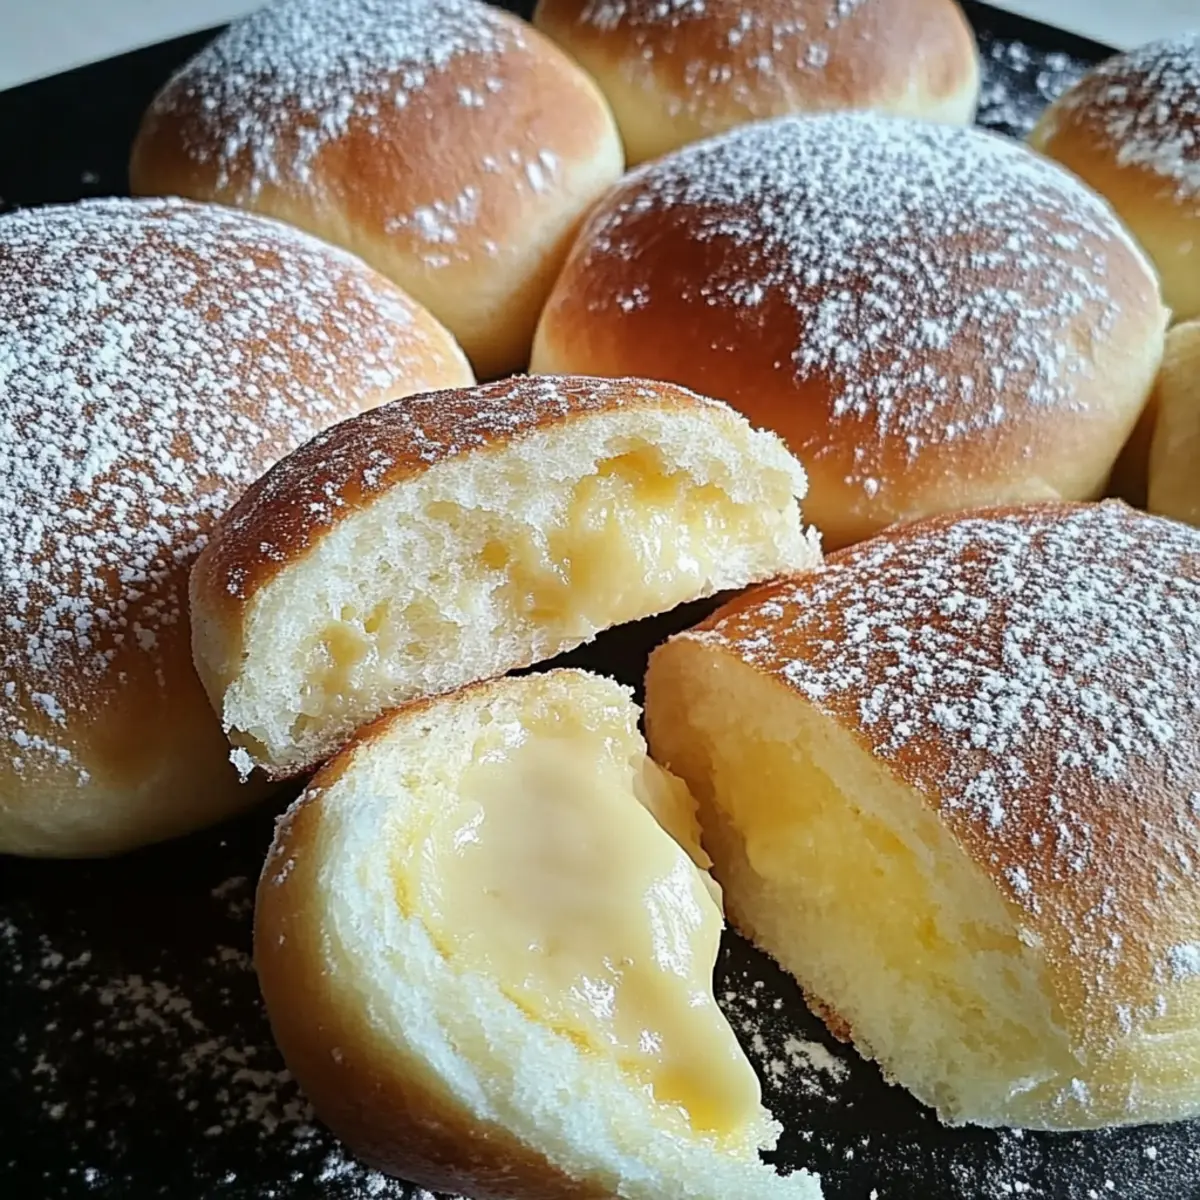
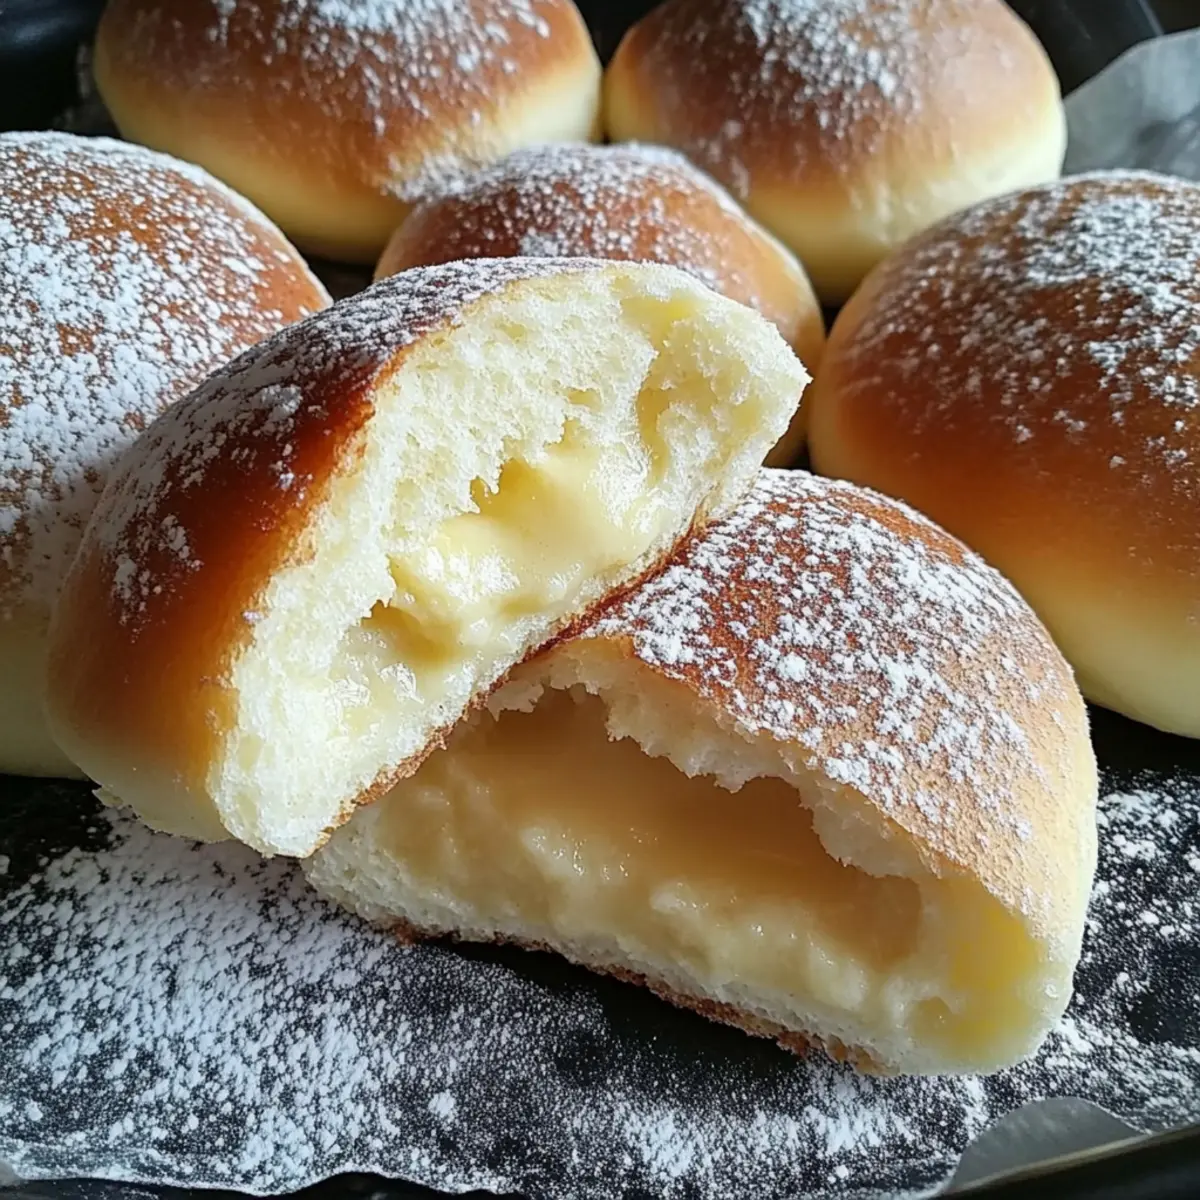
Once the dough has risen, gently punch it down to release the air. Knead for 3 minutes and divide it into 12 equal pieces. Roll each piece into a circle about 4 inches in diameter. Place a tablespoon of custard in the center of half the circles, then fold them over like a dumpling and pinch the edges to seal tightly, ensuring that the custard won’t leak during cooking.
Step 5: Cook
Heat a non-stick skillet over low heat. Lightly grease it with oil if necessary. Place the custard-filled buns into the skillet, ensuring there’s enough space between them. Cook for about 10 minutes on one side or until golden brown, then carefully flip and cook for an additional 5 minutes on the other side. The buns should look golden and soft to the touch.
Step 6: Cool & Serve
Once cooked, transfer the Stovetop Custard Cream Buns to a wire rack or a plate. Allow them to cool for a few minutes before serving. For a delightful finishing touch, dust the tops with powdered sugar. Enjoy these warm buns as a comforting treat perfect for breakfast, tea time, or a sweet snack!
How to Store and Freeze Stovetop Custard Cream Buns
Fridge: Store any leftover Stovetop Custard Cream Buns in an airtight container in the fridge for up to 2 days. This helps maintain their softness while preserving the custard filling.
Freezer: For longer storage, freeze the uncooked or cooked buns by placing them on a baking sheet in a single layer until frozen solid, then transfer to a freezer-safe bag for up to 2 months.
Reheating: To reheat from the fridge, warm the buns in the microwave for about 20-30 seconds or until heated through. If frozen, thaw overnight in the fridge first, then reheat.
Making Ahead: These custard-filled delights can be made ahead of time and are perfect for quick breakfasts or snacks throughout the week, ready to enjoy at a moment’s notice!
Expert Tips for Stovetop Custard Cream Buns
-
Warm Environment: Ensure you let the dough rise in a warm, draft-free area. This helps it puff up nicely for fluffy buns.
-
Low & Slow Cooking: Cook the buns on low heat to avoid burning. This allows them to cook evenly and keep that soft texture.
-
Tight Seals: When folding the buns, seal the edges tightly to prevent the custard from leaking during cooking.
-
Custard Variations: Feel free to experiment with various custards – chocolate, vanilla, or fruit-flavored. Each adds a unique twist to your Stovetop Custard Cream Buns!
-
Batch Cooking Tip: You can double the recipe and freeze the un-cooked buns. Just thaw and cook as needed for fresh treats anytime!
Stovetop Custard Cream Buns Variations
Feel free to get creative with these delightful Stovetop Custard Cream Buns and make them your own!
-
Chocolate Custard: Swap traditional custard for rich chocolate custard to satisfy your sweet tooth. It adds a delightful twist that chocolate lovers will adore.
-
Whole Wheat Flour: Substitute all-purpose flour with whole wheat for a heartier, healthier bun. Note that the texture will be slightly denser with a nutty flavor.
-
Flavored Dough: Add a splash of vanilla or almond extract to the dough for an aromatic twist. This simple addition can elevate the overall flavor profile beautifully.
-
Cinnamon Sugar Topping: Sprinkle a mixture of cinnamon and sugar on the buns before serving for a sweet, spiced kick. It transforms the buns into a mini dessert delight!
-
Fruit Filling: Instead of custard, consider using fruit preserves or fresh fruit puree for a lighter, refreshing filling. It introduces a vibrant flavor contrast.
-
Savory Version: Create a savory version by filling the buns with cream cheese and herbs instead of custard. This twist gives a unique breakfast or brunch option.
-
Spicy Kick: Add a pinch of cayenne pepper to your custard for a surprising heat. It creates an interesting flavor combination that piques the taste buds!
-
Gluten-Free Option: Use gluten-free flour along with a homemade custard powder version for a gluten-free treat that everyone can enjoy.
For an added touch, pair these buns with a comforting cup of Roasted Garlic Tomato soup, creating a wholesome meal that warms the soul.
Make Ahead Options
These Stovetop Custard Cream Buns are perfect for meal prep enthusiasts! You can prepare the dough up to 24 hours in advance, storing it in an airtight container in the refrigerator. The custard filling can also be made ahead (whether homemade or store-bought) and kept in the fridge for 2-3 days; just be sure to cover it well to prevent a skin from forming. When you’re ready to enjoy, allow the dough to come to room temperature for about 30 minutes before shaping and cooking the buns. This makes for a quick and easy treat that’s just as delicious with minimal effort—a great option for busy weeknights!
What to Serve with Stovetop Custard Cream Buns
To create a delightful meal around these sweet, fluffy treats, consider pairing them with a variety of complementary flavors and textures.
-
Fresh Fruit Salad: A vibrant mix of seasonal fruits adds a juicy, refreshing contrast to the creamy custard filling, making each bite lively and satisfying.
-
Herbal Tea: Opt for a soothing chamomile or refreshing mint tea. The gentle flavors balance the sweetness of the buns, creating a comforting afternoon moment.
-
Creamy Yogurt: A dollop of plain or vanilla yogurt on the side offers a tangy note that perfectly harmonizes with the sweetness of the custard, enhancing the overall experience.
-
Chocolate Drizzle: Elevate your buns with a warm chocolate drizzle that adds a rich and indulgent twist, perfect for those who crave a touch of decadence.
-
Smoothie Bowl: A thick berry smoothie bowl topped with granola and nuts provides a wholesome balance, making it an excellent breakfast option alongside the buns.
-
Spiced Chai Latte: The warmth and spices of a chai latte create a cozy pairing with the delicate sweetness of the custard, offering comfort in every sip and bite.
Indulge in these pairings for a memorable dining experience that beautifully complements your Stovetop Custard Cream Buns!
Stovetop Custard Cream Buns Recipe FAQs
What type of flour is best for Stovetop Custard Cream Buns?
Using all-purpose flour will give you a good structure and texture, but for an even lighter bun, I often recommend using cake flour. It yields a wonderfully soft result that melts in your mouth!
How should I store leftover custard buns?
Absolutely! Store any leftover Stovetop Custard Cream Buns in an airtight container in the fridge for up to 2 days. This keeps them soft while preserving the delicious custard filling. Just be sure to let them cool completely before sealing them up!
Can I freeze Stovetop Custard Cream Buns?
Yes, you can! To freeze, place the uncooked or cooked buns on a baking sheet in a single layer and freeze until solid. Then transfer them to a freezer bag for up to 2 months. For cooking, simply thaw them overnight in the fridge and then cook as directed.
What if my dough doesn’t rise?
Don’t worry! If your dough doesn’t rise, it could be due to the yeast being inactive. Ensure you use warm water (about 110°F or 43°C) to activate the yeast properly, and let it rise in a warm, draft-free area. If it’s not rising after an hour, consider trying a new batch of yeast for your next attempt.
Are these buns safe for those with egg allergies?
Very! These Stovetop Custard Cream Buns are egg-free by design. You can easily make a delicious custard filling without eggs, using custard powder or a dairy-free option, which makes them perfect for everyone to enjoy!
How can I prevent the custard from leaking during cooking?
To prevent custard from leaking out during cooking, make sure to seal the edges of your buns tightly after adding the filling. I recommend pinching the edges firmly and then rolling them slightly to ensure a secure closure before cooking.
Fluffy Stovetop Custard Cream Buns You’ll Love to Make
Ingredients
Equipment
Method
- In a large bowl, combine the flour, yeast, sugar, and salt.
- In a separate jug, mix the warm water, milk, and oil, and then incorporate into the dry ingredients.
- Knead the dough for about 5 minutes until smooth and elastic.
- Cover the dough and place it in a warm area to rise for about 1 hour until doubled in size.
- Prepare your chosen custard filling while the dough is rising.
- Once risen, punch down the dough, knead for 3 minutes, and divide into 12 pieces.
- Roll each piece into a circle, place custard in the center, fold, and seal edges tightly.
- Cook the buns in a non-stick skillet over low heat for about 10 minutes until golden, then flip and cook for another 5 minutes.
- Allow the cooked buns to cool slightly before serving, optionally dusting with powdered sugar.