
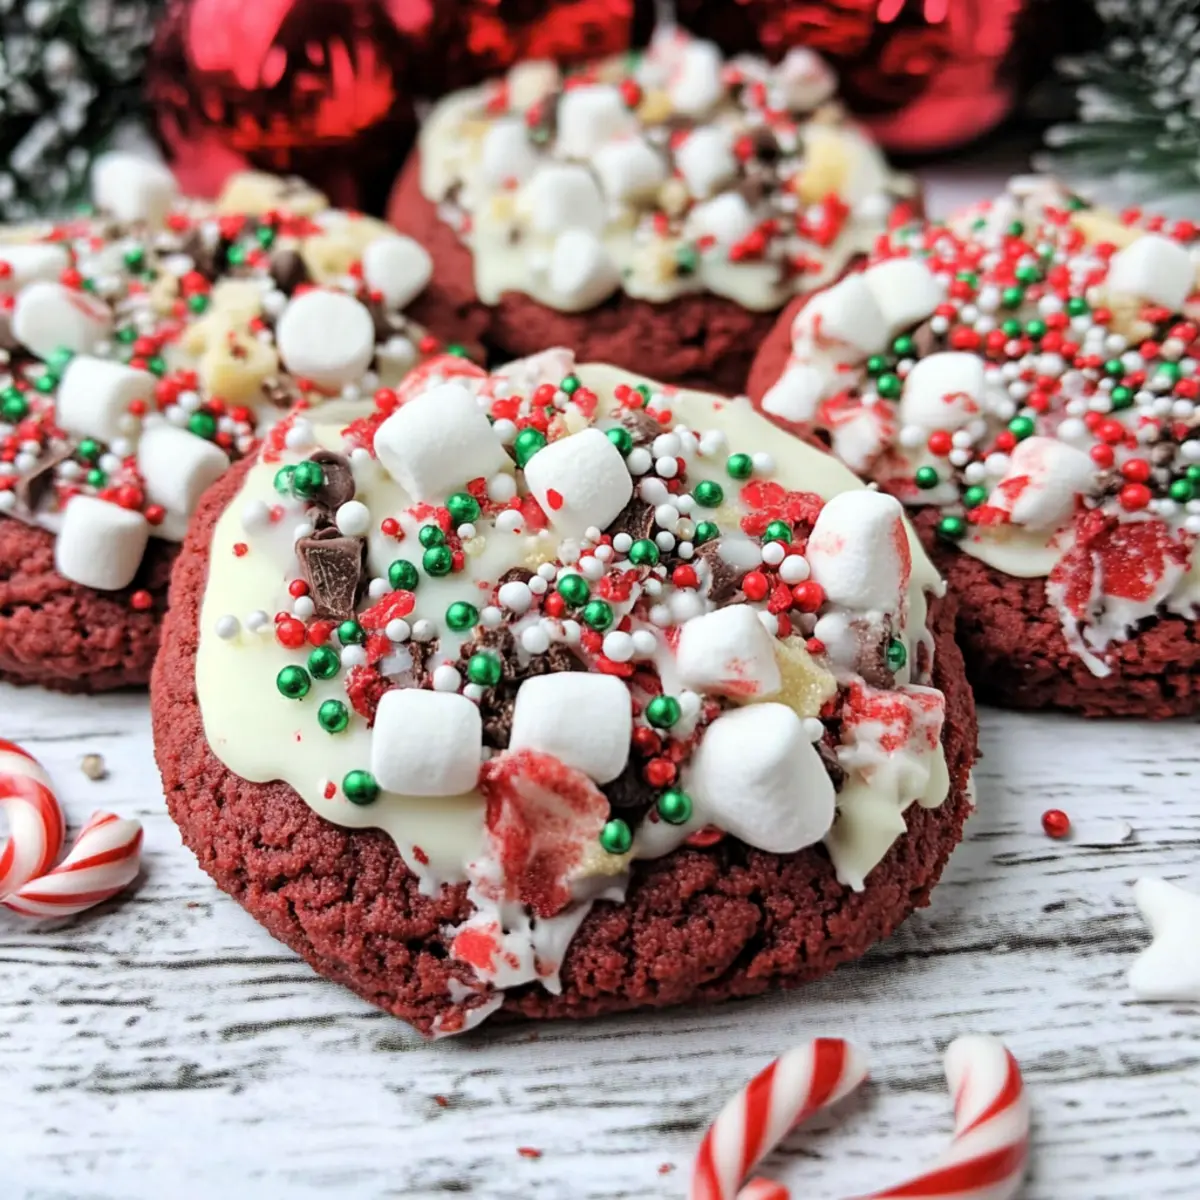
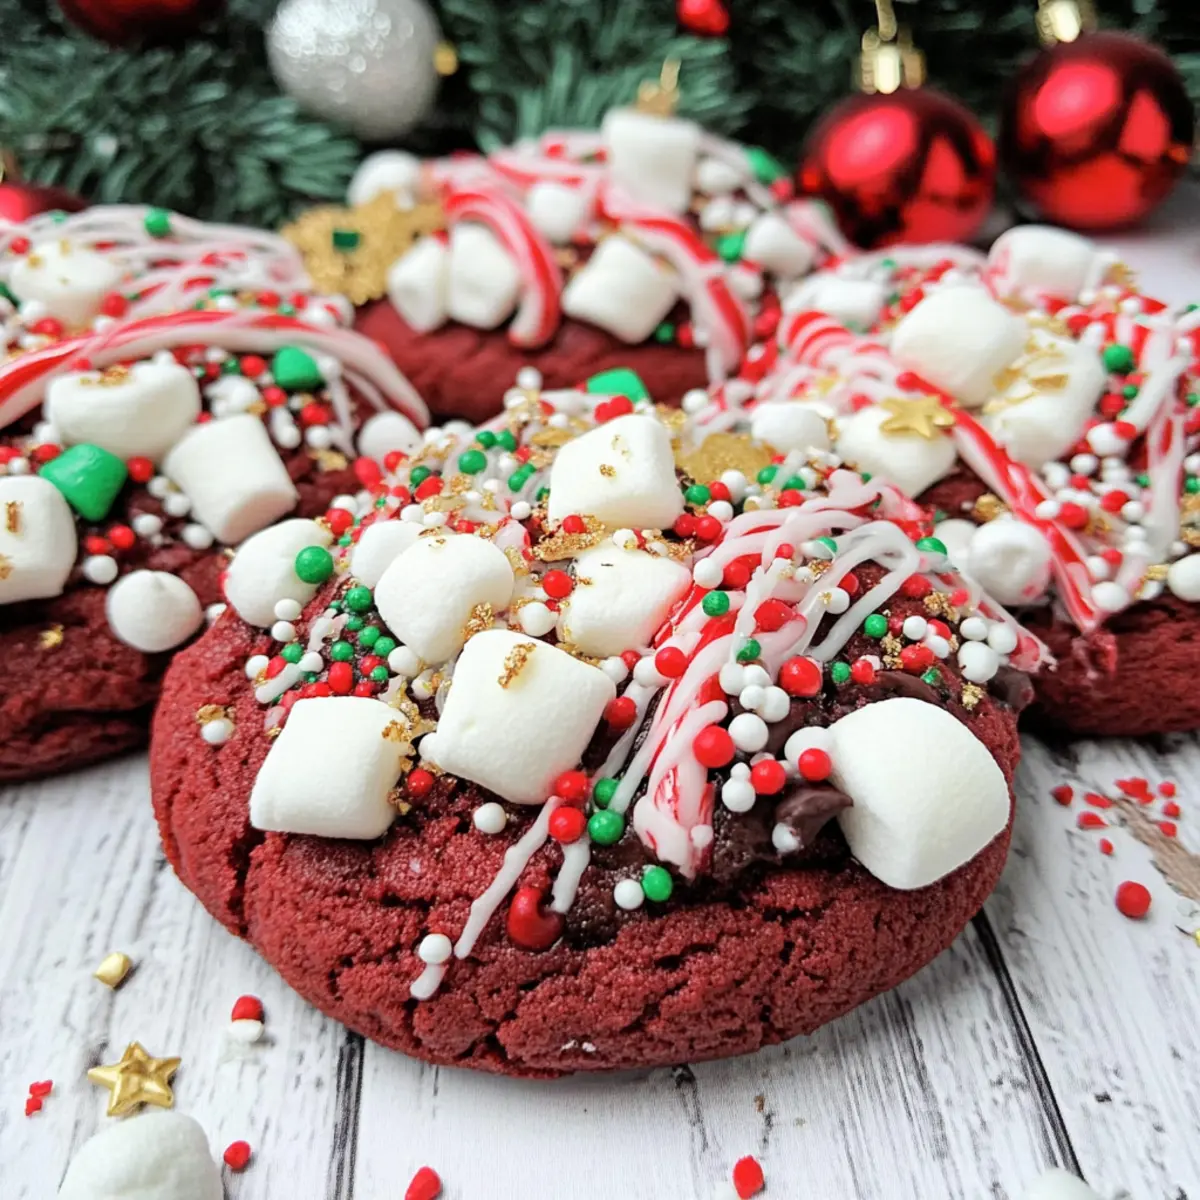
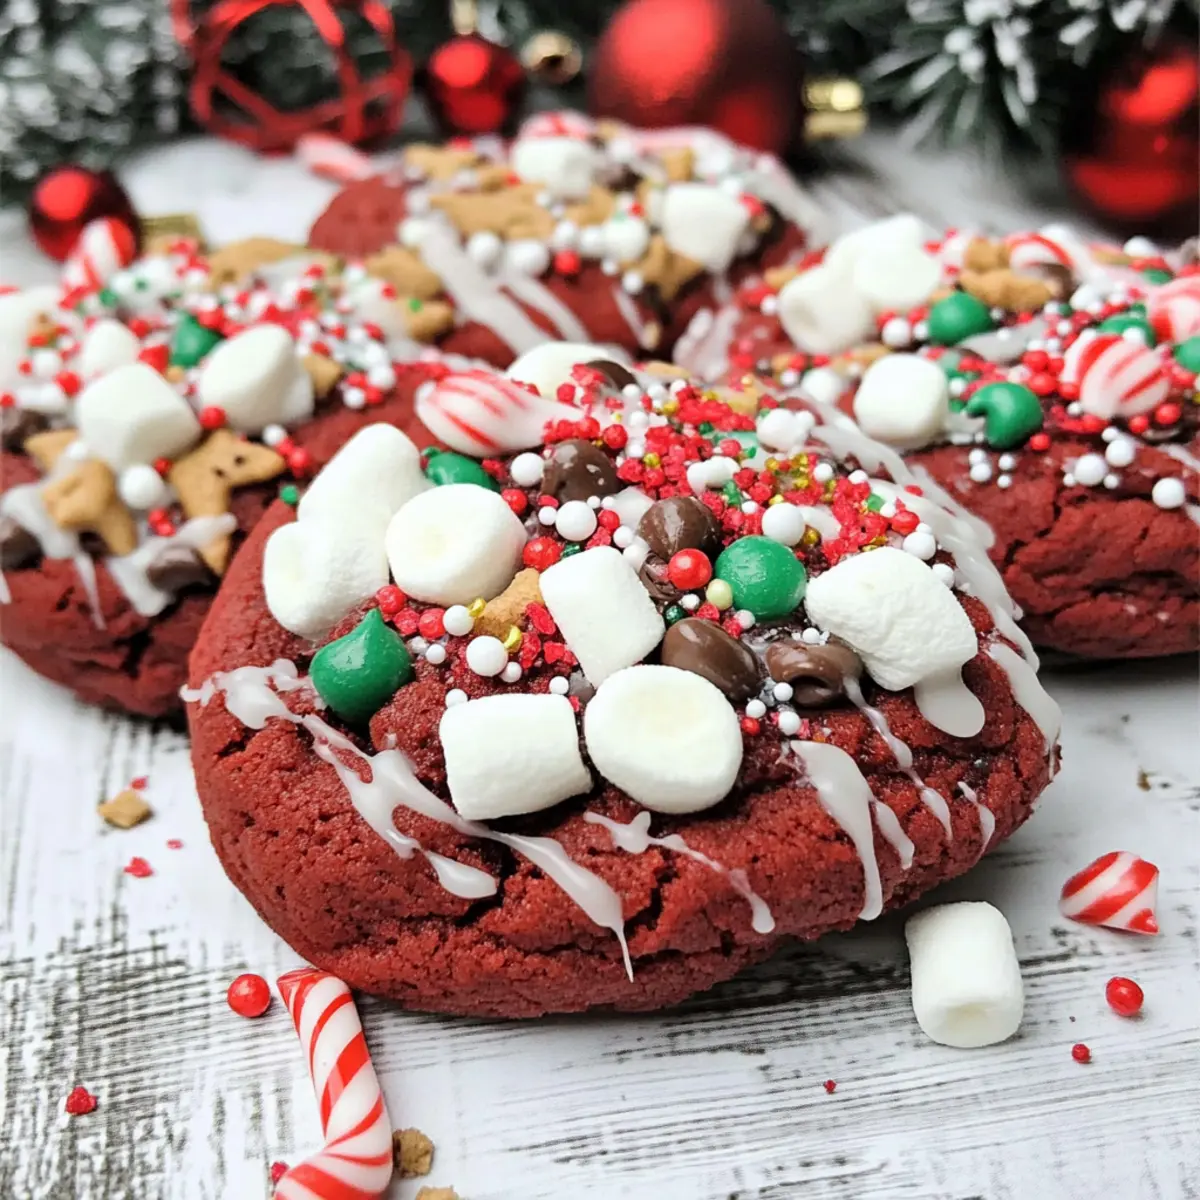
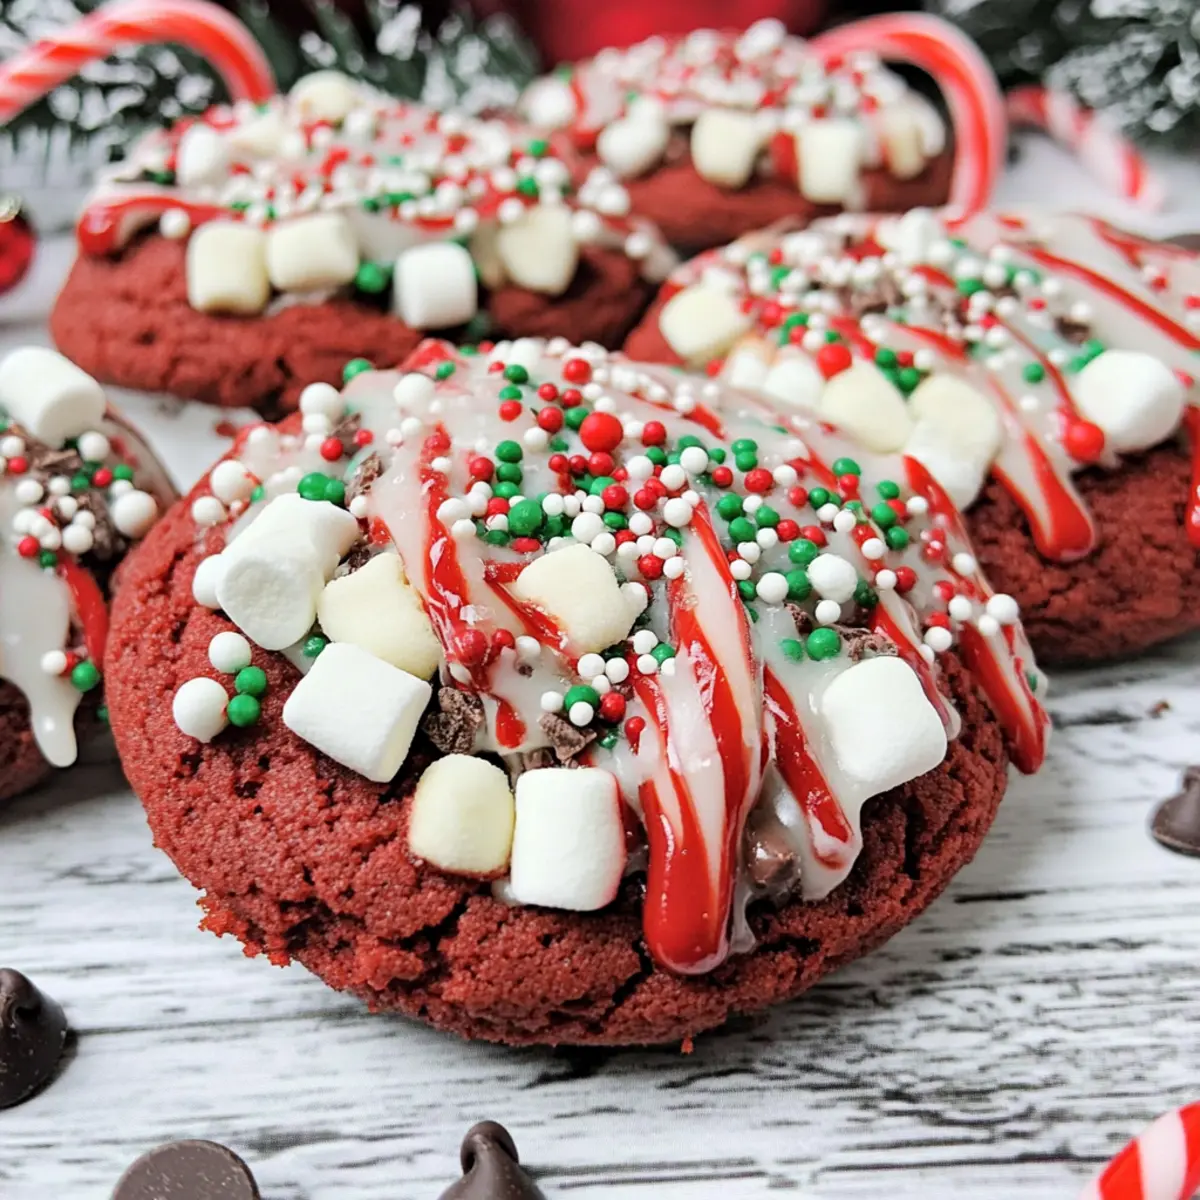
As I stood in my cozy kitchen filled with the delightful aromas of the holiday season, I realized there’s something truly magical about Santa’s Cookies Red Velvet Christmas Cookies. These vibrant red treats, studded with gooey chocolate chips and fluffy mini marshmallows, not only bring a pop of color to your festive spread but also set the stage for unforgettable memories with friends and family. The best part? They’re easy to make and can be customized with your favorite toppings, making them a fantastic crowd-pleaser for holiday gatherings. Whether you’re baking for a party or simply indulging in a sweet moment, these cookies are sure to enchant! So, what topping will you choose to make them extra special?
Why Are These Cookies a Must-Bake?
Vibrant Color: The striking red hue is perfect for holiday celebrations, bringing a delightful visual appeal to your dessert table.
Customizable: Feel free to personalize with your favorite toppings like cookie dough or white chocolate chips, ensuring every bite is unique.
Easy to Make: With a straightforward process, even novice bakers can whip up these festive treats in no time, making them ideal for any home cook.
Crowd-Pleasing: The combination of chewy, gooey textures combined with chocolate and marshmallows appeals to both young and old, making them a hit at gatherings.
Irresistible Chocolaty Flavor: Semi-sweet chocolate chips meld beautifully with the rich red velvet base, offering a delightful taste experience reminiscent of classic favorites.
Pair these cookies with a warm beverage or even try them alongside Cheesecake Stuffed Cookies for a delightful dessert spread that everyone will love!
Santa’s Cookies Red Velvet Ingredients
• These ingredients will create the perfect Santa’s Cookies Red Velvet Christmas Cookies!
For the Cookie Dough
- Unsalted Sweet Cream Butter – Use unsalted to control the saltiness and ensure the perfect richness.
- Granulated Sugar – Provides sweetness and helps achieve a chewy texture; light brown sugar can add flavor.
- Eggs – Essential for binding; make sure they are large and at room temperature for best results.
- Vanilla Extract – Enhances flavor; you can swap in almond extract for a unique twist.
- Super Red Food Coloring – Gives these cookies their iconic red velvet appearance.
- Unsweetened Cocoa Powder – Balances sweetness while adding depth of flavor and color.
- Baking Soda – Helps the cookies rise; always check the expiration date for effectiveness.
- Cornstarch – Guarantees soft centers and prevents cookies from spreading too much.
- Kosher Salt – Elevates the flavor; skip if you’re using salted butter.
- Cake Flour – Helps create a tender texture; gluten-free options are available.
- All-Purpose Flour – Provides structure; consider gluten-free alternatives if needed.
- Semi-Sweet Chocolate Chips – Adds a rich chocolate flavor; feel free to exchange for dark or white chocolate.
- Mini Marshmallows – Bring sweetness and a fun texture; you can use cut-up standard marshmallows instead.
For the Icing and Toppings
- Powdered Sugar – The foundation of the icing; adjust quantities for desired sweetness.
- Milk – Thins the icing to the right consistency; any non-dairy alternative will work as well.
- Optional Toppings – Get creative with edible cookie dough, more mini marshmallows, white chocolate chips, or festive sprinkles!
With these ingredients on hand, you’re set to create magnificent Santa’s Cookies Red Velvet Christmas Cookies that will undoubtedly charm everyone around your festive table!
Step‑by‑Step Instructions for Santa’s Cookies Red Velvet Christmas Cookies
Step 1: Preheat the Oven
Begin by preheating your oven to 410°F (210°C). This step is crucial as it ensures your cookies will bake evenly and achieve the perfect texture. While the oven warms up, gather your baking sheets and line them with silicone liners or parchment paper for easy cleanup.
Step 2: Cream Butter and Sugar
In a stand mixer fitted with a paddle attachment, cream together 1 cup of unsalted sweet cream butter and 2 cups of granulated sugar. Beat on medium speed for about 3 minutes until the mixture is light and fluffy, creating a base full of rich flavor for your Santa’s Cookies Red Velvet Christmas Cookies.
Step 3: Add Wet Ingredients
Next, incorporate 2 large eggs, one at a time, mixing thoroughly after each addition. Then, add 1 tablespoon of vanilla extract and a generous amount of super red food coloring. Continue mixing until the batter is smooth and the red hue is vibrant, setting the festive tone for the cookies.
Step 4: Mix Dry Ingredients
In a separate bowl, whisk together 1 ¾ cups of all-purpose flour, ½ cup of cake flour, ⅓ cup of unsweetened cocoa powder, 1 teaspoon of baking soda, 2 teaspoons of cornstarch, and ½ teaspoon of kosher salt. Gradually mix the dry ingredients into your wet mixture until just combined, ensuring a rich and velvety texture for your cookies.
Step 5: Fold in Extras
Once the dough is mixed, gently fold in 1 cup of semi-sweet chocolate chips and 1 cup of mini marshmallows. Ensure they’re evenly distributed throughout the dough to create delightful pockets of flavor in each bite of your Santa’s Cookies.
Step 6: Chill the Dough
Cover the mixing bowl with plastic wrap and refrigerate the dough for about 20 minutes. Chilling prevents excessive spreading during baking, helping your cookies maintain their chewy centers while achieving that nice outer crisp.
Step 7: Shape the Cookies
After chilling, use a large cookie scoop (about 3.5 oz) to portion the dough, placing the balls on the lined baking sheets. Lightly flatten each ball with your palm to ensure even baking, giving your cookies a good shape without losing their softness inside.
Step 8: Bake the Cookies
Place the baking sheets in your preheated oven and bake for 8 to 11 minutes. The cookies should look set at the edges but remain slightly gooey in the center for that perfect chewy texture typical of Santa’s Cookies. Keep a close eye, as ovens may vary.
Step 9: Cool on Sheets
Once baked, remove the cookies from the oven and allow them to cool on the sheets for several minutes. This helps them firm up while maintaining their delightful chewy centers. Transfer them to a wire rack to cool completely, preparing them for icing.
Step 10: Prepare the Icing
In a medium bowl, whisk together 2 cups of powdered sugar and enough milk (about 2-4 tablespoons) until you achieve a thick yet spreadable consistency. This icing will beautifully enhance your Santa’s Cookies Red Velvet Christmas Cookies with a sweet layer of flavor.
Step 11: Decorate the Cookies
Once the cookies are completely cool, drizzle or spread the icing on top of each cookie. Get creative with your decorations by adding toppings like crushed candy canes, more mini marshmallows, or festive sprinkles to give your cookies a cheerful holiday finish.
Expert Tips for Santa’s Cookies
-
Egg Temperature Matters: Room temperature eggs incorporate better, giving your Santa’s Cookies a smooth texture and richer flavor.
-
Chill the Dough: Don’t skip refrigerating the dough! This crucial step prevents spreading during baking, ensuring your cookies stay thick and chewy.
-
Monitor Baking Time: For perfectly gooey centers, bake until the edges are set but the middle looks slightly underdone. Each oven is different, so watch closely!
-
Customize Your Icing: Mix in some cream cheese to your icing for a delightful tangy flavor while adjusting the sugar for sweetness to your liking!
-
Experiment with Toppings: Personalize your Santa’s Cookies Red Velvet Christmas Cookies by adding various toppings like edible cookie dough or different chocolate types for extra flair!
Make Ahead Options
These Santa’s Cookies Red Velvet Christmas Cookies are perfect for busy home cooks looking to simplify their holiday baking! You can prepare the cookie dough up to 24 hours in advance by mixing all the ingredients, then covering it tightly and refrigerating. If you prefer, scoop the dough into balls and freeze them for up to 3 months; just bake them directly from the freezer, adding a minute or two to the baking time. For the icing, consider making it up to a day ahead and storing it in the fridge—just give it a quick stir before decorating. By prepping ahead, you’ll ensure that these delightful treats are just as delicious while saving precious time on the day you plan to serve them!
How to Store and Freeze Santa’s Cookies
Room Temperature: Store your cookies in an airtight container at room temperature for up to 2 weeks, keeping them soft and fresh for those cozy holiday moments.
Fridge: If you prefer longer freshness, refrigerate your cookies in an airtight container for up to 4 weeks. Just remember to let them come back to room temperature before enjoying!
Freezer: Freeze unbaked cookie balls for up to 3 months. Simply scoop the cookie dough, freeze on a sheet for an hour, then transfer to a freezer bag. When you’re ready, bake straight from the freezer, extending the baking time by a few minutes.
Reheating: To enjoy the cookies warm, microwave them for about 10-15 seconds. This will revive their soft, gooey texture, making them a delightful treat again!
Santa’s Cookies Red Velvet Christmas Variations
Feel free to have fun and personalize these festive cookies to suit your taste and dietary needs!
-
Gluten-Free: Substitute regular flour with a gluten-free blend to accommodate dietary restrictions without losing the cookie’s texture.
-
Dairy-Free: Replace butter with a dairy-free alternative and swap milk in the icing for almond or oat milk for a completely dairy-free treat.
-
Nutty Crunch: Add in ½ cup of chopped walnuts or pecans for a delightful crunch and extra flavor that complements the sweetness.
-
Minty Twist: Fold in crushed peppermint candies along with the chocolate chips for a refreshing minty flavor that’s perfect for the holidays.
-
Chocolate Lovers: Use dark chocolate chips instead of semi-sweet for an indulgent, rich flavor, or even a blend of chocolate varieties for extra depth.
-
Fruit Infusion: Add ½ cup of dried cranberries or cherries for a burst of tartness that beautifully balances the sweetness of the red velvet base.
-
Layered Icing: For a fun twist, mix cream cheese into your icing for a frosting that adds a tangy richness, elevating the flavor profile of your cookies.
-
Crispy Edges: For a different texture, flatten the cookie dough balls more before baking to create crispier edges, while still preserving that gooey center.
These variations allow everyone to enjoy the magic of Santa’s Cookies Red Velvet Christmas Cookies! You can even pair them with Twix Cookies Chewy or Oreo Cheesecake Cookies for an unforgettable cookie platter this holiday season. What will you try first?
What to Serve with Santa’s Cookies Red Velvet Christmas Cookies
As you bask in the warmth of holiday cheer, let’s create a delightful feast that enhances the magic of your red velvet creations.
- Cold Milk: This classic pairing balances the sweetness of the cookies perfectly, evoking childhood memories of delicious treats.
- Rich Hot Chocolate: Indulge in creamy hot chocolate topped with whipped cream, a cozy match to the festive flavors of red velvet.
- Coffee: The rich, bold flavors of coffee contrast beautifully with the sweet and chocolatey notes, making for an uplifting afternoon treat.
- Creamy Vanilla Ice Cream: A scoop of ice cream adds a cold, creamy element, melting into the warm cookies for a delightful combination.
- Candy Cane Cocoa: Amplify the holiday spirit with a peppermint-infused drink that complements the cookie’s crushed candy cane toppings.
- Warm Apple Cider: The spiced sweetness of apple cider recalls cheerful winter festivities and pairs wonderfully with the cookies’ unique flavor.
- Pecan Pie: For a dessert spread, traditional pecan pie’s nutty sweetness adds a delightful textural contrast to the chewy cookies.
- Sugar Cookie Bars: Soft and sugary, these bars provide a different texture and flavor that rounds out a wonderful dessert table at any gathering.
- Sparkling Water: A refreshing, effervescent drink cuts through the sweetness and cleanses the palate, offering balance amid sugary treats.
With these delightful pairings, your holiday gathering will certainly be a cherished occasion!
Santa’s Cookies Red Velvet Christmas Cookies Recipe FAQs
How do I select the right ingredients for my cookies?
Absolutely! For the best results, choose unsalted butter to control saltiness, and ensure your eggs are large and at room temperature for optimal mixing. When selecting cocoa powder, go for unsweetened varieties to keep the flavors balanced. For that vibrant red hue, opt for super red food coloring, and make sure the baking soda is fresh for proper rising.
What’s the best way to store my Santa’s Cookies?
Very easy! Store your Santa’s Cookies in an airtight container at room temperature for up to 2 weeks to keep them soft and fresh. If you’d like to keep them longer, refrigerate them for up to 4 weeks. Just remember to bring them back to room temperature before enjoying for the best taste and texture.
Can I freeze the cookie dough?
You bet! Freeze unbaked cookie balls for up to 3 months. Simply scoop the dough, place the balls on a baking sheet, and freeze for about an hour. Once firm, transfer them to a freezer bag. Bake them straight from the freezer when you’re ready, adding an extra few minutes to the baking time for perfect results!
What should I do if my cookies spread too much while baking?
No worries! If your cookies spread excessively, try chilling the dough a bit longer before baking. You can also add a touch more cornstarch to the mixture, which helps maintain their shape. Additionally, ensure your baking sheets are cool before placing the dough on them to prevent premature spreading.
Are there any dietary considerations I should keep in mind?
It’s always good to check! For those with gluten sensitivities, you can substitute all-purpose flour with gluten-free flour blends. If nut allergies are a concern, stick with vanilla extract instead of almond. For pet safety, remember that chocolate and certain toppings can be harmful to pets, so keep those cookies away from our furry friends!
How can I make these cookies more festive?
Absolutely! Customize your Santa’s Cookies by trying different toppings like crushed peppermint candies, edible glitter, or festive sprinkles. You can also add a dash of peppermint extract to the icing for a delightful twist! The more the merrier when it comes to making your cookies uniquely cheerful!
Santa’s Cookies Red Velvet Christmas Cookies to Wow Your Guests
Ingredients
Equipment
Method
- Preheat your oven to 410°F (210°C). Line baking sheets with silicone liners or parchment paper.
- In a stand mixer, cream together the unsalted butter and granulated sugar for about 3 minutes until light and fluffy.
- Add eggs one at a time, mixing well. Incorporate vanilla extract and food coloring until smooth.
- Whisk together all-purpose flour, cake flour, cocoa powder, baking soda, cornstarch, and kosher salt. Gradually mix into wet ingredients.
- Fold in chocolate chips and mini marshmallows. Mix evenly.
- Cover the bowl with plastic wrap and refrigerate the dough for about 20 minutes.
- Use a cookie scoop to portion the dough onto lined baking sheets and lightly flatten each ball.
- Bake in preheated oven for 8 to 11 minutes. Edges should be set but centers slightly gooey.
- Allow cookies to cool on sheets for several minutes before transferring to a wire rack.
- In a medium bowl, whisk together powdered sugar and enough milk to achieve a thick consistency.
- Once cooled, spread icing on cookies and add toppings like marshmallows or sprinkles.