
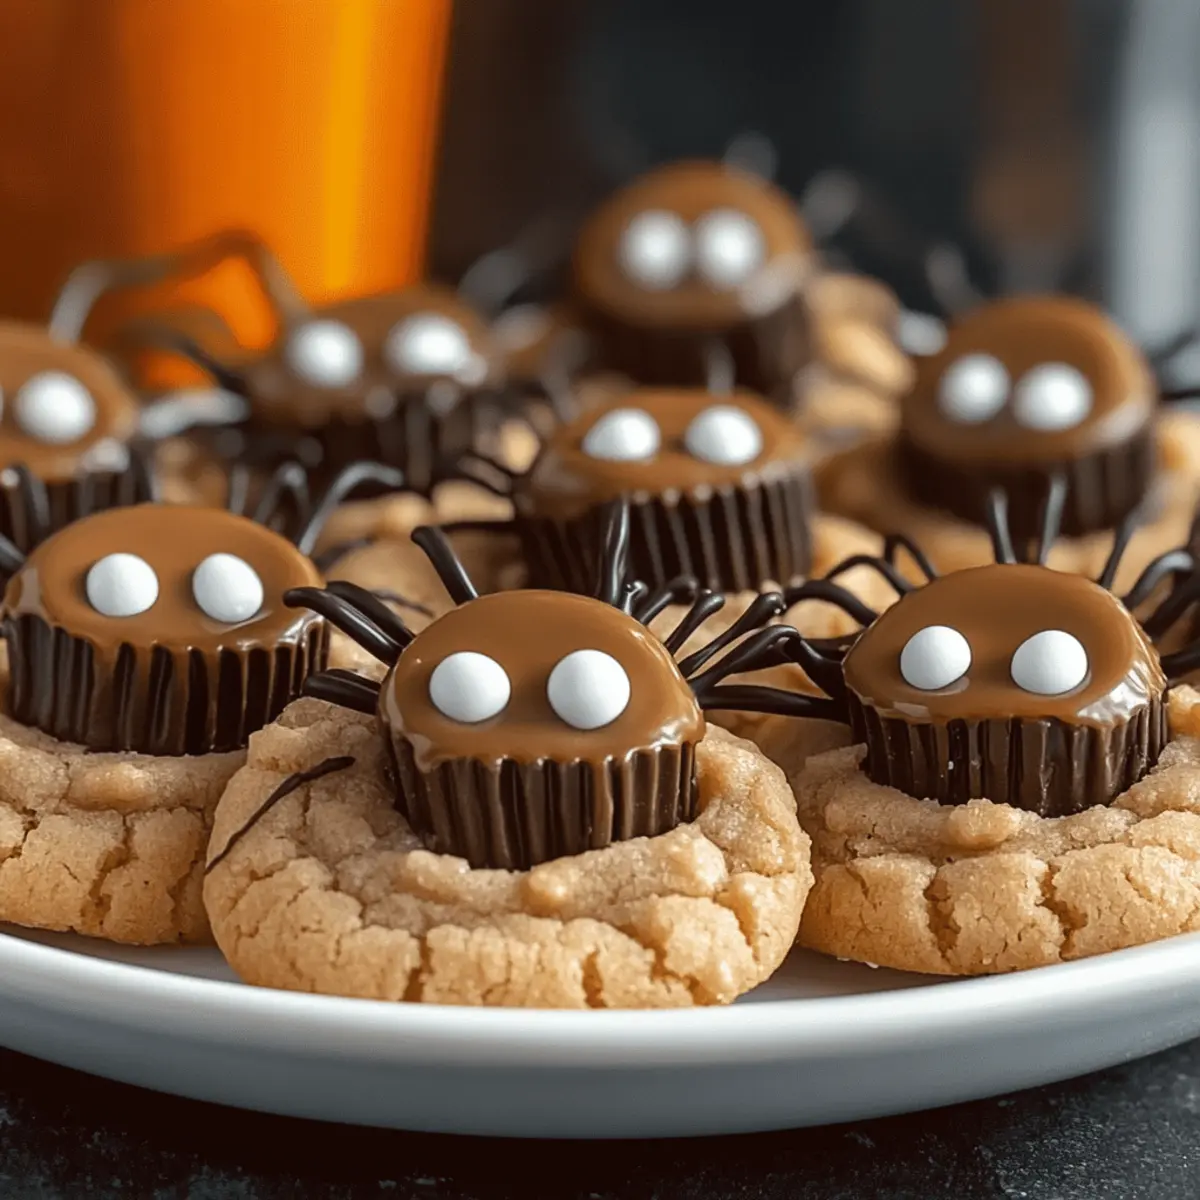
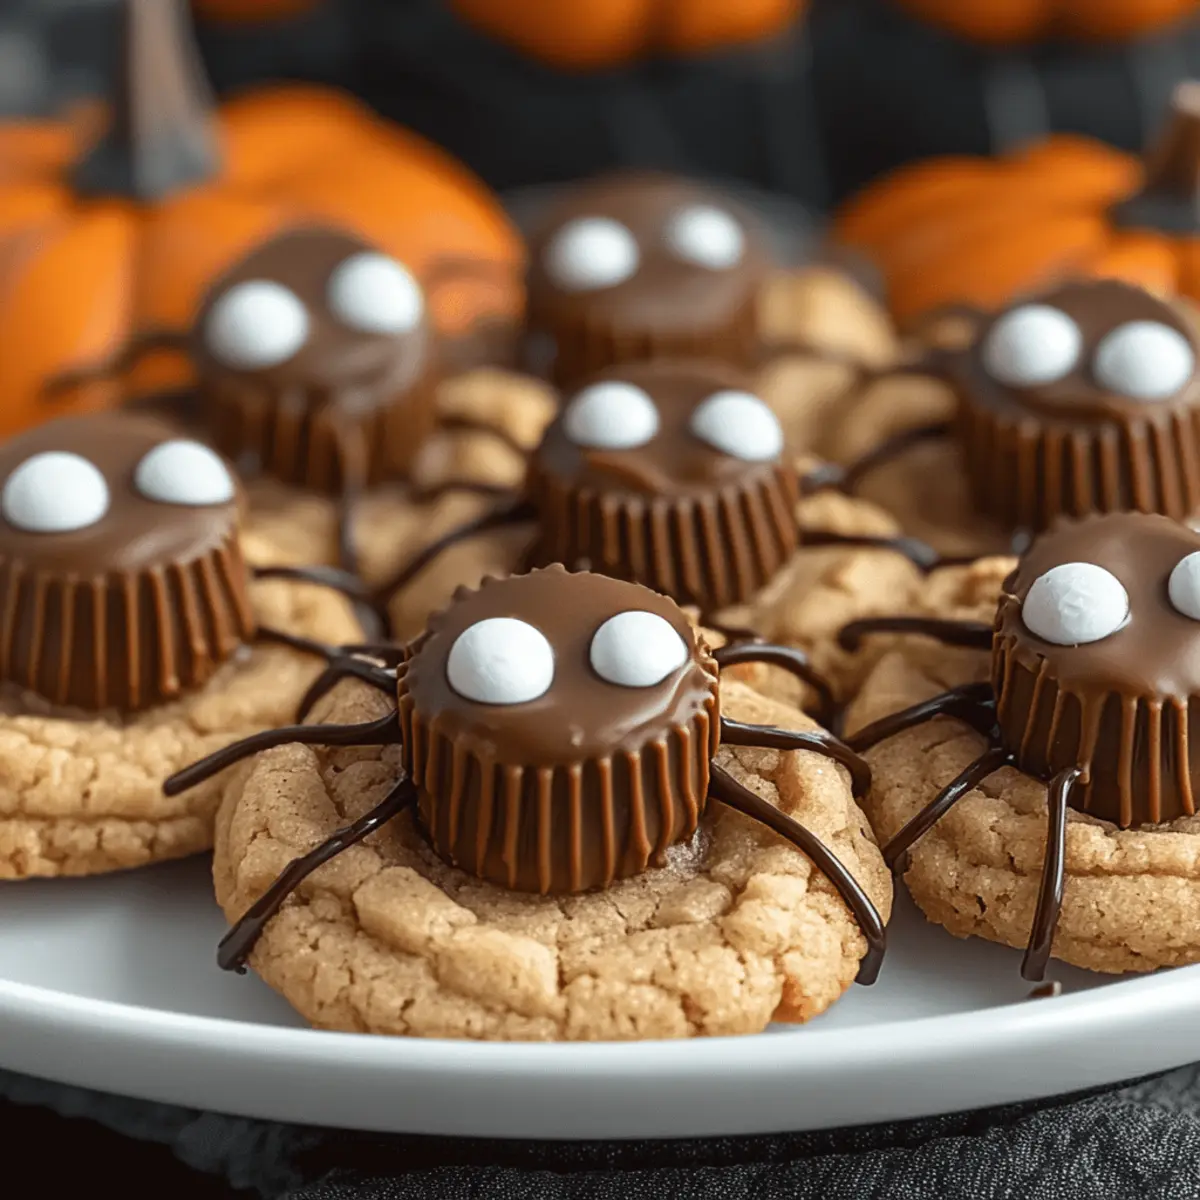
As the leaves begin to turn and Halloween approaches, the craving for something sweet and festive kicks in. There’s nothing quite like the joy of baking a batch of Peanut Butter Spider Cookies, perfect for both kids and adults alike. These cookies are not only cute but also incredibly quick and easy to make, meaning you can whip up a delightful treat in just 26 minutes! With the gooey goodness of melted Reese’s cups and the fun of candy eyeballs staring back at you, they add a playful twist to any Halloween gathering. Plus, they require no chilling time—just mix, bake, and decorate! Who’s ready to get baking and surprise their friends with these charming cookies?
Why Are Peanut Butter Spider Cookies Special?
Quick and Easy: These delightful cookies come together in just 26 minutes, making them a perfect last-minute treat for Halloween gatherings.
Fun Decoration: The candy eyes and chocolate legs transform ordinary cookies into adorable little spiders, pleasing both kids and adults alike.
Deliciously Chewy: With a soft peanut butter flavor and gooey melted Reese’s cups at the center, each bite is pure bliss.
Perfect for Sharing: Ideal for school events, Halloween parties, or cozy family nights, they’re a hit with everyone.
Versatile Options: Love customizing? Try swapping peanut butter for crunchy or use different candies like M&M’s for unique variations! Plus, if you’re looking for more creative desserts, check out these Cheesecake Stuffed Cookies and Oreo Cheesecake Cookies.
No need to overthink your Halloween treats; these cookies hit all the right notes!
Peanut Butter Spider Cookies Ingredients
• Perfectly festive and simple!
For the Cookie Dough
- Unsalted Butter – Provides moisture and richness; make sure it’s at room temperature for easy mixing.
- Brown Sugar – Adds sweetness and chewiness to the cookies.
- Granulated Sugar – Sweetens the dough while helping achieve a lovely crispness.
- Creamy Peanut Butter – The star flavor; a non-natural variety gives the best taste in these Peanut Butter Spider Cookies.
- Large Egg – Binds all the ingredients together for a sturdy cookie.
- Vanilla Extract – Enhances sweetness and contributes depth of flavor.
- All-Purpose Flour – Creates the structure; swap with a 1:1 gluten-free flour if necessary.
- Baking Soda – Helps the cookies rise, giving them that perfect texture.
- Baking Powder – Adds extra leavening for light and fluffy cookies.
- Salt – Balances the sweetness and enhances all the flavors.
For the Topping
- Granulated Sugar (for rolling) – Adds a delightful sweet crunch to the cookie exterior.
- Mini Reese’s Peanut Butter Cups – The key topping, providing rich chocolate and peanut butter flavor.
- Semi-Sweet Chocolate Chips – Used to create the spider legs; milk chocolate can add extra sweetness if preferred.
- Candy Eyeballs – Adorable decoration that adds a spooky touch to these festive cookies.
With these ingredients on hand, you’ll be well on your way to creating the cutest Halloween treats that everyone will love!
Step‑by‑Step Instructions for Peanut Butter Spider Cookies
Step 1: Chill Reese’s
Begin by placing 24 mini Reese’s cups in the freezer for about 10–15 minutes. This chilling step ensures they hold their shape when pressed into the freshly baked cookies, preventing too much melting. While they chill, you can move on to the next step of preparation.
Step 2: Preheat Oven
Preheat your oven to 350°F (175°C). This temperature is ideal for achieving that perfect golden edge while keeping the cookies soft and chewy in the center. As the oven warms up, gather all your ingredients to streamline the baking process.
Step 3: Cream Butter and Sugars
In a large mixing bowl, beat together 1 cup of room-temperature unsalted butter, 1 cup of brown sugar, and 1/2 cup of granulated sugar using an electric mixer. Mix on medium speed until the mixture is smooth, creamy, and light in color, which should take about 2–3 minutes. This base will create the rich flavor for your Peanut Butter Spider Cookies.
Step 4: Incorporate Wet Ingredients
Next, add in 1 cup of creamy peanut butter, 1 large egg, and 1 teaspoon of vanilla extract to your creamed butter and sugars. Mix on low speed until all wet ingredients are fully combined; this will take around 1–2 minutes. Aim for a smooth consistency with no visible clumps of peanut butter.
Step 5: Combine Dry Ingredients
In a separate bowl, whisk together 2 cups of all-purpose flour, 1 teaspoon of baking soda, 1 teaspoon of baking powder, and 1/2 teaspoon of salt. Gradually add this dry mix to your wet ingredients, stirring at low speed until just combined. Be careful not to over-mix; you want a soft dough for your Peanut Butter Spider Cookies.
Step 6: Form Cookies
Scoop tablespoon-sized balls of the cookie dough and roll them in granulated sugar to coat evenly. Place each dough ball about 2 inches apart on a parchment-lined baking sheet. This spacing is crucial to prevent the cookies from merging while baking, allowing them to retain their spider shape.
Step 7: Bake
Transfer the baking sheet to the preheated oven and bake the cookies for 8–11 minutes. Keep an eye on them as they bake; the edges should turn golden while the centers stay soft. Take them out when they look slightly underbaked, as they will continue to set as they cool.
Step 8: Cool and Decorate
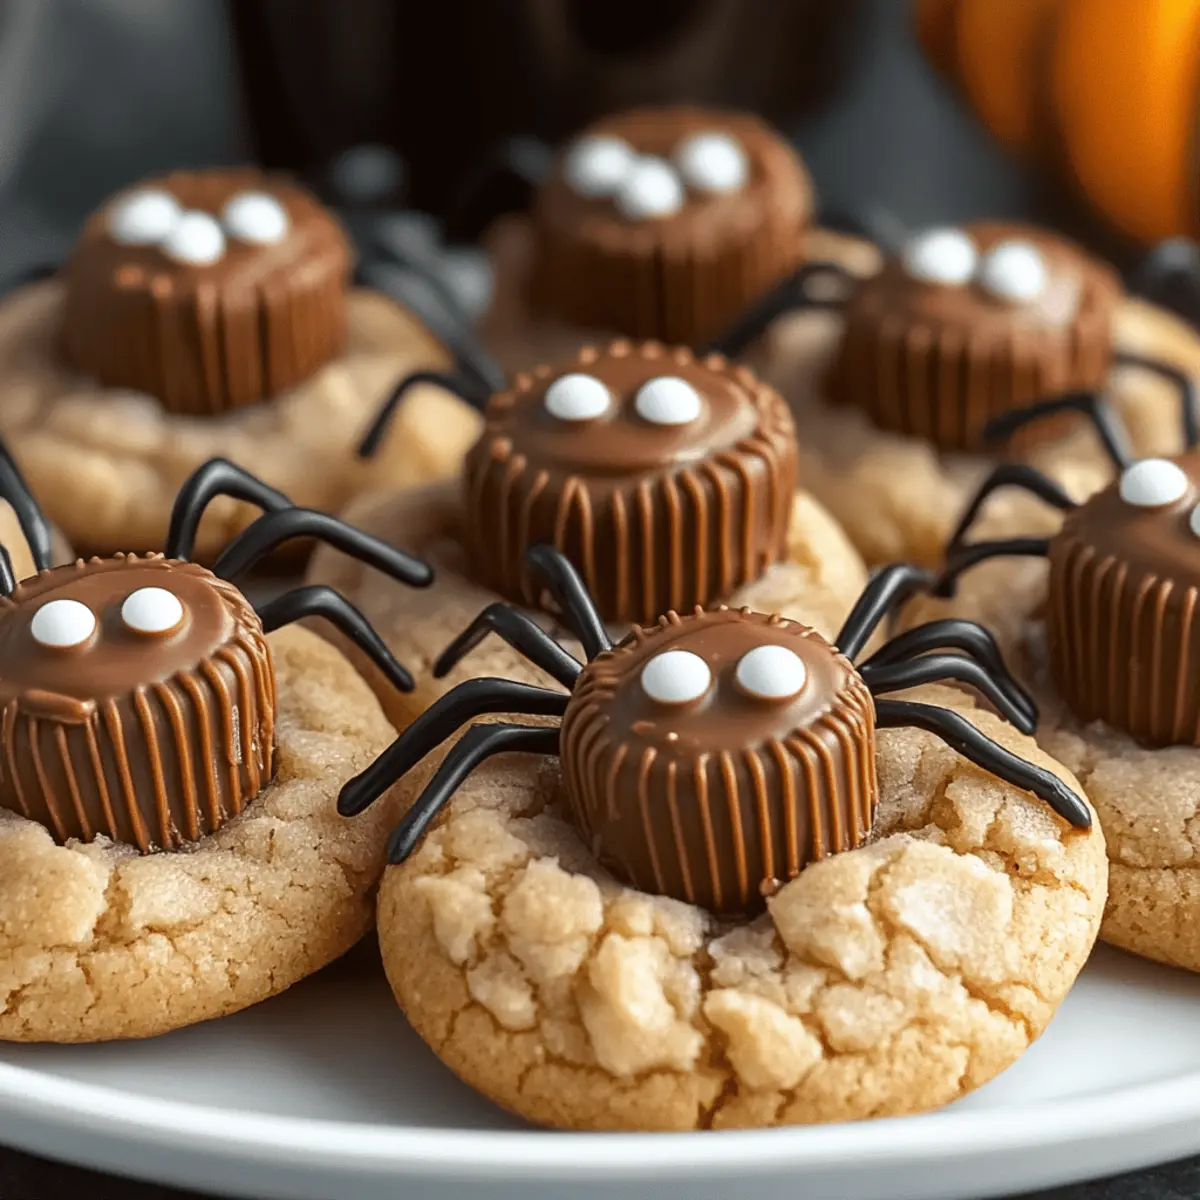
After baking, let the cookies sit on the baking sheet for 15-20 minutes. While they cool, gently press a chilled mini Reese’s into the center of each cookie to create a spider body. This will add a delicious chocolatey center as the cookies set.
Step 9: Add Chocolate Legs
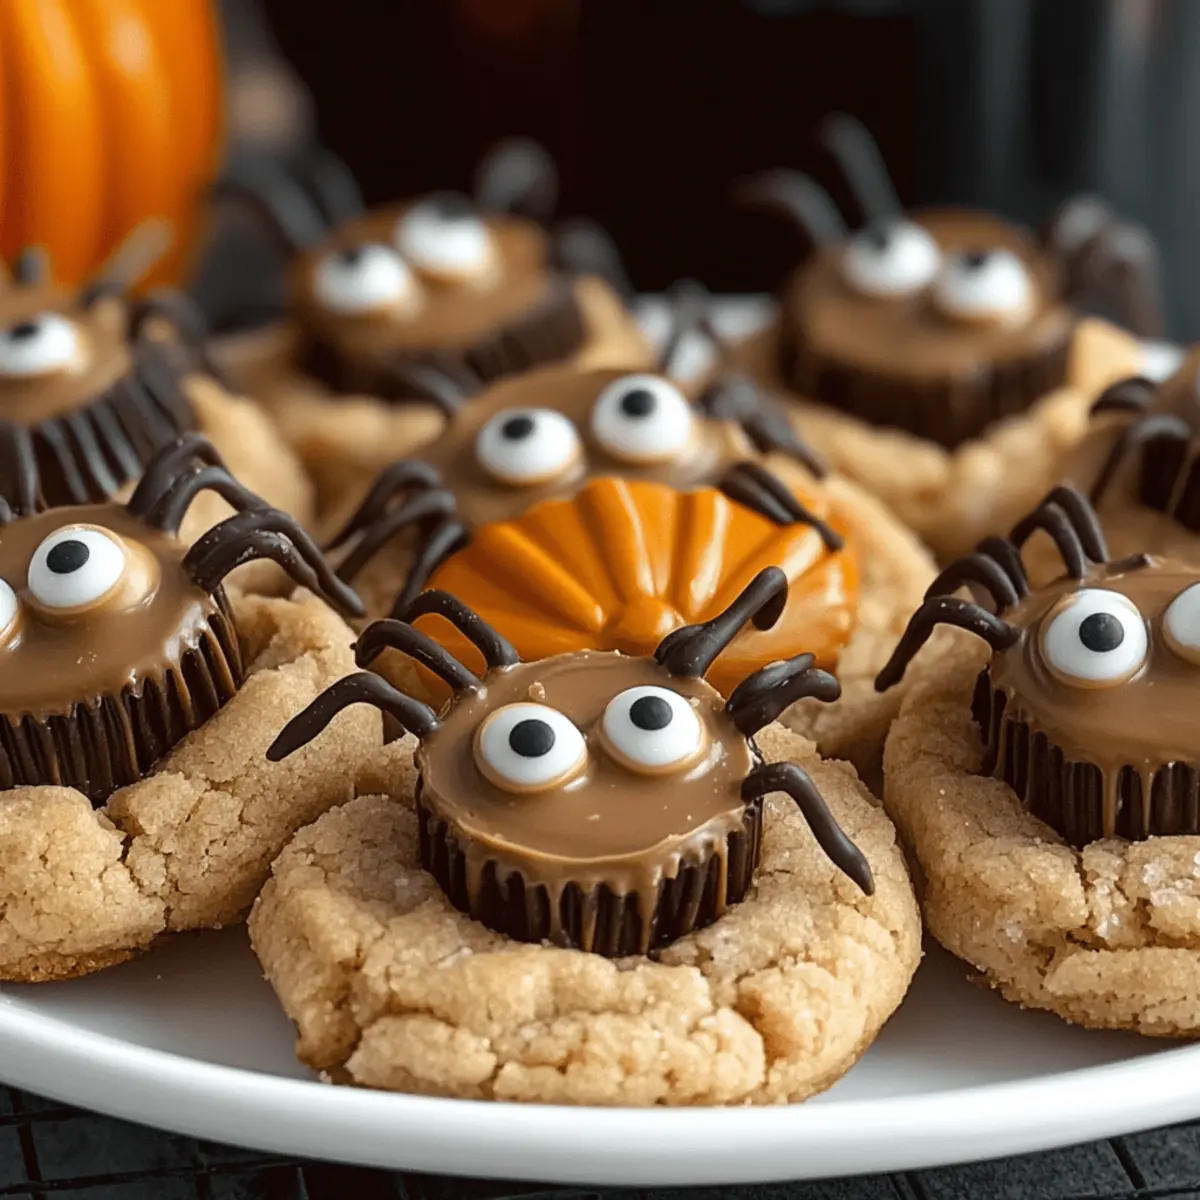
Melt 1 cup of semi-sweet chocolate chips in a microwave-safe bowl, heating in 20-second intervals and stirring until smooth. Transfer the melted chocolate into a squeeze bottle and pipe four spider legs on each side of the chocolate-covered Reese’s. The legs should resemble the delightful features of a spider, making your cookies even more festive!
Step 10: Attach Candy Eyeballs
Finally, use a small amount of the melted chocolate to secure candy eyeballs onto the tops of the Reese’s cups. Allow the chocolate to set completely at room temperature, which should take about 10-15 minutes. Your spooky Peanut Butter Spider Cookies are now ready to impress friends and family!
Make Ahead Options
These Peanut Butter Spider Cookies are fantastic for meal prep and will save you time during the busy Halloween season! You can prepare the cookie dough up to 24 hours in advance. Simply mix the dough, roll it into balls, and refrigerate them in an airtight container. When you’re ready to bake, place the chilled dough balls on a baking sheet, and they’ll hold their shape beautifully when baking. For longer storage, the unbaked dough can be frozen for up to 3 months. Just thaw overnight in the refrigerator before baking. Decorate with the melted chocolate and candy eyeballs just before serving to ensure freshness. Enjoy these adorable cookies without the last-minute rush!
Storage Tips for Peanut Butter Spider Cookies
Room Temperature: Store your Peanut Butter Spider Cookies in an airtight container for up to 3 days to maintain their freshness and chewy texture.
Fridge: If you prefer a chilled treat, these cookies can be kept in the refrigerator for up to 5 days, but allow them to come to room temperature before serving for the best flavor.
Freezer: Freeze cookies in a single layer to prevent sticking, then transfer to an airtight container or freezer bag. They can be stored for up to 3 months.
Reheating: To enjoy your cookies warm, reheat them in the microwave for about 10-15 seconds. This gives them that just-baked softness again!
Expert Tips for Peanut Butter Spider Cookies
-
Chill for Success: Ensure Reese’s are well-chilled before pressing them into the cookies to maintain their shape and prevent melting too much.
-
Spacing Matters: Allow enough space between cookie dough balls on the baking sheet to prevent them from merging while baking, preserving their cute spider shape.
-
Monitor Baking Time: Keep a close eye on the cookies while baking; they should be golden on the edges but still slightly soft in the middle for that perfect chewy texture.
-
Customize Your Toppings: Feel free to experiment with different candies for the spider legs or eyes, making your Peanut Butter Spider Cookies unique and fun.
-
Storage Tips: These cookies can be made ahead and stored in an airtight container for up to 3 days at room temperature or frozen for up to 3 months.
Peanut Butter Spider Cookies: Creative Twists!
Feel free to get playful with these delightful cookies, transforming them into your own personal masterpiece!
- Crunchy Peanut Butter: Swap creamy peanut butter for crunchy to add extra texture and a delightful bite.
- Different Candies: Use M&M’s or Skittles for the topping to inject more color and fun into your cookies. Mixing chocolate and fruity flavors can surprise your taste buds.
- Spicy Kick: Add a pinch of cayenne pepper to the cookie dough for a surprising heat that pairs beautifully with the sweetness.
- Nut Options: Toss in some chopped nuts like pecans or walnuts for an extra crunch, enhancing both texture and flavor.
- Gluten-Free: Substitute all-purpose flour with a 1:1 gluten-free flour to cater to gluten-sensitive friends.
- Vegan Version: Use a flax egg instead of a large egg and choose non-dairy chocolate chips for a delicious vegan treat.
- Pumpkin Spice: Add a teaspoon of pumpkin spice to the dough for an autumn twist that perfectly fits the Halloween theme.
- Chocolate Drizzle: Drizzle melted chocolate over the cooled cookies for an extra layer of sweetness and a fancier presentation.
No two batches need to be the same! If you find inspiration in other treats, you might explore our Oatmeal Peanut Butter or whip up Twix Cookies Chewy. Happy baking!
What to Serve with Peanut Butter Spider Cookies?
As Halloween festivities approach, make your dessert table even more delightful with these playful treats and the perfect accompaniments.
- Warm Apple Cider: This comforting drink complements the cozy flavors of the cookies, creating a perfect autumnal pairing.
- Pumpkin Spice Muffins: Their warm spices echo the festive season, enhancing the sweet notes of your Peanut Butter Spider Cookies.
- Chocolate Milkshake: An indulgent treat that contrasts wonderfully with the chewy texture of the cookies while satisfying every sweet tooth craving.
- Caramel Popcorn: The crunchy, buttery goodness of caramel popcorn provides a delightful texture contrast with the soft cookies, making it a fun snack choice.
- Halloween Fruit Platter: A vibrant selection of fruits adorned with spooky decorations offers freshness and colorful fun alongside the sweet treats.
- Ghostly Ice Cream: Vanilla ice cream with a drizzle of chocolate sauce is a delightful side, echoing the spooky theme while adding creaminess.
- Mini Pumpkin Pies: These individual pies bring in seasonal flavors and are a neat addition that guests can enjoy on the go.
- Fruity Halloween Punch: This refreshing beverage can balance the sweetness of your cookies and be a hit among adults and kids alike.
- Spooky Rice Krispie Treats: Easy to make and decorate, these offer a satisfying bite-sized option, adding variety to your Halloween spread.
- Spiced Chai Tea: The warm spices and delicious aroma create a welcoming experience, balancing the sweet cookies beautifully.
Peanut Butter Spider Cookies Recipe FAQs
What type of peanut butter should I use for the cookies?
Absolutely! I recommend using a creamy, non-natural peanut butter for these Peanut Butter Spider Cookies. This type provides a smooth texture and rich flavor that blends perfectly into the cookie dough without being too oily or crumbly. If you prefer a bit of crunch, feel free to substitute it with crunchy peanut butter for added texture!
How should I store the cookies to keep them fresh?
To maintain the freshness of your Peanut Butter Spider Cookies, store them in an airtight container at room temperature for up to 3 days. If you want to keep them longer, you can refrigerate them for up to 5 days; just ensure to let them come to room temperature before serving for the best taste.
Can I freeze Peanut Butter Spider Cookies?
Yes! If you want to make a batch ahead of time, these cookies freeze beautifully. First, allow the cookies to cool completely. Then, lay them in a single layer on a baking sheet and freeze until solid. Transfer them to an airtight container or a freezer bag, where they can stay fresh for up to 3 months. When you’re ready to enjoy them, simply thaw at room temperature or microwave for 10-15 seconds to warm them up again.
What should I do if my dough is too dry?
If you find that your dough is too dry and crumbly, don’t worry! This can happen sometimes due to variations in flour brands. To fix it, add a tablespoon of milk or an extra egg yolk to the dough and mix well until you reach a softer consistency. This small adjustment will help restore the moisture and allow for better dough handling.
Can I make these cookies allergen-friendly?
Certainly! If you’re looking for allergen-friendly versions, consider using gluten-free 1:1 flour for those with gluten sensitivities. For a nut-free option, you can swap the peanut butter with sun butter or a soy nut butter, ensuring all your friends and family can enjoy these festive treats without worry!
Peanut Butter Spider Cookies: Adorable Halloween Treats!
Ingredients
Equipment
Method
- Chill Reese’s by placing them in the freezer for about 10-15 minutes.
- Preheat your oven to 350°F (175°C).
- Cream together unsalted butter, brown sugar, and granulated sugar until smooth.
- Incorporate creamy peanut butter, egg, and vanilla extract into the mixture.
- Whisk together flour, baking soda, baking powder, and salt, then mix with wet ingredients.
- Form tablespoon-sized balls of dough, rolling them in granulated sugar.
- Bake for 8-11 minutes until edges are golden and centers are soft.
- Let cookies cool for 15-20 minutes, then press chilled Reese's into each cookie.
- Melt chocolate chips and pipe four legs onto each cookie.
- Attach candy eyeballs with melted chocolate and let set at room temperature.