
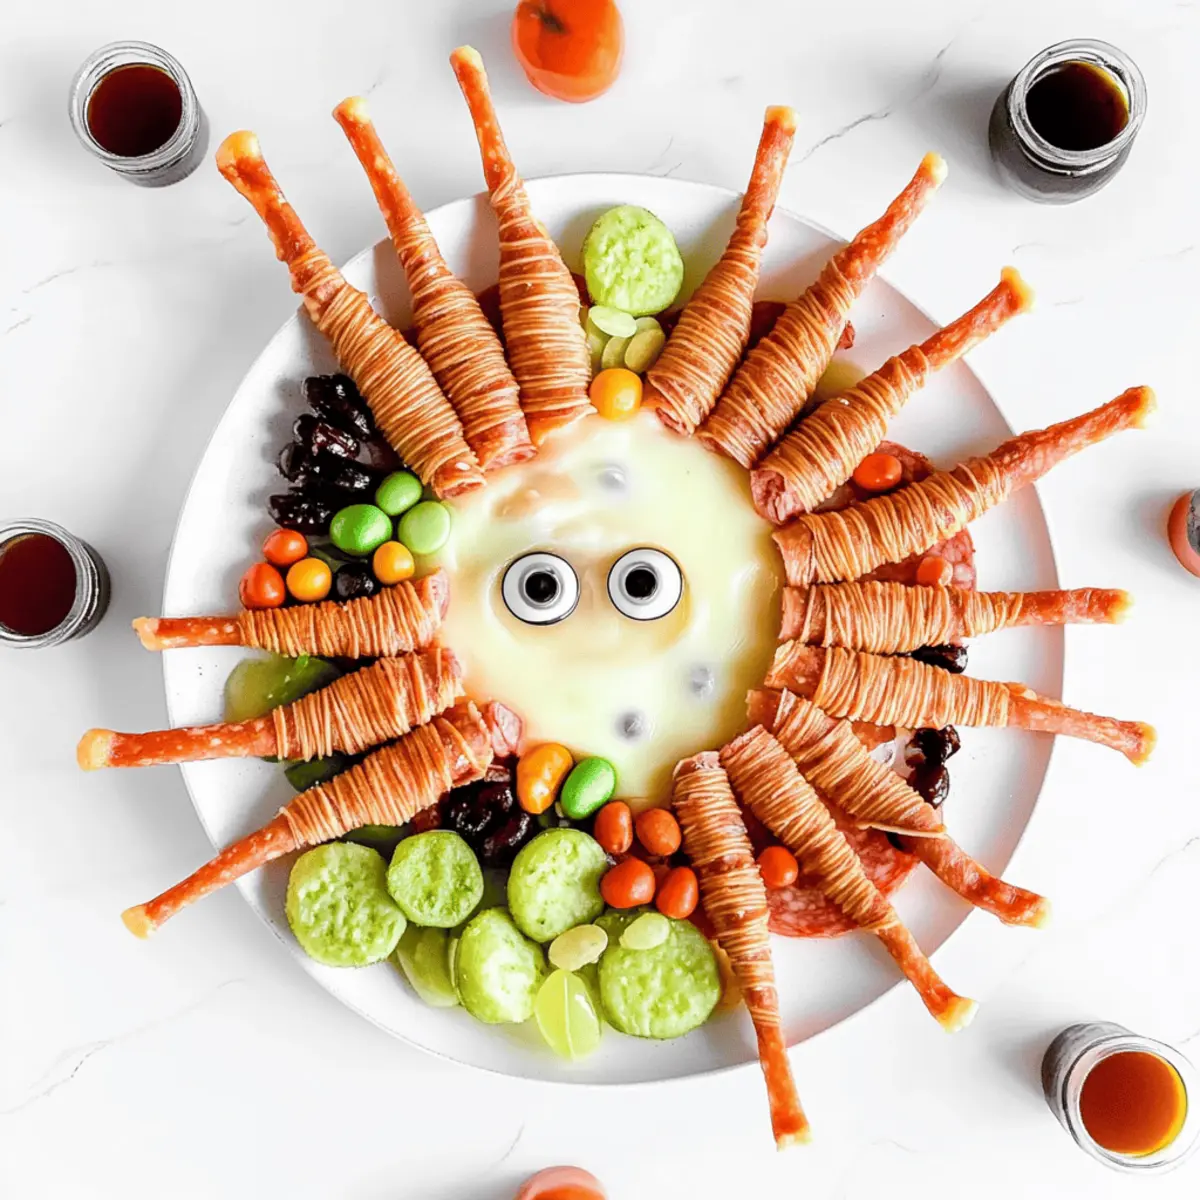
As I rummaged through my pantry, a delightful idea struck me—a spooky, playful twist for this Halloween season! Enter the Meaty Mummies Charcuterie Board, a fun and easy creation that’s here to save any festive gathering. Picture melted cheese adorning savory meats, making for an irresistible finger food that guarantees giggles and joy, especially from the little ones. What makes this recipe even better? It requires minimal prep time, leaving you free to mingle and enjoy the eeriness of the evening with friends and family. Plus, it’s a crowd-pleaser that combines a hearty snack with a whimsical flair. Ready to become the star of your Halloween party? Let’s dive into this frightfully delightful recipe!
Why Is This Charcuterie Board Perfect?
Fun and Festive: This Meaty Mummies Charcuterie Board brings holiday spirit right to your table, combining playful presentation with delicious flavors that all ages will love.
Quick Preparation: With just minutes spent in preps, you’ll have a show-stopping, kid-friendly snack that’s perfect for Halloween parties.
Savory and Gooey Goodness: The melted cheese paired with various meats creates a delightful texture combo—chewy, savory, and utterly irresistible!
Versatile for All Gatherings: Feel free to switch up the ingredients; try different meats, or even serve with a splash of colorful dips to suit any taste.
Easily Assemble-Ahead: Prep this charcuterie board in advance and simply broil before guests arrive for a stress-free entertaining experience! Make sure to check out some additional ideas for seasonal vegetables or themed serving suggestions for a stunning display.
Meaty Mummies Charcuterie Board Ingredients
For the Mummies
• Frigo® Cheese Heads® String Cheese – Provides gooeyness and that fun mummy-like texture; feel free to substitute with any string cheese variety.
• Sliced Meat (e.g., salami, pepperoni) – The base for the mummies, delivering protein and flavor; any deli meat can work as a substitute.
• Candy Eyes – Adds a playful spooky element; consider using chocolate chips or edible eyes if needed.
For the Dip
• Cream Cheese or Dip of Choice – Acts as the base for adhering the candy eyes and can be flavored as desired.
• Green Food Coloring – Optional for creating a fun witch’s brew dip; mix into your dip for a festive touch.
This Meaty Mummies Charcuterie Board is a delightful way to celebrate Halloween with a mix of flavors sure to please everyone!
Step‑by‑Step Instructions for Meaty Mummies Charcuterie Board
Step 1: Preheat the Oven
Preheat your oven to low broil, ensuring it’s ready to bring those mummies to life! This step is crucial for achieving that perfectly gooey cheese topping. While the oven warms up, gather your ingredients and a non-stick baking sheet for easy assembly.
Step 2: Prepare The Ingredients
Remove the packaging from the Frigo® Cheese Heads® String Cheese and the sliced meats. Slice the cheese into thin strips that can easily drape over the meat, mimicking mummy wrappings. Lay the sliced meats on your non-stick baking sheet, making sure they are evenly spaced for optimal melting.
Step 3: Assemble the Mummies
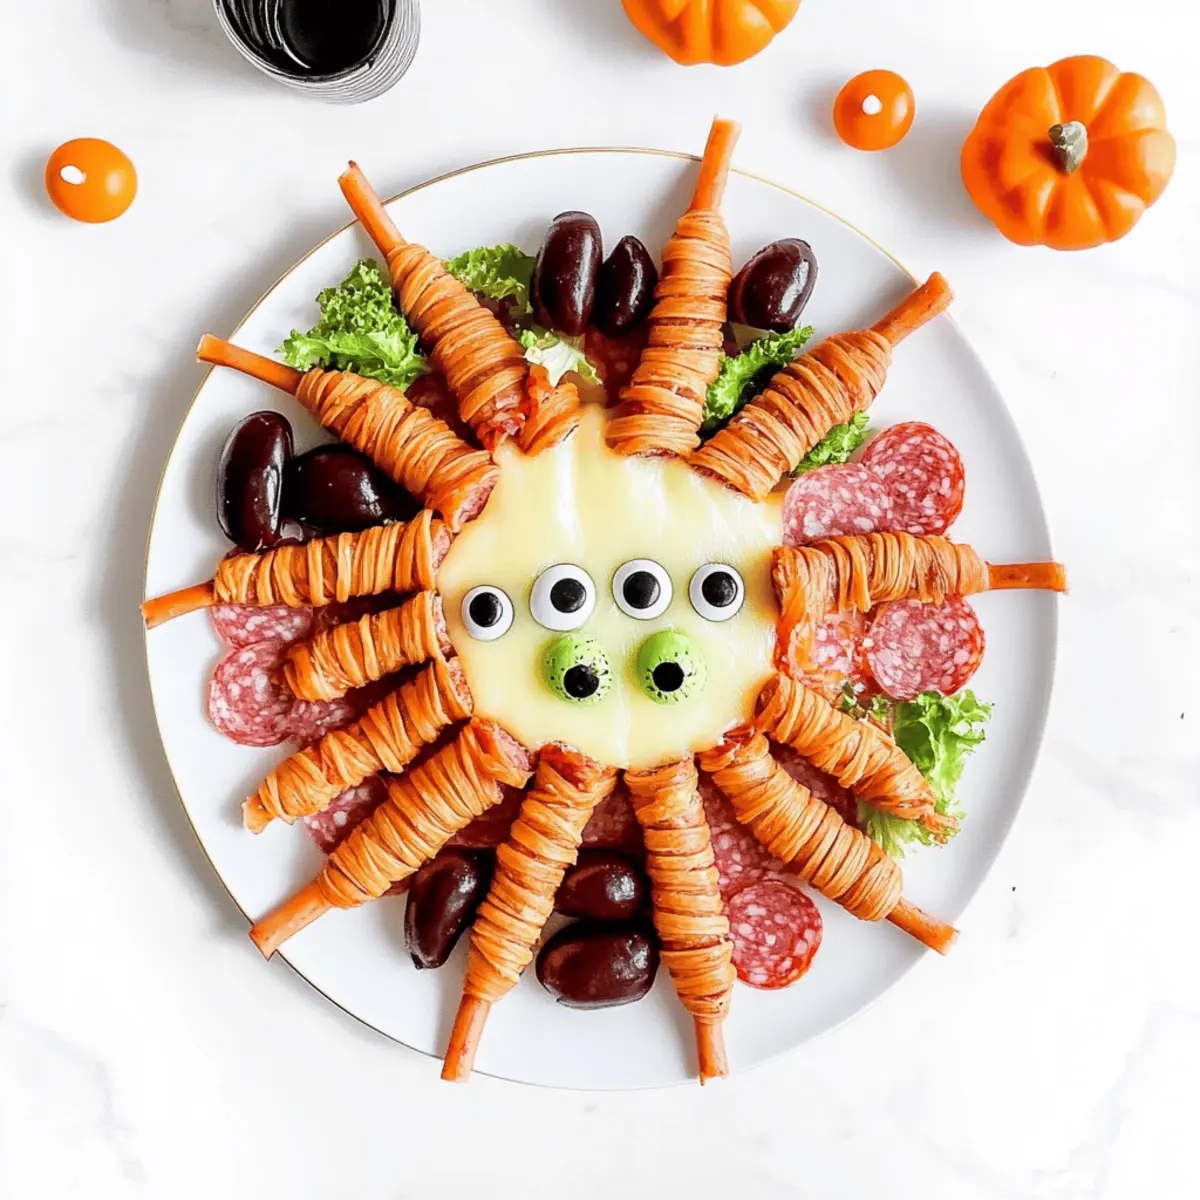
Carefully lay the cheese strips over the sliced meats to create your mummies. Arrange the cheese strips in a playful manner to mimic the bandaging of a mummy. This step not only enhances the festive look of your Meaty Mummies Charcuterie Board but also contributes to the savory flavor combination.
Step 4: Broil the Mummies
Place the baking sheet in the oven and broil for about 1 minute. Keep a close eye on the mummies to prevent the cheese from over-melting, as it should become just lightly melted with a bubbly texture. The visual cue here is the cheese gently oozing over the meats, signaling that it’s time to take them out.
Step 5: Cool and Add Eyes
Once the cheese is lightly melted, remove the baking sheet from the oven and allow the mummies to cool slightly. This is important to prevent hot cheese burns! Use a dab of cream cheese or your dip of choice to adhere the candy eyes, positioning them on each mummy as an adorable finishing touch.
Step 6: Prepare the Dip
For a fun twist, mix green food coloring into your dip until you reach your desired shade. This step adds a festive “witch’s brew” flair to your Meaty Mummies Charcuterie Board. Prepare a small serving bowl with the dip to accompany your spooky snacks, enhancing the overall presentation.
Step 7: Serve and Enjoy
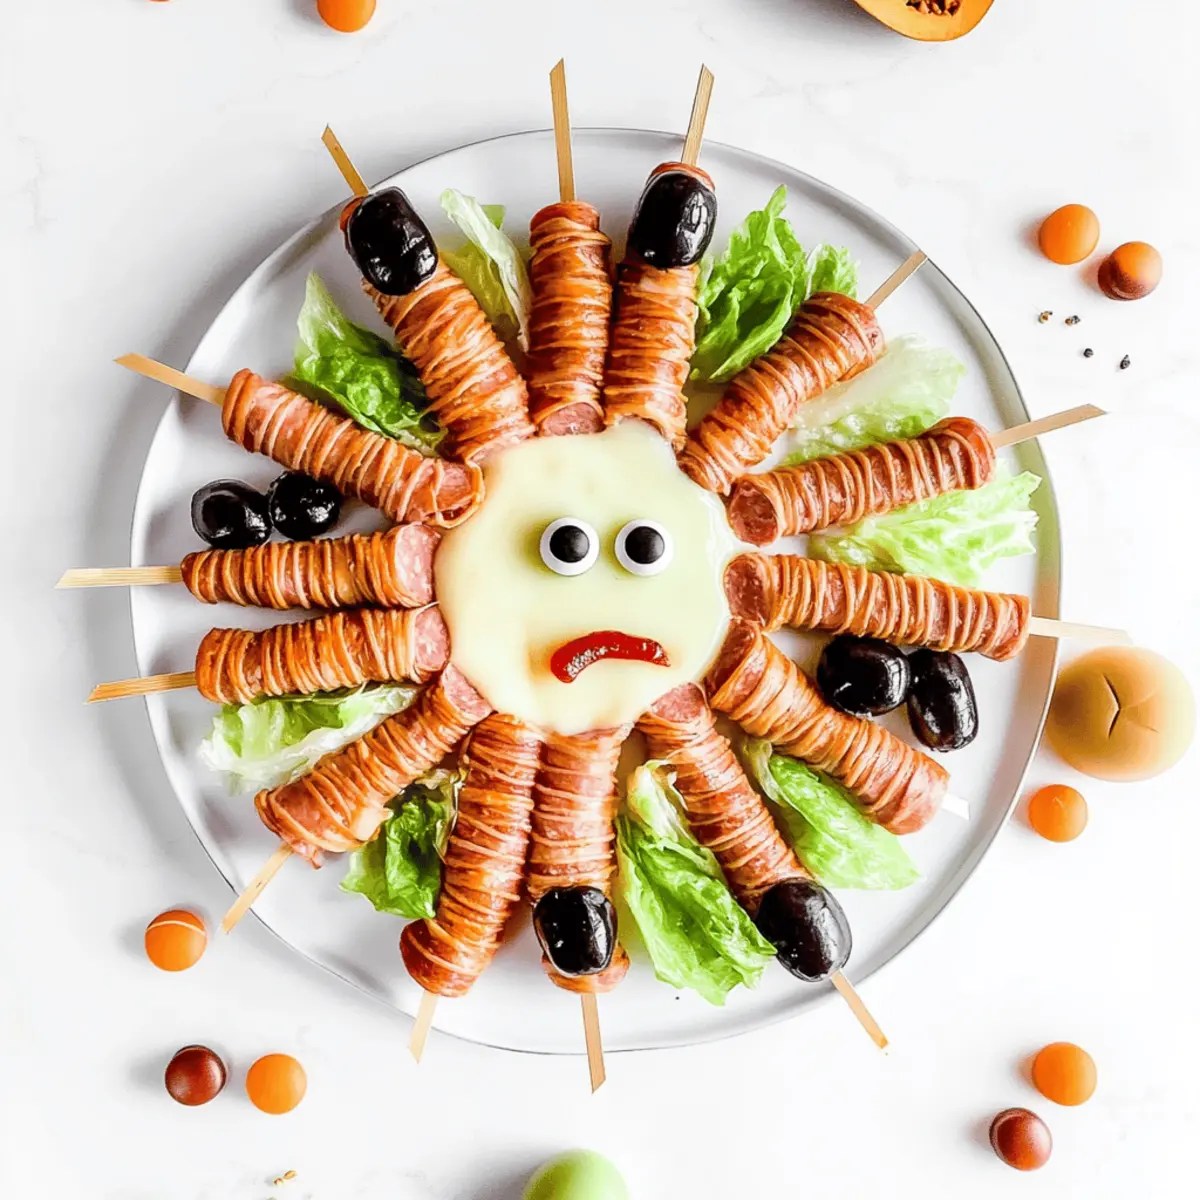
Arrange your finished mummies on a platter alongside the colorful dip. Consider adding some seasonal veggies or crackers to complement the board and create a visually appealing display. Your Meaty Mummies Charcuterie Board is now ready to be the star of your Halloween gathering, bringing smiles and satisfaction to all!
Make Ahead Options
These Meaty Mummies Charcuterie Board creations are perfect for busy home cooks looking to save time before a festive gathering! You can assemble the mummies (layering the sliced meats and cheese) up to 24 hours in advance. Simply cover the baking sheet with plastic wrap and refrigerate them to maintain freshness. To keep that delightful gooey texture, avoid adding the candy eyes until just before serving. When you’re ready to impress your guests, broil the mummies for about 1 minute to melt the cheese perfectly. With this prep-ahead strategy, you can enjoy the Halloween festivities without the stress, knowing your charcuterie board is ready to go!
What to Serve with Spooky Meaty Mummies Charcuterie Board
Create a festive feast that enchants your Halloween gathering and delights your taste buds.
-
Crispy Veggie Platter: Fresh carrots, celery, and bell peppers add a crunchy contrast to the gooey mummies, making your spread colorful and healthy. Don’t forget a tasty dip for an enticing touch!
-
Pumpkin Hummus: This seasonal twist brings a creamy, spiced flavor that complements the savory richness of the mummies while enhancing the Halloween theme.
-
Cheesy Garlic Breadsticks: Warm, buttery breadsticks provide a cozy, comforting side that pairs wonderfully with the melted cheese. They can easily be dipped into the cheesy mix for an extra indulgent bite!
-
Spooky Fruit Salad: Incorporate ghostly grapes and orange slices to balance flavors on your board. The freshness of fruit rounds out the richness of the mummies, creating a delightful mouthful.
-
Witch’s Brew Punch: A fun green drink spiked with mint or lime keeps the festive spirit high while offering a refreshing sip between snacks.
-
Chocolate-Covered Pretzels: The sweet and salty combination rounds out the charcuterie experience, while their playful look adds to the Halloween fun!
-
Caramel Dipped Apples: These sweet treats are a perfect contrast to savory flavors, inviting your guests to indulge in something sweet. The crunchy apple pairs beautifully with the melted cheese.
-
Monster Marshmallow Skewers: Add a playful dessert option by threading marshmallows and gummy candies onto skewers. These are not only easy to eat but bring the whimsical Halloween spirit to your dessert table.
Meaty Mummies Charcuterie Board Variations
Feel free to get creative with your Meaty Mummies Charcuterie Board, as there are so many fun ways to make it uniquely yours!
-
Dairy-Free: Substitute string cheese with dairy-free cheese alternatives for a tasty option everyone can enjoy.
-
Turkey Twist: Use turkey slices instead of traditional meats for a lighter, healthier mummy that doesn’t skimp on flavor.
-
Spicy Surprise: Incorporate pepper jack cheese into your mummies for a delicious kick that will get taste buds tingling.
-
Veggie Vitality: Scatter seasonal veggies like bell pepper strips or cherry tomatoes around your board for added color and nutrition.
-
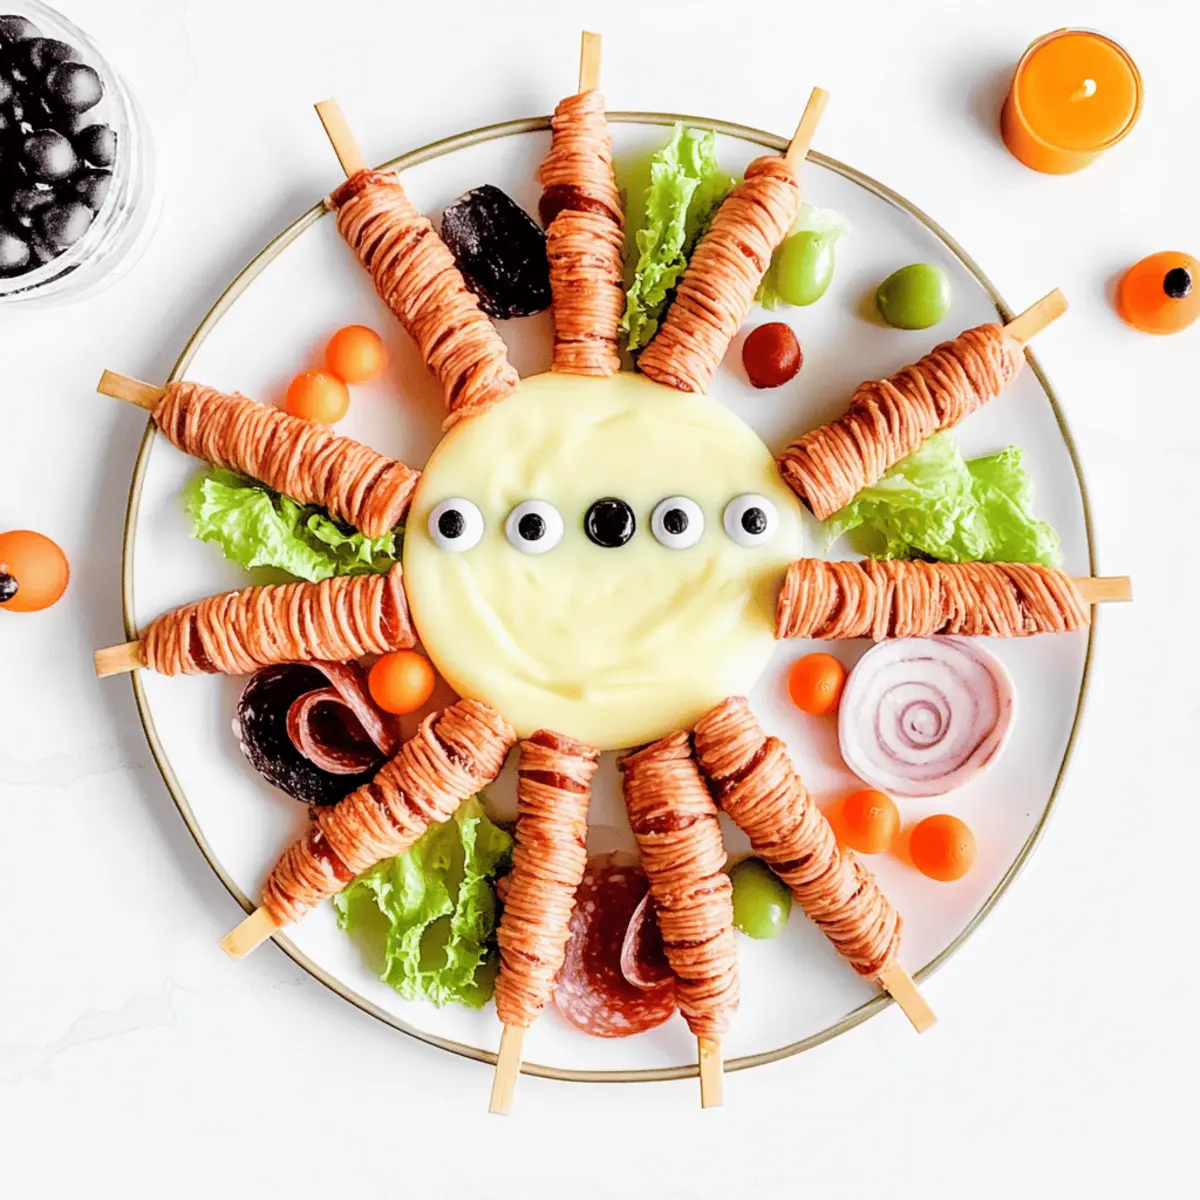
Creative Eyes: Swap candy eyes with sliced black olives or even colorful fruits like blueberries for a unique and healthy twist.
-
Sweet & Savory: Add a drizzle of honey or fig jam on the side for a delightful contrast between sweet and savory flavors.
-
Mini-Mummies: Transform this concept into bite-sized finger foods by using mini slices of bread or crackers topped with cheese and deli meat.
-
Flavorful Dips: Experiment with flavored dips, like a spicy garlic dip or a ranch-style favorite to enhance the overall taste experience.
The beauty of the Meaty Mummies Charcuterie Board is in its flexibility. Mix and match ideas to suit your gathering, and consider pairing it with some festive themed treats for a truly memorable Halloween spread!
Expert Tips for Meaty Mummies Charcuterie Board
- Perfect Melt: Keep a close watch while broiling; cheese should melt in about a minute. Over-melting can ruin the mummy look!
- Non-Stick Essential: Use a non-stick baking sheet to prevent any mummies from sticking, giving you an easier cleanup and beautiful presentation.
- Creative Presentation: Try different themed platters or add cauldrons for dips to elevate the spooky feel of your Meaty Mummies Charcuterie Board!
- Ingredient Swaps: Feel free to swap meats and cheeses based on your family’s preferences to create variations everyone will love.
- Prep Ahead: Assemble the mummies in advance and broil just before guests arrive, ensuring they’re served fresh and hot!
Storage Tips for Meaty Mummies Charcuterie Board
Fridge: Keep your assembled Meaty Mummies in an airtight container for up to 3 days to retain freshness and quality.
Freezer: For best results, freeze leftover mummies before broiling, wrapped tightly in plastic wrap; they can be stored for up to a month.
Reheating: When ready to enjoy, broil the mummies from frozen for about 2-3 minutes until cheese is melted and bubbly.
Make-Ahead: This board can be assembled ahead of time and kept in the fridge; broil just before serving to enjoy that delicious gooeyness!
Meaty Mummies Charcuterie Board Recipe FAQs
How do I select the right cheese for my mummies?
Absolutely! Look for string cheese that’s fresh and has a nice, gooey texture when melted. Frigo® Cheese Heads® are perfect because they melt beautifully and provide that fun mummy look. If you can’t find them, any other brand of string cheese or even mozzarella can work just as well!
What’s the best way to store leftover mummies?
I recommend placing leftover Meaty Mummies in an airtight container in the fridge. They can last for up to 3 days while still tasting great. Just remember to reheat them gently to preserve that delightful cheesy texture!
Can I freeze my mummies for later?
Absolutely! If you have leftover assembled mummies, wrap them tightly in plastic wrap and store them in the freezer for up to a month. When you’re ready to enjoy them, simply broil from frozen for about 2-3 minutes until the cheese is melted and bubbly. It’s a fantastic way to keep your Halloween spirits alive throughout the season!
What should I do if my cheese isn’t melting properly?
Very! If your cheese isn’t melting, it may be due to not broiling long enough or using cheese that’s not ideal for melting. Make sure to keep a close watch during broiling—around 1 minute should suffice, but it can vary based on the oven. If it’s not melting nicely, you can try increasing the time by 15-second intervals while keeping an eye on it to prevent burning.
Are there any allergies I should consider when making these mummies?
Definitely! If you’re serving guests, be mindful of dairy allergies—string cheese and cream cheese are key components. You could offer a dairy-free cheese alternative as a substitute. Also, check if anyone has sensitivities to meats like salami or pepperoni, and feel free to swap them out for turkey or other deli meats based on dietary needs.
How can I make these Meaty Mummies more visually appealing?
Oh, I love that idea! Consider adding some colorful seasonal veggies like bell peppers or cherry tomatoes around your Meaty Mummies Charcuterie Board for a pop of color. You can also use themed platters like a cauldron for dips or spooky-themed serving dishes for that extra festive touch.
Delightful Meaty Mummies Charcuterie Board for Halloween Fun
Ingredients
Equipment
Method
- Preheat your oven to low broil.
- Remove packaging from the Frigo® Cheese Heads® String Cheese and sliced meats. Slice the cheese into thin strips.
- Lay sliced meats on a non-stick baking sheet, spaced evenly.
- Lay cheese strips over the sliced meats to create mummies.
- Broil for about 1 minute until the cheese is lightly melted.
- Cool slightly before adding candy eyes with a dab of cream cheese.
- Mix green food coloring into your dip and serve alongside the mummies.
- Arrange mummies on a platter and enjoy!