
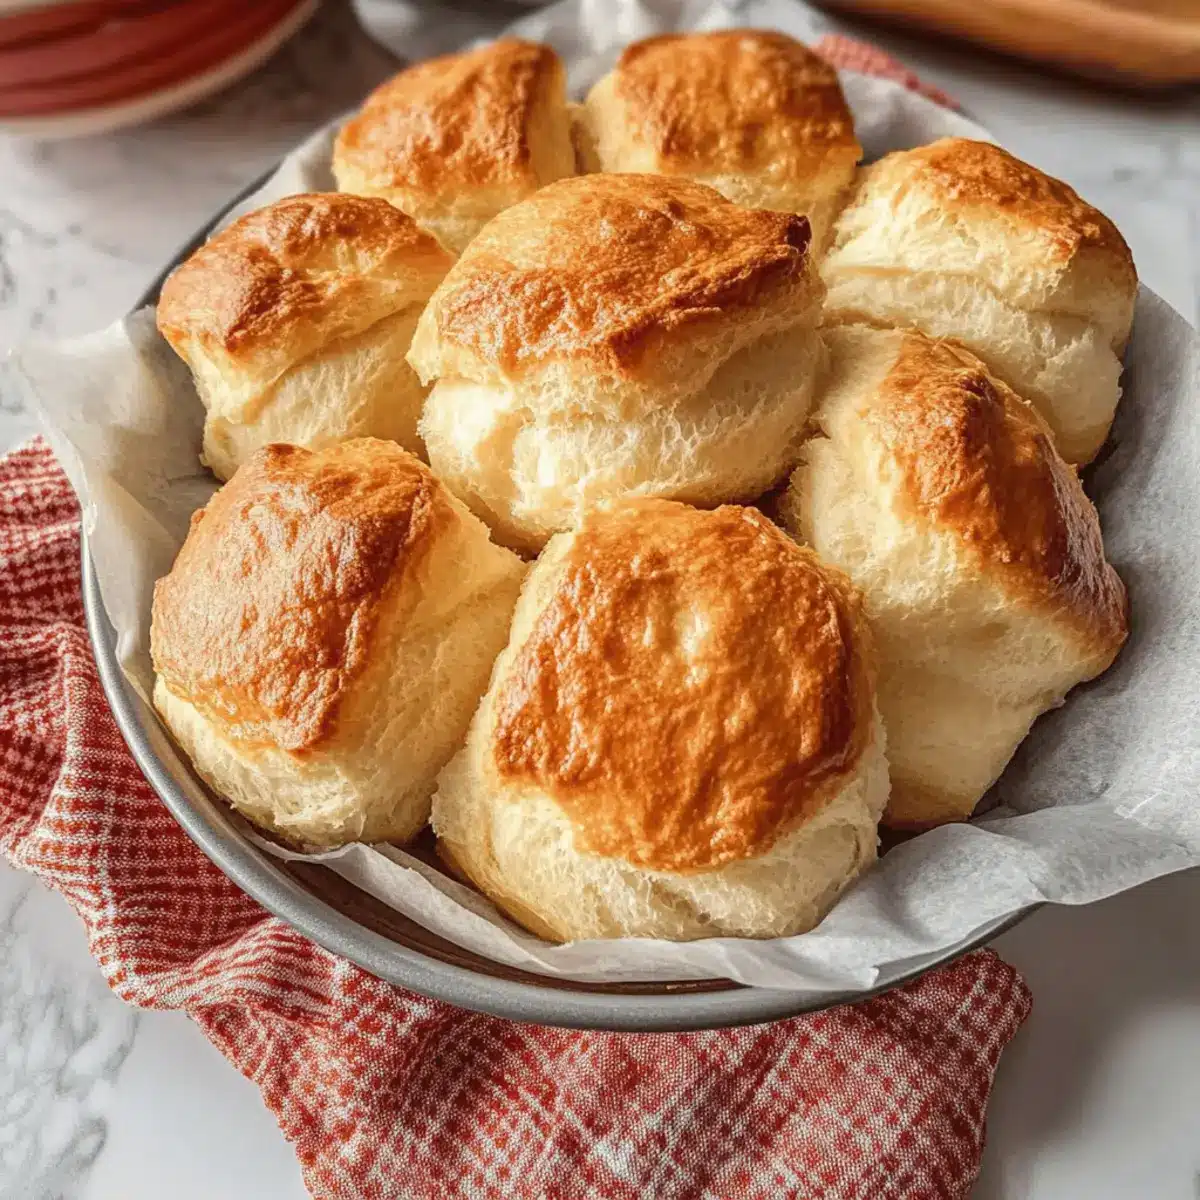
There’s something enchanting about the aroma of freshly baked bread wafting through the kitchen. When I first discovered how to make soft and fluffy Gluten Free Hawaiian Rolls, I felt like I had unearthed a secret weapon in my cooking arsenal. These delightful rolls come together quickly and effortlessly, making them perfect for busy weeknights or weekend gatherings. Not only do they bring a homemade charm that far surpasses any store-bought version, but they’re also versatile enough to serve as a side for soups or transformed into scrumptious sliders for your next BBQ. Plus, they can easily cater to your dietary needs with a dairy-free option! Are you ready to impress your family and friends with these delectable rolls? Let’s dive in!

Why You’ll Adore These Hawaiian Rolls?
Amazingly Soft Texture: These rolls are a revelation, boasting a pillow-like fluffiness that melts in your mouth.
Quick and Easy: No need to spend hours in the kitchen – this recipe is straightforward and perfect for busy cooks.
Versatile and Delicious: Serve them warm with soups or as sliders for your favorite fillings, making them a hit at any meal.
Gluten-Free Goodness: Even without gluten, you won’t miss the texture or flavor, ensuring everyone can enjoy fresh-baked bread.
Dairy-Free Option: Swap butter for vegan alternatives to accommodate dietary needs without compromising taste.
Get ready to experience the joy of baking these delightful rolls and add more cozy comfort to your table. If you’re also looking for something unique, check out these tasty Calorie Pizza Rolls for a fun twist!
Hawaiian Rolls Ingredients
• All you need for fluffy goodness!
For the Dough
- Caputo Fioreglut Gluten Free Flour / King Arthur Flour All-Purpose Gluten Free Flour – The backbone of your rolls, creating a delightful structure.
- Light Brown Sugar – Provides sweetness and moisture to enhance flavor.
- White Rice Flour – Offers additional stability while keeping a light texture.
- Cornstarch – Lightens the flour blend for that heavenly fluffiness.
- Xanthan Gum – Essential for binding, ensuring a pleasant texture in your gluten-free recipe.
- Instant Yeast – Your secret to achieving that irresistible fluffy rise.
- Salt – Brings out the flavors while regulating yeast activity.
For the Wet Ingredients
- Milk / Pineapple Juice (optional) – Adds moisture; pineapple juice lends a unique sweetness, though it may impact rising with some flours.
- Butter – Enriches the flavor for deliciously soft rolls; opt for vegan butter for a dairy-free version.
- Eggs – Contribute richness and help structure the rolls.
For Topping
- Melted Butter – A finishing touch that adds flavor and a glossy sheen to your rolls.
Now you’re ready to whip up these delightful Hawaiian rolls that’ll have everyone coming back for seconds!
Step‑by‑Step Instructions for Soft and Fluffy Gluten Free Hawaiian Rolls
Step 1: Whisk the Dry Ingredients
In a stand mixer, combine the Caputo Fioreglut gluten-free flour, light brown sugar, white rice flour, cornstarch, xanthan gum, instant yeast, and salt. Whisk together on low speed until all ingredients are well blended, creating a uniform dry mixture. This mix is the foundation for your Hawaiian rolls, giving them structure and flavor.
Step 2: Prepare the Wet Ingredients
Next, gently microwave the milk and butter together until melted, achieving a temperature between 120°F and 130°F. This temperature is crucial; ensure it’s warm but not hot enough to kill the yeast. Once melted, let the mixture cool slightly before moving to the next step to protect your yeast.
Step 3: Combine Wet and Dry Ingredients
Slowly pour the warm milk and butter mixture into the bowl with the dry ingredients. If you’re using pineapple juice, add it now along with the eggs, one at a time. Mix on medium speed until everything is well incorporated and a thick, smooth dough forms, about 5 minutes. This step creates the delightful texture of your Hawaiian rolls.
Step 4: Shape the Dough
Once your dough is ready, lightly moisten your hands with cooking oil to prevent sticking. Divide the dough into 12 equal portions and shape each portion into a ball. Place the shaped rolls close together in a greased cake pan, ensuring they touch slightly. This will help them rise and form a lovely bond during baking.
Step 5: Let the Dough Rise
Cover the pan with a clean kitchen towel and place it in a warm area. Allow the dough to rise for about 1 hour, or until it visibly increases in size and puffs up. You want your rolls to be soft and fluffy, promising a delightful texture once baked, so give them the time they need to rise properly.
Step 6: Preheat the Oven
While the dough is rising, preheat your oven to 350°F. This ensures it’s ready for the rolls as soon as they finish rising. The warm oven will help achieve a golden brown crust while retaining the softness of the Hawaiian rolls.
Step 7: Brush and Bake
Once the rolls have risen, gently brush the tops with melted butter for added flavor and a beautiful glossy finish. Place the cake pan in the preheated oven and bake for 20 to 30 minutes. Look for a golden-brown color on top and a slight spring when you tap the rolls to signal they’re fully baked.
Step 8: Cool and Serve
After baking, remove the Hawaiian rolls from the oven and let them cool in the pan for about 10 minutes. This resting time helps them firm up slightly. Once cooled, transfer them to a wire rack to cool completely, then serve warm with your favorite meals or as delightful sliders.
Hawaiian Rolls Variations & Substitutions
Feel free to explore these fun twists and swaps to make your Hawaiian Rolls even more personal and delightful!
-
Dairy-Free: Swap regular butter for vegan butter to enjoy these rolls without dairy, keeping them just as delicious and rich.
-
Alternative Milks: Use almond, oat, or coconut milk instead of regular milk for a lactose-free version. Each one brings a unique twist to flavor!
-
Pineapple Juice: Add this for a hint of fruity sweetness, but check if it impacts your dough’s rise based on the flour you use. Experimentation can lead to delightful surprises.
-
Flavor Boosters: Incorporate spices like ground cinnamon or nutmeg for a warm touch, or garlic powder for a savory kick that pairs beautifully with soups or savory dishes.
-
Herb Infusion: Add fresh or dried herbs like rosemary or thyme to the dough for a savory twist that’ll elevate your rolls. They make a lovely pairing with roasted meats.
-
Add-ins: Try mixing in crushed pineapple or shredded coconut to amplify that tropical vibe, giving a deliciously sweet and chewy texture.
-
Mini Rolls: Shape the dough into smaller portions for bite-sized dinner rolls or sliders, and serve with your favorite spreads or fillings. These are perfect for get-togethers!
For an exciting pairing, consider making these comforting Calorie Pizza Rolls for a fun menu idea or serve your Hawaiian Rolls alongside homemade soups and salads. Happy baking!
How to Store and Freeze Hawaiian Rolls
Room Temperature: Keep the rolls in an airtight container at room temperature for up to 3 days to maintain their softness and freshness.
Fridge: If you need to store them longer, place the Hawaiian rolls in the fridge for up to a week. Just remember they may lose some fluffiness, so reheat before serving.
Freezer: For extended storage, freeze the rolls in a resealable freezer bag for up to 3 months. Make sure to wrap them tightly to prevent freezer burn.
Reheating: To enjoy your rolls again, reheat from frozen directly in the oven at 350°F for about 10-15 minutes, just until warmed through and soft.
What to Serve with Soft and Fluffy Gluten Free Hawaiian Rolls
Enhance your mealtime experience by pairing these delightful rolls with complementary dishes that bring out their soft, sweet charm.
-
Savory Chicken Soup: A warm, comforting bowl enhances the sweet notes of the rolls while providing a hearty balance.
-
Grilled Pineapple Salsa: Bursting with tropical flavors, this refreshing salsa adds a zesty kick that complements the sweetness of the rolls beautifully.
-
Creamy Coleslaw: The crunch of fresh cabbage and a tangy dressing provide a refreshing contrast to the soft texture of these Hawaiian rolls.
-
BBQ Pulled Pork: Turn your rolls into scrumptious sliders! The rich, smoky flavor of pulled pork perfectly harmonizes with the roll’s delicate sweetness.
-
Sweet Potato Fries: Crispy and slightly sweet, they create a satisfying textural contrast and ground the meal with wholesome goodness.
-
Refreshing Lemonade: A glass of this tart drink complements the sweetness of the rolls, making for a delightful, thirst-quenching pairing.
-
Chocolate Chip Cookies: End on a sweet note – the gooeyness of warm cookies adds a nostalgic touch to your homemade spread.
These pairings will elevate your homemade rolls to star of the meal status, making every bite feel extra special!
Expert Tips for Perfect Hawaiian Rolls
-
Don’t Overwork Dough: Be gentle when mixing; overworking can lead to rubbery and dense rolls. Aim for a smooth, yet thick consistency.
-
Check Yeast Temperature: Ensure your milk and butter mixture is warm (120°F to 130°F) for optimal yeast activation. Too hot, and the yeast could die, ruining your Hawaiian rolls.
-
Watch Pineapple Juice Use: If adding pineapple juice, monitor if it affects the rising process based on your flour type. Test with a small batch first.
-
Oiled Hands Trick: Use cooking oil on your hands when shaping the dough to prevent sticking—this makes forming the rolls much easier!
-
Perfect Rising Environment: Let the dough rise in a warm, draft-free area for best results; a cozy kitchen corner works wonders.
-
Baking Time Variability: Check your rolls around 20 minutes of baking; oven temperatures can vary. You want them golden brown and slightly springy!
Make Ahead Options
Preparing these delightful Gluten Free Hawaiian Rolls in advance is a fantastic way to save time during busy weeknights! You can make the dough and shape the rolls up to 24 hours ahead. Simply follow the recipe up to the rising step, cover the shaped rolls in the cake pan with plastic wrap, and refrigerate. To maintain their quality, ensure they are well-covered to prevent drying out. When you’re ready to bake, remove them from the fridge, let them sit at room temperature for about 30 minutes to an hour to resume rising, then brush with melted butter and bake as directed. This method ensures your rolls are just as fluffy and delicious!
Gluten Free Hawaiian Rolls Recipe FAQs
How do I choose the right gluten-free flour?
Absolutely! I recommend using Caputo Fioreglut or King Arthur Flour All-Purpose Gluten Free Flour, as they provide the best structure. If you opt for other gluten-free flours, be mindful that they can alter both texture and flavor, so it might take some experimentation.
How should I store leftover Hawaiian rolls?
For sure! Store your rolls in an airtight container at room temperature for up to 3 days. If they last longer, you can refrigerate them for up to a week, but keep in mind they may lose some fluffiness. A quick reheat in the oven before serving can help restore their delightful texture.
Can I freeze these Hawaiian rolls?
Yes, very much! To freeze, place the rolls in a resealable freezer bag, ensuring they’re sealed tightly to prevent freezer burn. They can be stored for up to 3 months. When you’re ready to enjoy them, simply reheat from frozen in the oven at 350°F for about 10-15 minutes until warmed through and soft.
What should I do if my dough doesn’t rise properly?
Oh no, that can be frustrating! If your dough hasn’t risen well, first ensure your yeast is active; it should fizz when mixed with warm liquid. Moreover, check the temperature of your milk and butter; it should be between 120°F to 130°F. Also, make sure to place the dough in a warm, draft-free spot to encourage rising.
Are these rolls suitable for pets or allergies?
Great question! While these rolls are gluten-free, be cautious with any ingredients that might pose a risk to pets, like butter or eggs. Additionally, if anyone has allergies, always double-check your ingredient labels to avoid cross-contamination with allergens such as dairy, eggs, or specific gluten-free flour blends.
Can I modify the recipe for a dairy-free version?
Absolutely! To make these delightful Hawaiian rolls dairy-free, simply substitute the regular butter with vegan butter and use almond or oat milk instead of regular milk. This will keep the rolls delicious while accommodating those dietary needs!
Fluffy Hawaiian Rolls Your New Favorite Homemade Treat
Ingredients
Equipment
Method
- Whisk the dry ingredients together in a stand mixer until blended.
- Microwave milk and butter until melted, between 120°F and 130°F.
- Combine wet and dry ingredients, adding eggs one at a time, mixing until a smooth dough forms.
- Shape the dough into 12 equal balls and place them in a greased pan close together.
- Cover and let the dough rise for about 1 hour in a warm area.
- Preheat the oven to 350°F.
- Brush tops with melted butter and bake for 20 to 30 minutes until golden brown.
- Cool in the pan for 10 minutes before transferring to a wire rack.