
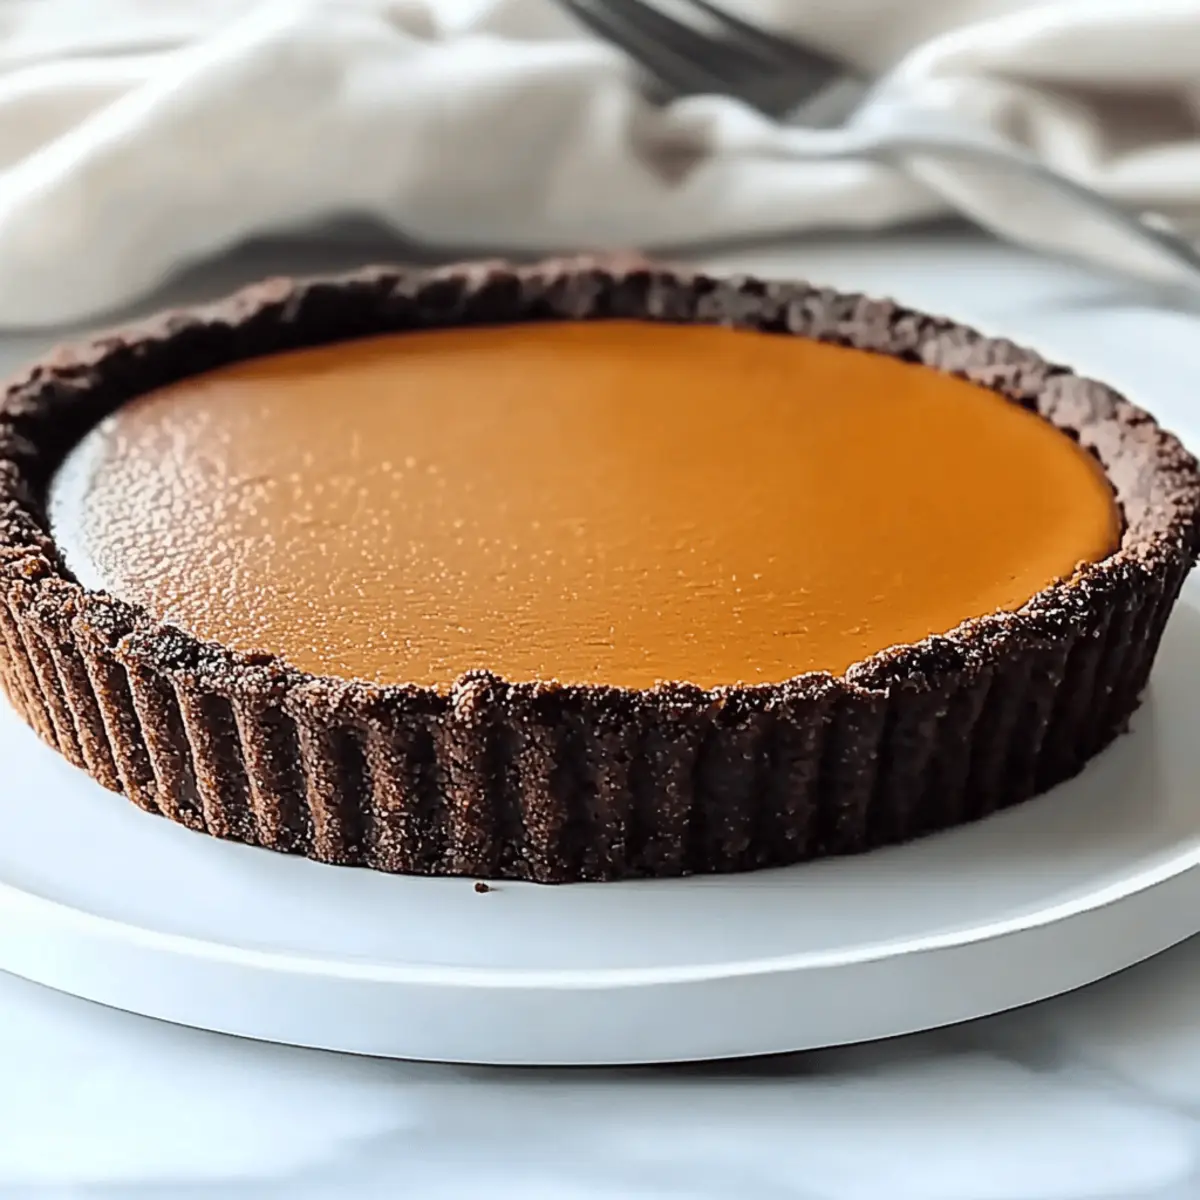
As I stood in my cozy kitchen, the warm scent of roasted pumpkin mingled with a hint of rich dark chocolate, instantly transporting me to crisp autumn days. This is the moment when I first tried my hand at creating a Dark Chocolate Pumpkin Tart, a recipe that elegantly marries the nostalgic flavors of fall with a sophisticated twist. Not only is this tart delightfully easy to prepare, but it also offers a stunning centerpiece for any Thanksgiving gathering. The combination of a buttery chocolate crust with a creamy, spiced pumpkin filling is simply irresistible. Whether you’re hosting friends or just treating yourself, this gluten-free dessert promises to be a luxurious indulgence that everyone will adore. Ready to impress your guests with a slice of this delightful tart? Let’s dive into the recipe!
Why is this tart a must-try?
Irresistible Fusion: This Dark Chocolate Pumpkin Tart brings together the warm spices of fall with a decadent chocolate twist that feels both festive and luxurious.
Simple Preparation: You’ll be amazed at how straightforward this tart is to make, perfect for both beginners and seasoned home chefs alike.
Crowd-Pleasing Appeal: With its eye-catching layers and rich flavors, it’s bound to impress family and friends gathered around your Thanksgiving table.
Versatile Enjoyment: Serve it with a scoop of ice cream or a dollop of whipped cream for an unforgettable dessert experience—just like with my Cheesecake Stuffed Chocolate cookies!
Healthy Substitutions: Opt for gluten-free flour or non-dairy options, ensuring everyone can savor this delightful dish without a worry.
Perfect for Fall: Celebrate the season with a dessert that captures the essence of autumn, making it a fabulous addition to your seasonal recipe repertoire.
Dark Chocolate Pumpkin Tart Ingredients
For the Crust
- All-Purpose Flour – Provides structure for the tart crust; can be substituted with gluten-free all-purpose flour for a gluten-free version.
- Unsweetened Dark Cocoa Powder – Adds deep chocolate flavor to the crust; dark cocoa enhances richness; use regular cocoa if unavailable.
- White Sugar – Sweetens the crust and filling; coconut sugar can be used as a healthier alternative.
- Kosher Salt – Enhances flavor in both crust and filling; regular salt can be used if kosher salt is not available.
- Unsalted Butter, Melted – Binds the crust ingredients together and adds richness; can substitute with coconut oil for a dairy-free option.
For the Filling
- Pure Pumpkin (canned) – Acts as the base for the filling; canned pure pumpkin ensures consistency, while sugar pie pumpkins are a good fresh alternative for sweetness.
- Sweetened Condensed Milk – Contributes creaminess and sweetness to the filling; alternatives such as coconut cream can be used for a dairy-free option.
- Large Egg – Binds the filling together; can be replaced with a flax egg for a vegan option.
- Pumpkin Pie Spice – Infuses warm spice flavors into the filling; consider making a homemade spice blend with cinnamon, nutmeg, and ginger.
Indulge in this Dark Chocolate Pumpkin Tart that perfectly balances festive flavors with sophistication!
Step‑by‑Step Instructions for Dark Chocolate Pumpkin Tart
Step 1: Preheat the Oven
Begin by preheating your oven to 425°F (220°C). This ensures a perfectly baked tart crust, setting the stage for your delicious Dark Chocolate Pumpkin Tart. Make sure your oven is fully heated before moving on to the next step, as this will give your crust the right initial lift.
Step 2: Prepare Tart Pan
While the oven heats, take a 9-inch round tart pan and spray it generously with non-stick spray. This prevents any sticking and helps in achieving a smooth finish. You want to ensure each slice comes out beautifully without damage, so don’t skip this important step!
Step 3: Make the Crust
In a large mixing bowl, whisk together the all-purpose flour, unsweetened dark cocoa powder, white sugar, and kosher salt until well combined. Then, pour in the melted unsalted butter and mix until the mixture resembles coarse crumbs. This crumbly dough should come together when pressed; work it into an even layer within your prepared tart pan for a sturdy base.
Step 4: Pre-Bake the Crust
Place the prepared crust in the preheated oven and bake it for 10 minutes. This initial baking helps create a firm foundation for your tart. Once done, remove it from the oven and allow it to cool for about 10 minutes before adding the filling to ensure it doesn’t become soggy.
Step 5: Prepare the Filling
In a clean mixing bowl, combine the pure pumpkin, sweetened condensed milk, large egg, pumpkin pie spice, and a pinch of salt. Whisk until the mixture is completely smooth and well-blended, ensuring there are no lumps. This creamy filling will provide a rich contrast to the chocolate crust of your Dark Chocolate Pumpkin Tart.
Step 6: Fill the Tart
Carefully pour the pumpkin filling into the cooled crust, using a spatula to spread it evenly. This step is crucial for achieving a beautiful layered look once baked. Be gentle to avoid disrupting the crust while allowing the filling to settle into the edges.
Step 7: Bake
Place the tart back into the oven; start by baking at 425°F for 10 minutes, then reduce the temperature to 350°F (175°C) and bake for an additional 25-30 minutes. You’ll know it’s done when the filling is just set—slightly firm to the touch with a little jiggle in the center. This ensures a silky filling that won’t crack.
Step 8: Cool Before Serving
Once baked, remove your Dark Chocolate Pumpkin Tart from the oven and let it cool in the pan for at least 1 hour. This cooling period is crucial for the filling to set properly and makes for easier slicing later on. After an hour, you can transfer it to the refrigerator for further cooling if desired, or serve it warm with a dollop of whipped cream.
Dark Chocolate Pumpkin Tart Variations
Feel free to get creative with your Dark Chocolate Pumpkin Tart—there’s more than one way to enjoy this delightful dessert!
-
Dairy-Free: Substitute sweetened condensed milk with coconut cream for a rich, creamy filling without dairy. The coconut adds a subtle tropical twist that perfectly complements the pumpkin.
-
Gluten-Free: Replace all-purpose flour with a gluten-free flour blend in the crust. This way, everyone can enjoy this fabulous tart during your Thanksgiving celebrations.
-
Flavor Twist: Add a splash of vanilla extract to the filling for an aromatic depth. You’ll be amazed at how such a simple addition can elevate the overall flavor.
-
Choco-Pumpkin Swirl: To create a beautiful visual effect, swirl melted dark chocolate through the pumpkin filling before baking. This adds a striking presentation, perfect for impressing guests.
-
Nutty Crunch: Incorporate finely chopped pecans or walnuts into the crust for added texture. Not only will it enhance the nuttiness of the crust, but it’s also a lovely nod to fall flavors.
-
Sweet Spice: Experiment by adding a pinch of cayenne pepper or chili powder to the filling for a touch of heat. This unexpected kick balances the sweetness, giving your tart a delightful edge.
-
Garnish Delight: Top each slice with a dollop of spiced whipped cream for an extra indulgent experience. You could also drizzle caramel sauce or chocolate ganache on top for that extra wow factor.
-
Serving Suggestion: Pair your tart with a scoop of vanilla ice cream or a dollop of whipped cream, elevating the creamy filling like with my irresistible Keto Brownie Waffles—the perfect complement to every slice!
Embrace the season with these fun variations and make this dish your own!
Storage Tips for Dark Chocolate Pumpkin Tart
Fridge: Store your Dark Chocolate Pumpkin Tart in the refrigerator, covered tightly, for up to 5 days. This keeps the flavors fresh while maintaining its creamy, rich texture.
Freezer: To enjoy your tart later, slice it and freeze individual pieces for up to 3 months. Wrap each slice in plastic wrap and place in an airtight container for best results.
Thawing: When ready to serve, simply thaw the slices in the fridge overnight. This gentle thawing method helps maintain the tart’s creamy filling and chocolatey crust without compromising texture.
Reheating: If you prefer your tart warm, reheat slices in the oven at 350°F for about 10 minutes. This will bring back the velvety experience of a freshly baked Dark Chocolate Pumpkin Tart!
Expert Tips for Dark Chocolate Pumpkin Tart
-
Avoid Overmixing: After adding the egg, mix just until combined. Overmixing can introduce air bubbles, leading to cracks on the surface.
-
Pre-Bake Thoroughly: Ensure your crust is adequately pre-baked to avoid a soggy bottom. Look for edges that are set and a center that’s slightly firm.
-
Cool Completely: Allow the tart to cool at room temperature before refrigerating. Cooling prevents filling separation and ensures a perfect slice.
-
Neat Slices: For cleaner cuts, dip your knife in warm water before slicing. This will help glide through the dark chocolate pumpkin tart smoothly.
-
Storage Wisdom: Store any leftovers tightly covered in the refrigerator for up to 5 days. Freezing slices for up to 3 months is also a great option—just remember to thaw in the fridge before serving!
Make Ahead Options
These Dark Chocolate Pumpkin Tart preparations are perfect for busy cooks looking to save time during the holiday season! You can prepare the crust up to 24 hours in advance; simply press the cooled crust into the tart pan, wrap it tightly in plastic wrap, and refrigerate until you’re ready to fill it. The filling can also be made ahead (it keeps well for 3 days in the fridge). Just whisk together the pumpkin, sweetened condensed milk, egg, and spices, storing it in an airtight container. When you’re ready to bake, simply pour the filling into the crust and follow the baking instructions for a dessert that tastes just as delicious as if it were freshly made!
What to Serve with Dark Chocolate Pumpkin Tart
Picture a cozy gathering where the flavors of fall come alive in every bite. The moment your guests take their first forkful of this luscious tart, they’ll be looking for the perfect accompaniments to enhance that rich, chocolatey experience.
- Whipped Cream: A dollop of freshly whipped cream adds a light, airy contrast to the tart’s richness, making each bite blissful.
- Vanilla Ice Cream: The classic pairing of warm tart with cold, creamy vanilla ice cream offers a delightful temperature contrast and enhances the chocolate notes.
- Toasted Pecans: The crunch of toasted pecans introduces a nutty texture that complements the smooth filling while echoing the warm spices of fall.
- Coffee or Espresso: A robust coffee or an elegant espresso brings out the chocolate’s deep flavor, adding warmth and complexity to the dessert experience.
- Spiced Apple Cider: Offering a warm glass of spiced apple cider creates a cozy beverage choice that harmonizes beautifully with the tart’s pumpkin flavor.
- Caramel Sauce: Drizzling with rich caramel adds a sweet contrast that amplifies both the chocolate and pumpkin, igniting a new layer of flavor in each bite.
- Pumpkin Spice Latte: For a festive drink that ties in the seasonal flavors, serve alongside a warm pumpkin spice latte to keep the autumn spirit alive.
- Dark Chocolate Shavings: Garnishing with chocolate shavings not only makes for a stunning presentation but also intensifies the chocolate experience that your tart offers.
Dark Chocolate Pumpkin Tart Recipe FAQs
How do I choose the right pumpkin for my tart?
When selecting pumpkin, I recommend using canned pure pumpkin for the best consistency and flavor. If you prefer fresh, look for sugar pie pumpkins, which are sweet and ideal for baking. Avoid using jack-o’-lantern pumpkins, as they are watery and less flavorful.
What is the best way to store a Dark Chocolate Pumpkin Tart?
Absolutely! Store your tart in the refrigerator, tightly covered, for up to 5 days. This keeps the flavors fresh. For longer storage, you can freeze slices for up to 3 months. Just remember to wrap each slice in plastic wrap and place them in an airtight container to prevent freezer burn.
Can I freeze my Dark Chocolate Pumpkin Tart?
Yes, you can! To freeze your tart, allow it to cool completely and then slice it into individual portions. Wrap each slice tightly in plastic wrap and place in an airtight container. When you’re ready to enjoy, simply thaw the slices in the fridge overnight.
What should I do if my tart filling cracks or doesn’t set properly?
If your filling cracks, don’t worry—this can happen! To prevent this in the future, avoid overmixing after adding the egg, as it can introduce air bubbles that cause cracks. If it doesn’t set, the filling may need more baking time. Make sure to bake it until it is just set, with a slight jiggle in the center.
Are there any dietary considerations I should keep in mind?
Definitely! For a gluten-free Dark Chocolate Pumpkin Tart, you can substitute all-purpose flour with a gluten-free flour blend. If you need it dairy-free, opt for coconut oil in the crust and coconut cream instead of sweetened condensed milk in the filling. Always check ingredient labels for potential allergens.
How long can I keep leftovers, and do they last well?
Your Dark Chocolate Pumpkin Tart will stay delicious when stored properly in the fridge for up to 5 days, or in slices in the freezer for about 3 months! It’s a great way to enjoy leftovers without compromising taste. Just be sure to let the tart cool completely before storing for the best results.
Decadent Dark Chocolate Pumpkin Tart to Impress This Fall
Ingredients
Equipment
Method
- Preheat the oven to 425°F (220°C).
- Prepare a 9-inch round tart pan with non-stick spray.
- Whisk together all-purpose flour, cocoa powder, sugar, and salt; add melted butter and mix until crumbly.
- Pre-bake the crust in the oven for 10 minutes, then cool for 10 minutes.
- Mix pure pumpkin, sweetened condensed milk, egg, pumpkin pie spice, and salt until smooth.
- Pour filling into cooled crust, spreading evenly.
- Bake at 425°F for 10 minutes, reduce to 350°F and bake for 25-30 minutes until filling is set.
- Cool the tart in the pan for at least 1 hour before serving.