
The sound of sizzling chicken fills the kitchen, a moment of culinary creation that stirs excitement. When it comes to quick and satisfying meals, the Crispy Chicken Ranch Snack Wrap is a delightful option that never disappoints. This beginner-friendly recipe combines the satisfying crunch of golden-brown chicken tenders, creamy ranch, and fresh veggies all wrapped in a soft tortilla. What I love most about this wrap is its incredible versatility—perfect for customizing with your favorite toppings or swapping out ingredients based on what you have on hand. Plus, it’s a fantastic choice for those busy days when you crave something wholesome and fast. Are you ready to transform your snack game with this unbeatable wrap? Let’s dive into making this delicious meal together!
Why is this snack wrap a must-try?
Quick and Easy: This Crispy Chicken Ranch Snack Wrap comes together in under 30 minutes, making it ideal for those hectic weeknights when time is short.
Customizable Delight: You can easily switch up the ingredients; add avocado or spice it up with jalapeños for added flair!
Savory Satisfaction: The marriage of crispy chicken, creamy ranch, and fresh veggies provides a flavor explosion that will leave your taste buds dancing.
Perfect for Everyone: Whether you’re cooking for yourself or a crowd, this wrap adapts beautifully to any occasion—think casual family dinners or meal prep.
Crowd-Pleaser: Guaranteed to please both kids and adults, it’s a healthier alternative to fast food without sacrificing taste, similar to our Chicken Bacon Ranch option!
Take your lunch game to new heights with this quick meal that holds the potential to become a new family favorite!
Crispy Chicken Ranch Snack Wrap Ingredients
For the Chicken
• Chicken Breast – The primary protein for a flavorful wrap; swap with juicy chicken thighs for a different texture.
• Olive Oil – Used for pan-searing the chicken to golden perfection; feel free to substitute with vegetable oil if needed.
• Salt and Black Pepper – Essential seasonings to elevate the flavor; adjust to your taste, exploring different salt types for variety.
• Garlic Powder – Adds depth and warmth; fresh garlic may also be used for a more robust flavor.
• Onion Powder – Enhances the overall flavor; you can substitute it with minced fresh onion for a fresh punch.
• Paprika – Contributes a lovely smokiness and color; try smoked paprika for an added depth of flavor.
For the Coating
• Flour – Perfect for dredging the chicken strips; almond flour works as a gluten-free alternative.
• Egg – Binds the breadcrumbs to the chicken for an irresistible crunch; consider a flax egg or cornstarch as a vegan option.
• Panko Breadcrumbs – Creates that delightful crispy coating; regular breadcrumbs can be substituted, but they’ll yield a softer texture.
For the Wrap
• Ranch Dressing – Adds moisture and a creamy flavor that harmonizes beautifully with the crunchy chicken; other dressings like blue cheese can also work.
• Flour Tortilla – The base of your wrap; opt for whole grain or gluten-free tortillas to fit your dietary needs.
• Cheddar Cheese – Melts into creamy goodness; swap with Monterey Jack or your preferred melting cheese.
• Shredded Lettuce – Provides a fresh crunch; spinach or arugula are excellent alternatives for a nutrient boost.
• Diced Tomatoes – Add juicy flavor; diced cucumbers can be a refreshing replacement for a crunchier bite.
Step‑by‑Step Instructions for Crispy Chicken Ranch Snack Wrap
Step 1: Preheat the Oven
Start by preheating your oven to 400°F (200°C) to prepare for baking the chicken strips later. This ensures even cooking and a crispy finish. While the oven heats up, gather all your ingredients and arrange your workspace for a smooth cooking experience.
Step 2: Prepare the Chicken
Slice the chicken breast horizontally into even pieces, aiming for uniform thickness to promote even cooking. This step is crucial for achieving the perfect crispy chicken in your Crispy Chicken Ranch Snack Wrap. Pat the chicken dry with paper towels to ensure a good sear and seasoning retention.
Step 3: Season the Chicken
In a mixing bowl, season your chicken strips generously with salt, black pepper, garlic powder, onion powder, and paprika. Ensure that each piece is evenly coated for maximum flavor. Let the seasoned chicken sit for a few minutes, allowing the spices to penetrate and enhance the taste.
Step 4: Cook the Chicken
Heat a tablespoon of olive oil in a skillet over medium-high heat. Once the oil is shimmering, carefully add the seasoned chicken and cook for about 4-5 minutes on each side until they are golden brown and reach an internal temperature of 165°F (74°C). This gives your chicken a deliciously crispy exterior while keeping it juicy inside.
Step 5: Prepare the Breading Stations
After cooking, allow the chicken to rest for a few minutes. Meanwhile, set up your breading stations: one with flour, one with a beaten egg, and the last with panko breadcrumbs. Line a baking sheet with parchment paper for easy cleanup and optimal crispiness during baking.
Step 6: Bread the Chicken
Slice the rested chicken into strips and take each piece through the breading stations in succession: first, coat with flour, then dip into the beaten egg, and finally, roll in panko breadcrumbs. Make sure each piece is well-coated to ensure a satisfying crunch in your crispy wraps.
Step 7: Bake the Chicken
Arrange the breaded chicken strips on the prepared parchment-lined baking sheet. Bake in the preheated oven for 10-12 minutes or until they are golden and crispy. Enjoy the delightful aroma filling your kitchen as the chicken bakes to perfection.
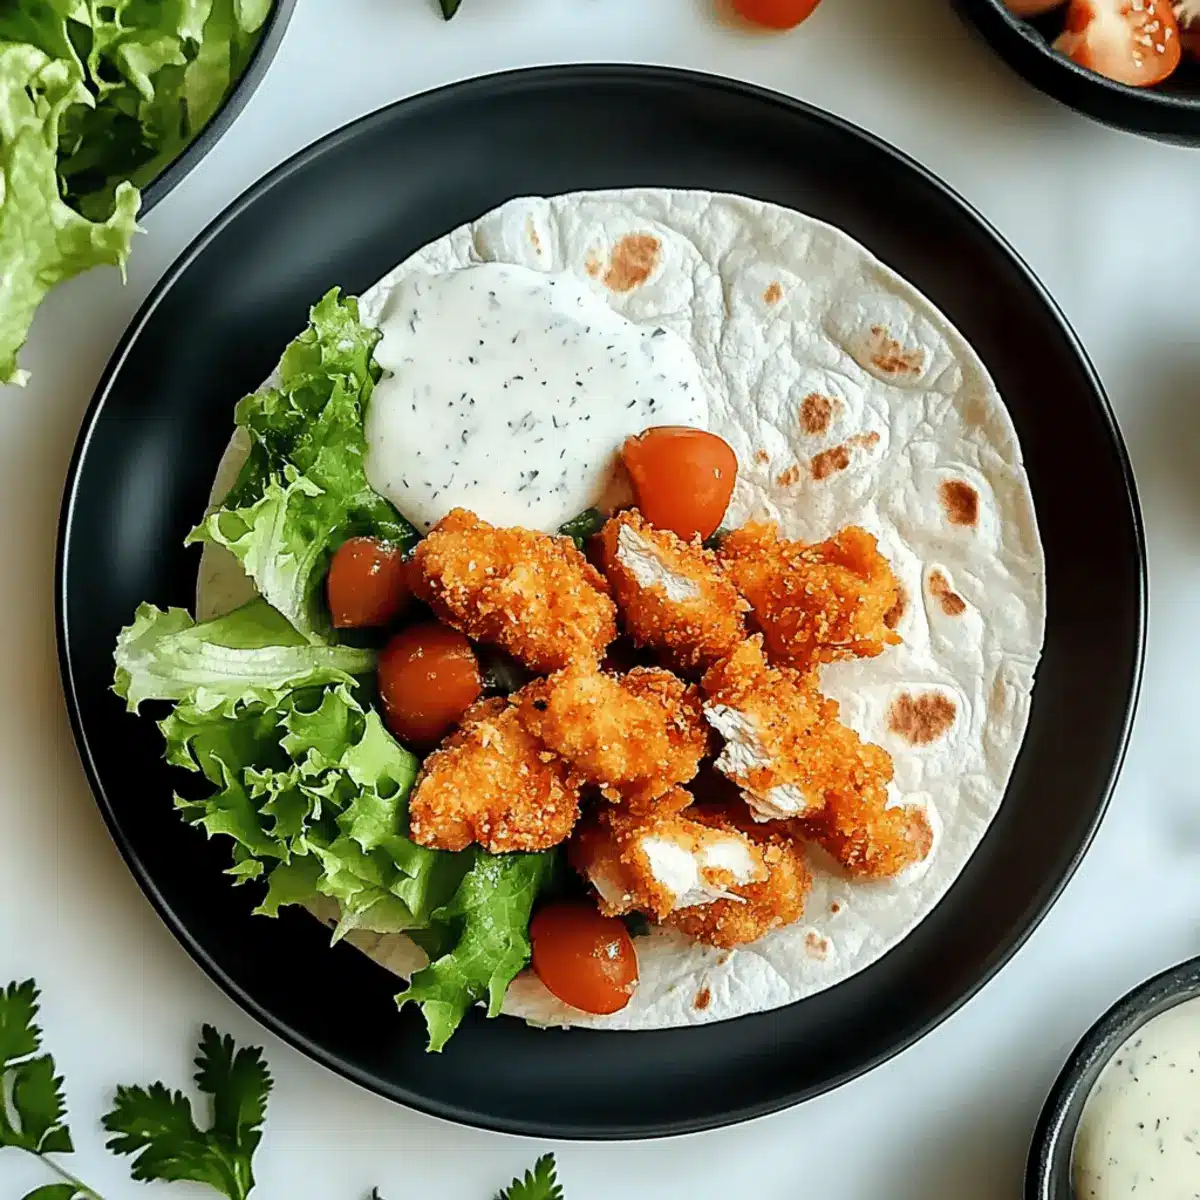
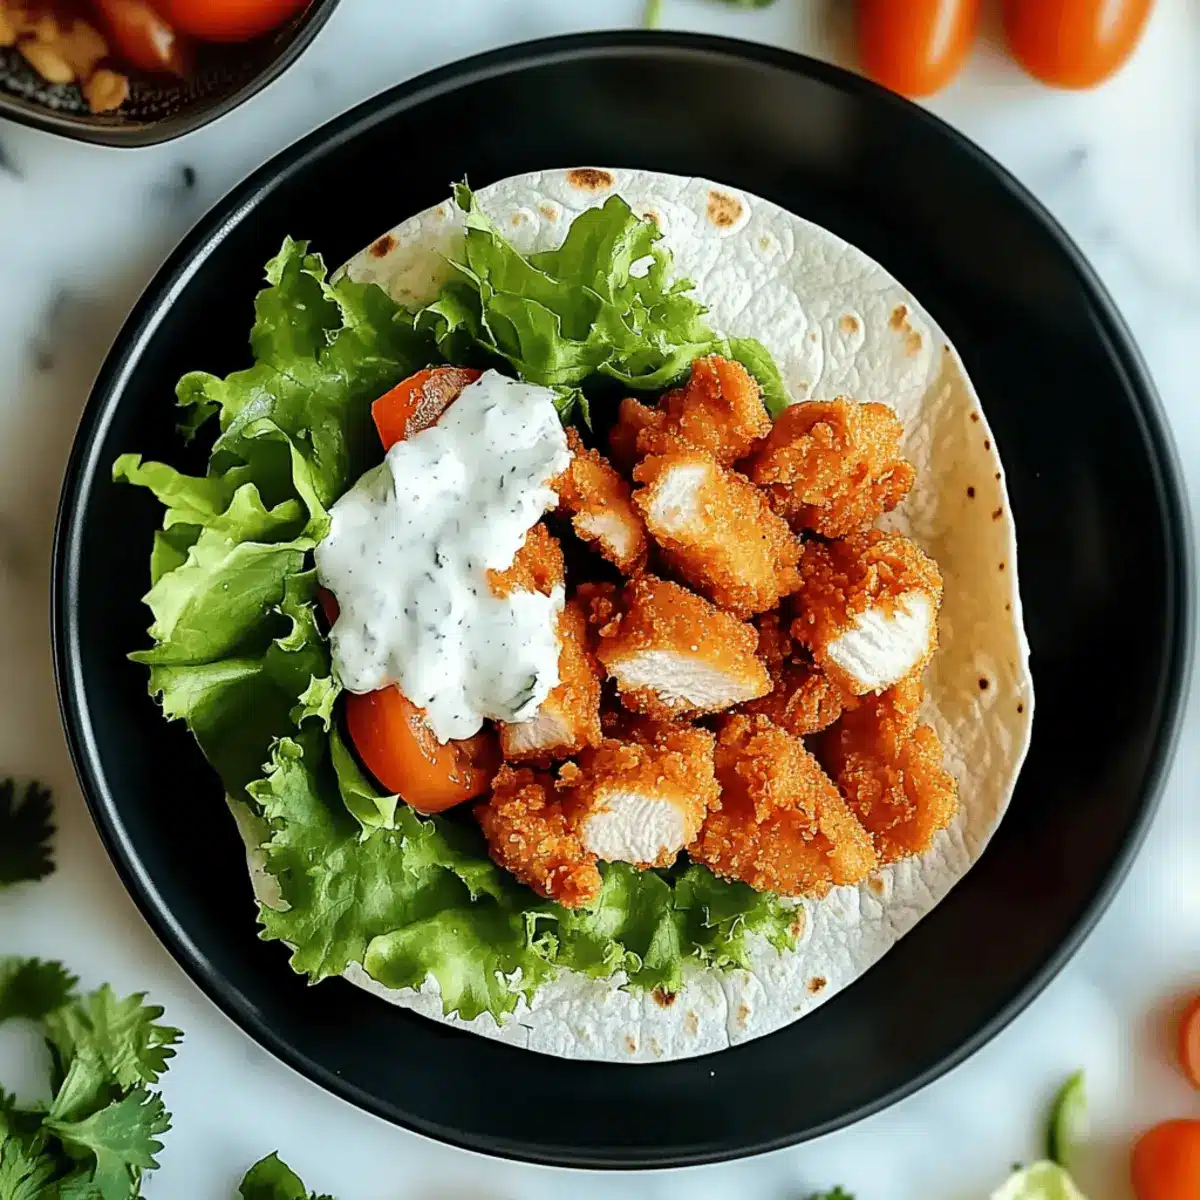
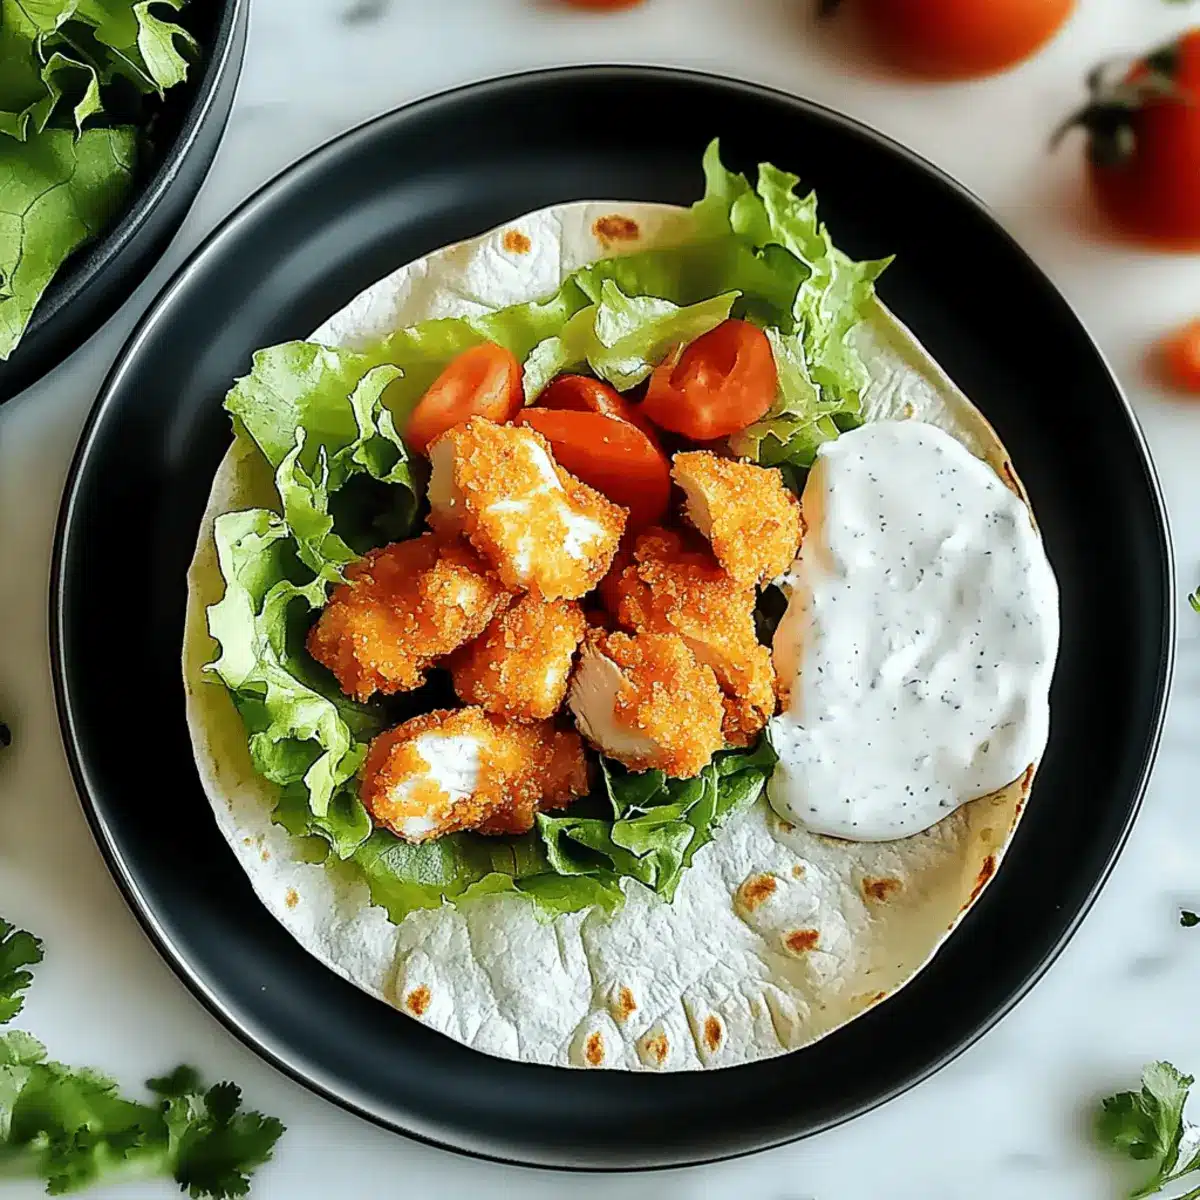
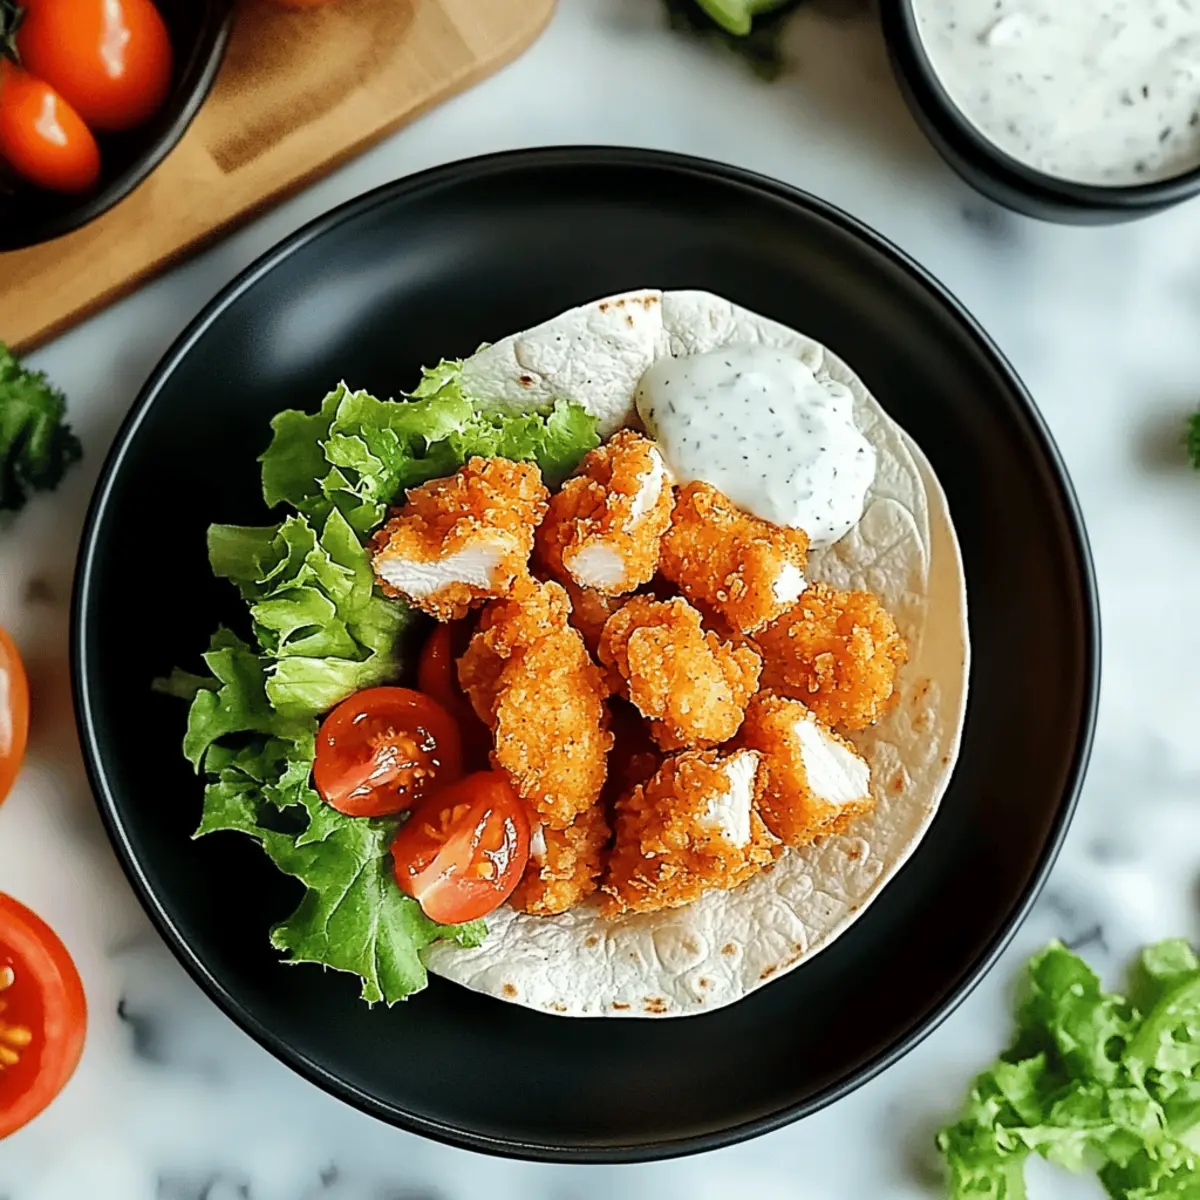
Step 8: Assemble the Wrap
Once the crispy chicken is out of the oven, it’s time to assemble your Crispy Chicken Ranch Snack Wrap. Spread a generous layer of ranch dressing over a warm flour tortilla, then layer on shredded cheese, baked chicken strips, fresh lettuce, and diced tomatoes. Arrange your ingredients artfully for an irresistible wrap.
Step 9: Roll and Serve
Carefully roll the tortilla tightly around the fillings, tucking in the edges as you go to secure everything inside. Slice the wrap in half if desired, and serve immediately while the ingredients are fresh and the chicken is still warm and crispy.
Make Ahead Options
These Crispy Chicken Ranch Snack Wraps are perfect for meal prep enthusiasts looking to save time during busy weekdays! You can prepare the chicken strips up to 24 hours in advance by breading them and storing them in the refrigerator. For best results, ensure they cool completely before wrapping them tightly in plastic wrap. Additionally, you can chop the lettuce and tomatoes up to 3 days ahead; just store them in airtight containers to preserve their freshness. When you’re ready to enjoy your wraps, simply bake the chicken from chilled for 10-12 minutes until crispy, then assemble with ranch dressing and your prepped veggies for a delicious, hassle-free meal!
What to Serve with Crispy Chicken Ranch Snack Wrap
Create an unforgettable meal by pairing your wrap with these delightful sides and complementary flavors.
- Crispy Sweet Potato Fries: Their natural sweetness and crunch balance perfectly with the savory chicken and creamy ranch, making every bite satisfying.
- Refreshing Fruit Salad: A medley of seasonal fruits adds a burst of color and freshness that elevates the meal while cleansing the palate.
- Coleslaw: Creamy or vinegar-based, coleslaw offers a delightful crunch and tang that complements the richness of your wrap.
- Roasted Vegetables: A mix of caramelized veggies like bell peppers and zucchini not only adds great color but also enhances the overall nutrition of your meal.
- Garlic Breadsticks: Soft and buttery, they provide a comforting, indulgent touch to your meal—perfect for mopping up any leftover ranch or drizzle.
- Iced Tea or Lemonade: These refreshing drinks keep the meal light and invigorating, delivering a sweet contrast to the savory flavors of the wrap.
- Potato Wedges: Their crispy exterior and fluffy interior create a satisfying texture alongside the crunchy wrap. Serve with a side of ranch for dipping!
- Chocolate Chip Cookies: End on a sweet note with warm, gooey cookies, providing the perfect indulgent contrast to a savory meal filled with crispy chicken and ranch.
How to Store and Freeze Crispy Chicken Ranch Snack Wrap
Fridge: Store assembled wraps in an airtight container in the refrigerator for up to 2 days for the best taste and texture.
Freezer: For longer storage, freeze baked chicken strips separately, allowing them to cool completely. Once frozen, they can last for up to 3 months.
Reheating: To reheat, bake frozen chicken strips directly from the freezer at 400°F (200°C) for 15-20 minutes until crispy. Assemble the wrap fresh to maintain that delightful crunch!
Avoid Sogginess: It’s best to keep the components separate until ready to enjoy your Crispy Chicken Ranch Snack Wrap for optimum freshness.
Crispy Chicken Ranch Snack Wrap Variations
Feel free to explore these fun and flavorful twists on the classic wrap to suit your preferences!
-
Spicy Kick: Add sliced jalapeños for a delightful heat that elevates your wrap to the next level of deliciousness. Spicy lovers will appreciate this fiery enhancement!
-
Creamy Avocado: Introduce creamy avocado slices for added richness and a smooth texture that pairs beautifully with the crispy chicken.
-
Veggie Boost: Toss in diced bell peppers, red onion, or shredded carrots for a crunchy, colorful addition that increases the veggie quotient of your snack wrap.
-
Cheese Swap: Try using Monterey Jack or Pepper Jack cheese for a different melty experience. Each cheese brings its unique flavor while still giving you that gooey goodness.
-
Whole Grain Health: Opt for whole grain or spinach tortillas to add extra nutrients without compromising taste. A simple swap that boosts the health factor!
-
Herbed Twist: Incorporate fresh herbs like cilantro or parsley for a fragrant twist that brightens every bite of your wrap.
-
Dijon Delight: Swap ranch dressing for zesty Dijon mustard or honey mustard for a tangy take that transforms the flavor profile of your wrap entirely.
-
Crunchy Texture: For an extra crunch, add crushed tortilla chips or fried onions into the wrap. This little touch adds a satisfying snapping sound with every bite!
Feel free to mix and match these variations! For more flavorful wrapped ideas, check out our Bang Bang Chicken or the delightful Mexican Chicken Rice for new inspiration. Enjoy customizing your wrap!
Expert Tips for Crispy Chicken Ranch Snack Wrap
Cook Thoroughly: Ensure chicken reaches an internal temperature of 165°F (74°C) to maintain safety and flavor.
Rest Before Wrapping: Let the chicken cool slightly before wrapping to prevent a soggy tortilla. You want that crunch in every bite!
Layer Wisely: Start with ranch dressing on the tortilla and build from there. This helps prevent the wrap from getting too wet too quickly.
Store Separately: For extra crispiness, keep baked chicken and wraps separate until you’re ready to serve the Crispy Chicken Ranch Snack Wrap.
Customize Ingredients: Feel free to swap in your favorite veggies or sauces to add a personal touch! Experimentation is key to discovering your ideal wrap.
Crispy Chicken Ranch Snack Wrap Recipe FAQs
How do I choose the right chicken breast for my wrap?
Absolutely! Look for chicken breasts that are plump and firm, with a pale pink color. Avoid those with dark spots or a slimy texture, which can indicate spoilage. If possible, consider using organic or free-range chicken for a more flavorful and ethical choice. If you want something juicier, chicken thighs are a great alternative to chicken breast!
What is the best way to store leftover wraps?
Very good question! After your Crispy Chicken Ranch Snack Wrap has been assembled, store any leftovers in an airtight container in the refrigerator. They should stay fresh for about 2 days. If you’d like them to last longer without risk of sogginess, store the baked chicken strips and wrap components separately. This way, you can maintain that satisfying crunch when you’re ready to enjoy them again!
Can I freeze the chicken strips? How should I do it?
Of course! Freezing the chicken strips is a fantastic way to enjoy this dish at your convenience. First, allow your baked chicken strips to cool completely after cooking. Next, arrange them in a single layer on a baking sheet and freeze them until solid. After they are frozen, transfer the strips to a freezer-safe bag or container. They’ll last in the freezer for up to 3 months! When you’re ready to enjoy them, just bake them directly from frozen at 400°F (200°C) for about 15-20 minutes, ensuring they are heated through and crispy.
What should I do if my chicken isn’t cooking evenly?
It’s easy to fix this issue! If you notice that your chicken isn’t cooking evenly, ensure you’ve sliced it to a uniform thickness as mentioned in the preparation steps. If you’ve achieved that and still face issues, consider adjusting the heat of your skillet. Medium-high should be hot enough to get a nice sear without burning; you may need to adjust slightly. Lastly, using a meat thermometer can help! Make sure each piece reaches 165°F (74°C) for safety and doneness.
Are there any dietary considerations for this recipe?
Absolutely! If you’re catering to dietary restrictions, there are a number of easy modifications. You can swap the flour for almond flour to keep it gluten-free. If you’re cooking for vegans, try a combination of chickpea flour and water as a binding agent instead of egg, and use plant-based chicken substitutes. Additionally, be mindful of dressings if any allergies are present—consider creamy dairy-free options if needed.
How can I keep my wrap from becoming soggy?
Great point! To avoid sogginess, allow your chicken to cool slightly before assembling your wrap. Start by spreading ranch dressing on the tortilla and layer your dry ingredients like cheese and veggies on top of the dressing. Finally, always serve your Crispy Chicken Ranch Snack Wrap immediately after assembling it to relish that perfect crunch!
Crispy Chicken Ranch Snack Wrap for Quick Flavor Bliss
Ingredients
Equipment
Method
- Preheat your oven to 400°F (200°C).
- Slice the chicken breast horizontally into even pieces.
- Season chicken strips with salt, black pepper, garlic powder, onion powder, and paprika.
- Heat olive oil in a skillet over medium-high heat and cook chicken for about 4-5 minutes on each side.
- Set up breading stations: one with flour, one with beaten egg, and one with panko breadcrumbs.
- Bread the chicken by coating each piece in flour, then egg, and then panko.
- Arrange chicken strips on a baking sheet and bake for 10-12 minutes until golden and crispy.
- Spread ranch dressing on a warm flour tortilla and layer with cheese, chicken, lettuce, and tomatoes.
- Roll the tortilla tightly around the fillings and slice in half if desired before serving.