
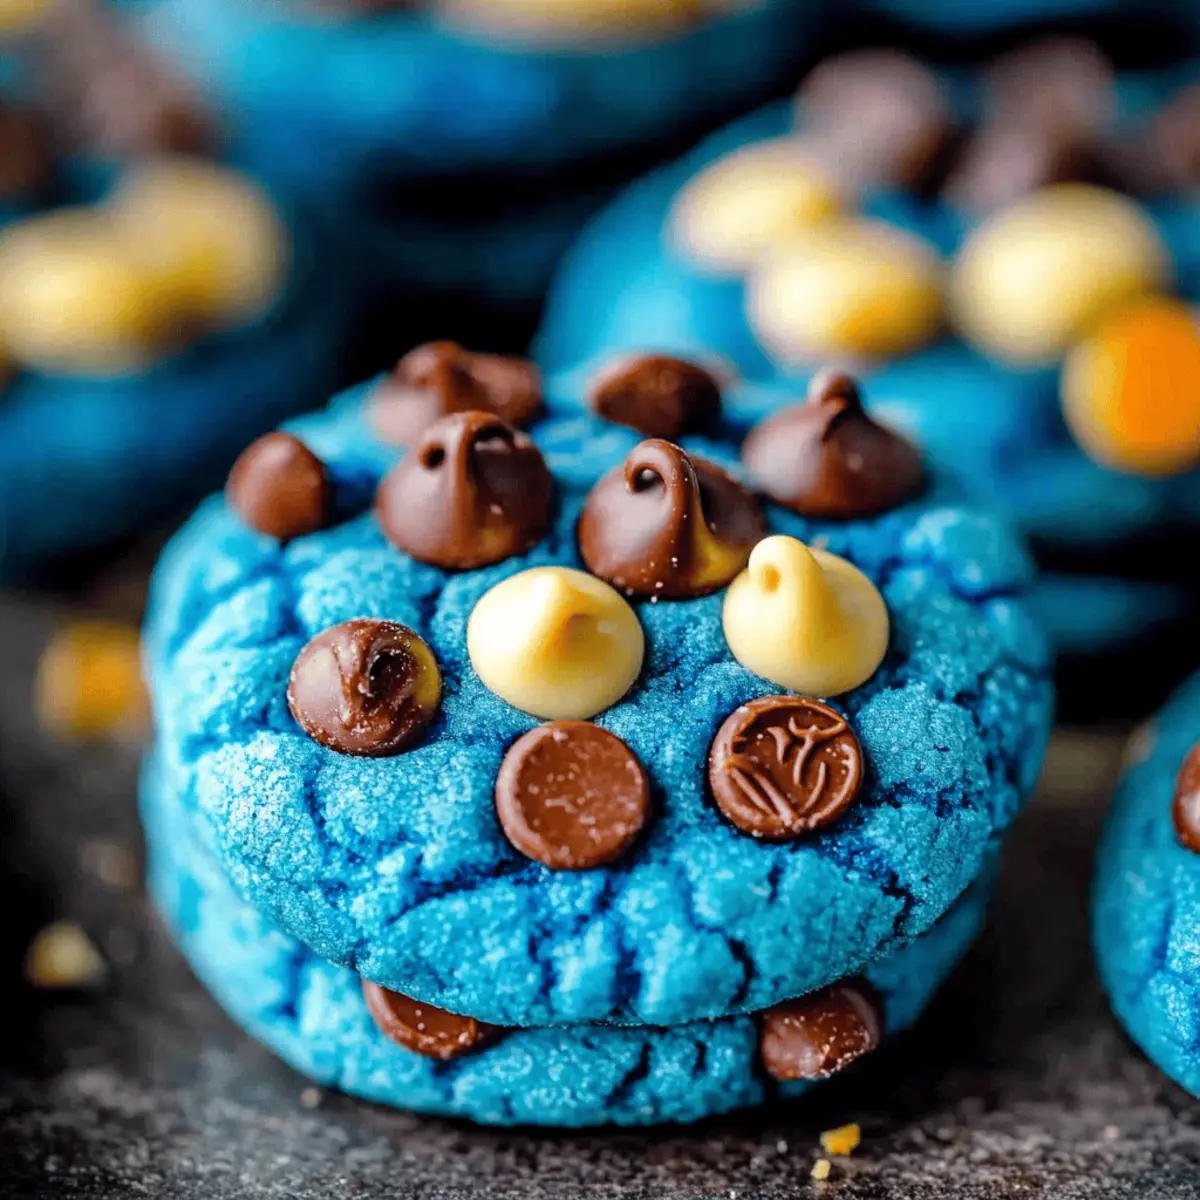
The sight of vibrant blue cookies fresh from the oven instantly transports me back to carefree childhood days, when dessert was pure magic. These Ultimate Classic Cookie Monster Cookies combine the whimsical spirit of fun baking with easy, beginner-friendly steps, perfect for family gatherings or a special afternoon treat. Picture soft, gooey cookies adorned with rich chocolate chips and a surprising crunch from crushed cookies—truly a colorful delight for both kids and adults alike. Plus, they make for a great bonding experience in the kitchen without requiring advanced skills. Curious how to whip up this delightful batch? Let’s dive into this fun and playful recipe!
Why are Cookie Monster Cookies irresistible?
Nostalgic Delight: These cookies are a vibrant throwback to childhood, bringing joy with each bite, reminding you of those carefree days spent baking.
Beginner-Friendly: Perfect for novice bakers, this recipe requires minimal skills, ensuring a fun experience for everyone involved.
Colorful Fun: The eye-catching blue dough and mix-ins create a visual treat that sparks excitement at any gathering.
Flexible Ingredients: Feel free to swap the Oreos or experiment with different cookies to tailor the recipe to your liking—endless possibilities await!
Perfect for Sharing: Whether it’s a family gathering or a fun kids’ party, these cookies are sure to be a hit and will have everyone asking for seconds. Don’t forget to check out Cheesecake Cookie Dough for more creative dessert ideas!
Monster Cookie Ingredients
For the Dough
• All-Purpose Flour – Provides structure; spoon and level for accuracy.
• Cornstarch – Adds softness and chewiness for the perfect texture.
• Salt – Enhances flavor balance, elevating the sweetness of the cookie.
• Baking Soda – Helps the cookies rise into soft, chewy treats.
• Unsalted Butter – Softened for easy creaming; adds richness and flavor.
• Granulated Sugar – Adds sweetness that melts in your mouth.
• Brown Sugar – Contributes moisture and depth to the flavor profile.
• Eggs – Binds ingredients and adds moisture; use at room temperature.
• Vanilla Extract – A classic flavor enhancer for delicious cookies.
• Blue Gel Food Coloring – Creates the signature Cookie Monster color; gel format is best for vibrancy.
For the Mix-Ins
• Mini Chocolate Chips – Provides delightful chocolate bursts throughout.
• Crushed Chocolate Chip Cookies – Adds extra crunch and cookie goodness.
• Mini Oreos or Crushed Oreos – Introduces more cookie fun; can be swapped for other cookie types or omitted.
Indulge in the magic of these Monster Cookies for a colorful baking adventure!
Step‑by‑Step Instructions for Monster Cookie
Step 1: Preheat Your Oven
Start by preheating your oven to 350°F (177°C) to ensure it reaches the perfect baking temperature. This will create an ideal environment for those Monster Cookies to rise and develop their chewy texture. While the oven heats up, prepare your baking sheets by lining them with parchment paper for easy cleanup.
Step 2: Mix Dry Ingredients
In a medium bowl, whisk together 2 cups of all-purpose flour, 2 tablespoons of cornstarch, 1 teaspoon of baking soda, and ½ teaspoon of salt. This dry mix is crucial for the structure and texture of your Monster Cookies! Once combined, set your bowl aside and let those flavors meld while you move on to the next step.
Step 3: Cream Butter and Sugars
In a large mixing bowl, beat ¾ cup of softened unsalted butter with ½ cup of granulated sugar and ¾ cup of brown sugar using an electric mixer for about 2–3 minutes. Aim for a light and creamy texture, which indicates that air has been incorporated. This fluffy mixture will help your cookies reach that delightful chewiness that Monster Cookies are known for—you’re already halfway there!
Step 4: Add Eggs and Flavor
Crack in 2 large eggs, adding them one at a time to the bowl, mixing well between each addition. Stir in 1 teaspoon of vanilla extract and a vibrant splash of blue gel food coloring until the mixture is uniformly blended. This colorful step is where the magic of the Monster Cookie truly begins to shine!
Step 5: Combine Wet and Dry Ingredients
Gradually incorporate the dry ingredient mixture into the butter-sugar-egg concoction. Mix until just combined, taking care not to overwork the dough. You’ll soon find yourself with a soft, slightly sticky dough that will be the foundation of your delicious Monster Cookies—what an exciting moment!
Step 6: Fold in the Mix-Ins
Gently fold in 1 cup of mini chocolate chips, 1 cup of crushed chocolate chip cookies, and ½ cup of mini Oreos until evenly distributed throughout the dough. This step brings in delightful bursts of flavor and texture, making each bite of your Monster Cookies an adventure. Make sure your mix-ins are well integrated for that fun cookie experience!
Step 7: Scoop the Dough
Using a tablespoon or cookie scoop, portion out 1.5 to 2 tablespoons of dough for each cookie, placing them about 2 inches apart on your lined baking sheets. This spacing is vital as the cookies will spread while baking, yielding that gooey center and crisp edges that everyone loves!
Step 8: Bake to Perfection
Slide your baking sheets into the preheated oven and bake the cookies for 10–12 minutes. Look for the edges to be set while the centers remain soft and slightly puffed. This visual cue is the hallmark of a perfectly baked Monster Cookie, ready to fill your kitchen with warm, sweet aromas!
Step 9: Cool Down
Once baked, let the cookies cool on the baking sheet for about 5 minutes. This resting period allows them to firm up a bit before transferring to a wire rack. The cookies will continue to set as they cool, providing that perfect chewy texture and ensuring they don’t crumble during the move. Enjoy the anticipation of that first delicious bite!

Storage Tips for Monster Cookies
Room Temperature: Store in an airtight container at room temperature for up to 1 week. This keeps your Monster Cookies soft and fresh for delightful snacking.
Fridge: If you prefer, you can refrigerate the cookies for up to 2 weeks, but let them come to room temperature before enjoying for the best texture.
Freezer: To enjoy monster cookies at a later date, freeze the dough for up to 3 months. Scoop and freeze cookie balls on a baking sheet before transferring to a freezer bag to bake fresh cookies anytime!
Reheating: For warm, chewy cookies, microwave them for 10-15 seconds or bake at 350°F (177°C) for a few minutes, restoring that gooey center and crisp edges.
What to Serve with Ultimate Classic Cookie Monster Cookies
Pairing your delightful Monster Cookies with complementary dishes elevates the experience, creating a whimsical feast for both the eyes and taste buds.
- Cold Milk: An absolute classic, chilled milk enhances the gooey chocolate chips while softening the indulgent cookie texture.
- Vanilla Ice Cream: Scoop a generous ball of creamy vanilla on top of the warm cookies for a dreamy dessert combo.
- Fruit Salad: The freshness of a colorful fruit salad contrasts the sweetness and richness of the cookies, making the meal well-rounded.
- Chocolate Dipping Sauce: Serve a warm dipping sauce for those who crave an extra layer of chocolate decadence—perfect for a dessert table.
- Hot Cocoa: Cozy up your serving with a steaming mug of rich hot cocoa, perfect for dipping the cookies, enhancing their softness.
- Rainbow Sprinkles: Add a fun twist by serving the cookies alongside bright rainbow sprinkles—bring on the cheer and joy!
- Whipped Cream Topping: Top your cookies with a dollop of fluffy whipped cream—it’s an extra touch of elegance and indulgence.
- Coffee or Espresso: Adults will appreciate the deep flavors of coffee or espresso paired with the sweet cookies, balancing the tastes beautifully.
Whichever combination you choose, your Cookie Monster Cookies will surely shine at any gathering!
Make Ahead Options
These delightful Cookie Monster Cookies are a great option for busy home cooks looking to save time during the week! You can prepare the dough up to 24 hours in advance by following the initial steps and then chilling the dough in the refrigerator. If you want to extend that time, scoop the dough balls, place them on a lined baking sheet, and freeze for up to 3 months. Just make sure they’re well-wrapped to maintain their quality, preventing freezer burn. When you’re ready to bake, simply preheat your oven and place the frozen dough balls directly on the baking sheet; add a minute or two to the baking time, and you’ll have freshly baked Cookie Monster Cookies, just as vibrant and delicious as if they were made that day!
Monster Cookie Variations & Substitutions
Get ready to unleash your creativity in the kitchen with these fun adaptations that will make your Monster Cookies uniquely yours!
- Dairy-Free: Use coconut oil or a dairy-free butter substitute instead of unsalted butter for a delightful vegan twist.
- Gluten-Free: Substitute all-purpose flour with a gluten-free blend and enjoy your cookies without worry!
- Extra Crunchy: Fold in chopped nuts like pecans or walnuts alongside the mini chocolate chips for added texture.
- Spicy Kick: Mix in a pinch of cayenne pepper or chili powder for an unexpected heat that elevates the chocolate flavors.
- Minty Freshness: Swap in mint chocolate chips or peppermint extract for a refreshing twist that pairs beautifully with the blue dough.
- Protein Boost: Add protein powder to the dry ingredients for a nutritional boost, perfect for post-workout treats!
- Color Explosion: Instead of blue gel, experiment with bright green or pink food coloring for a delightful visual surprise.
- Flavor Fusion: Try adding a tablespoon of almond or hazelnut extract for a depth of flavor; it can introduce a lovely nutty note, transforming your cookies into a new favorite.
Feel inspired to check out other fun cookie recipes like Panko Cookies Chewy or make a sweet twist with Oreo Cheesecake Cookies for even more delightful baking adventures!
Helpful Tricks for Monster Cookies
- Chill the Dough: Allowing the dough to chill for at least 30 minutes can prevent spreading and enhance the chewy texture of your Monster Cookies.
- Color Intensity: Use blue gel food coloring for a vibrant hue; mix thoroughly to avoid pale batches that don’t capture the Cookie Monster vibe.
- Mix-In Variations: Feel free to experiment with mix-ins like nuts or other candies; just be sure not to overload the dough, or it may affect the texture.
- Watch the Edges: Keep an eye on baking times; cookies should look set around the edges while remaining soft in the center for that perfect chewy bite.
- Storage Savvy: Store cookies in an airtight container for up to a week. Remember, they’re best enjoyed fresh, but you can freeze any extra dough for future baking adventures!

Cookie Monster Cookies Recipe FAQs
What type of blue food coloring should I use for Cookie Monster Cookies?
I recommend using gel food coloring for the best vibrancy in your Cookie Monster Cookies. Liquid coloring can dilute the dough and affect the consistency, while gel provides a rich, deep color that’s visually striking. Just make sure to mix it thoroughly—no pale cookies here!
How should I store my Cookie Monster Cookies once baked?
To keep your cookies soft and delicious, store them in an airtight container at room temperature for up to one week. If you find yourself with leftovers, using a container will help maintain their texture. If you’re like me and want to enjoy them longer, refrigerating them will keep them fresh for up to two weeks.
Can I freeze Cookie Monster cookie dough?
Absolutely! Freezing the cookie dough is a fantastic way to always have cookie magic on hand. Simply scoop 1.5 to 2 tablespoons of dough onto a lined baking sheet and freeze until solid. Once firm, transfer them to a freezer bag. They can be frozen for up to 3 months, so you can bake fresh cookies anytime by adding a couple of extra minutes to the baking time.
Why didn’t my Cookie Monster Cookies spread properly?
If your cookies didn’t spread as expected, there are a couple of things you might want to check. First, ensure the butter was softened but not melted, as melted butter can lead to flat cookies. Additionally, if the dough was chilled for too long, it might need a few minutes at room temperature before scooping. When baked, they should be set at the edges but soft in the center for that delicious chewy texture.
Are Cookie Monster Cookies suitable for people with allergies?
Cookie Monster Cookies contain common allergens like gluten (from the all-purpose flour) and dairy (from the butter). If you’re baking for someone with allergies, consider swapping out the flour for a gluten-free blend and using dairy-free butter as substitutes. Always double-check the ingredient labels, especially for the chocolate chips and Oreos, to ensure they are allergy-friendly!
How can I make Cookie Monster Cookies more festive?
You can easily customize your Monster Cookies for special occasions by adding themed sprinkles or swapping the Oreos for seasonal flavors. For example, try pumpkin spice Oreos during fall or candy canes for a festive twist around the holidays. These fun variations will keep your Cookie Monster Cookies exciting and visually appealing year-round!

Monster Cookie Bliss: Soft, Chewy, and Colorfully Fun!
Ingredients
Equipment
Method
- Preheat your oven to 350°F (177°C) and prepare baking sheets with parchment paper.
- In a medium bowl, whisk together the all-purpose flour, cornstarch, baking soda, and salt.
- In a large mixing bowl, beat the softened butter with granulated and brown sugar until light and creamy.
- Add the eggs one at a time, mixing well between each addition. Stir in vanilla extract and blue gel food coloring.
- Gradually incorporate the dry mixture into the wet mixture until just combined.
- Gently fold in mini chocolate chips, crushed cookies, and Oreos until evenly distributed.
- Scoop out portions of dough and place them on the lined baking sheets, spacing them 2 inches apart.
- Bake for 10–12 minutes, until edges are set and centers remain slightly soft.
- Let the cookies cool on the baking sheet for about 5 minutes before transferring to a wire rack.