
Stepping into the kitchen, I can’t help but feel excitement bubbling up — especially when I’m about to whip up a batch of no-bake Chocolate Peanut Butter Rice Krispie Cups! These treats blend the creamy richness of peanut butter with sweet, melty chocolate and the satisfying crunch of Rice Krispies. What’s not to love? They’re quick and easy to make, requiring just a handful of ingredients, and you can easily tailor them to your liking—whether you prefer a touch of sea salt or a sprinkle of nuts. Perfect for both kids and adults alike, these delightful cups are a go-to for satisfying sweet cravings without the fuss of baking. Ready to dive into a world of chocolatey goodness? Let’s make something delicious together!
Why Are These Rice Krispie Cups Irresistible?
Simplicity is key: With only a few ingredients, you’ll have a delicious treat ready in no time. No-Bake means less time in the kitchen and more time enjoying the sweet rewards! Customizable fun allows you to play with flavors—try adding butterscotch chips or nuts! Kid-Friendly and perfect for all occasions, these cups are a hit at parties or family gatherings. Discover similar treats with our Oatmeal Peanut Butter bites and Peanut Butter Spider cookies for more sweet inspiration!
Chocolate Peanut Butter Rice Krispie Cups Ingredients
• Whipping up these delicious treats starts with just a few simple ingredients!
For the Base
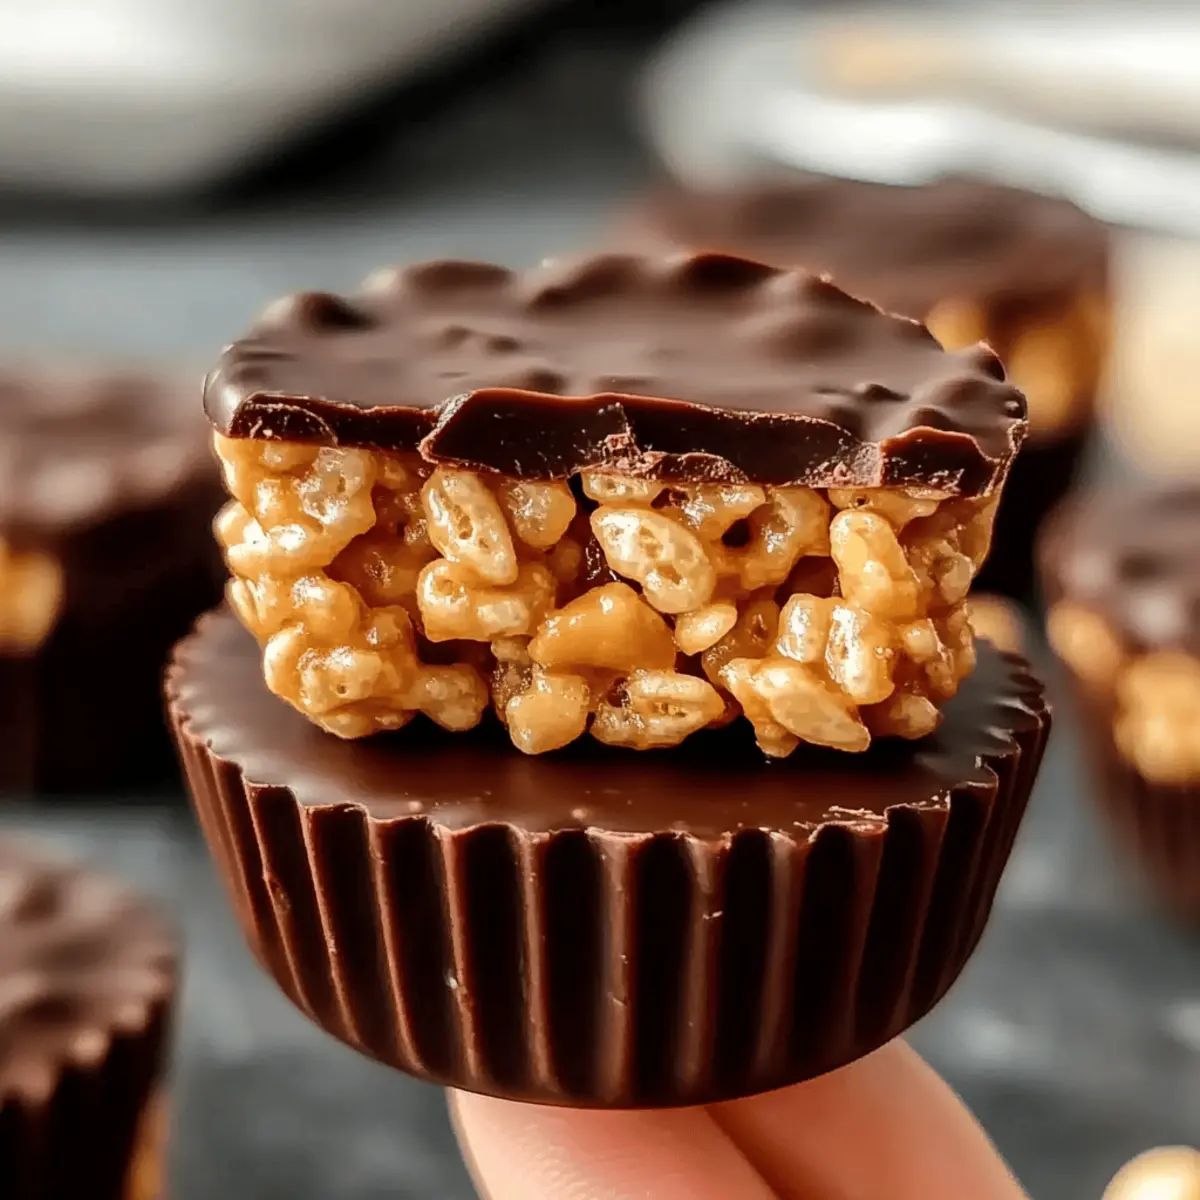
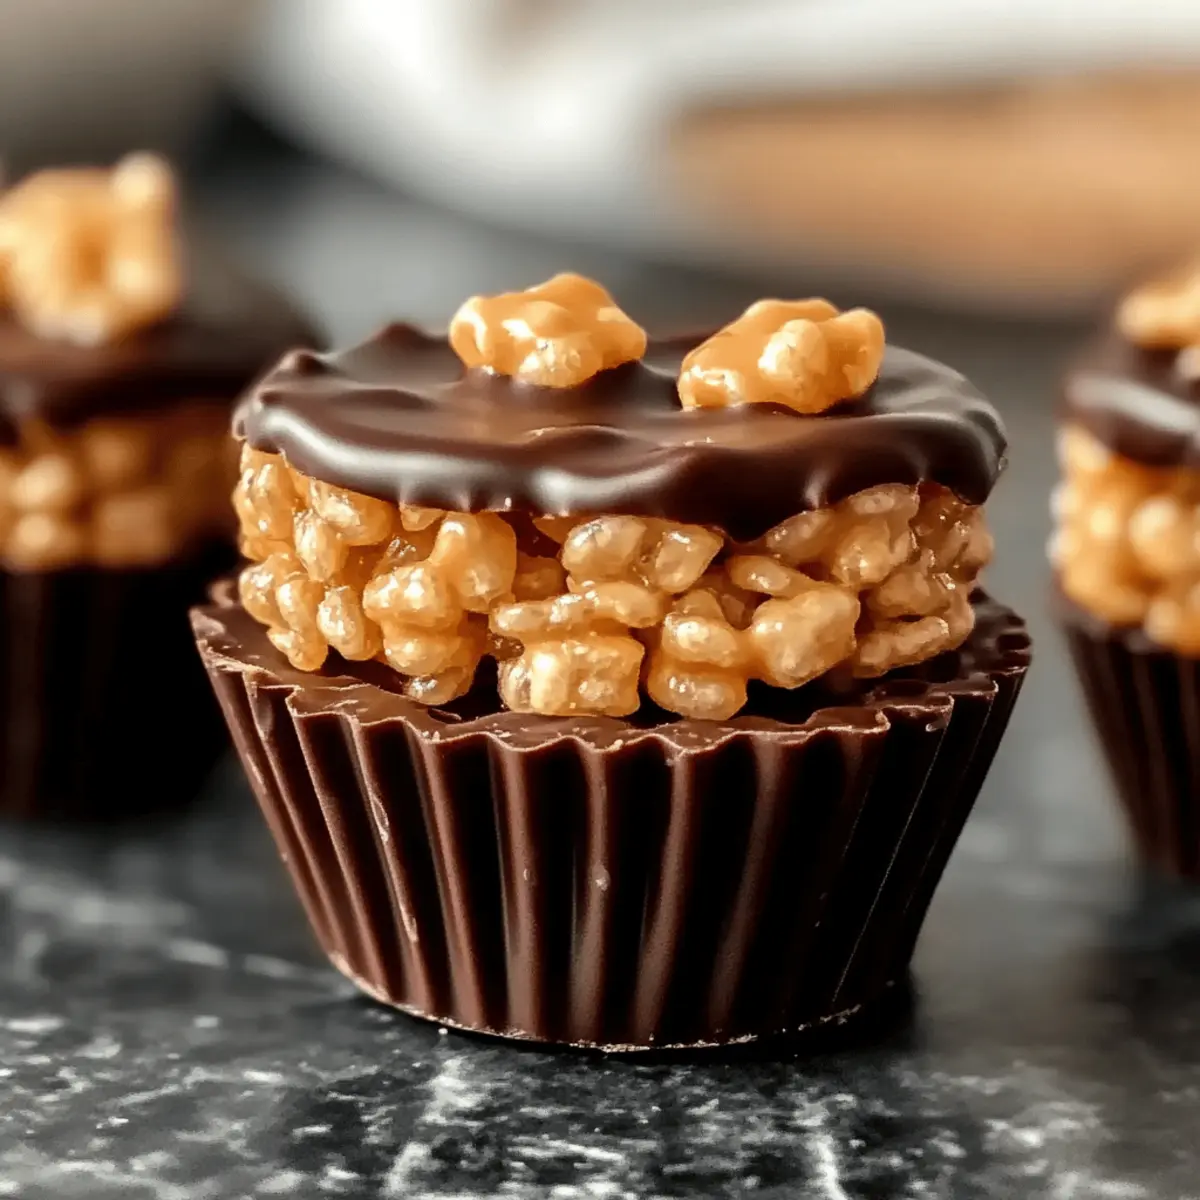
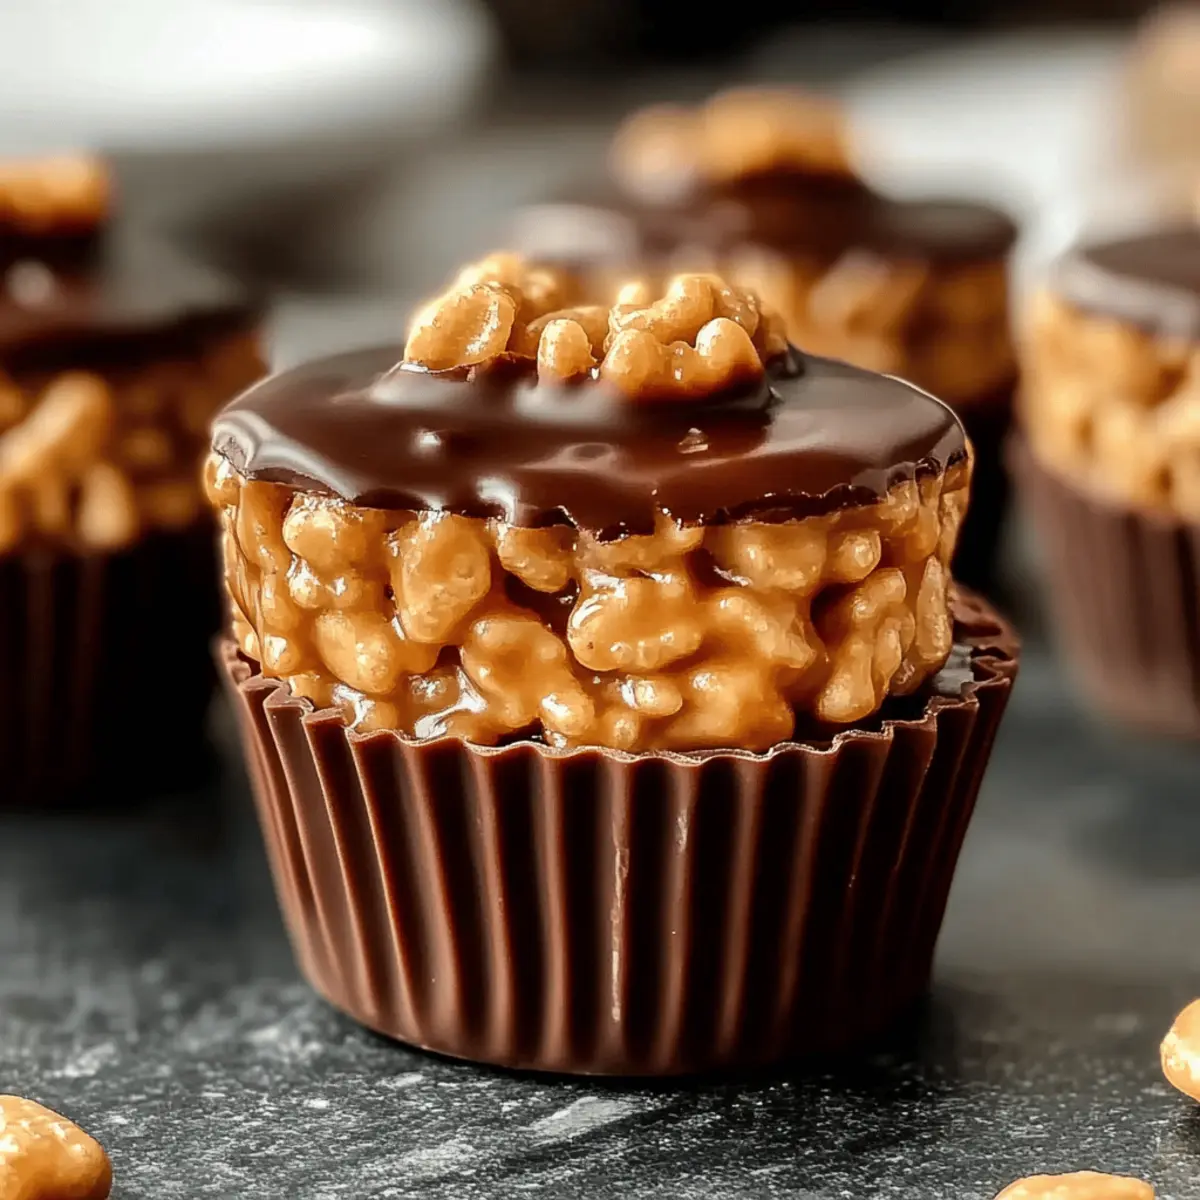
- Rice Krispies Cereal – Provides the delightful crunch that holds the cups together; any puffed rice can work too.
- Creamy Peanut Butter – Rich and velvety, it infuses the mixture with wonderful flavor; crunchy peanut butter adds extra texture.
- Unsalted Butter – Binds everything beautifully and adds moisture; substitute with margarine or a dairy-free option for vegans.
- Mini Marshmallows – Sweet and gooey, they help to hold the mixture together; swap for marshmallow fluff or vegan marshmallows if needed.
For the Topping
- Chocolate Chips – Create a luscious, chocolatey layer; choose dark or milk chocolate based on your preference for sweetness.
- Vanilla Extract (optional) – Enhances flavors beautifully; optional if you’re using flavored peanut butter.
- Sea Salt (optional) – Adds a delightful contrast to the sweetness; feel free to omit if you prefer a sweeter cup.
These Chocolate Peanut Butter Rice Krispie Cups are not just easy to make but also incredibly customizable. Dive in and enjoy your sweet creation!
Step‑by‑Step Instructions for Chocolate Peanut Butter Rice Krispie Cups
Step 1: Melt the Butter and Marshmallows
In a medium saucepan, combine 1⁄4 cup unsalted butter and 2 cups mini marshmallows over low heat. Stir continuously until the mixture is smooth and fully melted, about 5 minutes. Be careful to keep the heat low to prevent burning. Once melted, the mixture should be glossy and cohesive, signaling it’s ready for the next step.
Step 2: Combine with Peanut Butter
Remove the saucepan from heat and stir in 1 cup of creamy peanut butter, mixing well until fully incorporated. If you like, add 1 teaspoon of vanilla extract for additional flavor. The mixture should be thick and creamy, with no lumps remaining. This rich blend forms the delicious base of your Chocolate Peanut Butter Rice Krispie Cups!
Step 3: Mix with Rice Krispies
In a large mixing bowl, pour the chocolate-peanut butter mixture over 6 cups of Rice Krispies. Gently fold the cereal into the mixture using a spatula, ensuring each piece is evenly coated without crushing the cereal. This should take about 2 minutes, and you’ll see the crispness of the Rice Krispies shining through the luscious mixture.
Step 4: Shape the Cups
Line a muffin tin with paper liners for easy removal. Spoon the Rice Krispies mixture into each liner, filling them about three-quarters full. Use your fingers or the back of a spoon to gently press down on the mixture, shaping it into cup forms. Aim for a slight indentation in the middle, creating space for the forthcoming chocolate layer—this should take about 5 minutes.
Step 5: Prepare the Chocolate Layer
In a microwave-safe bowl, melt 1 cup of chocolate chips in 30-second increments, stirring between each until smooth. This should take about 1-2 minutes in total. Pour an even layer of melted chocolate over each Rice Krispie cup, spreading it out gently with a small spatula. Optionally, sprinkle a pinch of sea salt on top for an enhanced flavor contrast.
Step 6: Set and Serve
Allow the Chocolate Peanut Butter Rice Krispie Cups to cool at room temperature for about 20 minutes or until the chocolate has set. For quicker results, place them in the refrigerator for around 10 minutes. Once firm, gently remove each cup from their paper liners, and they’re ready to be enjoyed! These delightful treats are perfect for sharing or savoring all by yourself.
What to Serve with Chocolate Peanut Butter Rice Krispie Cups
Indulging in these delightful treats calls for a cozy meal to complement their rich flavors.
-
Fresh Fruit Salad: A vibrant mix of seasonal fruits adds a refreshing balance to the sweet cups, brightening up the palate with every bite. Incorporating citrus like oranges adds a refreshing zing, perfect after a rich treat.
-
Milkshakes: The creamy, classic flavor of vanilla or chocolate milkshakes pairs perfectly with the cups, enhancing the nostalgic vibes. Kids and adults alike will love this sweet duo, ideal for a fun dessert experience.
-
Ice Cream: Top each Rice Krispie cup with a scoop of vanilla or chocolate ice cream for an indulgent dessert. The cold creaminess perfectly complements the warm, chewy chocolate and peanut butter blend.
-
Nutty Granola Bars: Serve alongside some crunchy nutty granola bars for a delightful texture contrast. The added chewiness and nutty flavor will make snack time even more satisfying.
-
Coffee or Tea: A warm cup of coffee or tea adds a comforting touch to your sweet treats, creating a cozy atmosphere. Choose something lightly flavored to not overpower the deliciousness of the Rice Krispie cups.
-
Chocolate-Covered Pretzels: For an extra sweet-and-salty bite, pair them with chocolate-covered pretzels. The mix of crunchy pretzels and rich chocolate echoes the texture and flavor of the Rice Krispie cups.
-
Peanut Butter Dip: For a fun twist, whip up a creamy peanut butter dip to accompany fresh apple slices or pretzels. This enhances the peanut butter flavor and makes for an interactive dessert experience.
-
Fruit Smoothies: Create a fruity smoothie to cleanse the palate, using berries or bananas for a healthy pairing. It’s a great way to add some nutrition alongside those delightful Rice Krispie cups.
-
Decadent Brownies: When you’re feeling indulgent, serve with fudgy brownies to double the chocolate pleasure. The rich, gooey texture pairs beautifully with your sweet cups for a chocolate lover’s dream.
Chocolate Peanut Butter Rice Krispie Cups Variations
Feel free to elevate your Chocolate Peanut Butter Rice Krispie Cups with these fun and flavorful twists.
-
Nutty Delight: Add 1/2 cup of chopped nuts like almonds or pecans for a satisfying crunch. The mix of textures will delight your taste buds.
-
Coconut Bliss: Stir in 1/2 cup of sweetened shredded coconut to bring a tropical flair to your treats. It’s a sweet, chewy addition that complements the peanut butter beautifully.
-
Spicy Kick: Sprinkle in a pinch of cayenne pepper or chili powder for a surprising hint of heat. It adds an exciting twist that makes each bite intriguing!
-
Mini Chocolate Chips: Swap half of the chocolate chips for mini chocolate chips for a playful texture. The smaller chips will melt slightly, creating ribbons of chocolate throughout the cups.
-
Fruity Addition: Mix in 1/2 cup of dried cranberries or cherries for a pop of fruity sweetness. This can help cut through the richness of the chocolate and peanut butter.
-
Vegan Twist: Use almond or cashew butter instead of peanut butter and coconut oil in place of butter for a vegan-friendly version. Your friends won’t believe how good they are!
-
Sweetener Swap: For a healthier alternative, consider using agave nectar or maple syrup instead of mini marshmallows. This creates a delightful gooeyness while reducing added sugars.
-
Flavor Infusion: Experiment with flavored extracts, like almond or coconut, instead of vanilla for a different flavor profile. It adds a lovely twist without much extra effort.
Remember, the beauty of these cups lies in their versatility—get creative and try something new! If you’re interested in more kid-friendly recipes, don’t miss our delightful Cheesecake Stuffed Chocolate or hearty meals like Cheesy Hamburger Rice for the family!
Storage Tips for Chocolate Peanut Butter Rice Krispie Cups
-
Room Temperature: Store the cups in an airtight container at room temperature for up to 1 week to maintain freshness and crunchiness.
-
Fridge: For longer shelf life, refrigerate the cups in a sealed container, where they can last up to 2 weeks. This helps keep the chocolate topping firm.
-
Freezer: To enjoy these delightful treats later, freeze individual cups wrapped in plastic wrap or in a freezer-safe container for up to 1 month. Thaw in the fridge before serving.
-
Reheating: If desired, you can briefly microwave chilled cups for about 10 seconds to soften the chocolate, but be careful not to overheat. Enjoy the delectable Chocolate Peanut Butter Rice Krispie Cups!
Make Ahead Options
These Chocolate Peanut Butter Rice Krispie Cups are perfect for meal prep, allowing you to save time during your busy week! You can prepare the Rice Krispies mixture up to 24 hours in advance. Simply follow the first four steps: melt the butter and marshmallows, mix in the peanut butter, fold in the Rice Krispies, and shape the cups in the muffin tin. Cover the prepared cups tightly with plastic wrap and refrigerate. When you’re ready to enjoy them, simply add the chocolate layer by melting the chocolate chips and pouring it over—just let them sit for 20 minutes to set. This way, you’ll have delicious, homemade treats ready with minimal last-minute effort!
Expert Tips for Making Chocolate Peanut Butter Rice Krispie Cups
-
Low Heat Precaution: Keep the heat low while melting the butter and marshmallows; high heat can burn the mixture, affecting the final texture.
-
Gentle Mixing: When folding the Rice Krispies into the peanut butter mixture, use a soft touch to avoid crushing the cereal, preserving that delightful crunch.
-
Chocolate Layer Advice: Ensure the chocolate is smooth and evenly melted before pouring over the cups. Stirring frequently helps avoid any lumps.
-
Chill for a Perfect Set: To achieve the best firmness for your Chocolate Peanut Butter Rice Krispie Cups, chill them in the refrigerator for at least 10 minutes after preparing.
-
Variation Experimentation: Feel free to customize your cups! Try adding nuts, dried fruits, or different types of chocolate to make them uniquely yours.

Chocolate Peanut Butter Rice Krispie Cups Recipe FAQs
How do I know if my Rice Krispies are fresh enough to use?
Absolutely! Look for Rice Krispies that are free from any dark spots or stale smell. If they feel hard or lack the usual snap, it’s best to replace them to ensure your cups have that delightful crunch.
What’s the best way to store Chocolate Peanut Butter Rice Krispie Cups?
Store your cups in an airtight container at room temperature for about 1 week. If you want to keep them longer, you can refrigerate them in a sealed container for up to 2 weeks. Make sure they’re well-protected from moisture, as that can affect their crunchy texture!
Can I freeze these treats, and if so, how?
Very! To freeze your Chocolate Peanut Butter Rice Krispie Cups, wrap each cup tightly in plastic wrap or place them in a freezer-safe container. They can be stored in the freezer for up to 1 month. When you’re ready to enjoy, simply thaw them in the fridge for a few hours before serving.
What if my chocolate layer doesn’t set properly?
Don’t worry; it’s a common issue! If your chocolate isn’t setting, here’s what to do: Try placing the cups in the fridge for at least 10-15 minutes to help the chocolate firm up. If it’s still soft, gently reheat the chocolate by melting it again, stirring until smooth, and then reapplying a fresh layer over the cups. Allow them to chill once more until firm.
Are these Chocolate Peanut Butter Rice Krispie Cups suitable for those with nut allergies?
Not quite! Since this recipe prominently features peanut butter, it’s not recommended for individuals with nut allergies. However, you can easily substitute peanut butter with sun butter or soy nut butter for a nut-free version! Just be sure to use marshmallows that are also nut-free.
What should I do if I want to add extra ingredients, like nuts or dried fruit?
The more the merrier! You can certainly customize your Chocolate Peanut Butter Rice Krispie Cups. Start by mixing in about 1/2 to 1 cup of your choice of chopped nuts or dried fruits right before you fill the muffin tin. Just ensure that the additions are well-coated in the mixture for the best flavor and texture!
Decadent Chocolate Peanut Butter Rice Krispie Cups Recipe
Ingredients
Equipment
Method
- Melt the Butter and Marshmallows: In a medium saucepan, combine 1/4 cup unsalted butter and 2 cups mini marshmallows over low heat. Stir until smooth, about 5 minutes.
- Combine with Peanut Butter: Remove from heat and stir in 1 cup of creamy peanut butter and 1 teaspoon of vanilla extract if desired.
- Mix with Rice Krispies: Pour the chocolate-peanut butter mixture over 6 cups of Rice Krispies and gently fold the cereal in until evenly coated.
- Shape the Cups: Line a muffin tin with paper liners and spoon the mixture into each liner, pressing gently to shape the cups.
- Prepare the Chocolate Layer: Melt 1 cup of chocolate chips in a microwave-safe bowl and pour over each Rice Krispie cup.
- Set and Serve: Allow to cool at room temperature for about 20 minutes or refrigerate for quicker setting.