
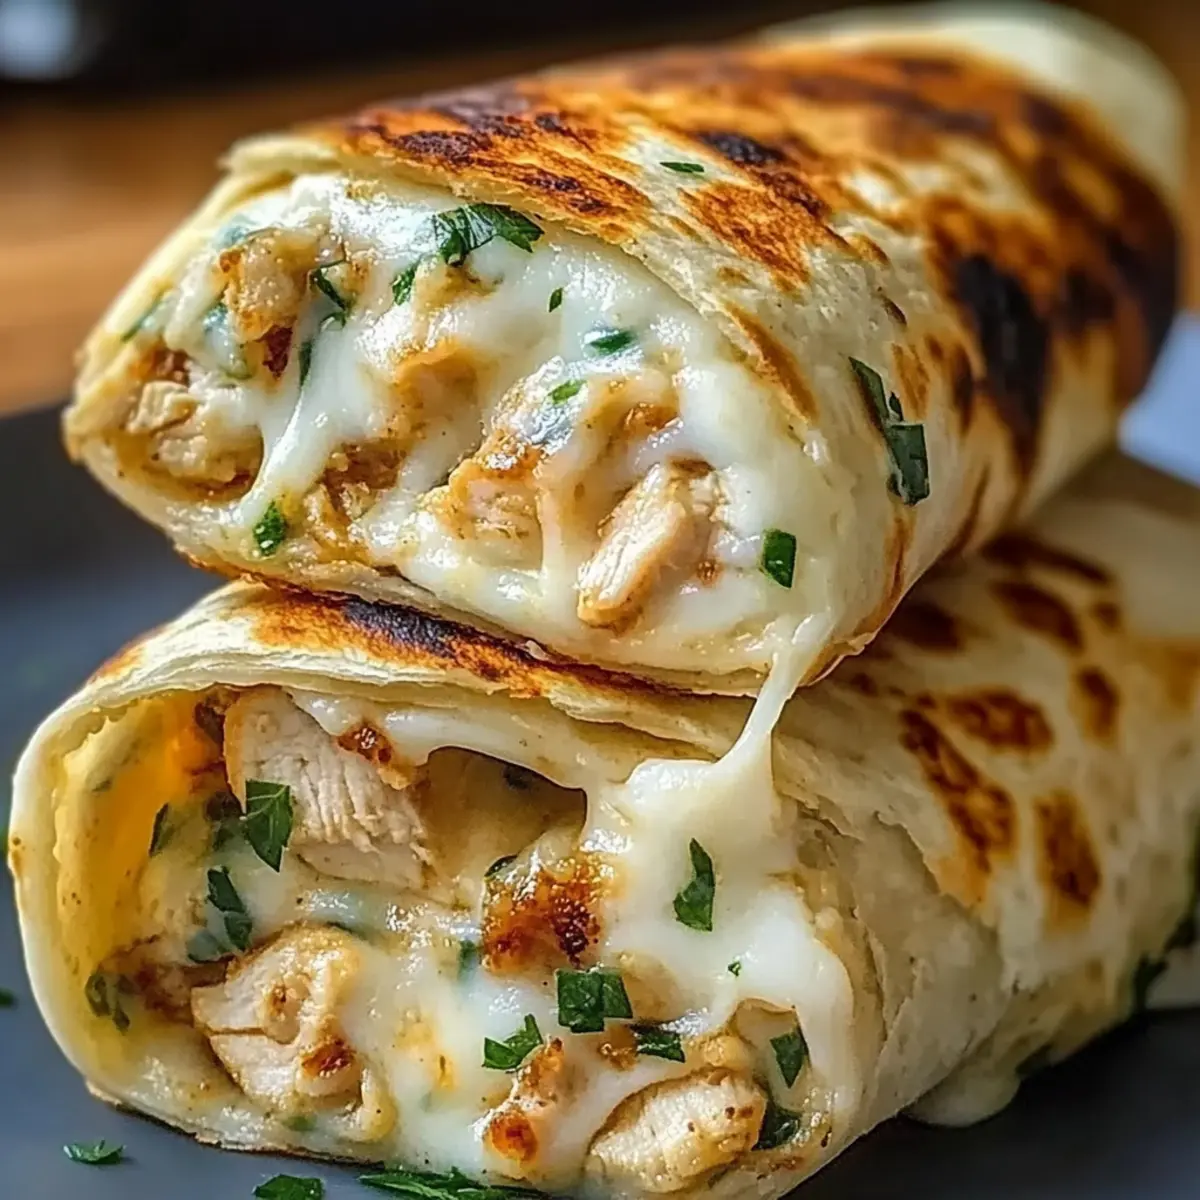
A delightful medley of crispy texture and savory satisfaction awaits you with these Low Carb Cheesy Garlic Chicken Wraps! Picture tender shredded chicken enveloped in a warm, gooey cheese blanket, accented by the aromatic punch of garlic—all wrapped in a low-carb tortilla that feels indulgent yet guilt-free. What I love most about this recipe is its quick preparation time of just 15 minutes, making it an ideal solution for those busy weeknights when you crave something homemade without the fuss. Plus, these wraps are wonderfully adaptable; whether you’re catering to family food preferences or dietary needs, they’re designed to fit seamlessly into your dinner rotation. Are you ready to elevate your dinner game and impress everyone at the table?
Why Are These Wraps a Must-Try?
Quick and Easy: You’ll whip these up in just 15 minutes, making them the perfect solution for busy weeknights.
Flavor Explosion: Each bite combines tender chicken and gooey cheeses, enhanced by the delightful aroma of garlic.
Family-Friendly: Everyone will love these wraps—customizable to cater to various tastes and dietary needs.
Low Carb Delight: Enjoy all the flavors without the carbs, ideal for those on a low-carb diet.
Versatile Options: Switch up the protein or add veggies for a unique twist every time you make them!
Dive into these Cheesy Garlic Chicken Wraps that promise satisfaction and joy in every bite!
Cheesy Garlic Chicken Wraps Ingredients
For the Filling
• Cooked Chicken Breast – Provides protein and substance; feel free to use shredded rotisserie chicken for a quicker option.
• Shredded Mozzarella Cheese – Adds creaminess and stretches beautifully when melted; substitute with dairy-free cheese to make these Cheesy Garlic Chicken Wraps vegan-friendly.
• Shredded Cheddar Cheese – Enhances flavor with a sharp, tangy note; can be switched for any preferred cheese type to suit your taste.
• Garlic, Minced – Infuses the wraps with a robust aroma and flavor; use garlic powder if fresh garlic is unavailable.
• Cream Cheese, Softened – Binds the filling together and adds a rich creaminess; replace with vegan cream cheese for a dairy-free option.
For Cooking
• Olive Oil – Enhances flavor and prevents sticking; any cooking oil or butter can be used as a substitute in a pinch.
• Low-Carb Tortillas or Wraps – The base of the wrap, vital for keeping the dish low carb; alternatives include collard greens or lettuce for a grain-free option.
For Garnish
• Fresh Parsley, Chopped – Adds freshness and color; feel free to omit or use other herbs like cilantro or Italian seasoning if preferred.
• Salt and Pepper – Essential for seasoning; adjust to taste for your perfect flavor.
Step‑by‑Step Instructions for Cheesy Garlic Chicken Wraps
Step 1: Preheat the Skillet
Begin by preheating a large skillet or grill pan over medium heat. Add a drizzle of olive oil, just enough to coat the bottom, and allow it to warm until shimmering. This is crucial to ensure the Cheesy Garlic Chicken Wraps achieve that perfect golden-brown exterior while preventing sticking.
Step 2: Prepare the Filling
In a mixing bowl, combine the cooked, shredded chicken breast with mozzarella and cheddar cheese, softened cream cheese, minced garlic, chopped parsley, salt, and pepper. Mix thoroughly until all ingredients are evenly distributed; the cream cheese should bind everything together, creating a creamy, flavorful filling that’s simply irresistible.
Step 3: Assemble the Wraps
Take a low-carb tortilla and lay it flat on a clean surface. Spoon an even portion of the cheesy chicken mixture onto the center of the tortilla, ensuring not to overfill. Carefully roll the tortilla tightly around the filling, tucking in the ends as you go to enclose all the delicious goodness of the Cheesy Garlic Chicken Wraps inside.
Step 4: Cook the Wraps
Place the wrapped tortillas seam side down into the preheated skillet. Cook for about 2-3 minutes on each side, or until the tortillas are golden brown and crispy while the cheese inside melts beautifully. Keep an eye out for that heavenly aroma wafting up, indicating that they are ready to flip!
Step 5: Slice and Serve
Once cooked, carefully remove the Cheesy Garlic Chicken Wraps from the skillet and let them cool for a moment. Using a sharp knife, slice them in half diagonally for a tempting presentation. Serve immediately, garnished with additional fresh parsley if desired, and get ready to enjoy this satisfying low-carb delight!
What to Serve with Low Carb Cheesy Garlic Chicken Wraps
Create a delightful dining experience with these versatile wraps that are bursting with cheesy, garlicky goodness.
- Crispy Side Salad: A vibrant mix of arugula, cherry tomatoes, and cucumbers that adds freshness and crunch to each bite.
- Guacamole: Creamy avocado dip brings a luscious, buttery flavor that complements the wraps perfectly, making every bite a treat.
- Homemade Salsa: Bright and tangy, this fresh salsa adds a zesty kick, enhancing the overall flavor profile of your meal.
- Garlic Yogurt Dip: Cool and creamy, this dip offers a rich contrast to the warm wraps and elevates the dining experience with its aromatic flavors.
- Roasted Veggies: Tossed with olive oil, garlic, and herbs, these colorful roasted vegetables provide a satisfying, nutritious side that contrasts beautifully with the cheesy wraps.
- Sparkling Lemonade: This refreshing, fizzy drink brightens the meal and balances the richness of the wraps, making it a winning combination.
- Chocolate Avocado Mousse: For dessert, this silky-smooth mousse is a low-carb, indulgent treat that rounds off your meal with a touch of sweetness.
- Herbed Quinoa: A light and fluffy side, this protein-packed quinoa complements the wraps while offering a subtle flavor enhancement with fresh herbs.
- Grilled Asparagus: Tender and smoky, grilled asparagus adds an elegant touch and a pleasing crunch to your dinner plate.
- Chilled White Wine: A glass of crisp white wine brightens the meal, making it feel special while pairing wonderfully with the garlic flavors.
How to Store and Freeze Cheesy Garlic Chicken Wraps
Fridge: Store leftovers in an airtight container in the fridge for up to 2 days. Reheat in the oven for best results, restoring that crispy texture.
Freezer: Wrap tightly in plastic wrap followed by aluminum foil to prevent freezer burn. They can be frozen for up to 3 months.
Reheating: For best results, reheat from frozen in the oven at 375°F (190°C) for about 20 minutes or until heated through and crispy. Avoid microwaving as it can make the wraps soggy.
Serving Tip: Consider garnishing with fresh herbs after reheating to refresh the flavors of your Cheesy Garlic Chicken Wraps!
Cheesy Garlic Chicken Wraps Variations
Feel free to customize your Cheesy Garlic Chicken Wraps for a delightful twist, catering to your taste buds and dietary needs!
- Dairy-Free: Replace cream cheese and cheeses with plant-based cheese alternatives for a creamy, vegan-friendly option. It’s just as indulgent and satisfying!
- Beefy Delight: Swap shredded chicken for shredded beef for a hearty and rustic variation. This change introduces a different flavor profile that’s equally scrumptious.
- Mushroom Magic: Use sautéed mushrooms instead of chicken to create a rich vegetarian option. Their earthy flavor pairs exceptionally well with garlic and cheese.
- Flavorful Tortillas: Use flavored tortillas, such as spinach or sun-dried tomato, to elevate the wraps visually and taste-wise. This simple switch can boost the overall experience!
- Veggie Boost: Mix in chopped spinach, bell peppers, or even sun-dried tomatoes to add a pop of color and extra nutrition. You’ll be amazed at how vibrant they become!
- Spicy Kick: Throw in some jalapeños or a dash of hot sauce to the filling for an exciting heat level. Spice lovers will enjoy this additional flavor dimension!
- Herbed Twist: Experiment with different herbs like fresh basil or cilantro for a refreshing finish. These aromatic additions can make your wraps even more enchanting!
- Ultimate Dipping Sauce: Serve with a homemade garlic yogurt dip or zesty salsa for an added layer of flavor. These companions not only balance the richness but also enhance the overall meal!
These versatile wraps can easily adapt to whatever you have on hand, making them a brilliant addition to your cooking repertoire. If you enjoy these wraps, you might also like exploring Street Corn Chicken for another delicious family-friendly recipe!
Make Ahead Options
These Low Carb Cheesy Garlic Chicken Wraps are perfect for busy home cooks looking to save time! You can prepare the filling (shredded chicken, cheeses, and seasonings) up to 24 hours in advance; simply store it in an airtight container in the refrigerator to maintain its freshness. Additionally, you can roll the wraps and refrigerate them for up to 3 days—this allows the flavors to meld beautifully. When you’re ready to serve, just cook the wraps in the skillet until golden and heated through; they’ll be just as delicious as when freshly made. This way, you’ll have a mouthwatering meal ready to go, making dinner a breeze!
Expert Tips for Cheesy Garlic Chicken Wraps
-
Prepping Cheese: Refrigerate cheese before grating to reduce mess; coarse grating over a plate helps control the flying shreds while making these Cheesy Garlic Chicken Wraps.
-
Avoid Sticking: Always use a non-stick skillet to cook wraps, ensuring they achieve that perfect brown without sticking to the pan.
-
Add Spice: For a flavor kick, toss in chili flakes or jalapeños with the filling; it enhances the wrap’s deliciousness without overwhelming the dish.
-
Fresh Herbs: Keep things fresh by adding chopped herbs like basil or cilantro for a vibrant twist; this subtle change can elevate your Cheesy Garlic Chicken Wraps to a new level.
-
Freeze Wisely: If you plan on freezing, ensure wraps are well-cooked and cooled completely to prevent sogginess upon reheating later.

Cheesy Garlic Chicken Wraps Recipe FAQs
What type of chicken should I use for these wraps?
You can use cooked chicken breast for these Cheesy Garlic Chicken Wraps, which provides ample protein and substance. A great shortcut is to use shredded rotisserie chicken to save time, and it adds a delicious depth of flavor.
How long can I store leftovers in the fridge?
Leftovers can be stored in an airtight container in the fridge for up to 2 days. To maintain their delightful crispness, I recommend reheating them in the oven rather than the microwave, which can make them soggy.
Can I freeze Cheesy Garlic Chicken Wraps?
Absolutely! To freeze, wrap each cooked wrap tightly in plastic wrap and then in aluminum foil to prevent freezer burn. They can be kept in the freezer for up to 3 months. When you’re ready to enjoy them, reheat from frozen in a preheated oven at 375°F (190°C) for about 20 minutes, until hot and crispy throughout.
What should I do if the cheese is oozing out while cooking?
If you find that cheese is leaking out, make sure the wraps are tightly rolled to keep the filling secure. Additionally, refrigerating the filled wraps for about 15 minutes before cooking can help firm up the cheese, reducing melting spillage as they cook.
Are there any dietary considerations I should keep in mind?
Yes! If you have dietary restrictions, you can easily customize the recipe. For a dairy-free option, use dairy-free cream cheese and cheese. If you’re catering to gluten-free needs, ensure you choose low-carb tortillas that fit those requirements, such as grain-free or lettuce wraps.
How can I elevate the flavors in my wraps?
For an extra kick, consider adding chili flakes or jalapeños to the chicken mixture before assembling the wraps. Fresh herbs like basil or cilantro mixed in will give the wraps a vibrant boost of flavor!
Cheesy Garlic Chicken Wraps: A Low-Carb Family Favorite
Ingredients
Equipment
Method
- Preheat a large skillet or grill pan over medium heat, adding olive oil until shimmering.
- In a mixing bowl, combine cooked chicken, mozzarella, cheddar, cream cheese, garlic, parsley, salt, and pepper.
- Lay a tortilla flat, spoon the cheesy chicken mixture into the center, and roll tightly.
- Place wrapped tortillas seam side down in the skillet, cooking for 2-3 minutes on each side until golden brown.
- Remove from skillet, slice in half diagonally, and serve immediately with additional parsley if desired.