
Amidst the flickering candlelight and echoes of laughter, I found myself surrounded by a vibrant spread of Halloween delights. This festive season calls for creativity, especially when it comes to food! My latest recipe collection, “Spooky & Delicious: 10 Easy Halloween Party Foods,” features whimsical treats that are not only fun but also super simple to make. With minimal prep time, you’ll have more moments to enjoy the company of your friends and family while captivating their taste buds with playful, spooky presentations. Each dish, from mummy pigs in blankets to ghostly crostini, brings both savory and sweet delights to your table, ensuring everyone, including the kids, has a blast. Are you ready to treat your guests to a Halloween party they won’t forget? Let’s dive into these enchanting recipes!
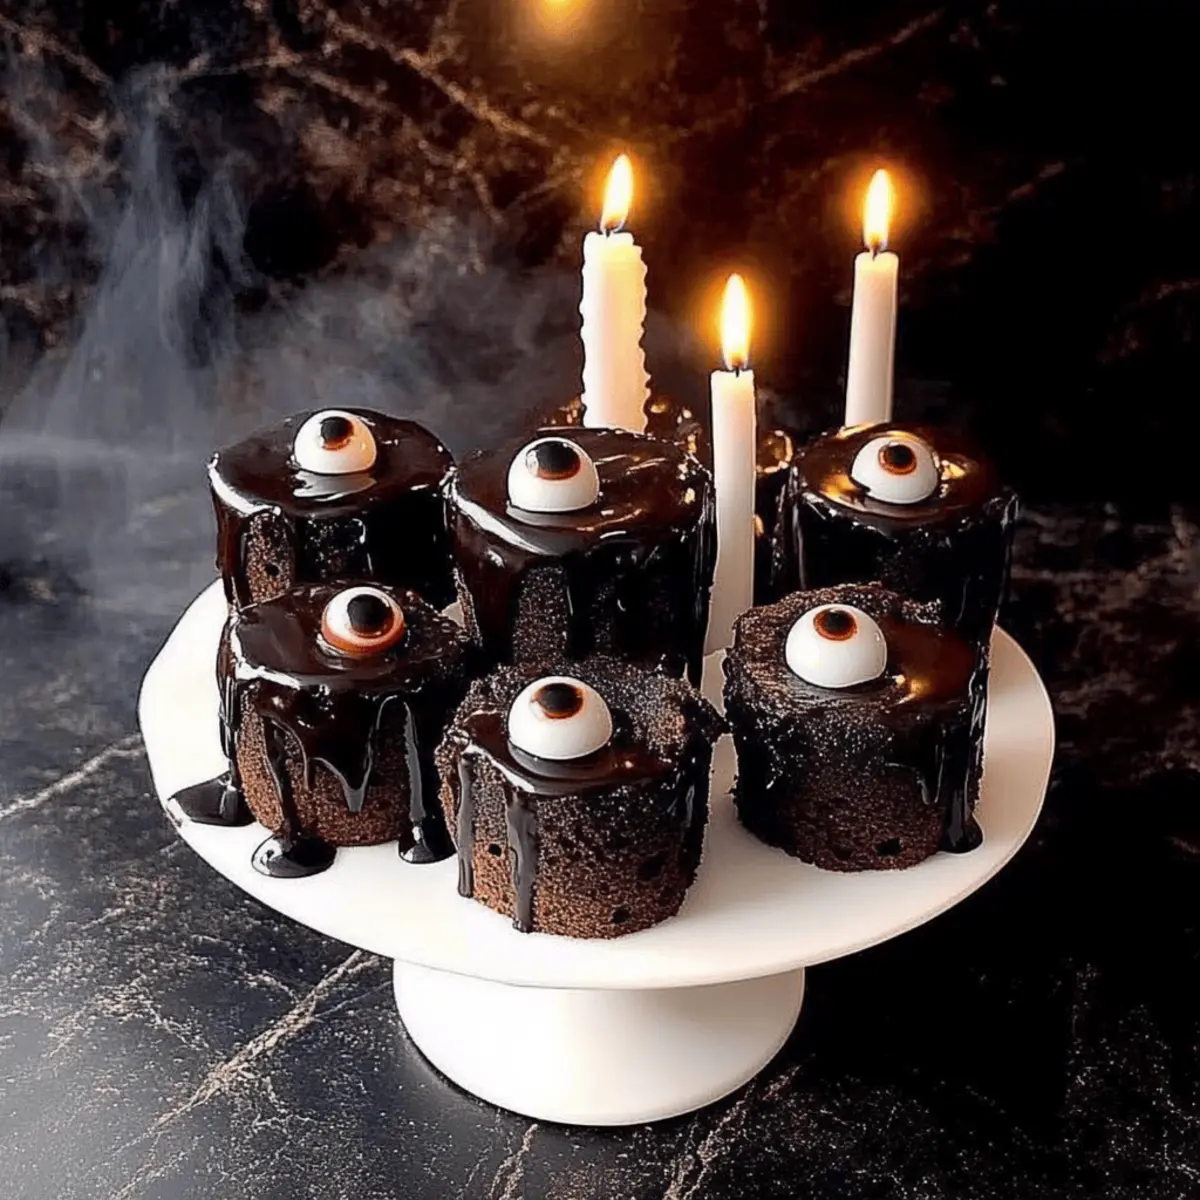
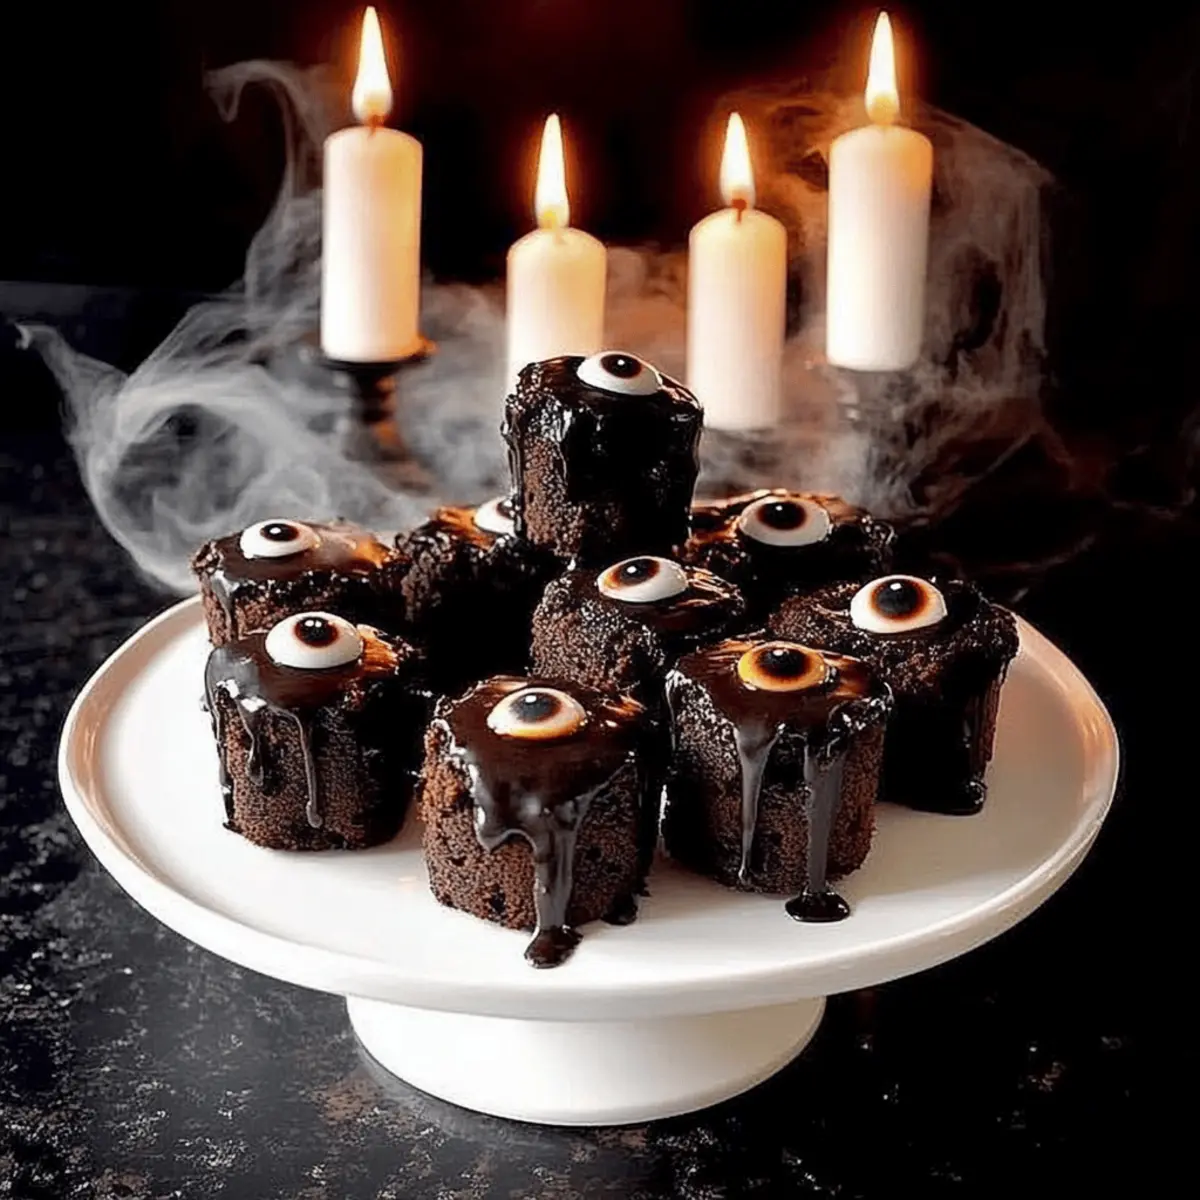
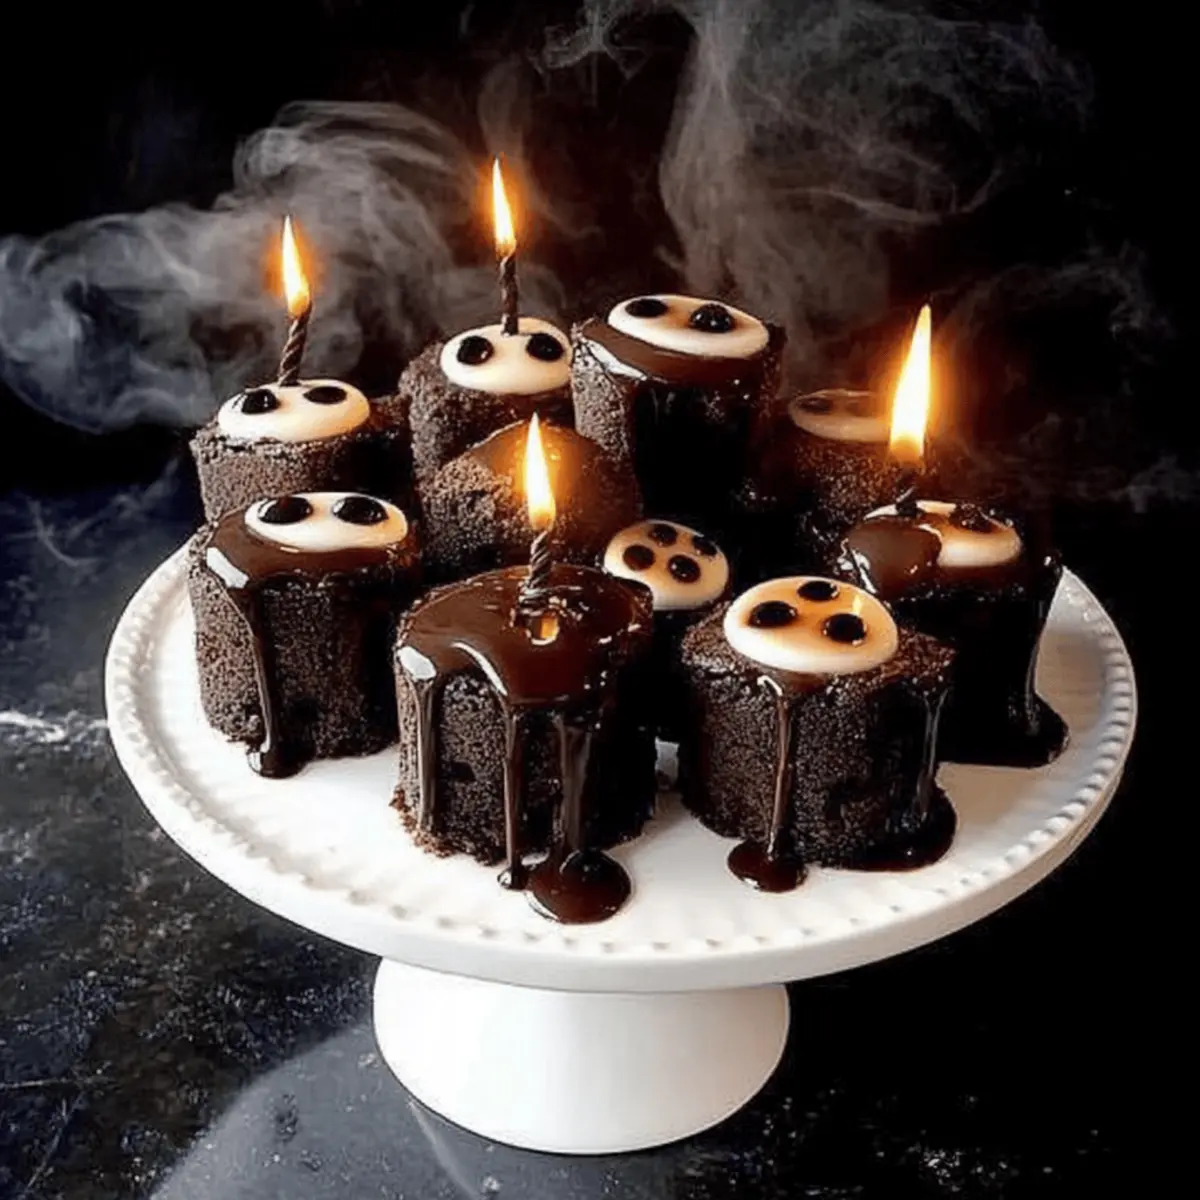
Why You’ll Adore Candle Cakes
Delightful, these Candle Cakes are the perfect centerpiece for your Halloween spread! Easy to make, they require minimal ingredients and can be crafted in no time, letting you focus on fun instead of fuss. Versatile in flavor, you can mix and match batters to satisfy every palate. Visually stunning, the candles create a whimsical touch that will impress your guests, making every bite feel special. Plus, they are a delightful alternative to traditional desserts, ensuring a unique experience for your Halloween festivities. Want more festive treats? Check out these Mini Key Lime Cheesecakes for a refreshing twist!
Candle Cakes Ingredients
• Note: These Candle Cakes are a fun addition to your Halloween festivities, bringing both charm and flavor!
For the Batter
- All-Purpose Flour – Use to create a fluffy base for your cakes; consider gluten-free flour for a suitable alternative.
- Granulated Sugar – This sweetener ensures your cakes are deliciously sweet; brown sugar can add a richer flavor.
- Baking Powder – Helps your cakes rise beautifully and gives them that light texture; ensure it’s fresh for best results.
- Salt – A pinch of salt enhances sweetness and balances flavors in every delightful bite.
- Eggs – Provides moisture and structure; you can replace them with applesauce or flax eggs for a vegan option.
- Milk – Keeps the batter moist and contributes to a tender crumb; any plant-based milk works well for dairy-free needs.
- Vanilla Extract – Infuses a warm aroma and flavor; almond extract can be used for a unique twist.
For the Frosting
- Butter – Offers a creamy texture for the frosting; use vegan butter for an equally tasty dairy-free option.
- Powdered Sugar – Creates a smooth and sweet frosting; sift for a lump-free finish.
- Milk – Adjusts the consistency to your liking; substitute with almond milk for a dairy-free version.
- Food Coloring – Use gel colors to create vibrant hues that match your Halloween theme; natural dyes can offer fun colors too.
For the Toppings
- Candles – Stick edible candles into the cakes for that festive touch; consider using colorful candles for added flair.
- Sprinkles – A sprinkle of festive decorations brings fun and excitement; try edible glitter for an extra dazzling effect.
- Chocolate Shavings – Adds texture and can heighten the rich flavor of your cakes; alternatively, use crushed nuts for a different crunch.
Let these delicious Candle Cakes light up your celebration with their playful charm and delightful taste!
Step‑by‑Step Instructions for CANDLE CAKES
Step 1: Preheat the Oven
Begin by preheating your oven to 350°F (175°C) to ensure an even bake for your Candle Cakes. Grease and flour your cake pans to prevent sticking. A light coat of cooking spray works well. While the oven warms, gather your ingredients to streamline the process and keep everything organized at your kitchen counter.
Step 2: Prepare the Batter
In a large mixing bowl, combine all-purpose flour, granulated sugar, baking powder, and salt. Whisk these dry ingredients together until well-blended. In a separate bowl, beat the eggs and then mix in the milk and vanilla extract. Gradually add the wet mixture to the dry ingredients, stirring until smooth. The batter should be creamy and free of lumps for perfect Candle Cakes.
Step 3: Bake the Cakes
Pour the prepared batter evenly into your greased cake pans, filling each about two-thirds full to allow room for rising. Place them in the preheated oven and bake for 20–25 minutes, or until a toothpick inserted in the center comes out clean. You’ll know the cakes are done when they are golden brown on top and spring back when gently pressed.
Step 4: Cool the Cakes
Once baked, remove the cake pans from the oven and let them cool on a wire rack for about 10 minutes. Then, gently run a knife around the edges to loosen the cakes, carefully inverting them onto the rack. Allow the cakes to cool completely, as this step is crucial for easy frosting and assembling the Candle Cakes.
Step 5: Make the Frosting
In a mixing bowl, cream together softened butter and powdered sugar until the mixture is fluffy and light. Add a splash of milk to achieve your desired frosting consistency, ensuring it’s smooth and spreadable. For a pop of color, incorporate food coloring to match your Halloween theme. This vibrant frosting will enhance the look of your Candle Cakes.
Step 6: Assemble the Candle Cakes
Once the cakes have cooled, place one layer on a serving platter and generously spread frosting on top. Add the second layer, pressing down lightly. Ice the entire cake with the remaining frosting, smoothing it out for a polished look. This multi-layer approach not only adds height but also enhances the dramatic effect of your delightful Candle Cakes.
Step 7: Decorate with Candles
To finish your Candle Cakes, strategically insert edible candles into the top using a gentle twisting motion. This festive detail transforms your cake into an eye-catching centerpiece for any party. Sprinkle festive decorations, such as chocolate shavings or colorful sprinkles, around the candles to elevate the aesthetics, making your creation truly enchanting for Halloween celebrations.
Tips for the Best Candle Cakes
-
Choose Fresh Ingredients: Always use fresh baking powder and eggs for a perfect rise and texture; old ingredients can lead to disappointingly dense cakes.
-
Cool Completely: Allow the cakes to cool completely before frosting; this prevents the icing from melting and helps maintain a beautiful, finished look.
-
Layer for Impact: For heartier Candle Cakes, consider stacking multiple layers; it not only looks impressive but also adds delightful flavor variations to each slice.
-
Use Gel Food Coloring: Opt for gel food coloring to achieve vibrant Halloween hues without altering the cake’s texture; traditional liquid dyes can alter the batter consistency.
-
Embrace Creative Toppings: Get creative with your toppings; think orange sprinkles or dark chocolate shavings to enhance the spooky theme while making your Candle Cakes truly stand out.
-
Don’t Overmix: When combining wet and dry ingredients, mix just until combined; overmixing can result in tough, chewy cakes instead of light and airy Candle Cakes.
Variations & Substitutions for CANDLE CAKES
Customize your Candle Cakes for a unique twist that delights the senses and makes every bite special!
-
Gluten-Free: Substitute all-purpose flour with a 1:1 gluten-free flour blend to cater to your gluten-sensitive guests. This way, everyone can enjoy the delight!
-
Vegan Option: Replace eggs with applesauce or flax eggs and use vegan butter to create a plant-based treat that’s just as tasty. Perfect for your vegan friends!
-
Flavored Cake: Add 1 teaspoon of pumpkin spice or cocoa powder to the batter for seasonal flair or rich chocolatey goodness. A little twist can elevate the flavor profile!
-
Frosting Variations: Try cream cheese frosting instead of traditional buttercream for a tangy contrast. This adds a delightful twist to your sweet Candle Cakes!
-
Colorful Candles: Use decorative, edible candles in various colors for an extra festive touch. It’s eye-catching and enhances the playful atmosphere of your gathering!
-
Theme Sprinkles: Amp up the decoration by using themed sprinkles like bats, ghosts, or pumpkin shapes to match the Halloween spirit. Kids (and adults!) love a bit of extra whimsy.
-
Mini Candle Cakes: Bake the batter in a mini muffin tin for bite-sized versions of these delightful treats! They’re ideal for easy serving and snacking during your party.
-
Sweet Fillings: Consider adding a layer of fruit preserves or chocolate ganache between the cake layers for an indulgent surprise. A hidden treat can be a game-changer for dessert!
By embracing these variations, your Candle Cakes will not only light up the table but also cater to everyone’s taste buds. If you’re in the mood for more sweet treats, consider adding some Mini Vegan Biscoff Cheesecakes or indulge in the refreshing flavor of Mini Key Lime Cheesecakes.
Storage Tips for Candle Cakes
- Room Temperature: Store unrefrigerated Candle Cakes in an airtight container for up to 3 days. This keeps them moist and fresh, ready for your guests to enjoy.
- Fridge: If your frosting includes dairy, place leftover Candle Cakes in the refrigerator, tightly covered, for up to 5 days. Allow them to come to room temperature before serving for the best taste.
- Freezer: For longer storage, wrap individual Candle Cakes in plastic wrap and then in aluminum foil, freezing for up to 2 months. Thaw in the fridge overnight before enjoying.
- Reheating: These delightful Candle Cakes are best enjoyed cold or at room temperature. If needed, warm slightly in the microwave for a few seconds—this can enhance their sweetness and flavor.
Make Ahead Options
These delicious Candle Cakes are perfect for meal prep and can save you time on the day of your gathering! You can prepare the cake layers up to 24 hours in advance; simply bake, cool, and wrap them tightly in plastic wrap to prevent drying out. Additionally, you can mix the frosting and store it in the refrigerator for up to 3 days—just give it a quick whip to restore its fluffy texture before spreading it on your cakes. When you’re ready to serve, assemble the cakes and add the decorative candles and sprinkles for that festive touch. This way, your Candle Cakes will be just as delicious, but you’ll have more time to enjoy the festivities!
What to Serve with Spooky & Delicious: 10 Easy Halloween Party Foods
Treat your guests to a sensational experience by pairing these vibrant dishes with delightful sides and drinks that elevate the spooky atmosphere.
- Creepy Veggie Platter: A colorful assortment of fresh veggies adds balance. Pair with a spooky dip like ranch decorated with olive spiders–it’s a delicious conversation starter!
- Witch’s Brew Punch: This refreshing drink, made with citrus and fizz, perfectly complements the sweetness of the desserts while keeping the spirit of fun alive.
- Haunted Hummus: Serve this creamy spread with purple tortilla chips to match the Halloween theme. Its savory flavor pairs beautifully with your treats and offers a healthy option.
- Boozy Apple Cider: Warm spiced apple cider brings a cozy touch to your gathering. Add a splash of rum or bourbon to enhance the festive spirit!
- Ghostly Garlic Bread: Crunchy and cheesy, this bread is a delicious accompaniment to rich party foods, and you can easily cut it into ghost shapes for a fun effect.
- Chilling Cheese Board: A selection of cheeses and fruits adds sophistication. Use spooky design elements, like skeleton-shaped cheese, to tie it all together while satisfying savory cravings.
- Sweet Pumpkin Spice Cookies: These cookies tie in beautifully with the Halloween theme, offering a sweet treat that echoes the flavors of the season, complementing the richness of the main dishes.
- Dark Chocolate Mousse: A luscious, decadent dessert provides a delightful end to your meal. The richness pairs well with the lighter, playful treats, leaving everyone wanting more.
- Cinnamon Sugar Donut Holes: Either buy or make, these soft bites add a touch of sweetness that will have your guests reminiscing about traditional fall festivities.
Candle Cakes Recipe FAQs
What type of flour should I use for Candle Cakes?
You can use all-purpose flour for a fluffy base, but if you’re looking for a gluten-free option, I recommend a one-to-one gluten-free flour blend. It works surprisingly well and maintains that tender crumb we all love!
How should I store leftover Candle Cakes?
For room temperature storage, keep your unrefrigerated Candle Cakes in an airtight container for up to 3 days. If your frosting is dairy-based, transfer them to the fridge, tightly covered, where they’ll last for about 5 days. To serve, let them come to room temperature for the best texture and flavor.
Can I freeze Candle Cakes?
Absolutely! To freeze your delightful Candle Cakes, wrap each individual cake in plastic wrap, followed by aluminum foil. This method helps prevent freezer burn and allows them to stay fresh for up to 2 months. When you’re ready to enjoy, simply thaw them in the fridge overnight.
What if my Candle Cake batter is too thick?
If your batter seems overly thick, don’t worry! Gradually add a little more milk, a tablespoon at a time, and mix until you achieve a smooth, pourable consistency. It’s all about adjusting to get that perfect batter for your charming cakes.
Can I use vegan options for this recipe?
Yes indeed! You can easily swap out the eggs for unsweetened applesauce or flax eggs (mix 1 tablespoon of ground flaxseed with 2.5 tablespoons of water and let it sit for a few minutes to thicken). For the milk, any plant-based milk will work wonderfully, and using vegan butter in your frosting maintains the delightful taste and texture.
What should I do if my frosting is too runny?
If your frosting turns out runny, don’t panic! Just add more powdered sugar, a few tablespoons at a time, until it thickens up to the desired consistency. Make sure you sift it to avoid lumps; this will give your frosting that smooth and creamy look we all want in our Halloween treats!

Delicious Candle Cakes That Light Up Any Celebration
Ingredients
Equipment
Method
- Preheat your oven to 350°F (175°C). Grease and flour your cake pans.
- In a large mixing bowl, combine all-purpose flour, granulated sugar, baking powder, and salt. In a separate bowl, beat the eggs and mix in the milk and vanilla extract. Gradually add the wet mixture to the dry ingredients, stirring until smooth.
- Pour the prepared batter evenly into your greased cake pans, filling each about two-thirds full. Bake for 20-25 minutes, or until a toothpick comes out clean.
- Remove the cake pans from the oven and let them cool on a wire rack for about 10 minutes. Invert them onto the rack to cool completely.
- In a mixing bowl, cream together softened butter and powdered sugar until fluffy. Add milk as needed for consistency and incorporate food coloring.
- Place one layer of cake on a serving platter, spread frosting on top, add the second layer, and ice the entire cake with the remaining frosting.
- Insert edible candles into the top of the cake and sprinkle with decorations like chocolate shavings or colorful sprinkles.