
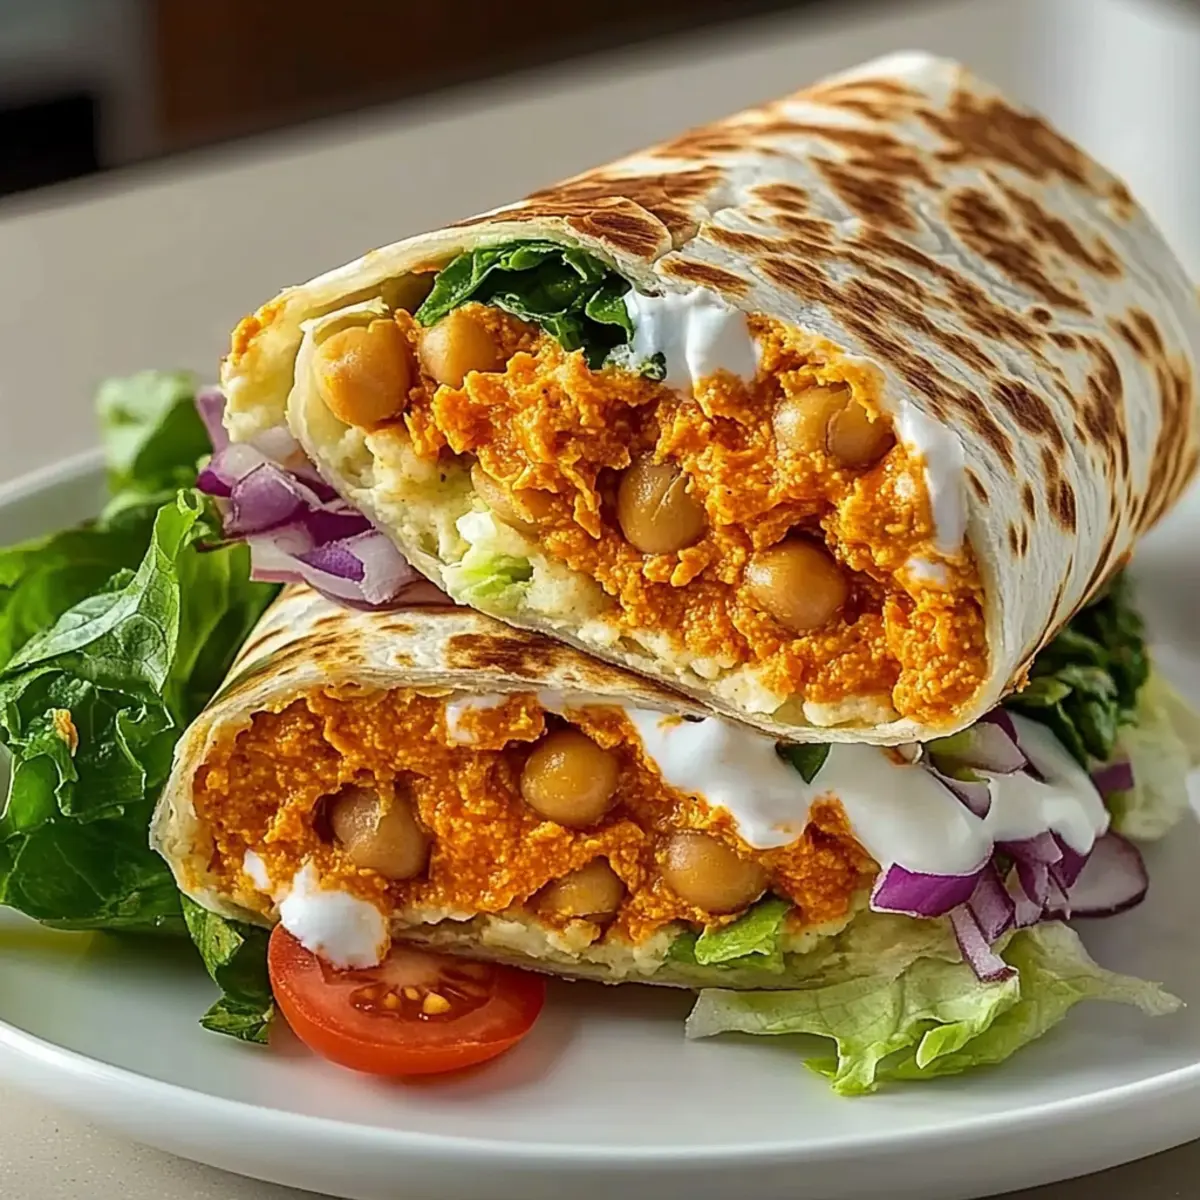
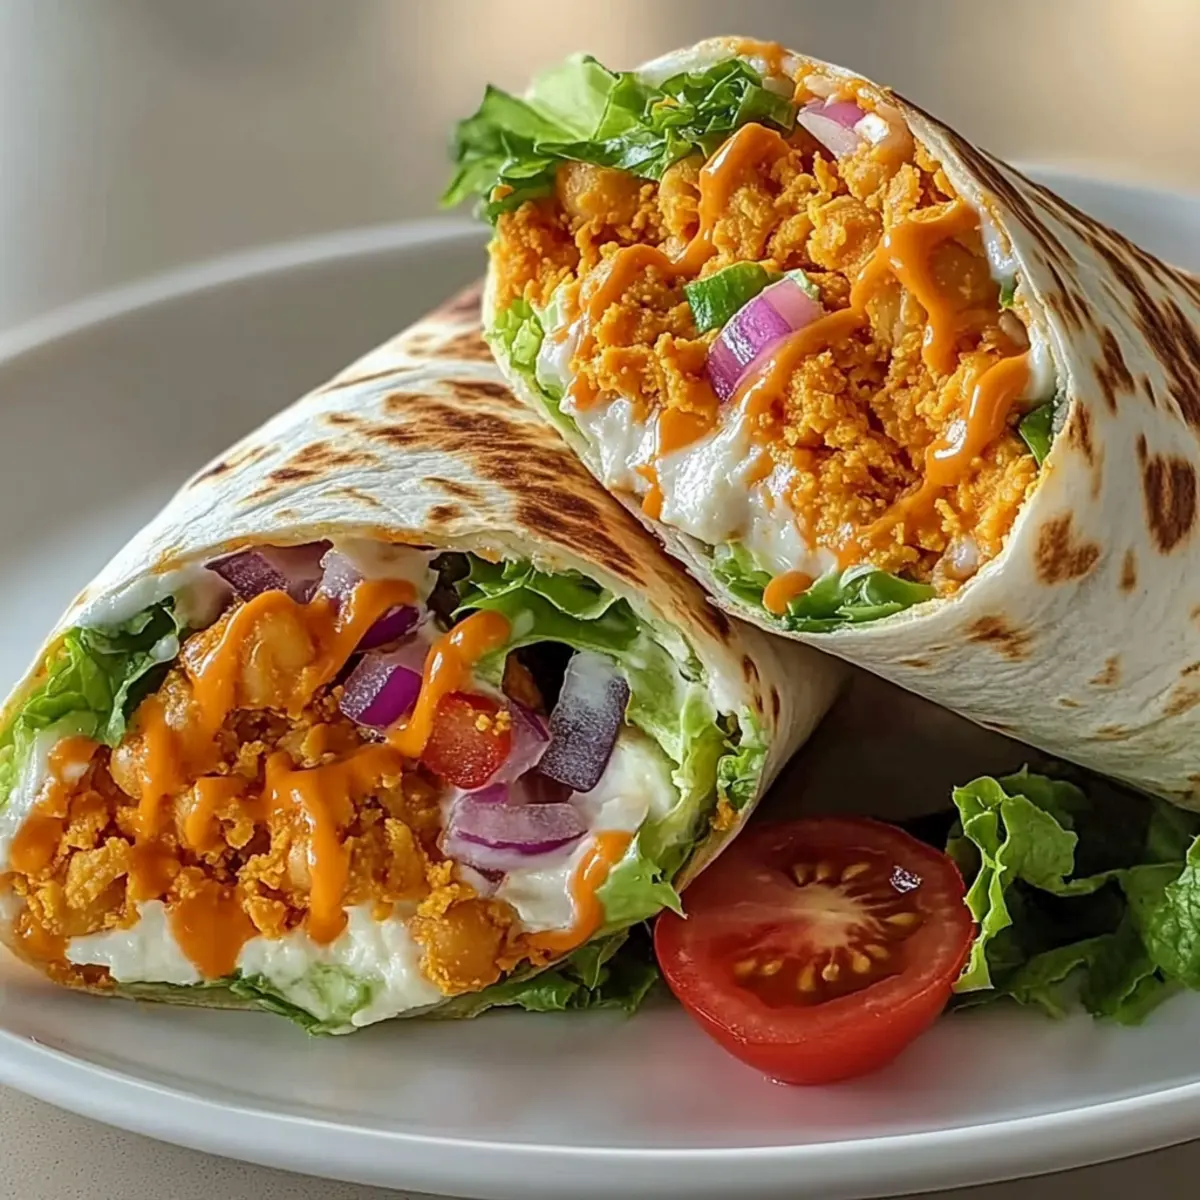
As I watched the rain patter against my window, I craved something vibrant and satisfying—enter the 15-Minute Buffalo Chickpea Wraps. These spicy delights offer a wonderful blend of creamy chickpeas and zesty buffalo sauce that instantly brightens any gray day. Perfectly suited for those of us busy earning our keep but still longing for a delicious homemade meal, these wraps combine speed with flavor in a way that’s simply irresistible. Packed with plant-based protein, they’re not just quick to whip up; they also cater beautifully to those looking for gluten-free or vegan options. With a splash of fresh veggies and a kick of heat, these wraps are a delightful spin on lunch or dinner! Ready to dive into this whirlwind of flavor?
Why You’ll Crave These Wraps?
Quick Prep Time: You’ll love how these wraps come together in just 15 minutes, making them the perfect solution for busy weeknights or lunch breaks.
Bold and Zesty: The combination of Buffalo hot sauce and creamy chickpeas delivers an explosion of flavor that tantalizes your taste buds with every bite.
Versatile Options: Whether you’re adhering to a gluten-free or vegan diet, these wraps can be easily adapted without sacrificing flavor—just see our suggestions for easy substitutions!
Protein-Packed Goodness: Thanks to chickpeas, you’ll enjoy a hefty dose of plant-based protein, ensuring you stay full and satisfied longer.
Crowd-Pleaser: These wraps are guaranteed to impress friends and family alike; serve them at your next gathering or lunch meeting alongside some crunchy vegetable sticks or sweet potato fries for an enticing meal.
Meal Prep Friendly: Perfect for preparing in advance, feel free to assemble the chickpea filling ahead of time while keeping the wraps separate to maintain freshness.
Buffalo Chickpea Wraps Ingredients
For the Chickpea Filling
• Chickpeas – Provide protein and a creamy texture; feel free to substitute with canned white beans or cooked lentils if needed.
• Vegan Mayonnaise or Greek Yogurt – Acts as a creamy binder; choose based on your dietary preference.
• Buffalo Hot Sauce – Delivers spiciness; adjust quantity according to your desired heat level.
• Fresh Lemon Juice – Adds brightness and acidity; there’s no substitution needed.
• Celery – Adds crunch; you can swap it out for diced bell peppers for extra flavor.
• Grated Carrot – Provides sweetness and color; can be omitted for simplicity.
• Red Onion – Contributes flavor and crunch; substitute with green onions for a milder taste.
• Fresh Parsley – Enhances freshness; no substitutions necessary.
• Garlic Powder – Adds depth of flavor; feel free to use fresh garlic if you prefer.
• Smoked Paprika – Imparts a unique smoky flavor; can be replaced with regular paprika.
• Salt and Pepper – For seasoning; adjust to your taste.
For the Wraps
• Tortillas (Flour or Whole Wheat) – Base for the wraps; gluten-free tortillas are recommended for those on a gluten-sensitive diet.
• Shredded Lettuce – Adds freshness and crunch; spinach can be an alternate for added nutrients.
• Diced Tomatoes – Provides juiciness and flavor; no substitutions necessary.
• Shredded Cheese (Optional) – Adds creaminess; substitute with vegan cheese for plant-based diets.
• Ranch or Blue Cheese Dressing (Optional) – Enhances flavor; look for vegan versions if desired.
Step‑by‑Step Instructions for Buffalo Chickpea Wraps
Step 1: Mash the Chickpeas
Begin by draining and rinsing one can of chickpeas. In a medium bowl, use a fork or potato masher to mash the chickpeas until they reach a creamy yet chunky consistency, ensuring some texture remains. This process should take about 3 to 5 minutes, creating a perfect base for your Buffalo chickpea wraps.
Step 2: Combine the Filling
To the mashed chickpeas, add two tablespoons of vegan mayonnaise or Greek yogurt, followed by three tablespoons of Buffalo hot sauce and the juice of half a lemon. Add in one diced celery stalk, a grated carrot, a small red onion (finely chopped), a handful of fresh parsley, and a sprinkle of garlic powder, smoked paprika, salt, and pepper. Mix thoroughly for about 2 minutes until all ingredients are well combined.
Step 3: Prepare the Tortilla Base
Lay out your tortillas on a clean surface or large plate. Evenly distribute a handful of shredded lettuce and a few diced tomatoes on each tortilla, creating a colorful and fresh base for your Buffalo chickpea filling. This step will only take about 2 minutes and sets the stage for a lovely wrap.
Step 4: Fill the Wraps
Spoon an ample amount of the prepared Buffalo chickpea salad onto the center of each tortilla. If desired, drizzle with ranch or blue cheese dressing for an extra layer of flavor. Ensure you leave some space around the edges to make rolling easier. This step takes about 1 to 2 minutes, allowing you to manage portions comfortably.
Step 5: Roll the Wraps
Fold in the sides of each tortilla, then firmly roll from the bottom to the top, encasing the filling securely. Be careful not to squeeze too tightly, as you want to maintain the integrity of the Buffalo chickpea wraps. This step should take about 2 minutes, ensuring each wrap is neatly formed for serving or packing.
Step 6: Serve or Pack
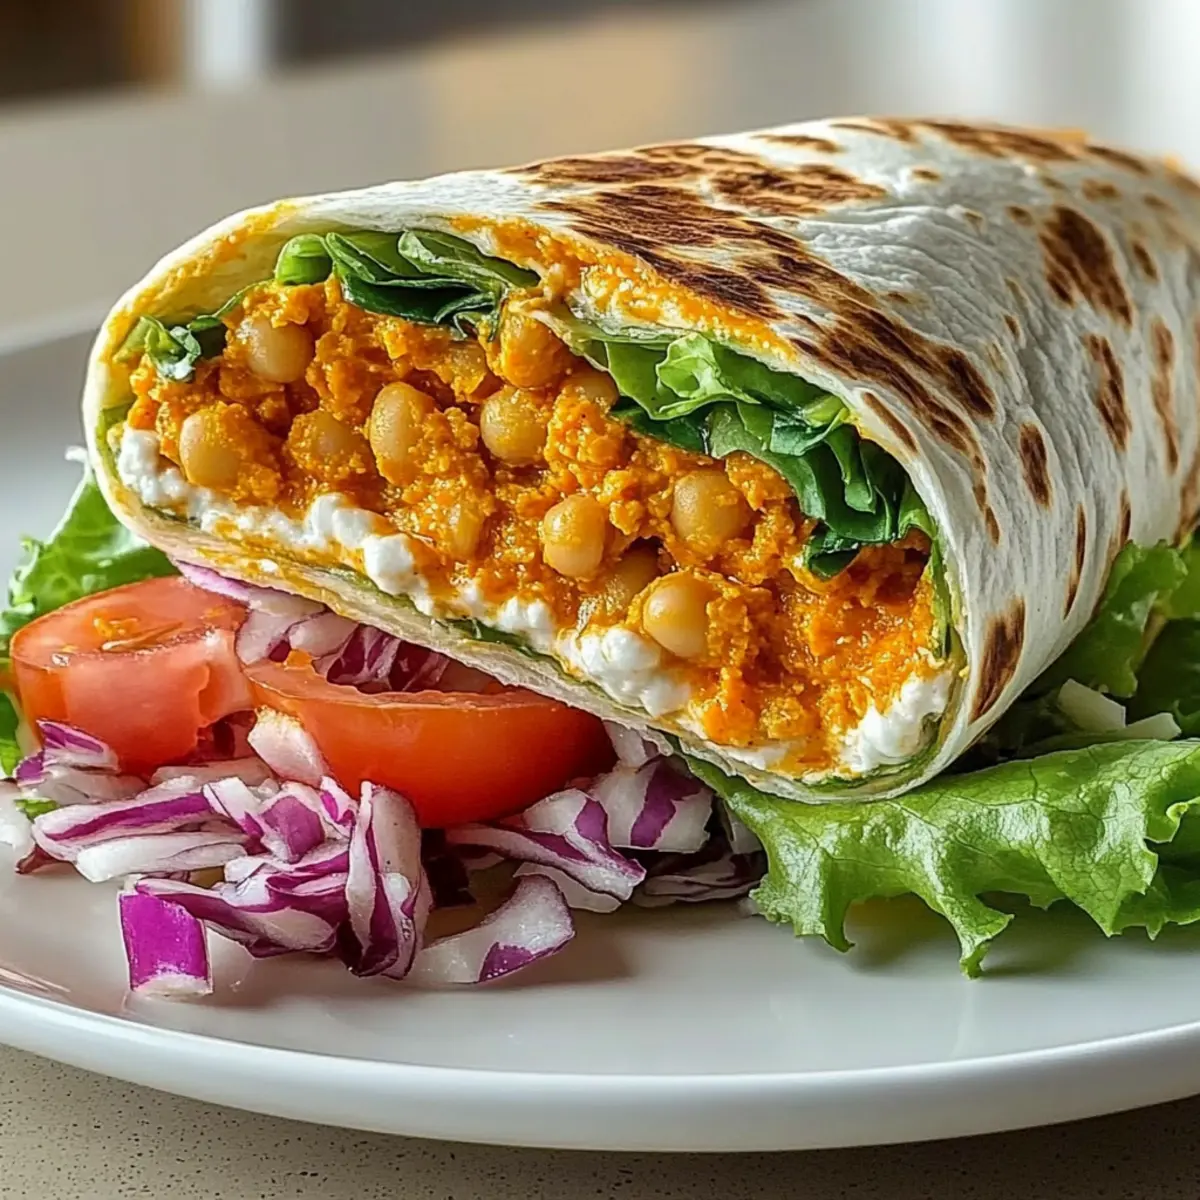
Cut each wrap in half diagonally for an attractive presentation if serving immediately. Alternatively, wrap them in foil for easy transport if you’re packing for lunch. These wraps can be enjoyed right away or stored in the fridge for up to three days, making them a versatile option for any meal.
Buffalo Chickpea Wraps Variations
Feel free to get creative with these wraps and tailor them to your taste preferences!
-
Gluten-Free: Opt for gluten-free tortillas to make these wraps suitable for those with gluten sensitivities; they taste just as great!
-
Vegan Delight: Swap the Greek yogurt for a creamy plant-based mayo to keep it fully vegan without sacrificing flavor.
-
Spicy Twist: Add jalapeños or a dash of cayenne pepper for an extra kick if you love your wraps with a fiery bite. Your taste buds will thank you!
-
Creamy Avocado: Incorporate slices of ripe avocado for a luscious, creamy texture that complements the spiciness beautifully. This addition also brings along healthy fats.
-
Additional Veggies: Try adding diced bell peppers or cucumbers for a refreshing crunch that enhances the overall flavor profile in each bite.
-
Cheese Lovers: For those who enjoy a cheesy touch, sprinkle some shredded cheddar or crumbled feta into the filling. If you’re vegan, reach for a plant-based cheese instead.
-
Wrap it Up: Experiment with different wrap styles, like cutting the wraps into pinwheels for fun finger food—perfect for gatherings or meal prep!
-
Flavor Boost: Drizzle with balsamic glaze or toss in some cilantro for fresh herbaceous notes that brighten every bite. Pair it well with a side of Buffalo Tuna Salad for a satisfying lunch or dinner.
Embark on a tasty journey with these variations, and enjoy the endless possibilities of flavor!
How to Store and Freeze Buffalo Chickpea Wraps
Fridge: Store any leftover Buffalo chickpea filling in an airtight container for up to 3 days to keep it fresh and tasty.
Wraps: If you’ve made the wraps, store them in a sealed container in the fridge for up to 2 days. To maintain crunch, it’s best to keep the filling and tortillas separate until ready to eat.
Freezer: For longer storage, freeze the chickpea filling in a freezer-safe container for up to 3 months. Thaw in the fridge overnight before use.
Reheating: To enjoy your wraps warm, reheat in a microwave for about 30-60 seconds or on a skillet for a few minutes until heated through, ensuring the Buffalo flavor shines through!
Make Ahead Options
These Buffalo Chickpea Wraps are fantastic for meal prep, allowing you to enjoy a delicious and satisfying meal without the last-minute scramble! You can prepare the Buffalo chickpea filling up to 3 days in advance and store it in an airtight container in the refrigerator. For best results, keep the tortillas separate until you’re ready to serve to prevent sogginess. When it’s time to eat, simply fill the tortillas with the prepared filling, add your choice of toppings, and roll them up. This way, you’ll have fresh, flavorful wraps that taste just as delicious as when made on the spot, saving you precious time during busy weekdays!
Expert Tips for Buffalo Chickpea Wraps
• Prep Ahead: Prepare the chickpea filling in advance but roll the wraps just before serving to keep them fresh and crunchy.
• Heat Adjustments: Tailor the spice level by starting with a small amount of Buffalo sauce. You can always add more if you love the heat!
• Freshness Matters: Use fresh veggies to enhance flavor and texture. Diced tomatoes, shredded lettuce, and crisp celery add delightful crunch to your Buffalo chickpea wraps.
• Tortilla Type: Choose gluten-free tortillas if you’re sensitive to gluten. This makes the wraps accessible to everyone without sacrificing taste or texture!
• Store Wisely: If you have filling left over, store it in an airtight container in the fridge for up to three days. Best kept separate from the wraps to prevent sogginess.
• Roll it Right: When rolling your wraps, don’t overstuff—this ensures they’ll seal properly and makes for an easier, mess-free experience!
What to Serve with 15-Minute Buffalo Chickpea Wraps
There’s nothing quite like a colorful, fulfilling meal that complements the bold flavors of these wraps.
- Crunchy Vegetable Sticks: A vibrant assortment of carrots, cucumbers, and bell peppers provides a refreshing crunch that mirrors the wrap’s texture while adding a nutritious boost.
- Sweet Potato Fries: Crispy on the outside and soft on the inside, sweet potato fries offer a lovely contrast to the spiciness of the wraps, making each bite a delightful experience.
- Creamy Coleslaw: A tangy, creamy slaw can cool down the heat from the Buffalo sauce, allowing the flavors of the wraps to shine without overpowering your palate.
- Quinoa Salad: Light yet protein-packed, a zesty quinoa salad can complement the wraps beautifully, adding an element of freshness to each meal.
- Fruit Salad: A mix of seasonal fruits adds a sweet and refreshing touch, balancing the spiciness of the Buffalo chickpea wraps while invigorating your taste buds.
- Iced Tea or Lemonade: A chilled beverage, like homemade lemonade or herbal iced tea, can offer a refreshing reprieve from the wrap’s heat, making your meal feel even more special.
- Avocado Slices: Creamy avocado sprinkled with salt and lime offers a smooth, rich counterpart to the spicy filling, enhancing each bite with a layer of luxurious flavor.
- Chocolate Chip Cookies: Satisfy your sweet tooth with warm, gooey cookies for dessert, contrasting beautifully with the heat from the wraps. Enjoy them with a tall glass of milk for the ultimate ending!

Buffalo Chickpea Wraps Recipe FAQs
How do I choose ripe chickpeas?
Absolutely! When selecting chickpeas, whether canned or dried, go for those that are firm yet tender. For canned chickpeas, look for ones without dark spots or excessive softness. If you’re cooking dried chickpeas, soak them for 8 hours then cook until they’re soft but not mushy for the best texture.
What’s the best way to store leftover Buffalo chickpea filling?
Very! Store any leftover filling in an airtight container in the fridge for up to 3 days. This keeps your filling fresh. If possible, store it separately from the tortillas to prevent the wraps from becoming soggy, maintaining that delightful crunch until you’re ready to eat.
Can I freeze Buffalo chickpea filling?
Absolutely! You can freeze the chickpea filling for up to 3 months. To do this, place the filling in a freezer-safe container, making sure to leave some space for expansion. When you’re ready to enjoy, simply thaw it in the fridge overnight before assembling your wraps.
What should I do if my wraps turn out soggy?
If your wraps end up soggy, it’s often due to the filling sitting too long in the tortillas. To prevent this, assemble your wraps right before you eat. If they are already soggy, try wrapping them in a paper towel and microwaving for 15-30 seconds to regain some of that crunch!
Are these wraps suitable for those with food allergies?
Very! These Buffalo Chickpea Wraps can be easily customized for various dietary needs. If you have a gluten intolerance, I recommend using gluten-free tortillas. Additionally, check your mayonnaise or yogurt for allergens, and use vegan cheese to cater to dairy sensitivities. Always seek ingredient labels to ensure safety!
How long can I keep assembled wraps in the fridge?
Great question! If you’ve assembled the Buffalo chickpea wraps already, aim to eat them within 1 to 2 days for the best flavor and texture. After that, they may be tendency to get soggy. For optimal freshness, store the filling and wraps separately until you’re ready to indulge!
Buffalo Chickpea Wraps: Spicy, Healthy, 15-Minute Delight
Ingredients
Equipment
Method
- Mash the chickpeas until creamy yet chunky in texture.
- Combine all filling ingredients in a bowl and mix thoroughly.
- Lay out tortillas and distribute shredded lettuce and diced tomatoes evenly on each.
- Spoon the chickpea mixture onto the center of each tortilla.
- Roll the tortillas firmly from bottom to top, encasing the filling.
- Cut wraps diagonally to serve or wrap in foil for transport.