
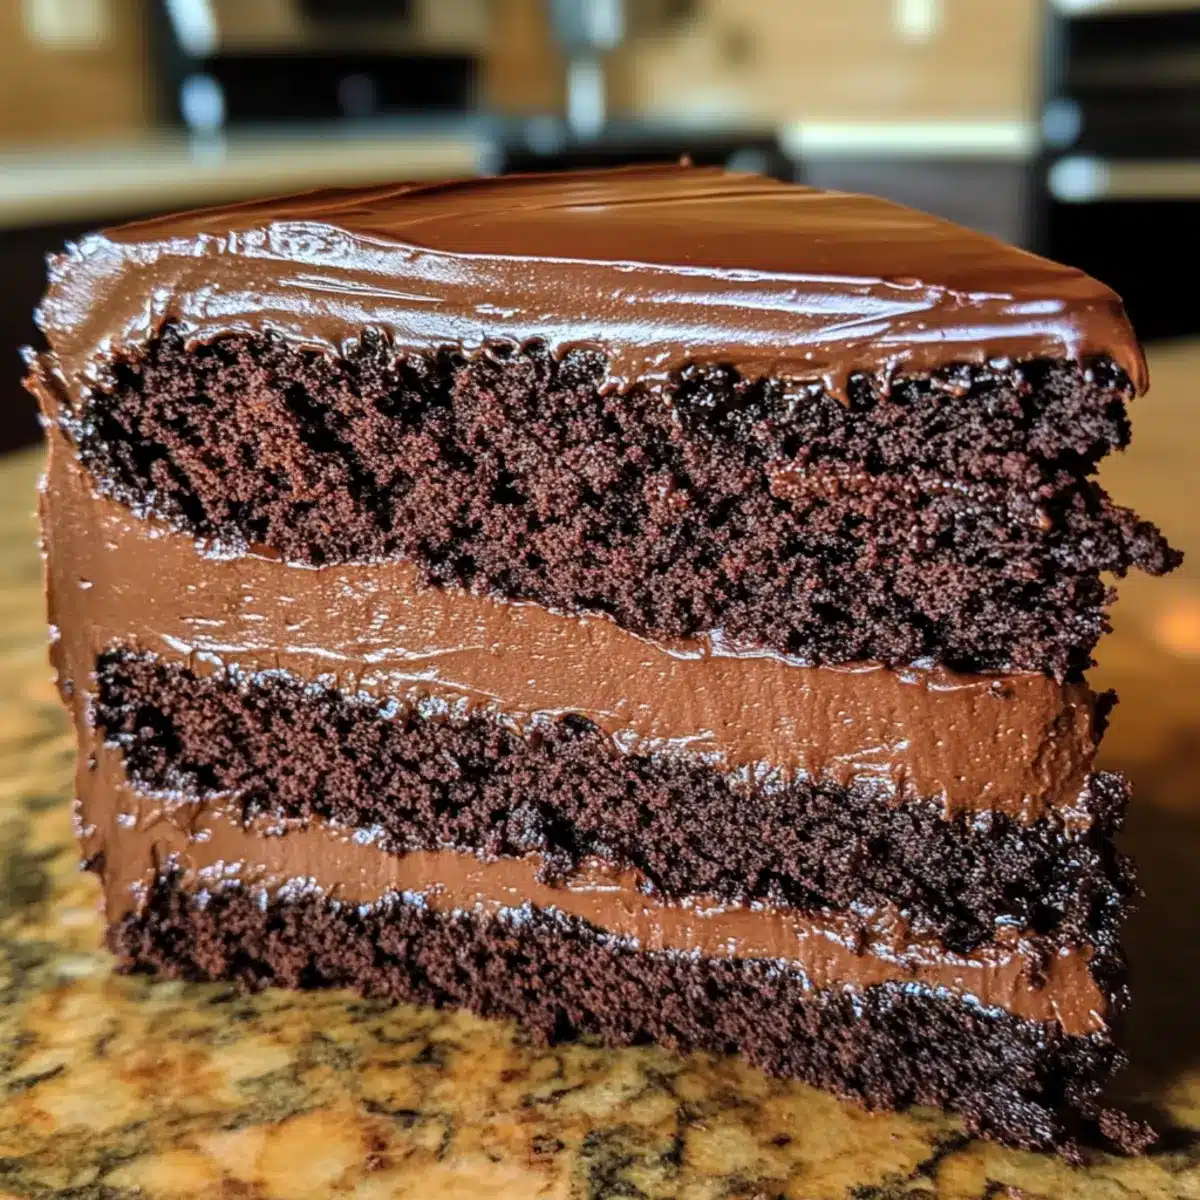
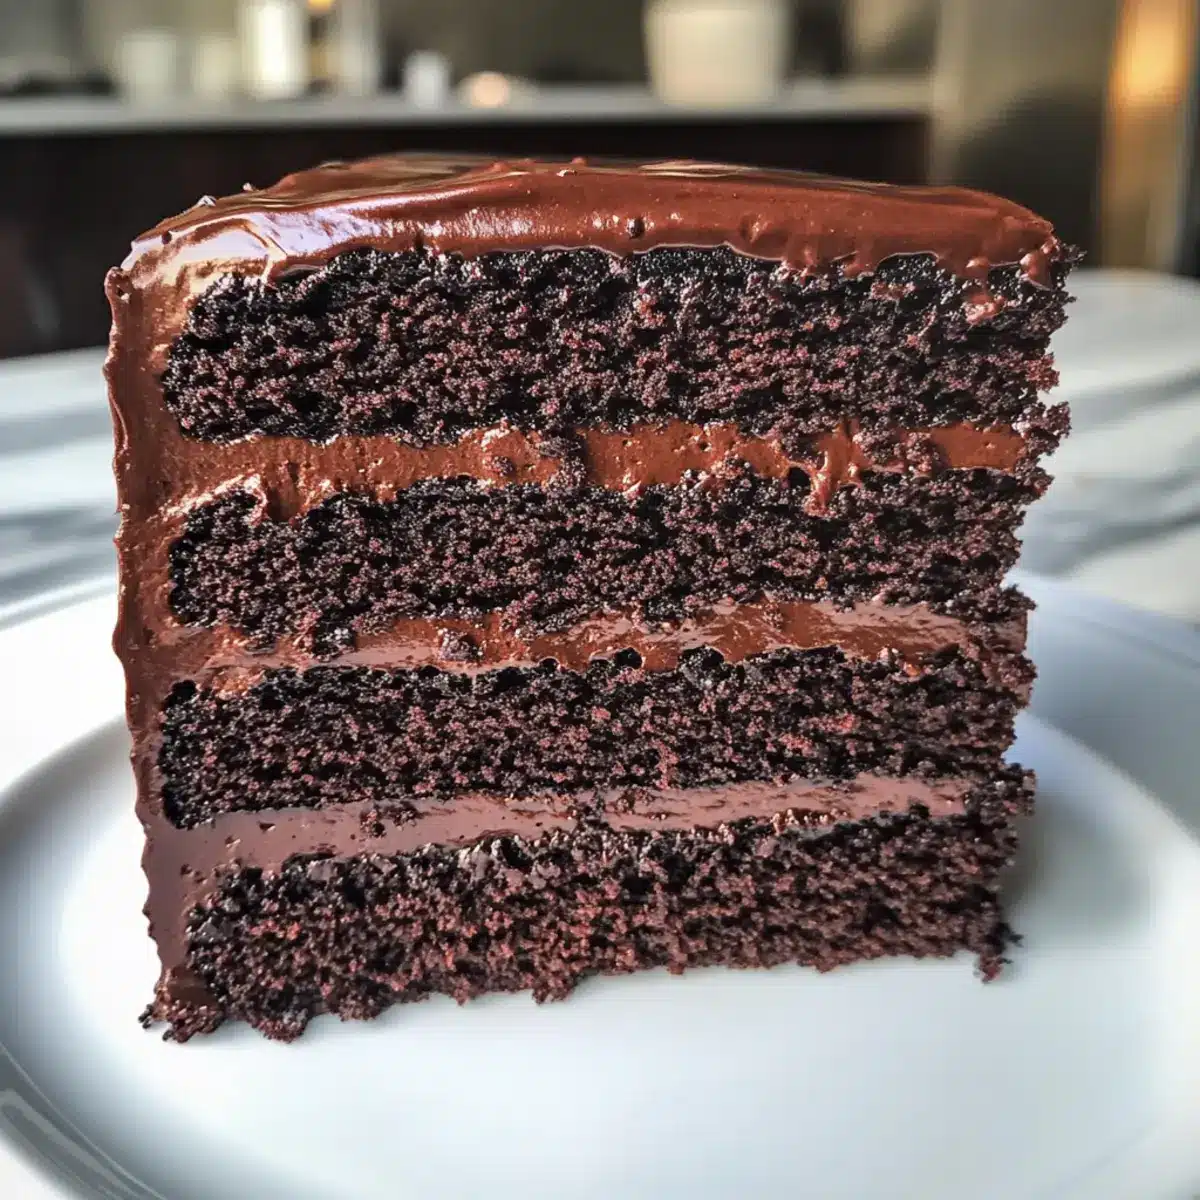
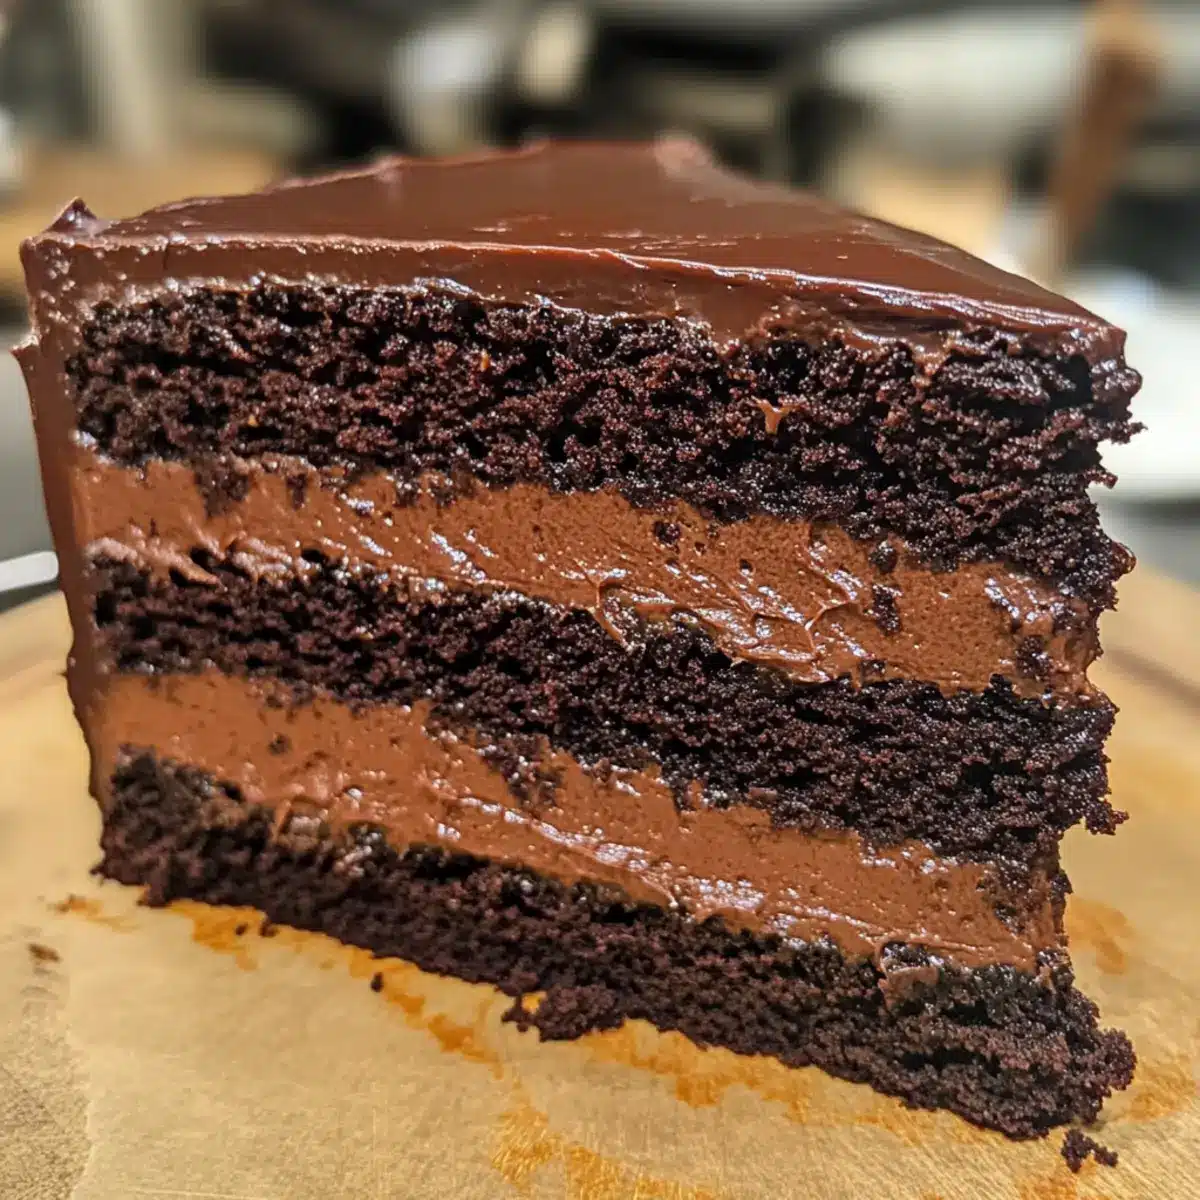
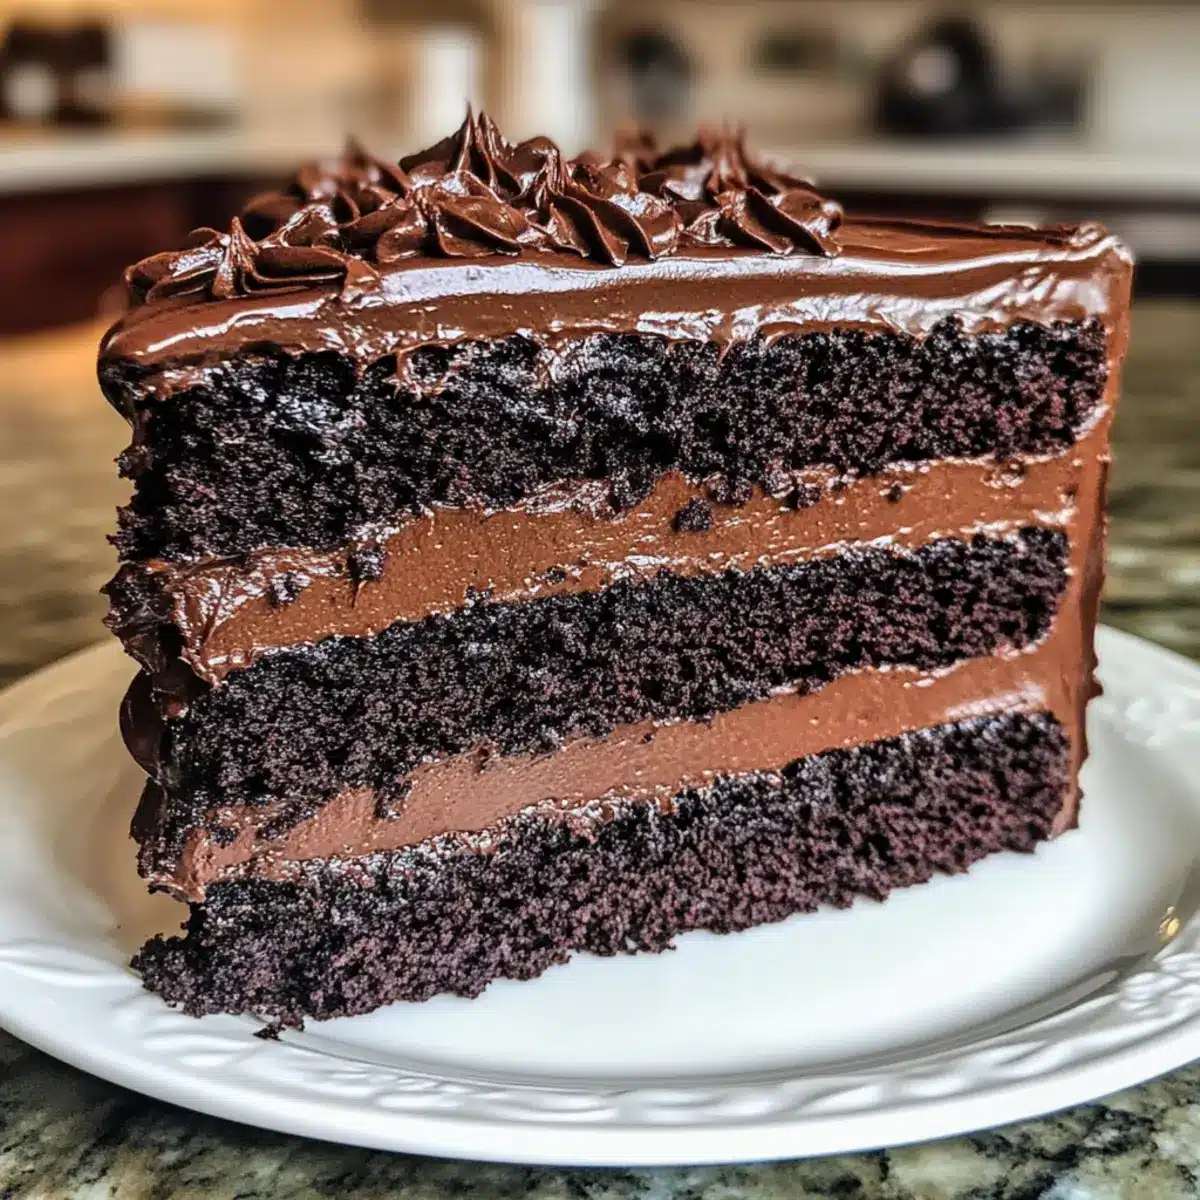
Under the soft glow of vintage kitchen lights, I found myself mesmerized by a slice of history: the Brooklyn Blackout Cake. This iconic chocolate dessert transports you back to World War II, when its origins became a comforting treat amidst uncertainty. It’s not just any cake; it’s a moist and rich indulgence that invites you to savor each bite. The allure of creating this classic at home is irresistible, especially with its quick prep and crowd-pleasing charm. Unleash your inner pastry chef and impress friends and family with decadent layers of chocolate goodness. Curious how to bring this slice of nostalgia to your table? Let’s dive into the recipe!
Why is Brooklyn Blackout Cake a Must-Try?
Indulgent Delight: This cake boasts an incredibly moist and rich texture that chocolate lovers will adore. Historic Charm: With roots tracing back to World War II, each bite tells a delicious story that makes it unique. Versatile Options: Experiment with various fillings and frostings, adding your personal touch to this classic dessert. Quick Prep Time: Whip it up in no time, impressing your guests with minimal effort! Pair it with a scoop of vanilla ice cream or a dollop of whipped cream for the ultimate experience. Ready to savor a slice of nostalgia?
Brooklyn Blackout Cake Ingredients
For the Cake
- All-purpose flour – Provides structure and texture; gluten-free flour can be a great substitute.
- Granulated sugar – Adds sweetness and moisture; consider brown sugar for a deeper flavor.
- Unsweetened cocoa powder – Essential for that rich chocolate flavor; Dutch-process cocoa enhances the taste.
- Baking powder – Acts as a leavening agent for a light rise; ensure it’s fresh for the best results.
- Salt – Balances the flavors; sea salt can elevate the cake with a gourmet touch.
- Eggs – Bind the ingredients while adding moisture; use flax eggs for a vegan alternative.
- Milk – Contributes to the cake’s richness; almond milk works well as a dairy-free option.
- Vegetable oil – Keeps the cake moist; melted butter can provide a richer taste.
For the Filling
- Chocolate filling – Traditional choice for the center; creative alternatives include raspberry or caramel.
For the Topping
- Whipped cream – A perfect topping for serving; replace with coconut cream for a non-dairy twist.
- Fresh berries – Optional garnish for a vibrant presentation; seasonal berries are best for freshness.
By gathering these ingredients, you’re one step closer to creating your very own Brooklyn Blackout Cake that will have everyone asking for seconds!
Step‑by‑Step Instructions for Brooklyn Blackout Cake
Step 1: Preheat the Oven
Begin by preheating your oven to 350°F (175°C). This ensures ideal baking conditions for your Brooklyn Blackout Cake, creating that perfect rise. While the oven warms up, grease and flour two 9-inch round cake pans to prevent sticking, preparing them for the rich chocolate batter.
Step 2: Mix the Dry Ingredients
In a large mixing bowl, combine 1 ¾ cups of all-purpose flour, 2 cups granulated sugar, ¾ cup unsweetened cocoa powder, 1 ½ teaspoons baking powder, and 1 teaspoon salt. Whisk the mixture thoroughly until everything is well distributed. This dry blend will form the foundation of your decadent cake, so ensure it looks uniform and inviting!
Step 3: Combine the Wet Ingredients
In a separate bowl, whisk together 2 large eggs, 1 cup of milk, and ½ cup of vegetable oil until you achieve a smooth consistency. The wet ingredients add moisture and richness to the Brooklyn Blackout Cake, yielding that delightful texture. Ensure there are no lumps for the best mixing experience.
Step 4: Mix Dry and Wet Ingredients
Gradually pour the wet mixture into your bowl of dry ingredients, stirring gently with a spatula until just combined. Be mindful not to overmix; the batter should be slightly lumpy but cohesive. This step is crucial to achieving the moist and tender crumb that defines your chocolate hero!
Step 5: Bake the Cakes
Divide the batter evenly between the prepared cake pans and smooth the tops. Place them in the preheated oven, allowing them to bake for 25-30 minutes or until a toothpick inserted into the center comes out clean. Keep an eye on them, the tops should look firm and slightly domed, enticingly aromatic!
Step 6: Cool the Cakes
Once baked, remove the cake pans from the oven and let them cool for about 10 minutes. Carefully transfer the cakes to wire racks to cool completely. This cooling stage is vital since assembling the Brooklyn Blackout Cake with warm layers will lead to a messy filling situation!
Step 7: Assemble the Cake
Once the cakes are completely cooled, place one layer on a serving plate and generously spread your chocolate filling in the center. Top with the second layer, matching it up beautifully. Frost the top and sides with remaining chocolate filling or ganache, ensuring each surface is lavishly coated for that decadent indulgence.
Step 8: Garnish and Serve
Finally, decorate your Brooklyn Blackout Cake with a dollop of whipped cream and fresh berries for a burst of color. This final touch adds elegance and richness, inviting everyone to dig into this iconic chocolate dessert. Slice up, serve, and enjoy the smiles this treat brings to your table!
Expert Tips for Brooklyn Blackout Cake
-
Room Temperature Ingredients: Ensure all your ingredients, especially eggs and milk, are at room temperature for optimal mixing and a fluffier cake.
-
Avoid Overmixing: Stir your batter just until combined to prevent a dense texture. A few lumps are okay—this helps maintain that moist cake crumb.
-
Cool Completely: Allow your cake layers to cool completely before assembling. Warm layers can melt the filling, leading to a gooey mess instead of a beautiful, layered dessert.
-
Level the Layers: Use a serrated knife to trim the tops of the cakes for even layers. This simple step will give your Brooklyn Blackout Cake a professional touch during assembly.
-
Filling Variations: Experiment with your filling! Try adding raspberry jam or caramel for a delightful twist alongside the chocolate filling—personalize it and make it your own!
Make Ahead Options
Making the Brooklyn Blackout Cake ahead of time is a fantastic way to save precious minutes during busy moments, without sacrificing taste! You can prepare the cake layers up to 3 days in advance; simply allow them to cool completely, wrap them tightly in plastic wrap, and refrigerate. The chocolate filling can also be made 24 hours ahead—store it in an airtight container in the fridge to keep it fresh. When you’re ready to serve, allow the layers to come to room temperature for optimal flavor, then assemble and frost the cake as directed. This way, you can enjoy decadent chocolate indulgence with minimal stress on the day of your gathering!
Storage Tips for Brooklyn Blackout Cake
- Room Temperature: Keep the cake at room temperature for up to 1 day if it’s frosted. Make sure it’s covered to prevent it from drying out.
- Fridge: Store leftover Brooklyn Blackout Cake in an airtight container in the refrigerator for up to 5 days. Allow it to come to room temperature before serving for the best texture.
- Freezer: If you want to keep it longer, wrap slices of cake tightly in plastic wrap and then in aluminum foil. It can freeze for up to 3 months; just thaw in the fridge overnight when you’re ready to enjoy it again.
- Reheating: For a warm treat, microwave individual slices for about 10-15 seconds. This will make the chocolate filling extra gooey and delightful!
What to Serve with Brooklyn Blackout Cake
The perfect dessert deserves the perfect companions to elevate your dining experience.
- Creamy Vanilla Ice Cream: A scoop of this classic flavor adds a delightful contrast to the rich chocolate, making each bite even more indulgent.
- Fresh Berries: The tartness of raspberries or strawberries cuts through the decadence, providing a refreshing balance that brightens your plate.
- Espresso or Coffee: A warm cup of coffee enhances the deep chocolate flavor, creating a cozy atmosphere for your dessert time. The bitterness of espresso complements the cake’s sweetness beautifully.
- Chocolate Ganache Drizzle: Additional chocolate elevates the dessert experience, giving every slice extra richness and a touch of elegance.
- Whipped Cream: A dollop of homemade whipped cream adds lightness and a touch of sweetness, making your Brooklyn Blackout Cake a truly dreamy delight!
- Salted Caramel Sauce: Drizzling this over your cake provides a luscious texture and a flavor contrast that is simply divine.
Enjoy exploring these delightful pairings as you savor your Brooklyn Blackout Cake!
Brooklyn Blackout Cake Variations
Get ready to elevate your baking game and explore some delightful twists on the classic Brooklyn Blackout Cake!
- Gluten-Free: Substitute all-purpose flour with a 1:1 gluten-free baking blend for a deliciously moist cake everyone can enjoy.
- Nutty Addition: Mix in half a cup of chopped walnuts or pecans into the batter for a satisfying crunch and added richness.
- Fruit Filling: Swap the chocolate filling with raspberry or cherry preserves to introduce a fruity flavor that perfectly balances the chocolatey cake.
- Dairy-Free Dream: Use almond milk and coconut cream in place of regular milk and whipped cream to create a creamy, non-dairy treat.
- Zesty Notes: Add a teaspoon of orange zest to the batter for a refreshing citrus twist that accentuates the chocolate flavor beautifully.
- Mocha Infusion: Incorporate a tablespoon of instant coffee granules into the batter for a subtle mocha flavor that chocolate lovers will adore.
- Spicy Kick: Add a pinch of cayenne pepper or chili powder in the batter for a surprising heat that pairs remarkably with chocolate.
- Layered Indulgence: Create a three-layer cake by dividing your batter into three pans. Alternate filling flavors for each layer to surprise your taste buds with every bite!
Feel inspired? You can even pair your Brooklyn Blackout Cake with a scoop of vanilla ice cream for a perfect dessert moment—or, if you’re in the mood for something lighter, serve it alongside some Lemon Ricotta Pancakes for a delightful brunch treat!
Brooklyn Blackout Cake Recipe FAQs
What type of flour should I use for the Brooklyn Blackout Cake?
I recommend using all-purpose flour for the best structure and texture. If you need a gluten-free option, feel free to substitute with a gluten-free flour blend. Just ensure it’s a 1:1 substitute for optimal results.
How should I store the Brooklyn Blackout Cake?
Store your cake in an airtight container at room temperature for up to 1 day if it’s frosted. If you have leftovers, transfer the cake to the fridge, where it will stay fresh for up to 5 days. Allow it to come to room temperature before serving—this helps restore its moisture and flavor.
Can I freeze Brooklyn Blackout Cake, and how?
Absolutely! To freeze, wrap individual slices tightly in plastic wrap, then wrap them again in aluminum foil to prevent freezer burn. This way, you can enjoy the cake up to 3 months later! When you’re ready to indulge, just thaw it in the fridge overnight to retain that delicious texture.
What common issues should I be aware of when baking this cake?
One common issue is overmixing the batter, which leads to a dense cake. Mix just until combined; a few lumps are perfectly fine! Additionally, ensure your baking powder is fresh for the best rise. If your cake layers are domed on top, simply trim them with a serrated knife for level layering.
Is there a way to accommodate dietary needs, like allergies?
Definitely! For a vegan version, utilize flax eggs instead of regular eggs and replace the milk with almond or oat milk. If you’re considering nut allergies, you can skip using almond milk and choose a soy or oat milk alternative instead. Always check for specific allergies with each ingredient used.
Can I add other flavors or variations to the filling?
Yes, the more the merrier! Get creative by swapping the chocolate filling for fruit-based options like raspberry jam or caramel. You can even add chopped nuts or chocolate chips to the batter for a delightful texture twist. Personalizing this cake is part of the fun!
Decadent Brooklyn Blackout Cake You Must Try Today
Ingredients
Equipment
Method
- Preheat the oven to 350°F (175°C) and grease and flour two 9-inch round cake pans.
- In a mixing bowl, combine the dry ingredients: flour, sugar, cocoa powder, baking powder, and salt. Whisk well.
- In another bowl, whisk together the eggs, milk, and vegetable oil until smooth.
- Gradually pour the wet mixture into the dry ingredients, stirring gently until just combined.
- Divide the batter between the prepared cake pans and bake for 25-30 minutes until a toothpick comes out clean.
- Let the cakes cool for about 10 minutes in the pans, then transfer to wire racks to cool completely.
- Once cooled, place one layer on a plate, spread chocolate filling, and top with the second layer, frosting the cake.
- Garnish with whipped cream and fresh berries before serving.