
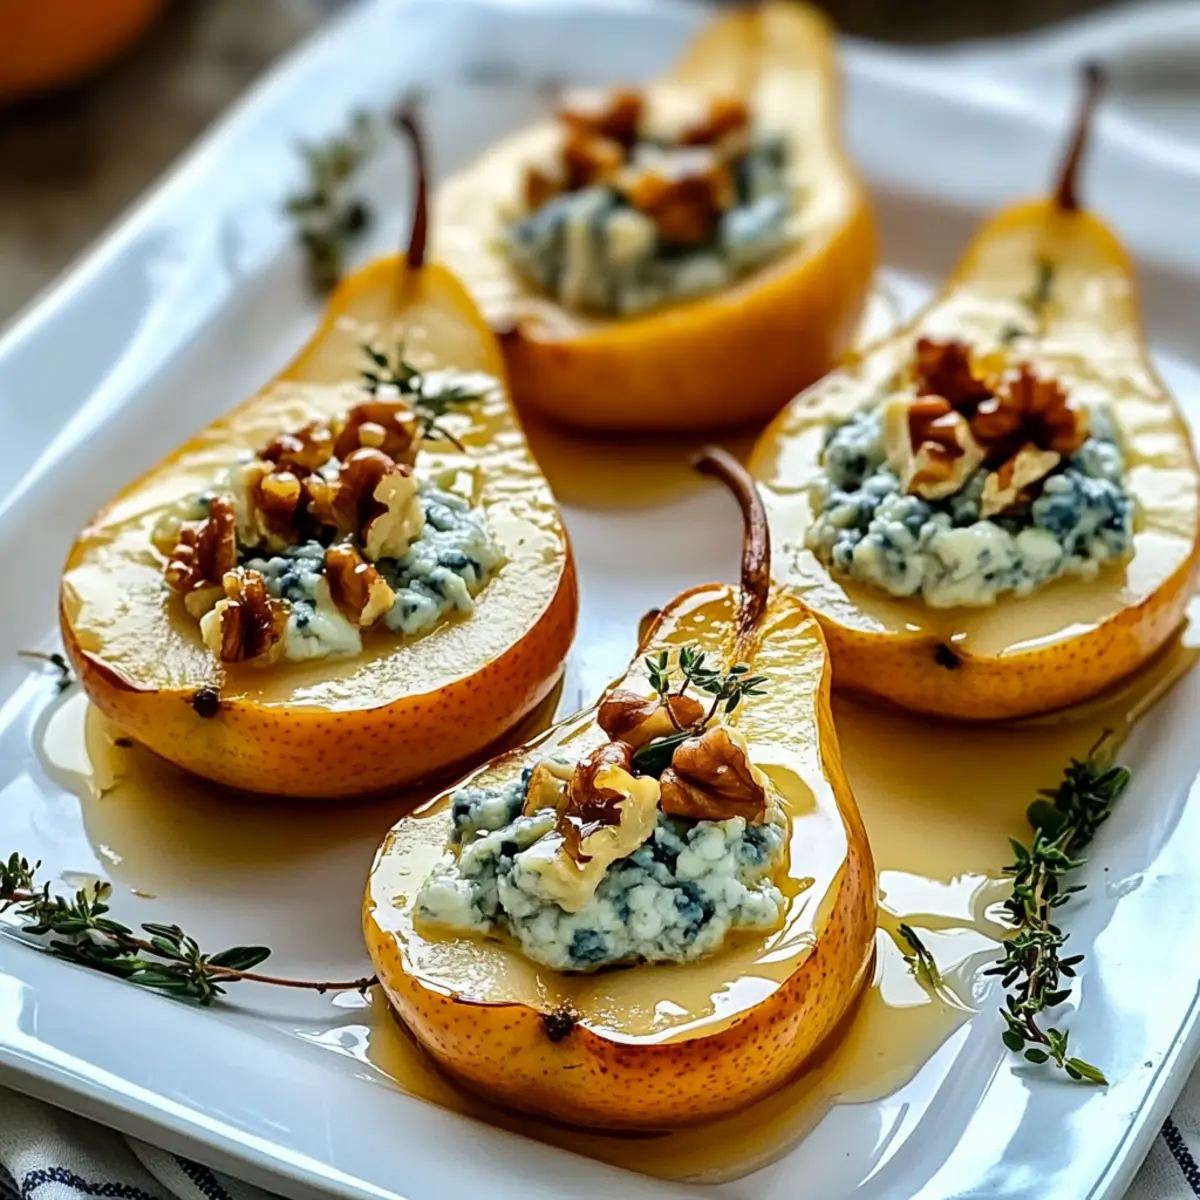
As I stood in my kitchen, the inviting aroma of freshly baked pears wafted through the air, instantly transporting me to a cozy bistro tucked away in the hills of France. These Elegant Blue Cheese Stuffed Pears are a delightful fusion of sweetness and savory richness, making them an impressive addition to any meal. With juicy pears filled with creamy blue cheese, crunchy toasted nuts, and fragrant thyme, this recipe offers the perfect balance of flavors. Best of all, it’s quick to whip up—ready in just 30 minutes—making it ideal for those busy weeknights or impromptu gatherings. Plus, the versatility of this dish lets you decide whether to serve it as an elegant appetizer, a vibrant salad course, or even a light dessert. Intrigued? Let’s dive into how to create this culinary masterpiece together!

Why Choose Blue Cheese Stuffed Pears?
Elegant presentation: These stuffed pears look stunning, making them the perfect centerpiece for your dinner table.
Versatile options: Feel free to swap blue cheese for goat cheese or ricotta based on your preference, or even bring in seasonal fruits!
Quick to prepare: With just 30 minutes, you can serve a gourmet dish that will impress family and friends alike.
Flavor harmony: The combination of sweet pears and savory blue cheese, accented by crunchy nuts and fresh herbs, is a flavor lover’s dream.
Unique serving styles: Enjoy them warm as an appetizer, top a fresh salad with them, or even add a scoop of ice cream for a sophisticated dessert—endless possibilities await!
Elevate your culinary skills while crafting something simple yet chic—like these delightful pears or try your hand at a Fried Mac Cheese for a comforting alternative!
Blue Cheese Stuffed Pears Ingredients
• Prepare to indulge your taste buds with these mouthwatering ingredients for making Blue Cheese Stuffed Pears.
For the Pears
- Ripe Pears – Use Bosc or Anjou for a perfect blend of sweetness and structure.
- Olive Oil – Brush on cut sides to enhance caramelization and keep pears moist during baking.
For the Filling
- Crumbled Blue Cheese – Offers a rich, creamy texture; feel free to swap with goat cheese or ricotta for a lighter flavor.
- Chopped Walnuts or Pecans – Toasted for a crunch that elevates the dish, or substitute sunflower seeds for a nut-free option.
- Fresh Thyme Leaves – Imparts an aromatic earthiness; rosemary can also be used for a different twist.
For Finishing Touches
- Honey – Drizzle over the top to add a touch of sweetness; adjust based on your preference.
- Black Pepper – Freshly cracked for a delightful flavor contrast that enhances the overall taste.
Now that you have all the important ingredients ready, let’s move on to crafting these spectacular Blue Cheese Stuffed Pears!
Step‑by‑Step Instructions for Blue Cheese Stuffed Pears
Step 1: Preheat the Oven
Begin by preheating your oven to 375°F (190°C). While the oven warms up, prepare a baking dish by lining it with parchment paper or lightly greasing it with olive oil. This will ensure that your Elegant Blue Cheese Stuffed Pears release effortlessly after baking.
Step 2: Prepare the Pears
Take your ripe pears and slice them lengthwise down the middle. Carefully scoop out the cores to create hollows for the filling. Aim for pears that are ripe yet firm, as they will hold their shape during baking and provide a sweet contrast to the savory filling.
Step 3: Brush the Pears
Using a brush or a paper towel, apply olive oil to the cut sides of the pear halves. Placing them cut-side up in your prepared baking dish will help them caramelize beautifully as they bake. The oil adds flavor and moisture, ensuring that your Blue Cheese Stuffed Pears come out tender and delicious.
Step 4: Mix the Filling
In a mixing bowl, combine the crumbled blue cheese, chopped walnuts or pecans, and fresh thyme leaves. Stir well until all ingredients are evenly mixed together. The filling should be creamy with plenty of texture, ready to impart its rich flavors into the pears once baked.
Step 5: Fill the Pears
Spoon the cheese mixture generously into each hollowed pear half, ensuring they are filled but not overflowing. This step is crucial for both presentation and taste, allowing the cheese to melt slightly while keeping the pears intact during baking.
Step 6: Bake the Pears
Slide your baking dish into the preheated oven and set a timer for 15-18 minutes. Keep an eye on the pears as they bake; they should become tender and lightly caramelized while retaining their shape. The aroma will signal their journey to perfection, inviting everyone to the table.
Step 7: Drizzle and Serve
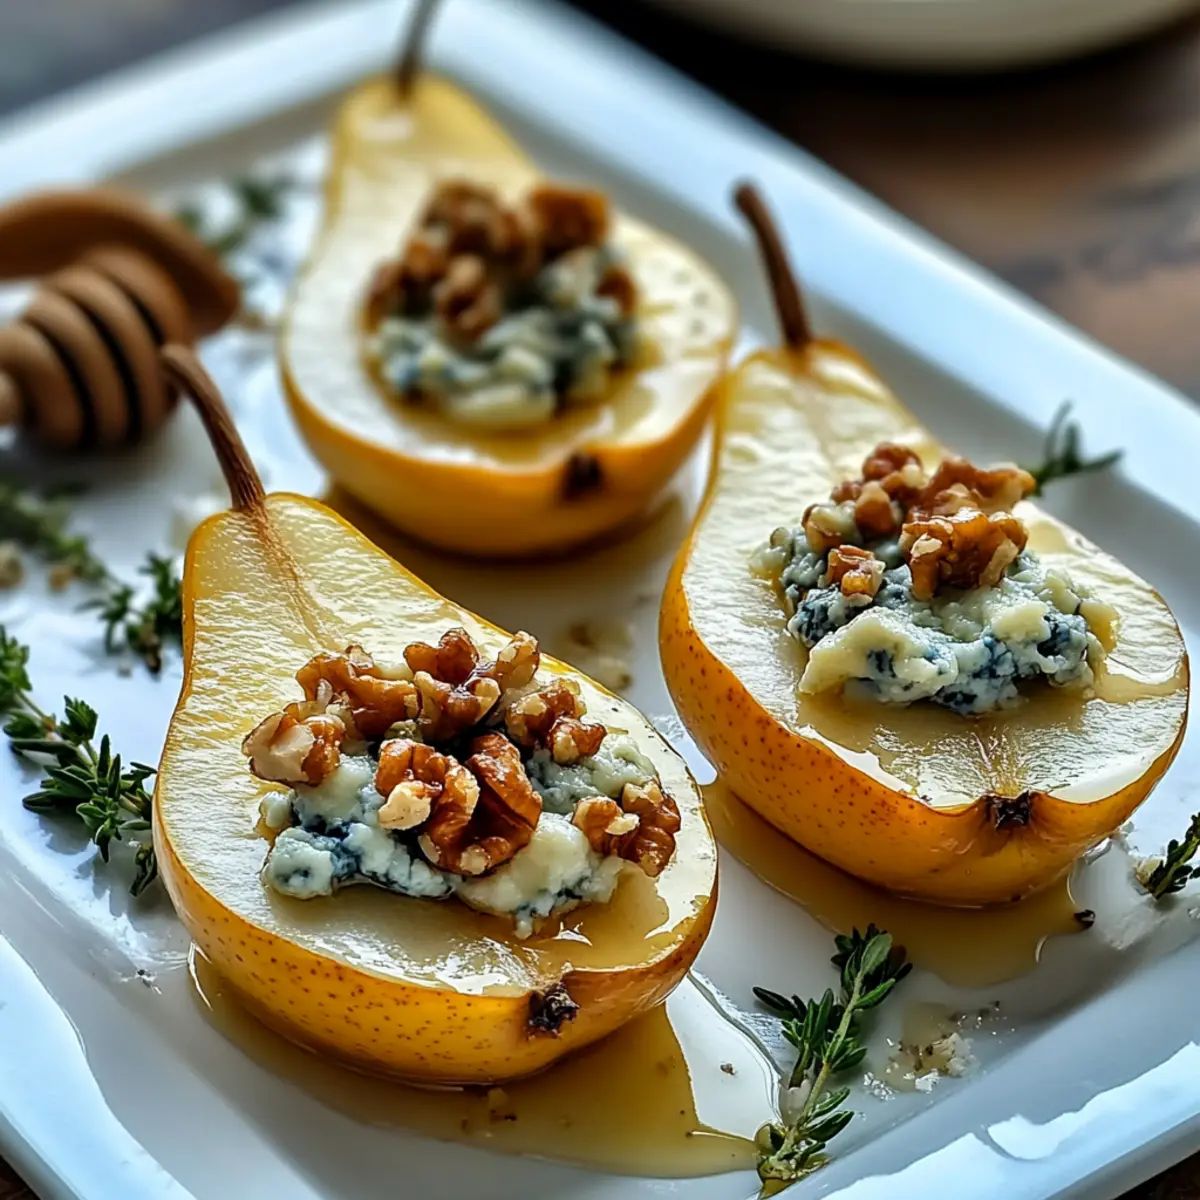
Once the pears are done baking, remove them from the oven and let them cool for a moment. Drizzle honey over each pear half and sprinkle freshly cracked black pepper for a touch of zing. These Elegant Blue Cheese Stuffed Pears are now ready to impress as an appetizer, salad addition, or a light dessert!
Blue Cheese Stuffed Pears Variations
Feel free to get creative with this recipe—your taste buds are waiting for a delightful twist!
- Goat Cheese: Substitute blue cheese with creamy goat cheese for a milder, tangy flavor that pairs beautifully with pears.
- Nut-Free Delight: Use sunflower seeds instead of walnuts or pecans for a crunchy texture without the nuts, perfect for dietary restrictions.
- Sweet and Spicy: Drizzle a touch of hot honey on top for a spicy kick that contrasts nicely with the sweetness of the pears.
- Fruit Fusion: Add chopped figs or dried cranberries to the filling for an exciting burst of fruity flavor. It’s a great way to add unexpected elements!
- Balsamic Glaze: Drizzle some balsamic reduction over the baked pears for an extra layer of flavor—a delicious complement to the savory cheese.
- Salad Sensation: Serve the stuffed pears on a bed of arugula with a vinaigrette for a festive salad, making it a stunning dish for gatherings.
- Dessert Style: Top your warm pears with a scoop of vanilla ice cream for an elegant yet simple dessert that everyone will love.
These variations add a world of flavor to your Blue Cheese Stuffed Pears, making each bite a unique experience. For something extra comforting, you might enjoy trying a Fried Mac Cheese alongside as a delightful side!
Make Ahead Options
These Elegant Blue Cheese Stuffed Pears are a fantastic choice for meal prep, allowing you to impress guests with minimal last-minute effort! You can prepare the pears and fill them with the blue cheese mixture up to 24 hours in advance. Simply refrigerate them in an airtight container to maintain freshness. When you’re ready to bake, allow the pears to sit at room temperature for about 10-15 minutes before placing them in the oven. This will help them heat evenly and enhance their flavors. Once baked, they’ll be just as delicious and tender as if made fresh on the spot, making this recipe a perfect time-saver for busy weeknights or gatherings!
Storage Tips for Blue Cheese Stuffed Pears
Fridge: Store any leftover Blue Cheese Stuffed Pears in an airtight container in the fridge for up to 3 days. Make sure they are cooled to room temperature before sealing.
Freezer: If you want to save prepared pears for later, freeze them before baking! Place the stuffed pears in a single layer on a parchment-lined baking sheet. Once frozen solid, transfer to a freezer bag and store for up to 3 months.
Reheating: When you’re ready to enjoy your frozen Blue Cheese Stuffed Pears, thaw them in the fridge overnight, then bake at 375°F (190°C) for 18-20 minutes until heated through and tender.
Make-Ahead Tips: You can prepare the pears and fill them up to a few hours in advance. Refrigerate until ready to bake; allow them to sit at room temperature for 10-15 minutes to ensure even cooking.
What to Serve with Elegant Blue Cheese Stuffed Pears
Imagine the delightful conversations that will spark around your dining table as you pair these enticing morsels with the perfect accompaniments!
-
Fresh Arugula Salad: A peppery salad provides a crisp contrast, balancing the rich flavors of the stuffed pears beautifully.
-
Creamy Mashed Potatoes: Smooth and buttery, these mashed potatoes add comforting richness, making each bite a heavenly experience.
-
Charcuterie Board: Serve alongside a selection of cured meats and cheeses. The savory notes enhance the sweetness of the pears, creating a dynamic dining experience.
-
Toasted Baguette Slices: Crispy and warm, these slices are perfect for scooping up any leftover filling or dipping into honey for a sweet touch.
-
Honey Glazed Carrots: Sweet and tender, honey-glazed carrots echo the flavors of the pears, providing a lovely burst of color and taste.
-
Sparkling Wine or Cider: A glass of crisp sparkling wine or a fruity cider elevates the meal, offering refreshing notes that complement the sweetness of the pears.
Experiment with these combinations, and prepare for an unforgettable meal that dazzles both the palate and the eye!
Expert Tips for Blue Cheese Stuffed Pears
-
Choose the Right Pears: Use ripe but firm pears like Bosc or Anjou to ensure they hold their shape during baking while providing natural sweetness.
-
Nut Toasting: Toast your walnuts or pecans for 2-3 minutes over medium heat to enhance their flavor. This step can elevate your Blue Cheese Stuffed Pears to new heights!
-
Filling Technique: Avoid overfilling the pears to maintain their beautiful shape post-baking. A generous yet tidy filling makes for a more visually appealing dish.
-
Cooling Period: Allow the pears to cool for a few minutes before serving. This brief wait allows flavors to meld and intensify, making each bite even more delightful.
-
Flavor Variation: Don’t hesitate to experiment! Swapping blue cheese for goat cheese or ricotta can create a different flavor profile, allowing for varied interpretations of the Blue Cheese Stuffed Pears.
Elegant Blue Cheese Stuffed Pears Recipe FAQs
What kind of pears should I use for Blue Cheese Stuffed Pears?
For the best results, I recommend using ripe but firm pears like Bosc or Anjou. They provide a deliciously sweet flavor and maintain their structure when baked, giving your Elegant Blue Cheese Stuffed Pears the perfect texture.
How long will leftovers stay good in the fridge?
Leftover Blue Cheese Stuffed Pears can be stored in an airtight container in the refrigerator for up to 3 days. Make sure they’ve cooled to room temperature before sealing them to preserve their delicious flavors.
Can I freeze Blue Cheese Stuffed Pears?
Absolutely! If you want to save some prepared pears for later, freeze them before baking. Place the stuffed pears in a single layer on a parchment-lined baking sheet and freeze until solid. Then, transfer them to a freezer bag and store for up to 3 months. When you’re ready to enjoy them, thaw in the fridge overnight and bake at 375°F (190°C) for 18-20 minutes until heated through.
What should I do if my pears are overripe?
If your pears are overly soft or squishy, avoid using them as they may not hold their shape during baking. Look for pears that have a slight firmness but yield slightly when you press them. If they have dark spots all over, it’s a sign they may have passed their prime.
Are these Blue Cheese Stuffed Pears suitable for people with nut allergies?
While walnuts and pecans are traditional fillings, you can easily substitute them with sunflower seeds to ensure the recipe remains nut-free. This will still provide a delightful crunch to your dish without compromising flavor.

Elegant Blue Cheese Stuffed Pears for Effortless Gourmet Bliss
Ingredients
Equipment
Method
- Preheat your oven to 375°F (190°C) and prepare a baking dish with parchment paper or olive oil.
- Slice the pears lengthwise and scoop out the cores.
- Brush olive oil on the cut sides of the pears and place cut-side up in the baking dish.
- In a bowl, mix the crumbled blue cheese, chopped walnuts or pecans, and fresh thyme leaves.
- Generously fill each pear half with the cheese mixture.
- Bake in the preheated oven for 15-18 minutes until tender and lightly caramelized.
- Let cool slightly, then drizzle honey and sprinkle black pepper over each pear half before serving.