
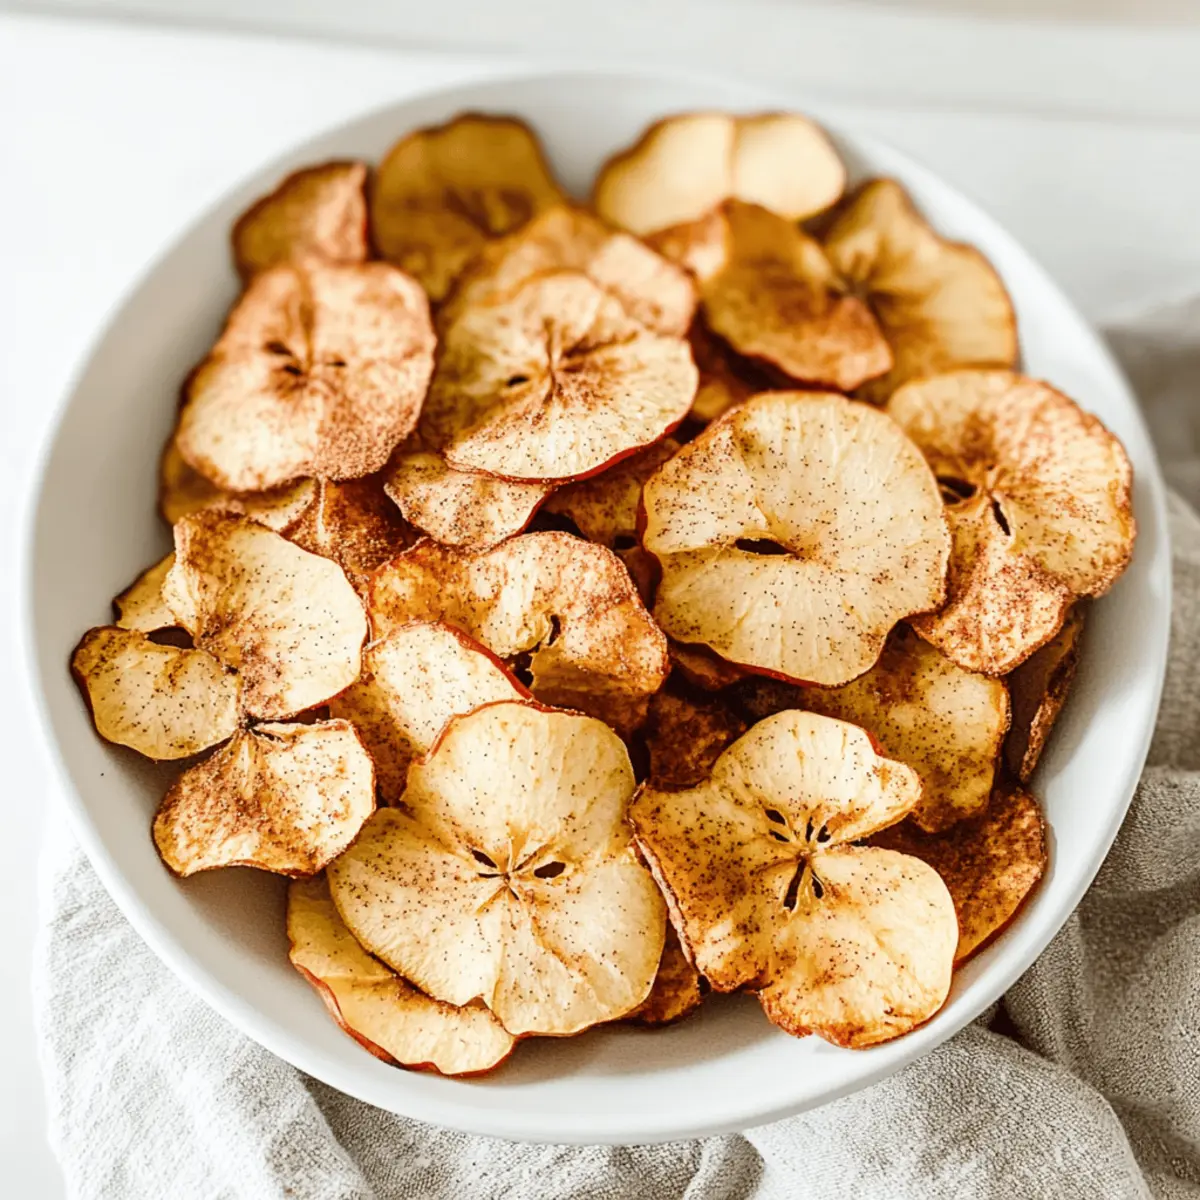
As I stood in the kitchen, the autumn air filled with the sweet, tangy scent of fresh apples, I realized I was on the verge of a delicious transformation. Baked apple chips are my go-to recipe for turning a simple, seasonal fruit into a crunchy snack that’s not only healthy but also incredibly satisfying. With no added sugar and packed with fiber, these crispy little bites are a fantastic alternative to those addictive store-bought snacks. Plus, the hint of cinnamon adds a warm, cozy twist that perfectly complements the natural sweetness of the apples. Whether you’re snacking solo or looking to impress friends at your next gathering, these homemade apple chips will have everyone coming back for more. Curious about how easy it is to whip up this delightful treat? Let’s dive in!
Why You’ll Crave These Apple Chips?
Healthy Delight: These apple chips are a guilt-free snack option, featuring no added sugar and high fiber content.
Simple to Make: With minimal ingredients and straightforward steps, you can whip these up in no time—even for a last-minute craving!
Customizable Flavor: Add a pinch of nutmeg or pumpkin spice to tailor them to your taste, or try experimenting with other fruits for unique flavors.
Perfect for All Occasions: Whether you’re munching during movie night or dressing up a salad with crunchy toppings, these chips will please everyone.
Storage Friendly: Keep them fresh in an airtight container for up to a week, making it easy to snack healthily whenever the craving hits.
Enjoy your homemade crisps like these alongside treats like Chicken Pineapple Quesadillas for a truly satisfying snack table!
Apple Chips Ingredients
• Perfect for crispy snacks!
For the Chips
- Apples – The star of the show! Choose sweet varieties like Gala or Fuji for a delightful crunch.
- Ground Cinnamon – Adds a warm, cozy flavor; feel free to swap it with nutmeg or pumpkin spice for a twist.
These simple ingredients come together to create irresistible apple chips that are not only tasty but also a healthy snack option!
Step‑by‑Step Instructions for Healthy Baked Apple Chips
Step 1: Preheat the Oven
Start by preheating your oven to 200°F (90°C). This low temperature is key to achieving that perfect crunchy texture for your baked apple chips. Meanwhile, gather your tools: you’ll need large baking sheets, parchment paper, and a mandoline for slicing the apples. Preheating allows for even baking, so don’t skip this step!
Step 2: Prepare the Baking Sheets
While the oven warms up, line two large baking sheets with parchment paper or silicone mats. This crucial step helps prevent the apple chips from sticking and ensures easy cleanup. Make sure the sheets are large enough to arrange the apple slices in a single layer once they are ready.
Step 3: Slice the Apples
Next, wash your chosen sweet apples thoroughly and slice them thinly to about 1/8-inch thickness, using a mandoline for consistency. It’s important to remove any seeds during this process. The thinner the slices, the crisper your healthy baked apple chips will be after baking.
Step 4: Arrange the Slices
Take the thin apple slices and lay them out in a single layer on your prepared baking sheets. Make sure none of the slices overlap to ensure even cooking. Sprinkle a light dusting of ground cinnamon over both sides of the apple slices for that warm, cozy flavor, setting the stage for delicious apple chips.
Step 5: Bake the Chips
Place the baking sheets in the preheated oven and let those apple slices bake for about 1 hour. After this time, the edges should start to curl, indicating they are getting crispy. Flip the chips carefully to ensure even baking on both sides, then return them to the oven for another hour.
Step 6: Cool Down
Once the baking time is complete, turn off the oven and allow the apple chips to cool inside. Keep the door closed for about 30 minutes; this helps them crisp up even more. If they aren’t quite crunchy enough after cooling, you can bake them in 15-minute increments until you achieve your desired crispiness.
Step 7: Store Properly
Finally, once your healthy baked apple chips have reached that satisfying crunch, store them in an airtight container. This will keep them fresh and crispy for up to a week. Be mindful to keep them away from humidity, ensuring they last as your go-to snack!
Make Ahead Options
These Healthy Baked Apple Chips are fantastic for meal prep, allowing you to enjoy a wholesome snack throughout the week! You can slice and season the apples up to 24 hours in advance. Simply wash and thinly slice the apples, sprinkle with cinnamon, and arrange them on the baking sheets; then refrigerate them until you’re ready to bake. When you’re prepared to enjoy your snack, preheat your oven and bake directly from the fridge. For optimal crispness, ensure your apple slices are thoroughly dried before baking and store the final product in an airtight container at room temperature to maintain that delightful crunch. Enjoy hassle-free snacking at its best!
Apple Chips: Twist and Customize!
Feel free to get creative with your apple chips and explore exciting flavor variations that will elevate your snack game!
-
Nutmeg Kick:
Sprinkle nutmeg instead of cinnamon for a warm, festive twist! The nutmeg will lend a cozy, holiday aroma to your chips that pairs perfectly with crisp apple sweetness. -
Spicy Zing:
Add a dash of cayenne pepper for a spicy kick! The heat contrasts beautifully with the sweetness of apples, making for an unforgettable flavor experience. -
Fruit Fusion:
Mix in other fruits like pears or beets! Slice them thin using the same method, and enjoy a colorful assortment of flavors and textures in every crunchy bite. -
Sweet and Savory:
Drizzle a bit of honey or maple syrup over the apple slices before baking for a touch of natural sweetness. This will create a chewy texture alongside the usual crispiness. -
Pumpkin Spice Delight:
Replace ground cinnamon with pumpkin spice for a seasonal twist! This variation is perfect for autumn snacking and will bring a delightful warmth to your apple chips. -
Chocolate Coating:
Dipping your baked apple chips in melted dark chocolate will add a scrumptious layer of indulgence. Once cooled, these decadent treats become a hit for sweet tooth cravings. -
Citrus Zest:
Grate some lemon or orange zest on the apple slices before baking. This will brighten the flavor and offer a refreshing hint that complements the natural sweetness of the apples.
Adventuring in the kitchen doesn’t stop here! Try serving these chips alongside a healthy yogurt dip or sprinkle them over salads to enhance flavor and crunch. If you’re looking for other delicious recipes, don’t miss out on the cozy goodness of Apple Pancake Cozy and satisfy your savory cravings with Chicken Pineapple Quesadillas!
Expert Tips for Baked Apple Chips
- Slice Thinly: For maximum crunchiness, aim for apple slices that are thinner than 1/8 inch; the thinner they are, the crunchier your apple chips will be.
- Keep an Eye on Time: Monitor the baking closely during the last increments to prevent burning; every oven is different, and chips can go from perfect to overcooked quickly.
- Crispiness Check: After cooling, if they aren’t quite crispy, bake in 15-minute increments until the desired texture is achieved—patience is key for the perfect apple chips!
- Seal for Freshness: Make sure to store your baked apple chips in an airtight container to maintain their crispness; exposure to air can lead to sogginess.
- Flavor Variations: Don’t hesitate to introduce your own twist with spices like nutmeg or cardamom to create a unique flavor profile for your apple chips!
How to Store and Freeze Apple Chips
Room Temperature: Store your baked apple chips in an airtight container at room temperature for up to 1 week to maintain their delightful crunch.
Refrigerator: While it’s not necessary, if you live in a humid environment, you can refrigerate the apple chips in a sealed container for up to 2 weeks.
Freezer: For longer storage, freeze the apple chips in a single layer on a baking sheet until solid, then transfer to an airtight freezer bag. They’ll last for about 6 months.
Reheating: If needed, re-crisp your apple chips in a preheated oven at 200°F (90°C) for 10-15 minutes, keeping an eye on them to avoid burning. Enjoy your homemade apple chips anytime!
What to Serve with Healthy Baked Apple Chips
Indulge in a delightful snacking experience that brings warmth and crunch to your gatherings.
-
Creamy Yogurt Dip: Perfect for contrasting the apple chips’ crunch, this creamy dip enhances the sweetness while adding a tangy kick.
-
Nutty Granola: Sprinkle some over your yogurt or enjoy it alongside the chips for an added crunch and flavor complexity.
-
Cheese Platter: Pair your apple chips with aged cheddar or creamy brie for a beautiful sweet and savory balance that’s delightful on your palate.
-
Mixed Green Salad: Use the chips as a topping to give your salads a satisfying crunch, enhancing the textures in every bite.
-
Herbal Tea: A warm cup of chamomile or mint tea contrasts beautifully with the crispness of the apple chips, making for a soothing snack experience.
-
Dark Chocolate: For a sweet treat, enjoy a few dark chocolate squares alongside the apple chips. This indulgent combination offers a perfect balance of flavors!
Baked Apple Chips Recipe FAQs
What types of apples are best for baking chips?
Absolutely! For the sweetest and most flavorful apple chips, I recommend using Gala, Fuji, or Honeycrisp apples. If you prefer a tart bite, try Gravenstein, Pink Lady, or Cortland varieties. Their natural sweetness and texture make them perfect for creating crispy chips.
How should I store my baked apple chips to keep them fresh?
You can store your baked apple chips in an airtight container at room temperature for up to one week. Make sure to keep them away from humidity, as moisture can make them lose that delightful crunch. If you live in a humid area, you can refrigerate them for up to two weeks in a sealed container.
Can I freeze apple chips for later use?
Definitely! To freeze your apple chips, first, lay them out in a single layer on a baking sheet and freeze until solid. Then, transfer the chips to an airtight freezer bag. They can last for up to six months in the freezer. Just remember to re-crisp them by placing them in a preheated oven at 200°F (90°C) for about 10-15 minutes whenever you’re ready to enjoy them again.
What should I do if my apple chips aren’t crunchy enough?
If your apple chips aren’t reaching that perfect crunch you desire, don’t worry! After cooling, simply bake them in 15-minute increments at 200°F (90°C) until they reach your preferred texture. It’s essential to keep an eye on them to avoid over-baking. Every oven is a little different, and patience is key!
Are there any dietary considerations for these apple chips?
Very! These baked apple chips are gluten-free and contain no added sugar, making them a healthy snack option for most diets. However, always double-check for any specific allergies, particularly if you’re using other spices like nutmeg or pumpkin spice. If you have pets, it’s best to keep these away, as some fruits can upset their stomachs.
Can I experiment with other fruits for this recipe?
Absolutely! You can use other fruits like pears or even beets by following the same slicing and baking method. Just slice them thinly, arrange them on baking sheets, and bake at the same temperature. Each fruit has its unique flavor, so don’t hesitate to play around with different combinations!
Crispy Apple Chips: Sweet & Healthy Snack for Everyone
Ingredients
Equipment
Method
- Preheat your oven to 200°F (90°C). Gather baking sheets, parchment paper, and a mandoline for slicing.
- Line two large baking sheets with parchment paper or silicone mats.
- Wash apples thoroughly and slice thinly to about 1/8-inch thickness using a mandoline.
- Lay thin apple slices in a single layer on baking sheets, ensuring they do not overlap. Sprinkle ground cinnamon over both sides.
- Bake in the preheated oven for about 1 hour, flipping chips halfway through.
- Allow the chips to cool in the oven with the door closed for about 30 minutes.
- Store in an airtight container for up to a week.