
As I rummaged through the summer bounty of fresh fruits at the market, I stumbled upon the perfect inspiration for a cool treat: Fruity Frozen Yogurt Pops. With vibrant colors and a luscious creamy texture, they’re not just a fun way to beat the heat but a delightful way to savor the season’s best offerings. These pops are incredibly easy to whip up, making them a go-to recipe for busy days or spontaneous gatherings. Plus, they’re a healthy snack option for both kids and adults, showcasing minimal waste thanks to the use of wholesome, simple ingredients. Ready to impress everyone at your next barbecue or picnic? Let’s dive into the delicious world of these fruity yogurt pops!

Why Are These Fruity Yogurt Pops Exceptional?
Refreshingly Unique: These fruity yogurt pops combine the lusciousness of fresh fruits with the creaminess of yogurt for a standout treat that’s both delicious and eye-catching.
Quick & Convenient: Whipping up these pops takes little time, making them an ideal recipe for those busy summer afternoons. No complicated steps here!
Versatile Combinations: Whether you’re a fan of mango, strawberries, or bananas, you can easily customize these pops with your favorite fruits or decide on a vegan twist using homemade coconut yogurt.
Guilt-Free Indulgence: Made with simple, wholesome ingredients, these pops are perfect for health-conscious snackers and provide a nutritious alternative to store-bought treats.
Fun for Everyone: Kid-approved and perfect for summer gatherings, these versatile pops will impress both children and adults alike, making them a crowd favorite! Consider pairing them with some of Protein Frozen Peanut for a complete snack experience!
Fruity Yogurt Pops Ingredients
For the Pops
- Fresh Fruit – Use ripe, seasonal fruits like strawberries, bananas, or mangoes for natural sweetness and vibrant flavors.
- Yogurt – A creamy base; substitute with homemade coconut yogurt for an excellent vegan option.
- Agave Syrup – Sweetens your pops while balancing the yogurt’s tanginess; feel free to use honey if you’re not strictly vegan.
For the Molds
- Popsicle Sticks – Essential for easy handling; wooden sticks are a great sustainable choice.
These fruity yogurt pops are as scrumptious as they are simple to make, bringing a burst of summer delight to your table!
Step‑by‑Step Instructions for Fruity Yogurt Pops
Step 1: Gather Your Ingredients
Start by collecting all your ingredients and equipment. You’ll need fresh fruits like strawberries, bananas, or mangoes, yogurt (or coconut yogurt for a vegan option), and agave syrup. Also, grab reusable silicone baking cups or popsicle molds and wooden sticks. Set your workspace with a blender ready to combine everything smoothly.
Step 2: Prepare the Fruits
Wash and cut your chosen ripe fruits into smaller chunks for easier blending. This step ensures that you’ll achieve a creamy, even texture in your fruity yogurt pops. Aim for about 1-2 cups of fruit. You can mix and match depending on what you have available, ensuring a vibrant and flavorful outcome.
Step 3: Blend the Mixture
Add the chopped fruits, yogurt, and agave syrup into your blender. Blend on high for about 30-60 seconds or until the mixture reaches a smooth, creamy consistency. Keep an eye out for any chunks of fruit; you want a uniform blend that will freeze beautifully into your fruity yogurt pops.
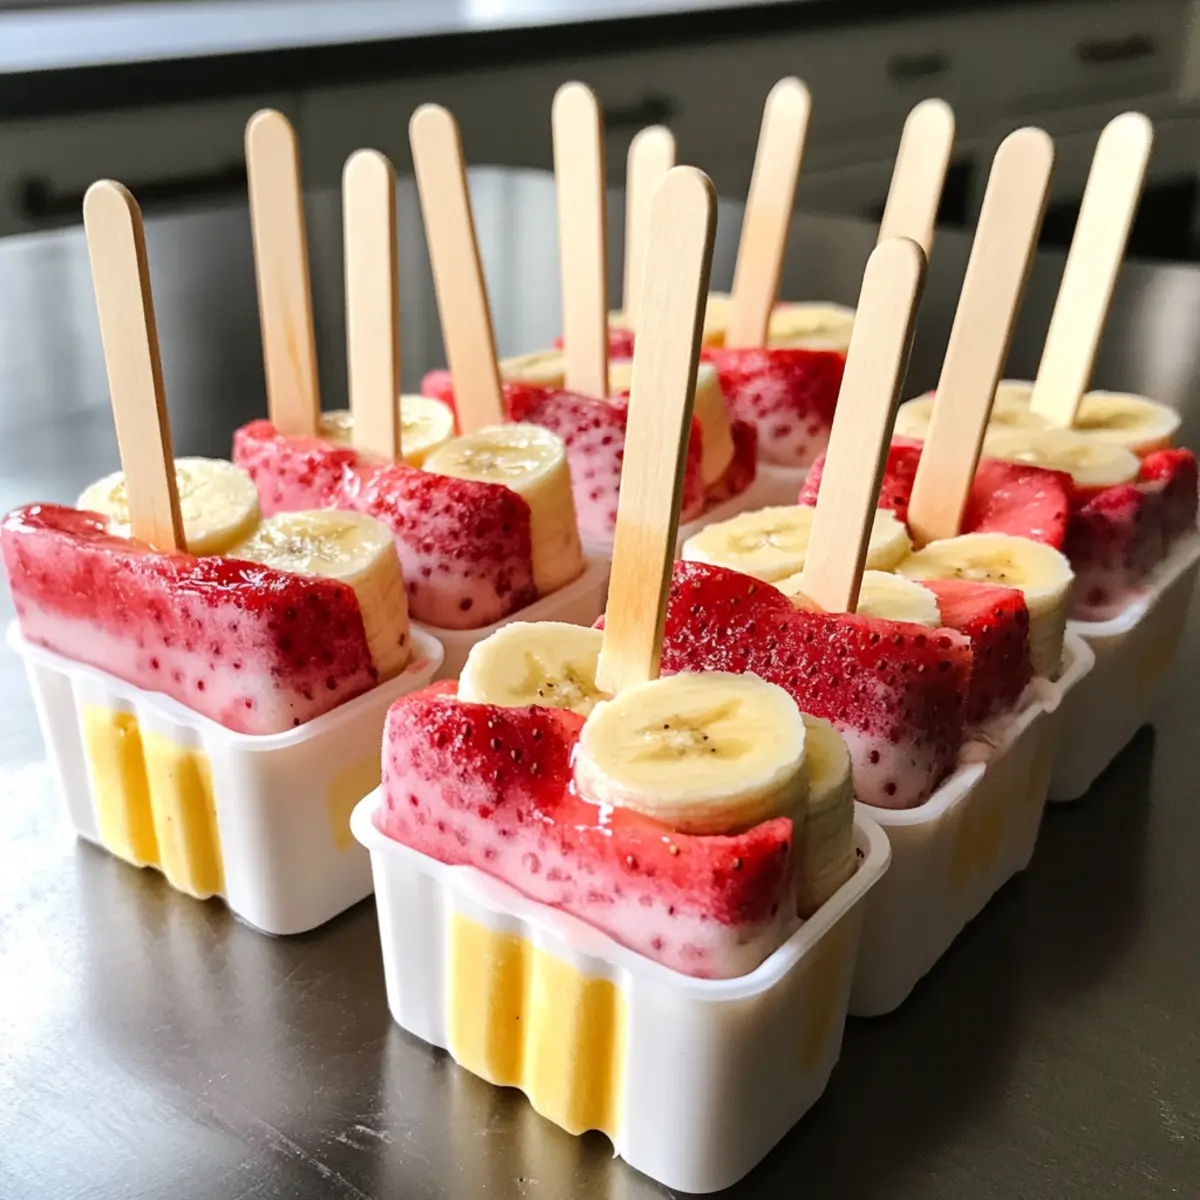
Step 4: Fill the Molds
Once blended, carefully pour the fruity yogurt mixture into your silicone cups or popsicle molds. Fill them about ¾ full to prevent overflow when freezing. Use a small funnel or measuring cup for easier pouring, and enjoy the colorful visual of your mixture as you go!
Step 5: Insert the Sticks
After filling the molds, freeze them for about 1 hour. This time allows the mixture to become firm enough to hold the sticks. Once slightly frozen, remove them from the freezer and insert your wooden sticks into the center of each pop, ensuring they remain upright as they continue to freeze.
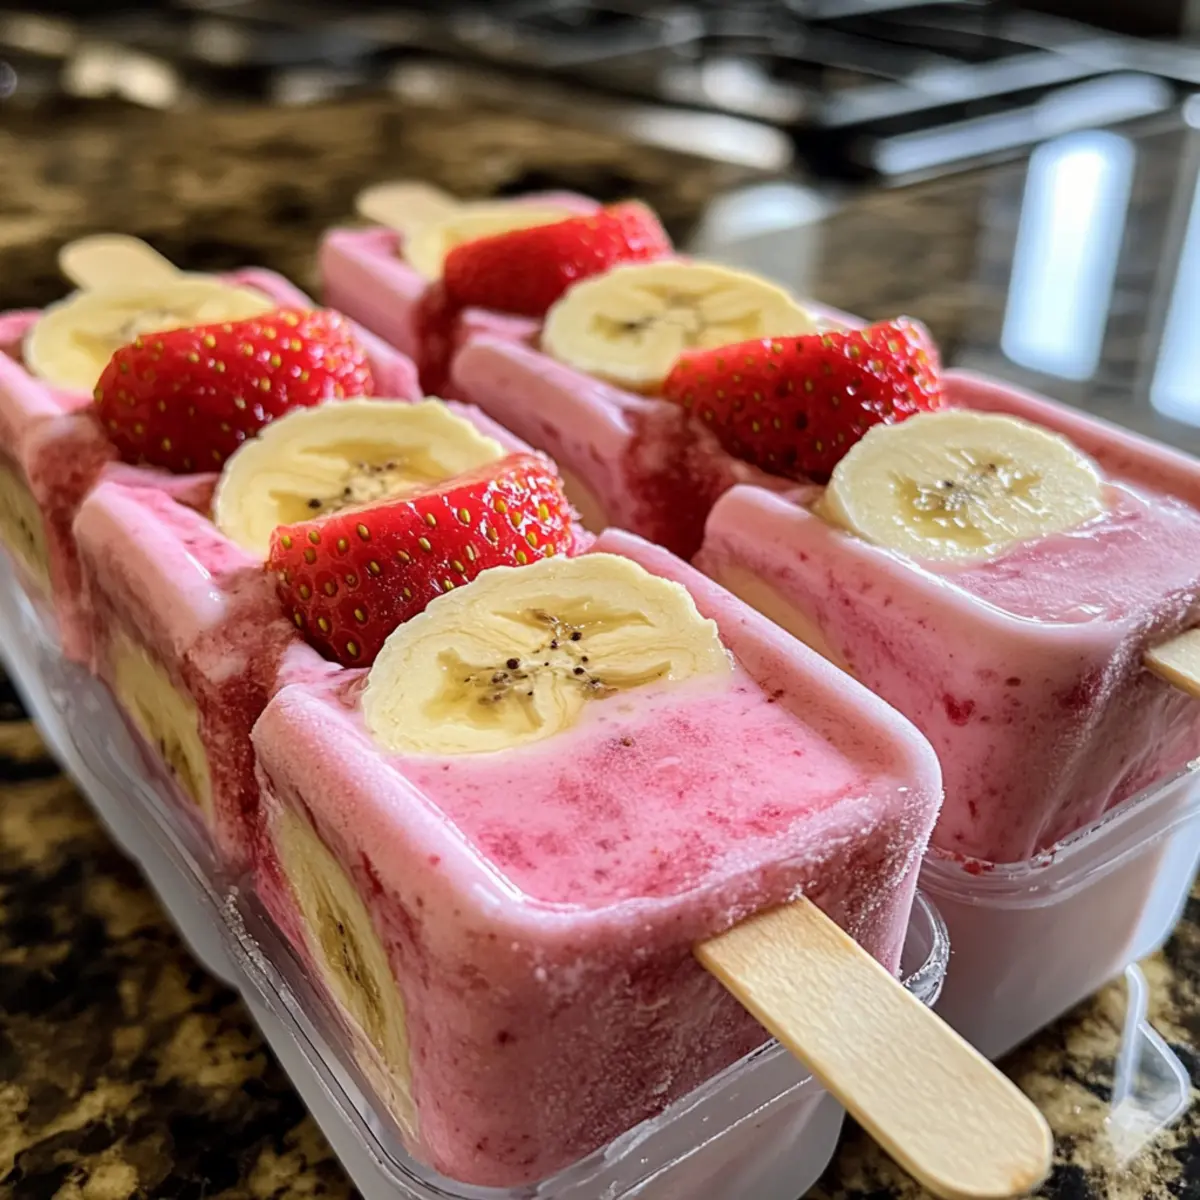
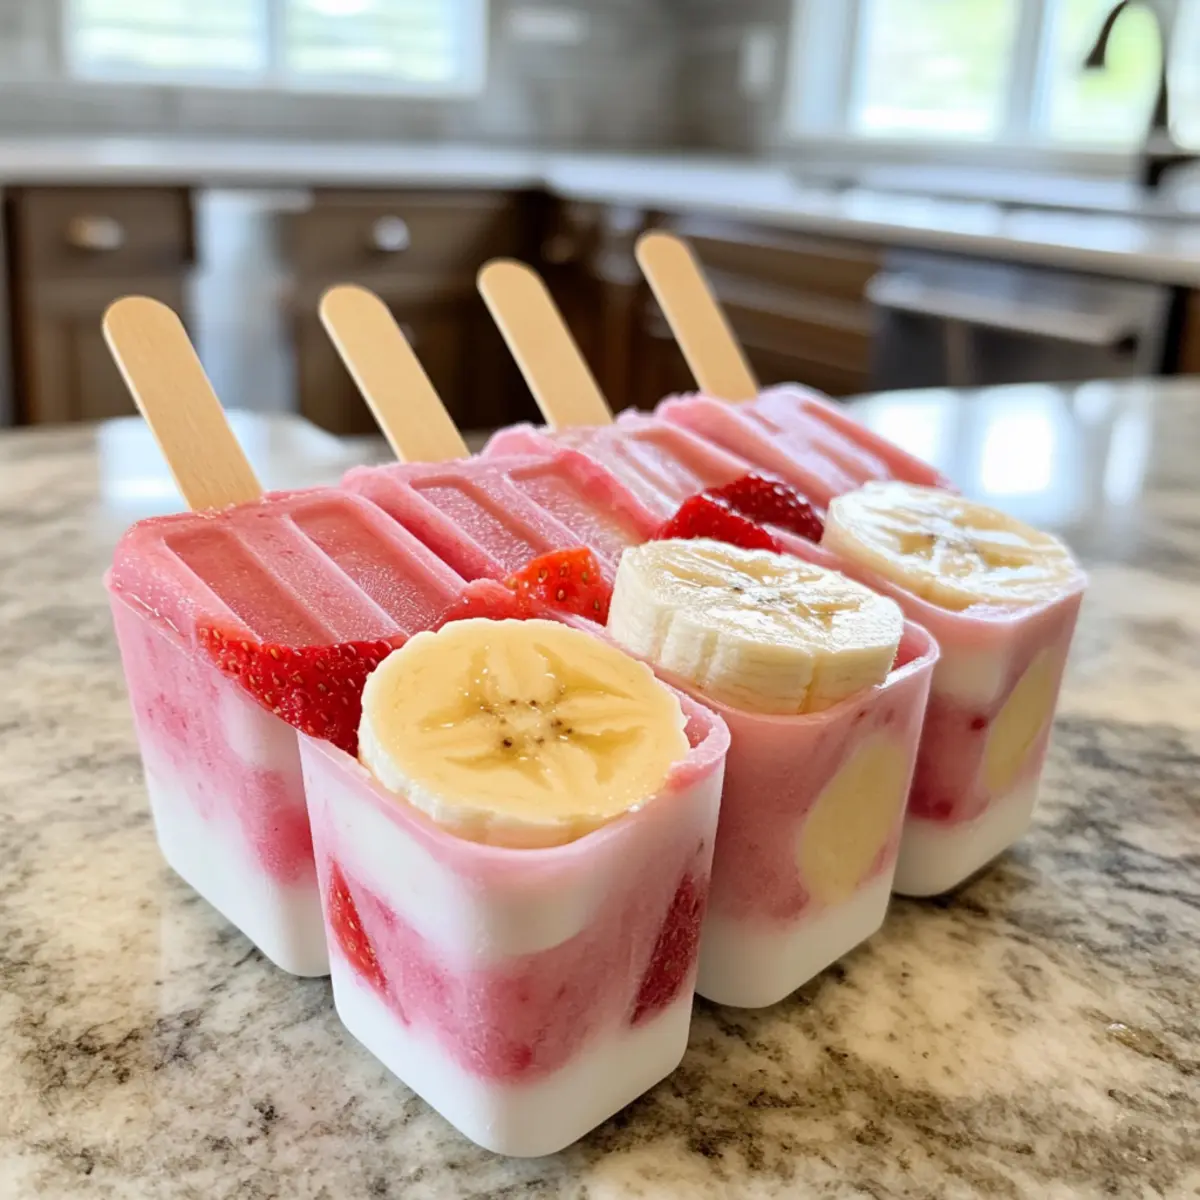
Step 6: Freeze Until Solid
Return the molds to the freezer and let your fruity yogurt pops freeze for an additional 4-5 hours, or until completely solid. You’ll know they’re ready when you can easily pull them out without any mushiness. This step is key for achieving the perfect texture for your final pops.
Step 7: Enjoy Your Pops
Once frozen solid, carefully remove the fruity yogurt pops from the molds by gently pulling at the sticks. If they stick, run the outside of the molds under warm water for a few seconds to loosen them. Serve as a refreshing treat on a hot day, and relish in the joy of your homemade fruity yogurt pops!
Make Ahead Options
These fruity yogurt pops are perfect for meal prep enthusiasts! You can blend the fruit and yogurt mixture up to 24 hours in advance and store it in the refrigerator. Simply pour the blended mixture into your molds when you’re ready to freeze. For optimal freshness and texture, use airtight containers to prevent any absorption of odors from the fridge. After filling the molds, freeze for about 1 hour before inserting the sticks to maintain their upright position. Once fully frozen, they can be stored in the freezer for up to a month, allowing you to enjoy these delicious, healthy fruity yogurt pops whenever you want to cool off on a busy day!
What to Serve with Fruity Frozen Yogurt Pops
Take your warm-weather gatherings to the next level with these delightful pairings that enhance the fruity flavors and refreshing crunch of your yogurt pops!
-
Crispy Granola: Adds a satisfying crunch that contrasts perfectly with the creamy pops, making for a textural delight in every bite.
-
Fresh Fruit Salad: A medley of seasonal fruits provides a burst of freshness, balancing the sweetness of the yogurt pops beautifully and adding even more vibrant colors to your table.
-
Minty Lime Spritzer: This refreshing drink complements the fruity flavors and adds a zing that awakens the palate, perfect for sipping alongside your pops on a hot day.
-
Chocolate Dipping Sauce: For a fun twist, serve some melted dark chocolate for dipping. It creates an indulgent contrast that’s simply irresistible!
-
Coconut Whipped Cream: Light and airy, this luxurious topping adds a creamy touch to your pops, enhancing their tropical essence and making them feel extra special.
-
Zesty Lemon Sorbet: Echoing the vibrant flavors of the yogurt pops, a scoop of lemon sorbet adds a refreshing tang that’s both uplifting and joyful on a sunny afternoon.
With these delicious options, you’ll create a colorful and exciting spread that captures the essence of summer in every bite!
Expert Tips for Fruity Yogurt Pops
-
Select Ripe Fruits: Choose fruits that are perfectly ripe for maximum sweetness and flavor. Overripe fruits can result in a mushy texture that doesn’t blend well in your fruity yogurt pops.
-
Blend Thoroughly: Make sure to blend the mixture until it’s completely smooth. Any chunks of fruit will freeze and create an uneven texture, detracting from the creamy finish you want.
-
Freezing Technique: To keep the sticks upright, freeze the pops for about an hour before inserting the sticks. This allows for a stable base which prevents the sticks from sliding down as they freeze.
-
Experiment with Flavors: Don’t hesitate to mix and match your fruits! Try unique combinations like pineapple-mango or strawberry-banana for endless flavor options in your fruity yogurt pops.
-
Storage Advice: Wrap any leftover pops in plastic wrap or store them in a sealed container. Properly stored, they can maintain their freshness in the freezer for up to a month.
How to Store and Freeze Fruity Yogurt Pops
Fridge: Keep leftover fruity yogurt pops in an airtight container for up to 3 days. This ensures they remain fresh and ready to enjoy, as long as they don’t melt!
Freezer: Store your pops in a sealed plastic bag or container for up to a month. Make sure to wrap each pop individually to prevent freezer burn, ensuring maximum flavor.
Serving: When ready to indulge, remove them from the freezer and let them sit for a few minutes for easy removal from the molds. Enjoy them cold for a refreshing treat!
Reheating: These fruity yogurt pops are best enjoyed frozen; do not attempt to reheat them, as that will compromise their delightful texture and cooling effect.
Fruity Yogurt Pops Variations
Feel free to add your twist to these delightful fruity yogurt pops and create a unique masterpiece that suits your taste!
- Nut-Free: Substitute traditional yogurt with oat or soy yogurt for a creamy, nut-free option. This keeps the pops accessible for everyone!
- Tropical Flavors: Use coconut milk in place of yogurt for a tropical coconut twist that transports you straight to the beach. Pair it with pineapple or mango for an exotic touch!
- Berry Blast: Mix a medley of berries, like blueberries, raspberries, and blackberries, creating a tart and colorful delight that’s both nutritious and visually stunning.
- Protein-Packed: Boost nutrition by stirring in some protein powder before blending; this is a fantastic way to make these fruity yogurt pops a post-workout treat! For even more protein, consider serving alongside some of Protein Frozen Peanut.
- Herbal Infusion: Add a few fresh mint or basil leaves to the blender for a refreshing herbal kick that elevates the flavor profile beautifully.
- Chocolate Drizzle: Once frozen, dip the pops in melted dark chocolate for a decadent treat that adds a fantastic contrast to the fruity sweetness.
- Sweet Heat: For those who love a little kick, sprinkle in a pinch of cayenne or mix in some chopped jalapeño for a spicy surprise that enhances the sweetness of the fruit!
- Creamy Twist: Blend in a spoonful of nut butter like almond or cashew for an extra layer of creaminess and a delightful nutty flavor.
Let your creativity flow and savor the delicious possibilities of these fruity yogurt pops!
Fruity Yogurt Pops Recipe FAQs
What fruits are best for making fruity yogurt pops?
Absolutely! When choosing fruits for your pops, aim for ripe seasonal options like strawberries, bananas, or mangoes. Ripe fruits provide maximum sweetness and flavor, ensuring a delicious final product. I often recommend avoiding overly ripe fruits, as they can create an undesirable mushy texture when blended.
How should I store leftover fruity yogurt pops?
Very! To store your leftover pops, place them in an airtight container in the fridge for up to 3 days. For longer storage, individual wrapping in plastic wrap or placing them in a sealed plastic bag will keep them fresh in the freezer for up to a month. This prevents freezer burn and maintains their delightful flavor.
Can I freeze fruity yogurt pops for later use?
Certainly! To freeze your pops, follow these steps: Once you’ve filled your molds and inserted the sticks, freeze them for about 4-5 hours until solid. To prevent freezer burn, store them in individual wraps or a sealed container. They will stay fresh and delicious for up to a month in the freezer.
What should I do if my pops are too hard to remove from the molds?
If you’re struggling to pull your fruity yogurt pops from the molds, don’t worry! Simply run the outside of the molds under warm water for a few seconds. This will help to loosen the pops without damaging them, making it easier to enjoy your refreshing treat.
Can I make these fruity yogurt pops vegan?
Absolutely! To make these pops vegan, use homemade coconut yogurt or any store-bought dairy-free yogurt instead of regular yogurt. With this simple substitution, you can still enjoy a creamy and delicious treat that’s kind to our furry friends too!
Can I use frozen fruit in my fruity yogurt pops?
Although fresh fruit is generally recommended for the best flavor and texture, you can use frozen fruit if fresh options are unavailable. Just make sure to thaw and drain any excess moisture before blending to ensure a smooth consistency. Enjoy your creativity with these delicious fruity yogurt pops!
Fruity Yogurt Pops That Make Summer Moments Sweeter
Ingredients
Equipment
Method
- Gather all your ingredients and equipment, including fresh fruits, yogurt, agave syrup, and popsicle molds.
- Wash and cut your fruits into chunks for easy blending.
- Blend the chopped fruits, yogurt, and agave syrup until smooth for 30-60 seconds.
- Pour the fruity yogurt mixture into the molds, filling them about ¾ full.
- Freeze for about 1 hour, then insert the wooden sticks upright into each pop.
- Return to the freezer for another 4-5 hours until solid.
- Remove pops from molds by gently pulling at the sticks; run under warm water if needed.