
Stepping into my kitchen, the aroma of freshly brewed coffee instantly transports me to a bustling Italian café. If you’ve ever craved a rich dessert that’s both indulgent and effortlessly simple, you’ve landed in the right spot with these no-bake tiramisu balls. Combining the classic flavors of coffee-soaked ladyfingers and creamy mascarpone, these delightful bites offer the perfect treat for both everyday moments and special celebrations. Best of all, they’re fuss-free and ready in no time, making them an ideal solution for anyone looking to elevate their dessert game without turning on the oven. Ready to impress your friends and family with this bite-sized version of a timeless classic? Let’s dive in!
Why are Tiramisu Balls a Must-Try?
Irresistible Sweetness: These no-bake tiramisu balls deliver that classic tiramisu taste in a bite-sized treat, making them ideal for sharing.
Quick & Easy: With just a few simple steps, you can whip these up in no time—perfect for those last-minute cravings!
Party Pleaser: These delightful bites are perfect for gatherings or dessert tables, wow your guests without the hassle.
Versatile Treat: Feel free to experiment! Substitute cream cheese for a tangy twist or add spices for extra flavor.
Make-Ahead Magic: Prepping these ahead of time means you can spend more time enjoying the party and less time in the kitchen.
Add a touch of elegance to your dessert table with these scrumptious Tiramisu Balls and watch them disappear!
Tiramisu Balls Ingredients
For the Base
• Ladyfingers – The heart of the dessert, delivering that classic tiramisu flavor; both store-bought and homemade work beautifully.
• Mascarpone Cheese – Adds luxurious creaminess; can be swapped with cream cheese for a tangier twist.
For the Flavor
• Coffee (brewed or instant) – Infuses rich coffee notes; opt for instant espresso for an extra kick.
• Powdered Sugar – Sweetens and helps bind the mixture; adjust to suit your taste for these delightful tiramisu balls.
For the Coating
• Cocoa Powder – Provides a finishing touch of elegance; Dutch-processed cocoa can deepen the chocolate flavor.
• Optional Liqueur (e.g., coffee liqueur) – Enhances the flavor profile; feel free to omit it for a non-alcoholic treat.
Step‑by‑Step Instructions for Tiramisu Balls
Step 1: Prepare Coffee Mixture
Start by brewing a small cup of strong coffee and allow it to cool to room temperature, which should take about 10 minutes. If using instant coffee, dissolve it in a couple of tablespoons of hot water. This coffee mixture will serve as the flavorful base for your tiramisu balls, giving them that characteristic richness.
Step 2: Crush Ladyfingers
In a food processor, pulse the ladyfingers until they resemble fine crumbs, roughly 1-2 minutes. Alternatively, place them in a ziplock bag and crush with a rolling pin. Aim for a crumbly texture that will hold together in the final mixture, ensuring each bite of your tiramisu balls has the perfect base flavor.
Step 3: Mix Ingredients
In a spacious mixing bowl, combine the crushed ladyfingers, about 8 ounces of mascarpone cheese, and ½ cup of powdered sugar. Pour in the cooled coffee and, if desired, a splash of coffee liqueur for that extra depth. Stir well with a spatula until all ingredients are thoroughly blended, achieving a smooth and creamy texture that captures the essence of traditional tiramisu.
Step 4: Form Balls
Using a small cookie scoop or your hands, take portions of the mixture and roll it into balls about one inch in diameter. This should yield around 12-15 uniform tiramisu balls. Make sure they are compact and smooth for the best final presentation; they should easily hold their shape.
Step 5: Chill
Lay the formed tiramisu balls on a lined tray and refrigerate them for at least 30 minutes. This time in the fridge allows the flavors to meld and the balls to firm up, making them easier to handle and enhancing the overall texture, which is essential for the no-bake delight.
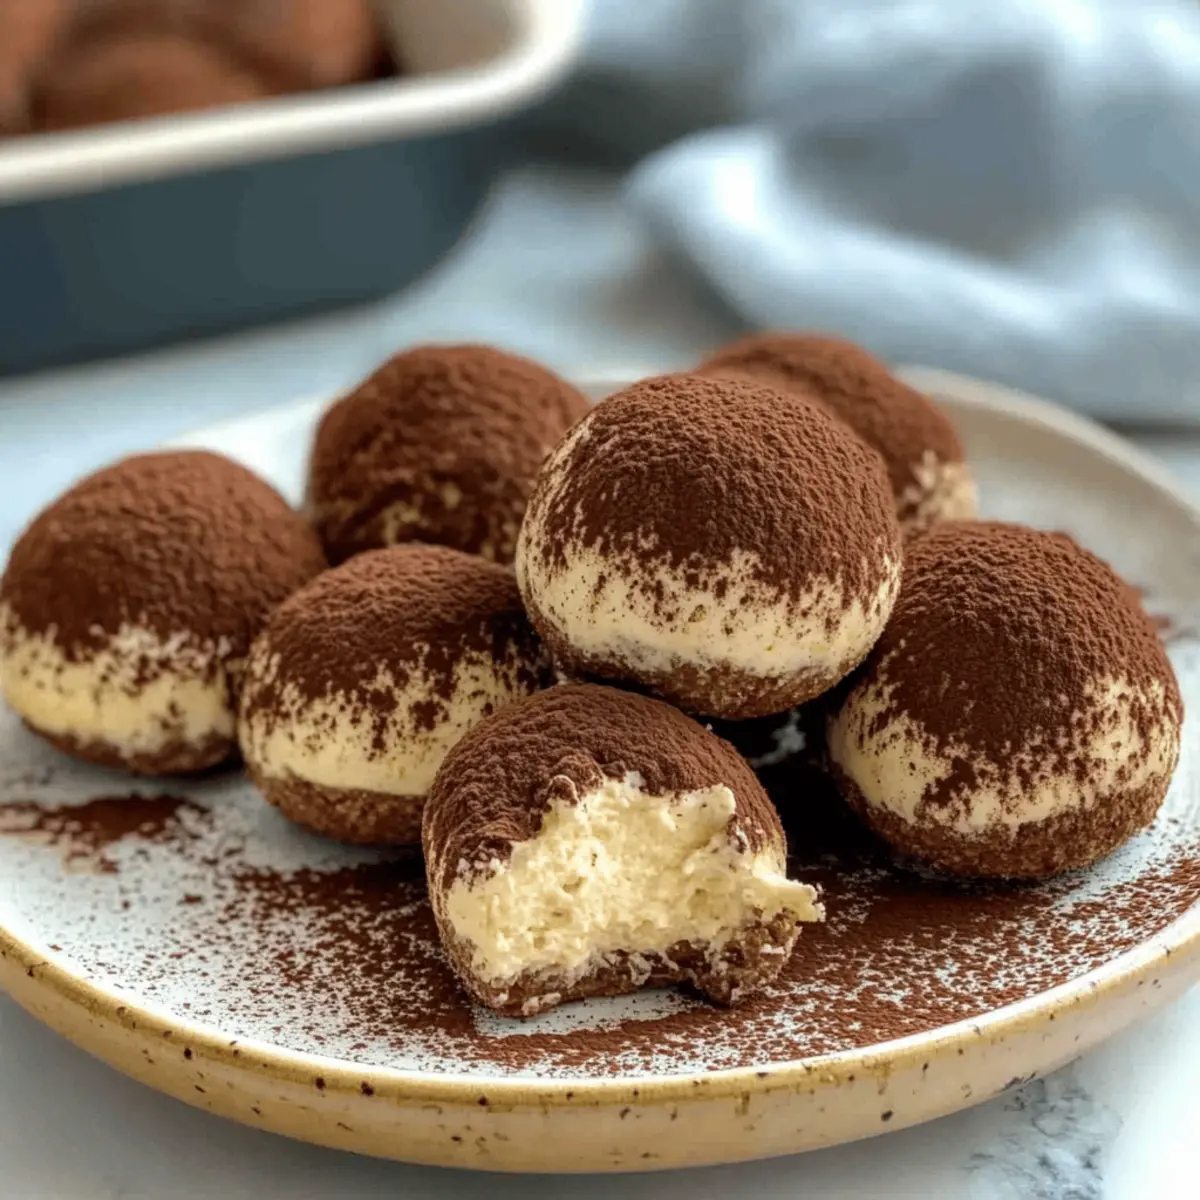
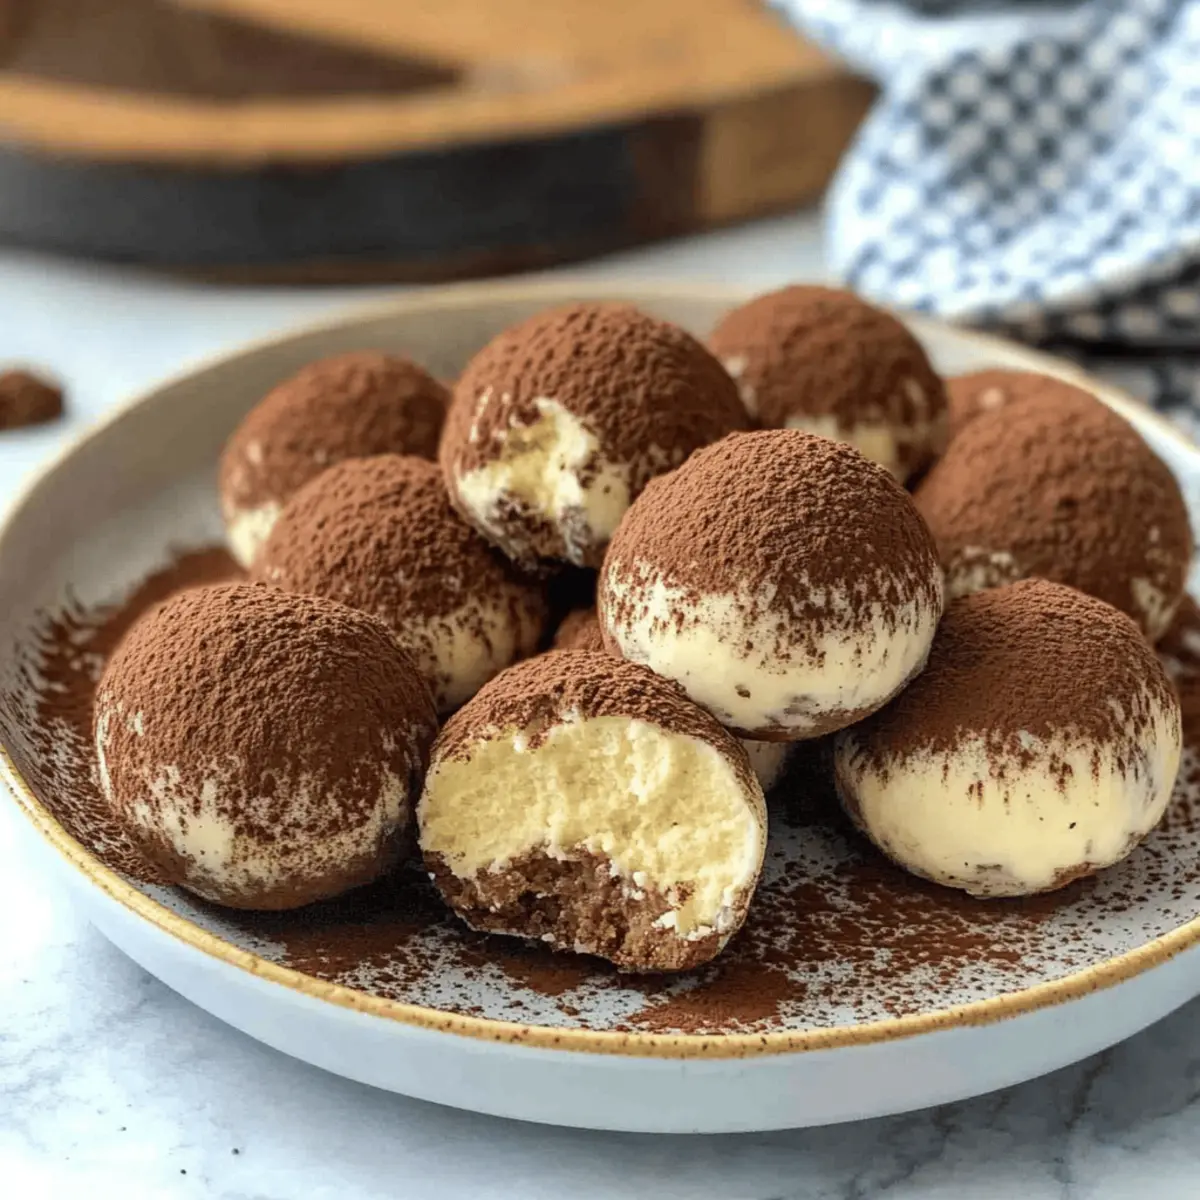
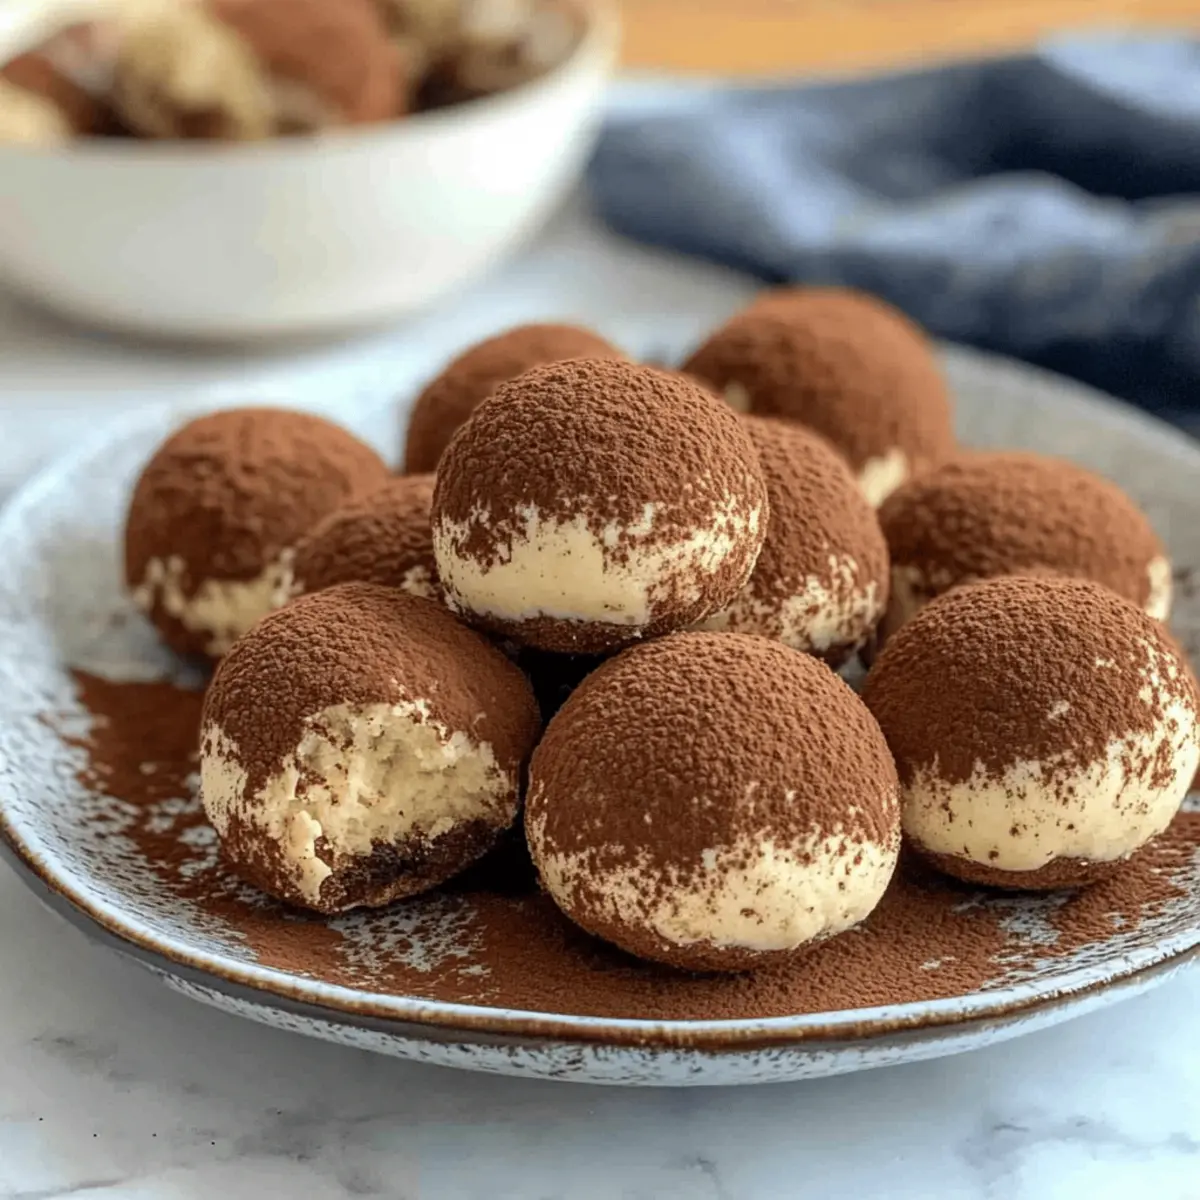
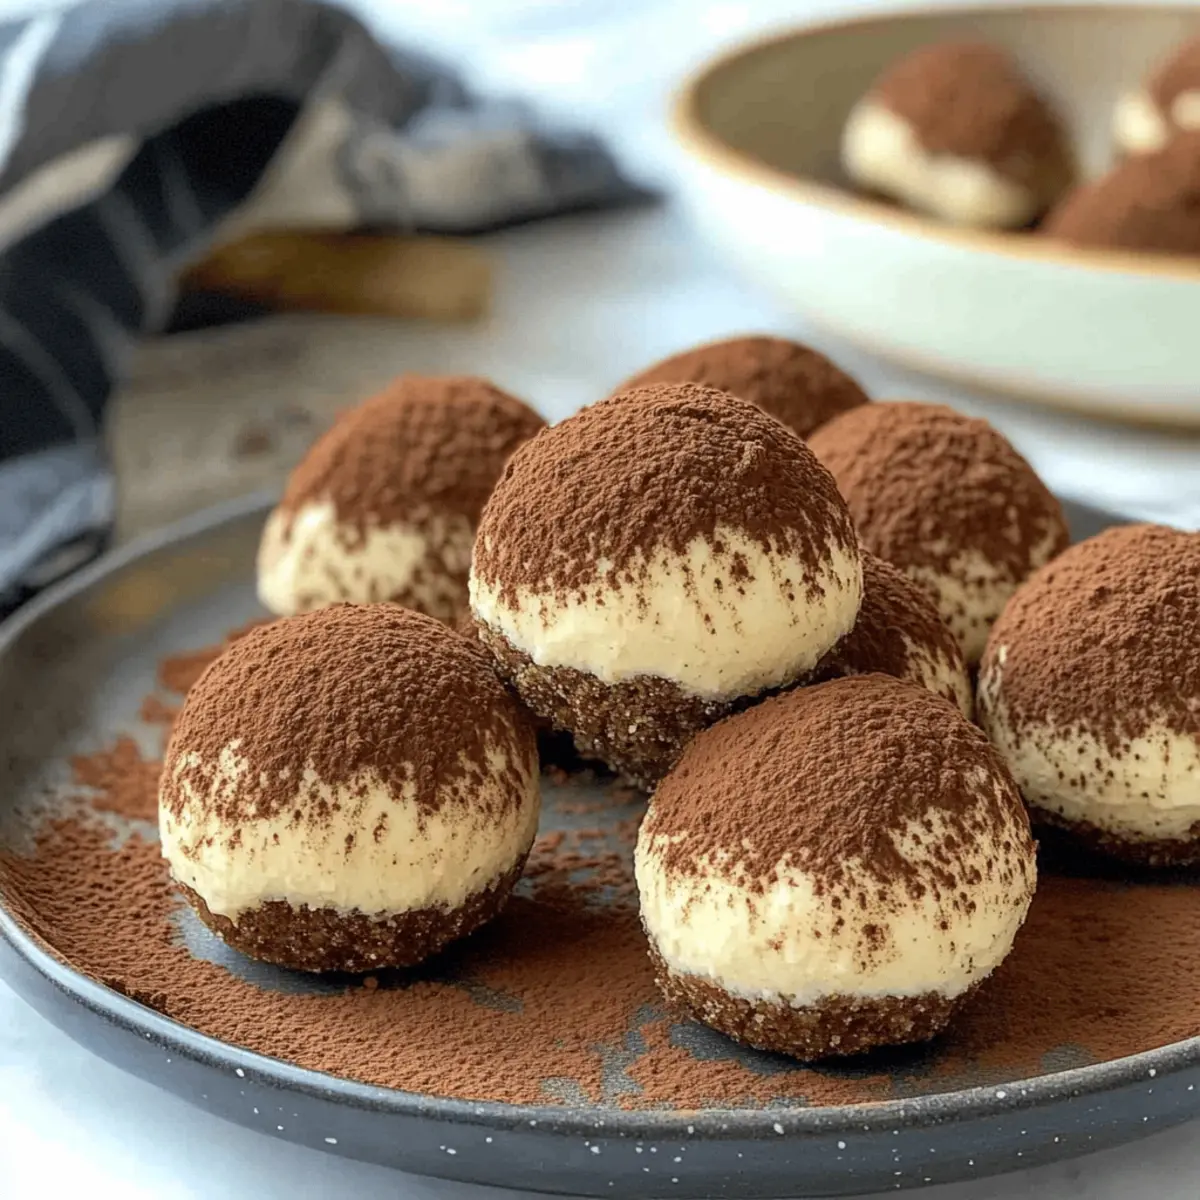
Step 6: Coat with Cocoa
Once chilled, take the tiramisu balls out of the refrigerator. Carefully roll each ball in a bowl of cocoa powder until evenly coated. This will add a rich finish and complement the sweetness inside, making each bite an indulgent experience that beautifully mirrors the iconic dessert.
How to Store and Freeze Tiramisu Balls
Fridge: Store the tiramisu balls in an airtight container in the fridge for up to one week to maintain their freshness and creamy texture.
Freezer: For longer storage, freeze the tiramisu balls in a single layer on a baking sheet, then transfer them to a freezer-safe container. They can be kept for up to three months.
Reheating: There’s no need to reheat these delightful bites; simply thaw in the fridge for a few hours before serving, allowing the flavors to mellow.
Make-Ahead Tips: Prepare a batch of tiramisu balls a day in advance for easy entertaining. They taste even better after chilling overnight, as the flavors meld beautifully.
Expert Tips for Tiramisu Balls
-
Cool Coffee First: Always let the coffee cool before mixing; hot coffee can melt the mascarpone and affect texture.
-
Adjust Consistency: If the mixture is too wet, add more crushed ladyfingers; if too dry, a touch of powdered sugar will bind it better.
-
Chilling Time: For firmer tiramisu balls, refrigerate them for at least an hour. The longer they chill, the better they hold their shape.
-
Perfect Coating: Use a fine cocoa powder for a smoother finish; Dutch-processed cocoa gives a richer flavor.
-
Creative Variations: Don’t hesitate to get creative! A splash of rum or looking beyond the cocoa for crushed nuts can add exciting twists to these tiramisu balls.
What to Serve with No-Bake Tiramisu Balls?
Creating a delightful dessert experience is easy when you pair these indulgent bites with complementary flavors and textures.
-
Fresh Berries: Adding vibrant strawberries or raspberries not only enhances the visual appeal but also provides a refreshing contrast to the rich creaminess of the tiramisu balls.
-
Coffee or Espresso: A warm cup of coffee complements the coffee-infused flavor of the tiramisu balls, elevating the overall experience and satisfying your caffeine cravings.
-
Chocolate Drizzle: A light drizzle of melted chocolate on top adds an extra layer of decadence, making each bite even more irresistible.
-
Creamy Gelato: Serving alongside a scoop of vanilla or espresso gelato introduces a creamy texture that pairs beautifully with the soft tiramisu balls.
-
Whipped Cream: A dollop of lightly sweetened whipped cream brings a cloud-like fluffiness that contrasts with the dense bites, enhancing the dessert experience.
-
Nutty Biscotti: Crunchy biscotti serves as a perfect side snack, providing a delightful crunch and adding a different flavor dimension while nibbling between tiramisu bites.
Pairing these options with your no-bake tiramisu balls will surely wow your guests and make for a truly memorable dessert experience!
Make Ahead Options
These no-bake tiramisu balls are perfect for meal prep, allowing you to enjoy a delicious treat with minimal last-minute fuss. You can prepare the mixture up to 24 hours in advance—simply combine the ladyfingers, mascarpone, coffee, and powdered sugar as instructed, then form the balls and refrigerate them. For optimal texture, keep them covered in an airtight container to prevent drying out. When you’re ready to serve, roll the chilled tiramisu balls in cocoa powder for that finishing touch. With these make-ahead tips, serving a delightful dessert will be a breeze, allowing you to enjoy your time with family and friends.
Tiramisu Balls Variations & Substitutions
Feel free to get creative with these tiramisu balls and make them your own! Each variation brings a delightful twist to this classic treat.
-
Creamy Swap: Substitute mascarpone with cream cheese mixed with a little heavy cream for a tangy flavor. This swap gives a slightly different texture that many find refreshing.
-
Flavor Infusion: Add a splash of vanilla extract or a sprinkle of cinnamon to elevate the flavor profile. These spices bring warmth and cozy notes, making each bite even more delicious.
-
Nutty Crunch: Roll the balls in crushed nuts like almonds or hazelnuts instead of cocoa powder. This adds a delightful crunch and a nutty richness that perfectly complements the sweet filling.
-
Dairy-Free Delight: Use coconut cream instead of mascarpone to make these balls dairy-free. The coconut flavor adds a fun tropical twist, turning this classic into something uniquely refreshing.
-
Decadent Drizzle: Drizzle melted dark chocolate over the chilled balls for an extravagant touch. Not only does it enhance presentation, but it also adds an extra layer of rich flavor that chocolate lovers will appreciate.
-
Spicy Kick: Incorporate a pinch of cayenne pepper or espresso powder to the mixture for a surprising but delightful heat. This subtle kick can balance the sweetness and create a more complex flavor.
-
Sweet Sprinkles: Use colorful sprinkles instead of cocoa powder for a fun party treat. This variation is particularly great for kids or festive celebrations, brightening up the presentation and adding a playful element.
Don’t forget to enjoy these delightful bites with a cup of coffee or as part of a dessert platter! If you love easy yet indulgent desserts, you might also want to explore our scrumptious Pot Turkey Meatballs, which offer wonderful flavors with effortless preparation.
Tiramisu Balls Recipe FAQs
How do I choose the right ladyfingers for my tiramisu balls?
Absolutely! Look for crisp, dry ladyfingers that are slightly stale as they soak up the coffee flavor better. Fresh ladyfingers may become too soggy, compromising the texture of your tiramisu balls. You can use either store-bought or homemade versions, depending on your preference.
What is the best way to store leftover tiramisu balls?
Very! Place the tiramisu balls in an airtight container in the refrigerator. They will stay fresh for up to one week. If you are prepping them for a party, consider making them a day in advance for optimal flavor. Just keep them in the fridge until you’re ready to serve!
Can I freeze tiramisu balls, and if so, how?
Absolutely! Freeze your tiramisu balls by first laying them out on a baking sheet in a single layer. Freeze them for about 1 to 2 hours until firm, then transfer them into a freezer-safe container or ziplock bag for up to three months. When you’re ready to enjoy them, simply thaw in the fridge for a few hours before serving.
What if my tiramisu balls turn out too wet?
No worries! If the mixture is too wet and doesn’t hold together well, you can easily fix it. Add more crushed ladyfingers—about one tablespoon at a time—until you reach the desired consistency. Alternatively, a sprinkle of powdered sugar may help bind the mixture if it’s too dry.
Are tiramisu balls suitable for people with dietary restrictions?
Very! For those with dairy sensitivities, consider substituting the mascarpone cheese with a dairy-free cream cheese or a blend of cashew cream. If you’re avoiding alcohol, simply skip the optional coffee liqueur in the recipe. Always double-check the ingredient labels to avoid allergens and customize to your dietary needs.
Delicious Tiramisu Balls for Effortless No-Bake Indulgence
Ingredients
Equipment
Method
- Prepare Coffee Mixture: Brew a small cup of strong coffee and cool to room temperature, about 10 minutes.
- Crush Ladyfingers: Pulse ladyfingers in a food processor until fine crumbs, 1-2 minutes.
- Mix Ingredients: In a bowl, combine crushed ladyfingers, mascarpone, powdered sugar, cooled coffee, and liqueur until smooth.
- Form Balls: Roll mixture into balls about one inch in diameter; should yield around 12-15.
- Chill: Place balls on a tray and refrigerate for at least 30 minutes.
- Coat with Cocoa: Roll chilled balls in cocoa powder until evenly coated.