
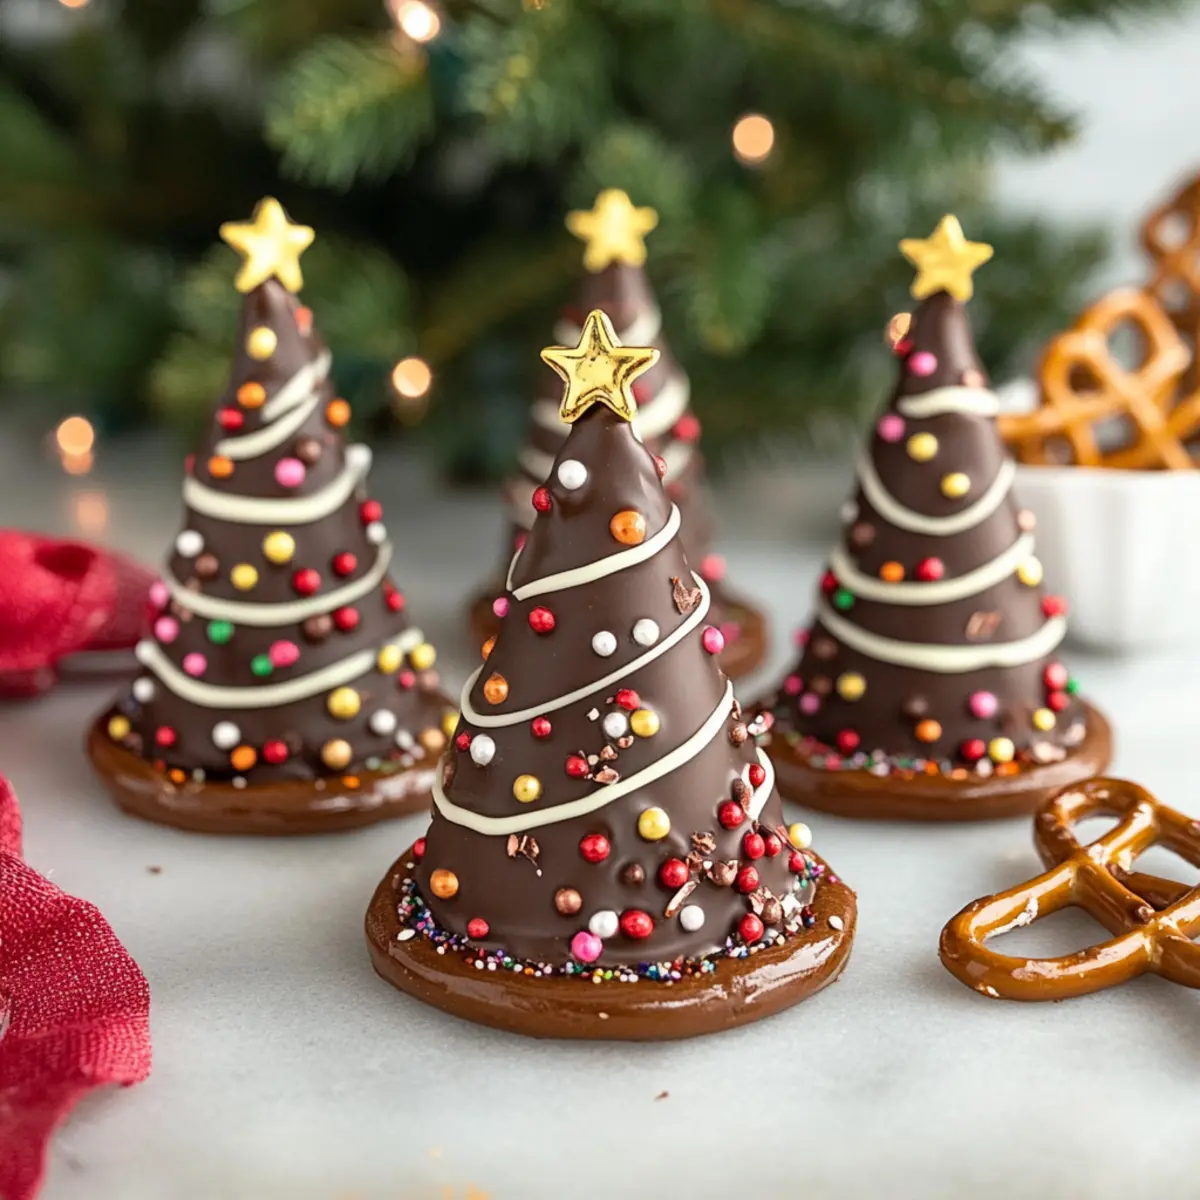
As I stood in my kitchen, surrounded by the joyful chaos of the holiday season, an idea struck me: why not create festive treats that even the littlest hands in my family could help with? Enter the magical world of Christmas Chocolate Trees! These delightful bites combine crunchy pretzels as trunks and smooth chocolate bark, elegantly adorned with colorful sprinkles. Not only is this recipe a no-bake wonder that can be whipped up in just 30 minutes, but it’s also an excellent way to bring everyone together, forging memories amidst the holiday hustle. With kid-friendly preparation and options to make it gluten-free, these charming chocolate trees promise to bring smiles and festive flair to your celebrations. Are you ready to add a sprinkle of magic to your holiday festivities?
Why are Christmas Chocolate Trees a must-try?
Kid-Friendly Fun: These delightful chocolate trees are perfect for little hands eager to create!
No Baking Required: In just 30 minutes, you can whip up these festive treats without any oven fuss.
Versatile Decorations: Get creative! Use different chocolates and sprinkles to customize each tree to match your holiday theme.
Crowd-Pleasing Treats: They’re not only adorable but also delicious—great for parties or as a charming centerpiece.
Memory-Making Moments: Enjoy the joy of decorating these trees together with family, creating sweet memories to cherish.
Try pairing them with our Keto Brownie Waffles for a festive dessert table that everyone will love!
Christmas Chocolate Trees Ingredients
• Perfect for festive decorations!
For the Chocolate Trees
- Dark Chocolate – Provides the main flavor and structure for the trees; can substitute with milk or white chocolate for a sweeter twist.
- White Chocolate – Drizzled on top for a snow-like effect, enhancing the overall presentation.
- Mini Colorful Sprinkles – Add a festive flair; feel free to use any variety that captures your holiday spirit.
- Pretzel Sticks – Serve as the crunchy trunks of the trees; opt for gluten-free pretzels for an inclusive treat if needed.
Step‑by‑Step Instructions for Christmas Chocolate Trees
Step 1: Prepare the Baking Tray
Line a baking tray with parchment paper, ensuring it’s flat and smooth to prevent sticking. This will serve as the foundation for our Christmas Chocolate Trees. Make sure the parchment paper is large enough to accommodate multiple trees, allowing you to work efficiently as you prepare your delightful, no-bake treats.
Step 2: Melt the Dark Chocolate
In a microwave-safe bowl, melt the dark chocolate in 30-second intervals, stirring between each session until fully smooth and creamy. This should take about 1-2 minutes total. Alternatively, use a double boiler over low heat, stirring consistently to avoid burning. Your melted chocolate should have a glossy appearance, ready for piping into festive tree shapes.
Step 3: Pipe the Tree Shapes
Transfer the melted dark chocolate into a piping bag or a zip-top bag with a corner snipped off. Pipe tree shapes onto the parchment paper, aiming for approximately 3 inches tall and 2 inches wide, with a wider base to support each pretzel trunk. Ensure each base overlaps with the pretzel stick for sturdy assembly, creating a festive forest of edible delight.
Step 4: Decorate with White Chocolate
Melt the white chocolate using the same technique as the dark chocolate. Once smooth, drizzle it over the piped chocolate trees to create a snowy effect. While the white chocolate is still wet, scatter mini colorful sprinkles over each tree, allowing them to stick and bring your Christmas Chocolate Trees to life with vibrant color and fun texture.
Step 5: Set the Chocolate Trees
Allow the Christmas Chocolate Trees to set at room temperature for about 10-15 minutes or place them in the refrigerator for quicker firming, approximately 15-20 minutes. As they cool, the chocolate will harden, resulting in a delightful crunch, while maintaining their whimsical shape ready for display or enjoyment.
Step 6: Display and Serve
Once set, carefully lift each tree from the parchment and arrange them on a festive platter. This charming presentation not only serves as a sweet centerpiece but makes for a delightful treat that can be shared or enjoyed individually. Feel free to get creative with your display to highlight these festive Christmas Chocolate Trees at your holiday gatherings!
Christmas Chocolate Trees Variations
Feel free to sprinkle your creativity into these delightful edible trees and customize them to your liking!
-
Milk Chocolate: Swap dark for milk chocolate for a sweeter, creamier flavor appeal that kids will adore.
-
White Chocolate: For a snowy touch, use only white chocolate to create your trees, giving them a winter wonderland vibe!
-
Gluten-Free Option: Substitute traditional pretzel sticks with gluten-free pretzels to make these festive treats accessible for everyone.
-
Candy Toppings: Add crushed peppermint candies or colorful mini M&Ms to the sprinkling stage for a delightful crunch and festive flair.
-
Mini Marshmallows: Use mini marshmallows as decorations to resemble snow-covered trees, enhancing their whimsical holiday charm.
-
Nutty Crunch: Drizzle with caramel and top with chopped nuts for a sweet surprise that adds rich flavor and texture.
-
Chocolate-Covered Pretzels: Get creative by using chocolate-covered pretzels as tree trunks for a double chocolate delight!
Feel inspired? Try serving your Christmas Chocolate Trees alongside our delightful Cheesecake Stuffed Chocolate for a heavenly dessert table that will impress your guests!
What to Serve with Christmas Chocolate Trees
These delightful treats are sure to be the star of your holiday table, and pairing them just right will make your celebrations even sweeter.
- Creamy Hot Chocolate: A warm cup of rich hot chocolate enhances the chocolatey goodness while adding a cozy, festive vibe.
- Fresh Fruit Platter: A colorful array of seasonal fruits provides a refreshing contrast to the sweetness, balancing flavors beautifully. Think juicy pomegranates and crisp apples!
- Peppermint Bark: This peppermint-infused treat echoes the festive flavors, creating a perfect pairing with your Christmas Chocolate Trees.
- Gingerbread Cookies: The warm spices from gingerbread complement the rich chocolate, adding an extra festive flair to your dessert spread.
- Nutty Biscotti: A crunchy, nutty biscotti dipped in coffee or tea brings texture and warmth, rounding out the dessert experience.
- Sparkling Apple Cider: A bubbly glass of sparkling cider adds a festive toast, enhancing the joyful atmosphere of your holiday gathering.
- Whipped Cream or Marshmallows: These simple toppings can elevate hot chocolate, making every sip a delightful experience alongside your chocolate trees.
- Yule Log Cake: An elegant yule log cake offers a classic holiday flavor that pairs splendidly with the playful charm of chocolate trees.
- Chocolate Mint Shake: For a creamy drink indulgence, this shake will resonate with the sweet and minty vibes of the holiday season.
- Vanilla Ice Cream: A scoop of vanilla ice cream pairs beautifully, offering a creamy counterpoint to the crunch of your chocolate creations.
Make Ahead Options
These Christmas Chocolate Trees are perfect for busy home cooks looking to save time during the festive season! You can prepare the chocolate tree shapes up to 24 hours in advance, piping and decorating them with sprinkles. Simply set them on a parchment-lined tray, and once they have cooled, store them in an airtight container to maintain their freshness and prevent sticking. If you’re aiming for ultra-fresh treats, keep the assembled trees refrigerated for up to 3 days before your holiday celebration. When you’re ready to serve, simply arrange them on a platter for an eye-catching display that brings holiday cheer without any last-minute hassle!
Expert Tips for Christmas Chocolate Trees
• Quick Work: Always work quickly with melted chocolate; it sets faster than you think! Have everything prepped beforehand for smooth sailing.
• Proper Melting: Ensure the chocolate is melted completely until silky smooth for easy piping. Lumpy chocolate can ruin the tree shapes.
• Secure the Trunk: If the pretzel trunk wobbles or comes off, use melted chocolate as glue to securely attach it, ensuring your Christmas Chocolate Trees stand tall!
• Creative Variations: Don’t hesitate to mix and match chocolate types and sprinkle colors—this makes decorating fun and adds a personal touch.
• Storage Tips: Keep your chocolate trees in an airtight container to maintain texture. They stay fresh for up to 5 days at room temperature!
How to Store and Freeze Christmas Chocolate Trees
Room Temperature: Keep your Christmas Chocolate Trees in an airtight container with layers of parchment paper for up to 5 days, ensuring they stay fresh and delicious.
Fridge: For a longer shelf life, refrigerate the chocolate trees for up to 2 weeks. Just remember to use a sealed container to prevent moisture from affecting their texture.
Freezer: You can freeze the chocolate trees for up to 2 months. Place them in a freezer bag or container, and thaw them in the fridge overnight before serving for the best flavor and texture.
Reheating: There’s no need to reheat these delightful treats; simply enjoy them as is, or let them come to room temperature if they’ve been chilled.
Christmas Chocolate Trees Recipe FAQs
What type of chocolate should I use for the Christmas Chocolate Trees?
Absolutely! Dark chocolate provides a rich flavor and sturdy structure, but you can definitely swap it for milk or white chocolate if you prefer a sweeter taste. Each type will give your trees a different vibe, so feel free to experiment with what you love best!
How long can I store my Christmas Chocolate Trees?
You can keep your Christmas Chocolate Trees in an airtight container with layers of parchment paper for up to 5 days at room temperature. If you’d like them to last longer, refrigerate them for up to 2 weeks. Just remember to store them in a sealed container to maintain their delightful texture!
Can I freeze the Christmas Chocolate Trees?
Yes, you can freeze these delightful treats for up to 2 months. To do this, place them in a freezer bag or container, ensuring they’re well-sealed. When you’re ready to enjoy them, thaw them in the refrigerator overnight for the best flavor and texture, so they don’t lose their charm!
What should I do if the melted chocolate is too thick for piping?
Very! If your melted chocolate is hardening or too thick for piping, you can easily fix it by gently reheating it in the microwave in 15-second intervals, stirring in between until it’s smooth again. This will give you the consistency needed to pipe beautifully shaped trees.
Are there any dietary considerations for the Christmas Chocolate Trees?
Certainly! If you have dietary restrictions, this recipe can easily be adapted. Substitute the standard pretzel sticks with gluten-free pretzels to make the treat gluten-free. Just ensure to check that the chocolate you use is also gluten-free, especially if you’re using store-bought brands. Always check labels for potential allergens!
Can I customize the decorations on my Christmas Chocolate Trees?
Yes, the more the merrier! You can have fun with toppings! Experiment with different types of sprinkles, crushed candies, or even edible glitter to create festive designs. This not only adds personal flair but also allows the kids to get creative with their decorating!
Delightful Christmas Chocolate Trees: Easy No-Bake Fun
Ingredients
Equipment
Method
- Line a baking tray with parchment paper, ensuring it’s flat and smooth to prevent sticking.
- In a microwave-safe bowl, melt the dark chocolate in 30-second intervals, stirring until fully smooth.
- Transfer the melted dark chocolate into a piping bag and pipe tree shapes onto the parchment paper.
- Melt the white chocolate using the same technique and drizzle it over the piped chocolate trees.
- Allow the Christmas Chocolate Trees to set at room temperature for about 10-15 minutes or refrigerate for quicker firming.
- Carefully lift each tree from the parchment and arrange them on a festive platter.