
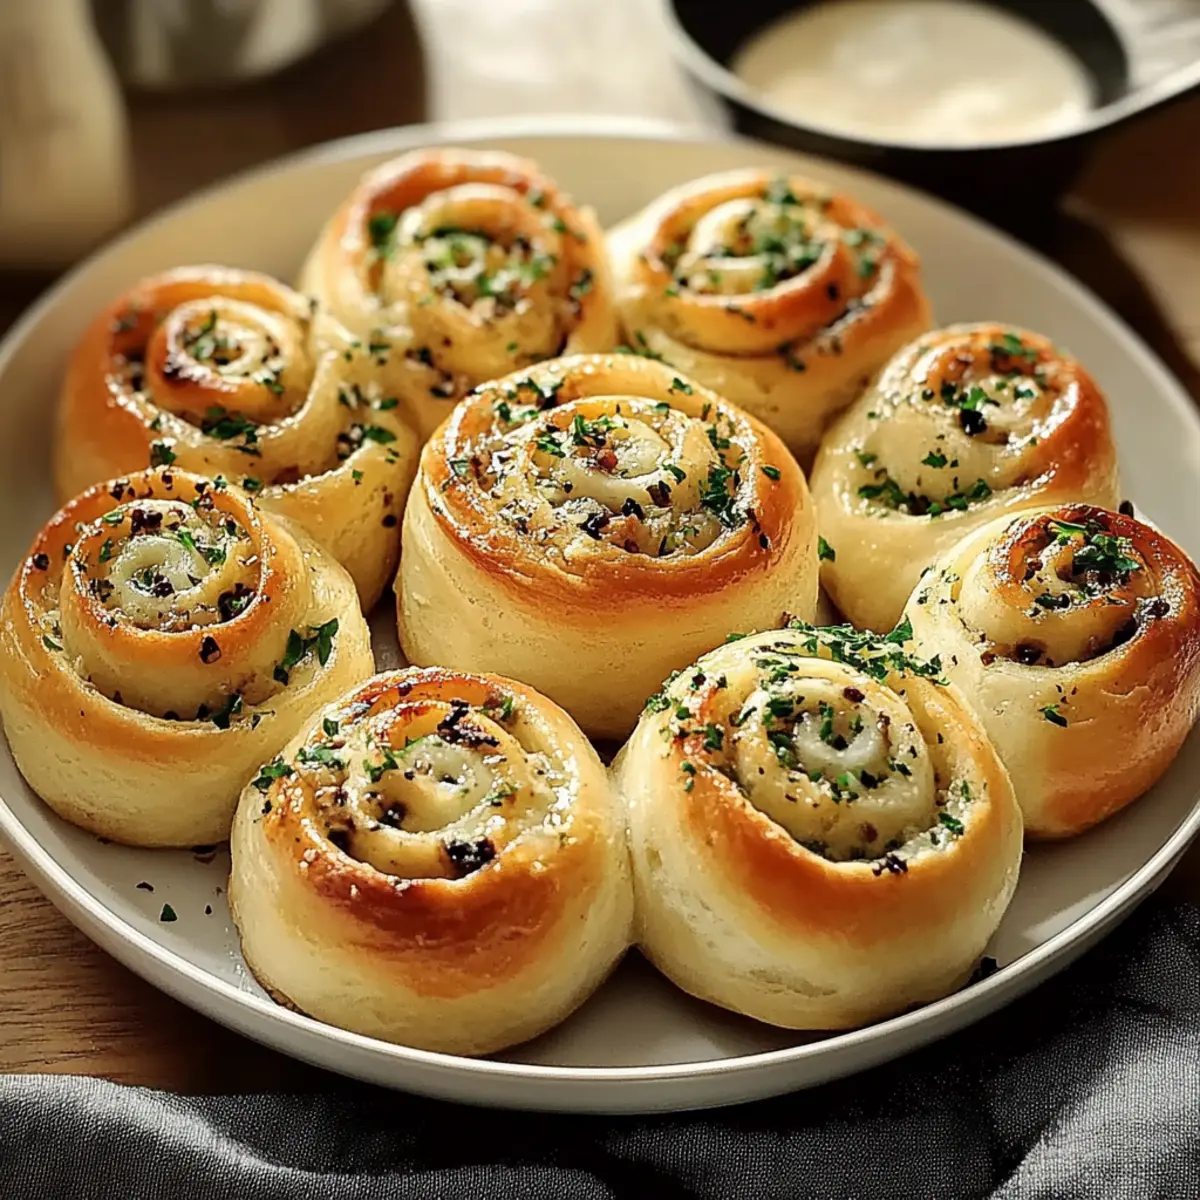
As the aroma of warm garlic rolls fills my kitchen, I can’t help but feel transported to cozy family gatherings where good food brings us all together. These Garlic-Swirl Rolls are the ultimate comfort food, boasting a soft, fluffy texture that perfectly cradles a rich, savory garlic butter filling. Not only are they a delightful treat for any family dinner or holiday feast, but they’re also embarrassingly easy to customize—tailor the filling to your tastes by adding cheeses or herbs for a personal twist! With just a few simple steps, you’ll find yourself in possession of a warm, aromatic batch that quickly becomes a kitchen staple. Curious how to create these irresistible rolls that melt in your mouth? Let’s dive in!
Why Will You Love Garlic-Swirl Rolls?
Satisfying Comfort: These rolls are the epitome of comfort food, with each bite enveloped in the rich flavor of garlic butter that warms the soul.
Easy Customization: Whether you’re a cheese lover or looking for a veggie boost, the flexibility of this recipe means you can easily adapt it to suit your taste, just like with my Garlic Shrimp Pasta.
Crowd-Pleasing: Perfect for family gatherings or casual get-togethers, they’re bound to impress everyone seated at your table.
Quick Turnaround: With straightforward instructions, you’ll have fresh, fluffy rolls ready in under two hours!
Visual Appeal: The beautiful swirls of garlic filling and golden crust make these rolls as pleasing to the eye as they are to the palate, just like my Roasted Garlic Tomato soup pairs well for a complete meal.
Embrace the joy of baking with these Garlic-Swirl Rolls—a treat your taste buds will thank you for!
Garlic Swirl Rolls Ingredients
For the Dough
- All-Purpose Flour – Provides structure and texture; opt for bread flour for chewier rolls.
- Active Dry Yeast – Serves as a leavening agent for fluffy rolls; can substitute with instant yeast and skip activation.
- Warm Milk (110°F) – Hydrates the flour and activates the yeast; feel free to use non-dairy milk for a dairy-free option.
- Granulated Sugar – Adds sweetness and activates the yeast; honey or maple syrup can be a tasty alternative.
- Unsalted Butter – Enhances flavor and moisture; plant-based butter works great for a dairy-free version.
- Large Eggs – Adds richness and helps bind the dough; flax eggs or egg substitutes can be useful for a vegan option.
- Salt – Essential for enhancing flavor and balancing the sweetness of the dough.
For the Filling
- Garlic (minced) – The core flavor in these garlic-swirled delights; adjust quantity for a milder presence.
- Fresh Parsley (chopped) – Adds freshness and color to the filling; dried parsley or other herbs can be swapped in.
- Black Pepper – Adds a subtle spice; optional for those who prefer a milder flavor.
For Topping (Optional)
- Parmesan Cheese – Adds depth of flavor; feel free to omit or use dairy-free cheese for a vegan-friendly twist.
These Garlic-Swirl Rolls are not only delicious but also customizable, allowing each bite to be as unique as the occasion. Enjoy the baking!
Step‑by‑Step Instructions for Garlic Swirl Rolls
Step 1: Prepare the Dough
In a large mixing bowl, combine 1 cup of warm milk (about 110°F) and 1 tablespoon of granulated sugar. Sprinkle 2 teaspoons of active dry yeast on top and let it sit for 5-10 minutes until frothy. Once activated, mix in ¼ cup of melted unsalted butter, 2 large eggs, and 1 teaspoon of salt. Gradually add in 3-4 cups of all-purpose flour until a soft dough forms.
Step 2: Knead
Transfer the dough onto a floured surface and knead for 5-7 minutes until it’s smooth and elastic. The dough should feel slightly tacky but not sticky. Form it into a ball and place it in a greased bowl, covering it with a clean kitchen towel. Let it rise in a warm, draft-free area for 1 to 1.5 hours, or until it doubles in size.
Step 3: Prepare Filling
While the dough rises, mix together ½ cup of softened unsalted butter, 4-6 cloves of minced garlic, ¼ cup of chopped fresh parsley, and a pinch of salt and pepper in a medium bowl. Blend these ingredients until smooth, creating a rich garlic butter filling that will elevate your Garlic Swirl Rolls.
Step 4: Shape Rolls
After the dough has risen, punch it down to release air, then roll it out into a rectangle on a floured surface, about ½ inch thick. Evenly spread the garlic butter filling across the surface of the dough. Starting from one long side, tightly roll the dough into a log shape. Slice the log into 12 equal pieces using a sharp knife or dental floss for clean cuts.
Step 5: Second Rise
Place the sliced rolls cut-side up in a greased baking dish, ensuring they’re slightly spaced apart. Cover the dish with a towel and let the rolls rise for another 30-45 minutes, until they’ve puffed up. This second rise is crucial for soft and fluffy Garlic Swirl Rolls.
Step 6: Bake
Preheat your oven to 350°F (175°C) while the rolls complete their second rise. Once heated, bake the rolls for 20-25 minutes or until they turn a lovely golden brown. Keep an eye on them during the last few minutes to prevent over-browning. Once finished, let them cool slightly before serving for the optimal experience.
How to Store and Freeze Garlic-Swirl Rolls
Room Temperature: Store in an airtight container or wrap in plastic wrap for up to 2 days to maintain freshness.
Fridge: If you need to keep them longer, refrigerate your Garlic-Swirl Rolls for up to 1 week; gently reheat in the oven or microwave before serving.
Freezer: Freeze the rolls for up to 3 months. Wrap each roll tightly in plastic wrap, then place them in a freezer bag. Thaw overnight in the fridge before reheating.
Reheating: For best results, warm the rolls in a preheated oven at 350°F (175°C) for about 10 minutes to restore their fluffy texture.
Expert Tips for Garlic-Swirl Rolls
-
Activate Yeast Correctly: Always ensure your yeast is active; if it doesn’t bubble after 10 minutes, start over with fresh yeast.
-
Don’t Over-Knead: Knead the dough just until smooth and elastic; over-kneading can result in tough rolls instead of the desired fluffy texture.
-
Warm Rising Environment: For optimal dough rise, keep it in a warm, draft-free area. A slightly warmed oven or a sunny spot works wonders!
-
Measure Flour Accurately: Use the scoop-and-level method to avoid adding too much flour; too much flour can lead to dense Garlic Swirl Rolls.
-
Portion Filling Wisely: Spread the filling evenly but don’t overdo it, as too much can make the rolls soggy instead of delightfully fluffy.
-
Cool Before Serving: Allow your rolls to cool for a few minutes before digging in; this helps the flavors to meld and makes for easier handling.
Garlic Swirl Rolls: Creative Twists Await
Get ready to make these flavorful Garlic Swirl Rolls even more special by putting your unique spin on them—let your taste buds lead the way!
-
Cheesy Bliss: Add shredded mozzarella or cheddar to the filling for a gooey, cheesy twist that makes every bite irresistible.
-
Veggie Delight: Incorporate sautéed spinach or caramelized onions for a nutritious flavor burst. They add layers of sweetness and a touch of earthiness, perfect for balancing the garlic’s kick.
-
Herb-Infused: Swap out parsley for fresh basil or thyme to infuse a different herbal note. It’s a wonderful way to personalize these rolls to your flavor preferences.
-
Heat it Up: A sprinkle of crushed red pepper flakes in the garlic filling will give your rolls an exciting kick that heat lovers will adore.
-
Garlic-Free Twist: Want to try something different? Substitute the garlic with shallots or mix in roasted red peppers for a sweet, savory alternative.
-
Sweet Surprise: For a sweeter version, spread a layer of cinnamon butter along with the garlic filling. The combination can be a delightful breakfast treat!
-
Nutty Crunch: Add a tablespoon of sesame seeds to the top of the rolls before baking for a nutty finish that adds extra texture and flavor.
-
Vegan-Friendly: Use plant-based butter, skip the eggs, and opt for a non-dairy milk to make these rolls vegan, all while keeping the flavor intact.
Feel free to explore these variations or create your own! Remember, if you’re in need of more inspiration, check out my delicious Honey Garlic Tofu that showcases versatile flavors too. With Garlic-Swirl Rolls in your kitchen, the possibilities are endless!
What to Serve with Garlic-Swirl Rolls
These delightful rolls bring warmth and flavor to any meal, so let’s complement them perfectly!
- Creamy Tomato Soup: The tanginess of tomato soup pairs beautifully with the savory garlic flavors, creating a comforting combination for cozy nights.
- Caesar Salad: Crisp romaine and a rich Caesar dressing provide a refreshing contrast to the fluffy rolls, adding texture and zest to your meal.
- Grilled Chicken: Tender, seasoned chicken brings a savory heartiness to the table, making for a satisfying dinner alongside your buttered rolls.
- Herbed Butter: A simple mix of fresh herbs and softened butter enhances the flavor of the rolls, encouraging you to savor every bite.
- Spicy Marinara Sauce: Dip your Garlic-Swirl Rolls in spicy marinara for a burst of flavor that will excite your taste buds, perfect for sharing!
- Cheese Board: Curated cheeses, olives, and nuts create a delightful appetizer spread, making the rolls excellent additions to any charcuterie.
- Red Wine: A glass of smooth red wine enhances the meal, harmonizing with the garlic flavors to elevate your dining experience.
- Apple Crisp: Finish on a sweet note with a warm, gooey apple crisp—its sweetness balances the savory rolls and warms the heart.
These pairings not only enhance the rolls but ensure your meal is a comforting, flavorful experience!
Make Ahead Options
These Garlic-Swirl Rolls are an excellent choice for meal prep! You can prepare the dough and shape the rolls up to 24 hours in advance. Simply follow the recipe instructions up to the second rise, then cover the rolls tightly with plastic wrap and refrigerate. To maintain their fluffy texture, allow the rolls to come to room temperature for about 30 minutes before baking. Alternatively, you can freeze uncooked rolls for up to 3 months; before baking, let them thaw overnight in the refrigerator and rise for an additional 30-45 minutes. When you’re ready to enjoy, simply bake them as directed, and you’ll have fresh, comforting Garlic-Swirl Rolls with minimal effort!
Garlic Swirl Rolls Recipe FAQs
How do I select ripe ingredients for Garlic-Swirl Rolls?
Absolutely! For the best results, opt for high-quality ingredients: look for all-purpose flour that feels fresh and doesn’t have dark spots. Use whole garlic cloves that are firm to the touch with no sprouting. Fresh parsley should be bright green and not wilted. For butter, choose unsalted to control salt levels.
What are the best storage methods for Garlic-Swirl Rolls, and how long do they last?
Simply store your Garlic-Swirl Rolls in an airtight container at room temperature for up to 2 days. If refrigeration is needed, they’ll stay fresh for about a week. Make sure to reheat them to restore their fluffy texture—just pop them in the oven at 350°F for about 10 minutes, and they’ll be good as new!
Can I freeze Garlic-Swirl Rolls, and what’s the best way to do it?
Yes, you can definitely freeze these yummy rolls! Wrap each cooled roll tightly in plastic wrap, then place them in a freezer bag to prevent freezer burn. They’ll stay delicious for up to 3 months. To reheat, just thaw overnight in the fridge and warm them at 350°F for 10-15 minutes.
What should I do if my dough doesn’t rise properly?
Very! If your dough isn’t rising, first, check your yeast—if it hasn’t bubbled after 10 minutes in warm milk, it may be inactive. Create a warm environment for rising, like placing it in a slightly warm oven. If the dough has still not risen after adjusting the conditions, it might be necessary to start over with fresh yeast.
Are there any dietary considerations I should keep in mind for Garlic-Swirl Rolls?
Sure thing! For vegans or those with dairy allergies, simply substitute the regular butter with plant-based butter and use a flax egg in place of the large egg. Make sure to check that all cheeses and other toppings are dairy-free if needed. These rolls can be easily adjusted to fit various dietary needs without sacrificing flavor!
Can I customize the filling for Garlic-Swirl Rolls?
Absolutely! The garlic filling can be modified to your liking by adding ingredients like shredded mozzarella or cheddar for a cheesy twist, or even incorporating sautéed spinach and onions for an added veggie boost. Tinker with the garlic amount depending on your preference for a milder flavor!
Garlic Swirl Rolls: Fluffy Comfort You Can't Resist
Ingredients
Equipment
Method
- Combine warm milk and granulated sugar in a mixing bowl. Sprinkle yeast on top and let sit for 5-10 minutes until frothy. Mix in melted butter, eggs, and salt, then gradually add flour to form a soft dough.
- Knead the dough on a floured surface for 5-7 minutes until smooth and elastic. Place in a greased bowl, cover, and let rise for 1 to 1.5 hours until doubled in size.
- Mix together softened butter, minced garlic, chopped parsley, and a pinch of salt and pepper for the filling.
- Punch down the risen dough, roll it out into a rectangle, and spread the filling evenly. Roll into a log and slice into 12 equal pieces.
- Place the rolls cut-side up in a greased baking dish, cover, and let rise for 30-45 minutes until puffed up.
- Preheat the oven to 350°F (175°C) and bake the rolls for 20-25 minutes until golden brown. Allow to cool slightly before serving.