
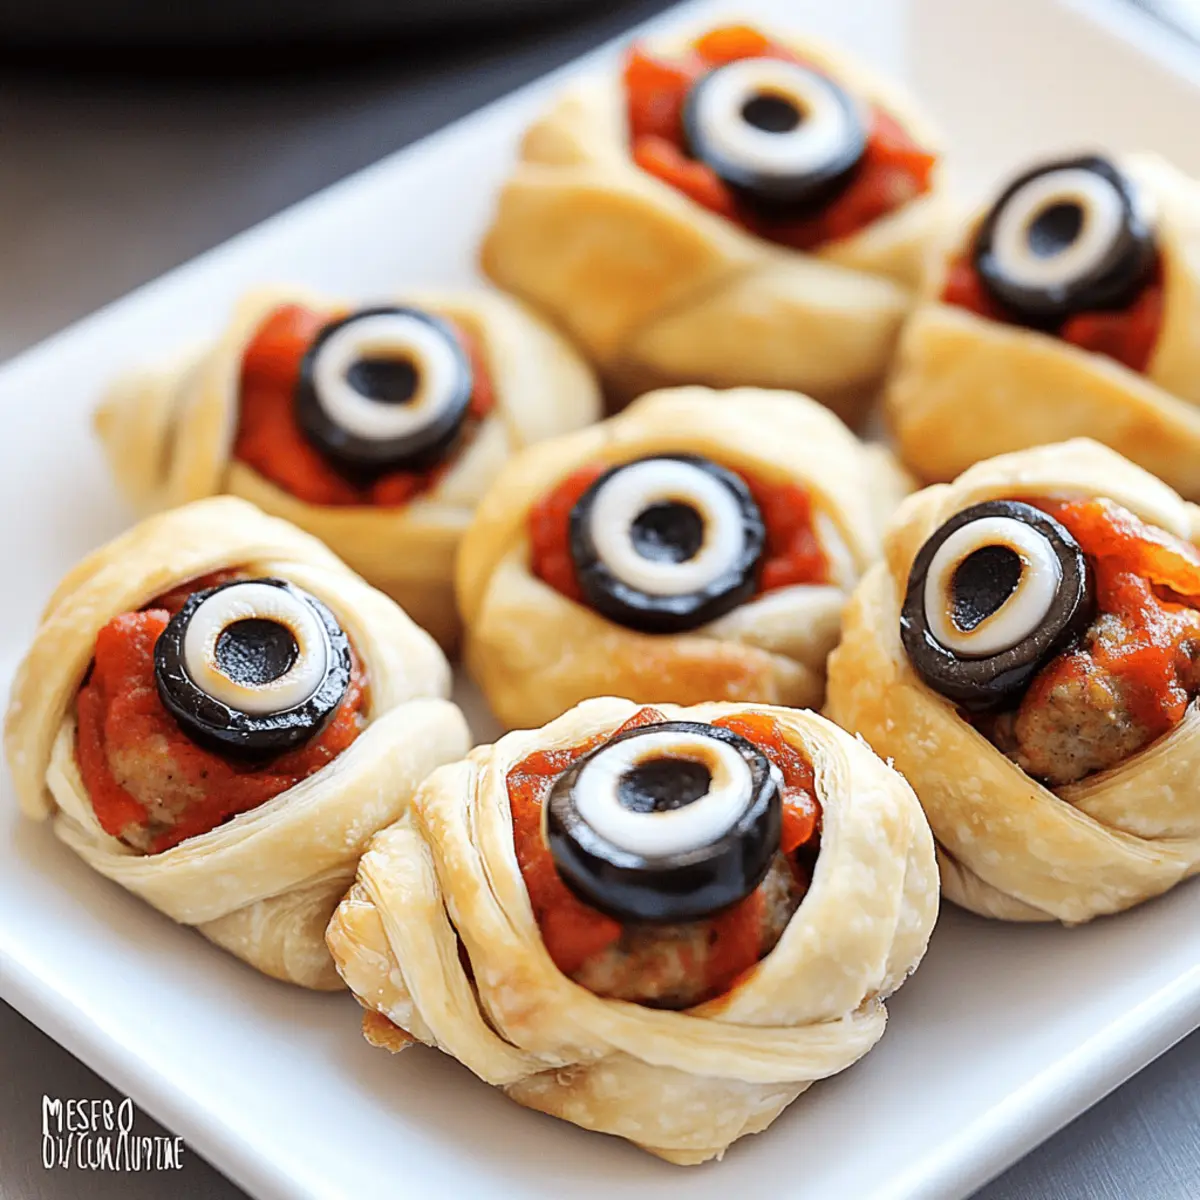
As I rummaged through my pantry in search of Halloween treats, my eyes landed on a pack of crescent rolls and a bag of frozen meatballs. Suddenly, inspiration struck—why not transform these everyday ingredients into spooky yet delightful Meatball Mummies? These easy, finger-licking appetizers are perfect for any gathering, bringing a playful twist to your holiday spread. With just a few simple steps, you’ll wrap up delicious meatballs in flaky dough, creating a dish that’s not only adorable but also a crowd-pleaser. Imagine their delighted faces as they dip these mummy-inspired bites into a rich marinara sauce. Ready to make your Halloween a little more fun with these Meatball Mummies? Let’s get cooking!

Why Are Meatball Mummies So Special?
Delightfully Fun: Meatball Mummies are not just tasty; they’re a playful take on classic appetizers that kids and adults will love alike.
Easy to Prepare: With minimal ingredients, making these spooky treats is a breeze and perfect for even novice cooks.
Flavorful Layers: The contrast of flaky crescent dough and juicy meatballs creates a delightful bite that’s bursting with flavor.
Perfect Party Food: These mummies serve as a fun conversation starter and are great for holiday gatherings, making them a must-try for any spooky celebration.
Versatile and Customizable: Swap out the olives for other favorites, or add more dipping sauces like ranch for a personal touch—it’s your creation!
Ready to impress your guests? They’re sure to be a hit alongside other festive treats like Pot Turkey Meatballs.
Meatball Mummies Ingredients
For the Mummies
• Crescent Roll Sheet – Provides the mummified look and flaky texture; can substitute with puff pastry if preferred.
• Frozen Meatballs – The main protein component that offers convenience; using homemade meatballs gives a fresher taste.
For the Eyes
• Sliced Olives – Adds a savory touch and creates the “eyes” of the mummies; alternatively, use small pieces of pepperoni or cheddar for a fun twist.
For Dipping
• Marinara Sauce – Serves as both a flavorful topping and dip; consider using a spicy marinara for an extra kick.
These simple ingredients come together to create your delightful Meatball Mummies, perfect for adding some festive fun to your Halloween celebrations!
Step‑by‑Step Instructions for Meatball Mummies
Step 1: Preheat the Oven
Begin by preheating your oven to 350°F (175°C) and line a baking sheet with parchment paper. This will ensure an easy release of the Meatball Mummies after baking and help with even cooking. Take a moment to gather your ingredients, including the crescent roll sheet and frozen meatballs, so everything is ready for assembly.
Step 2: Prepare the Crescent Dough
Unroll the crescent roll sheet on a clean, lightly floured surface, and use a pizza cutter or knife to slice it into thin strips, about 1/4-inch wide. These strips will mimic the bandages for your Meatball Mummies as they bake. Make sure the strips are uniform in size for even wrapping around the meatballs.
Step 3: Wrap the Meatballs
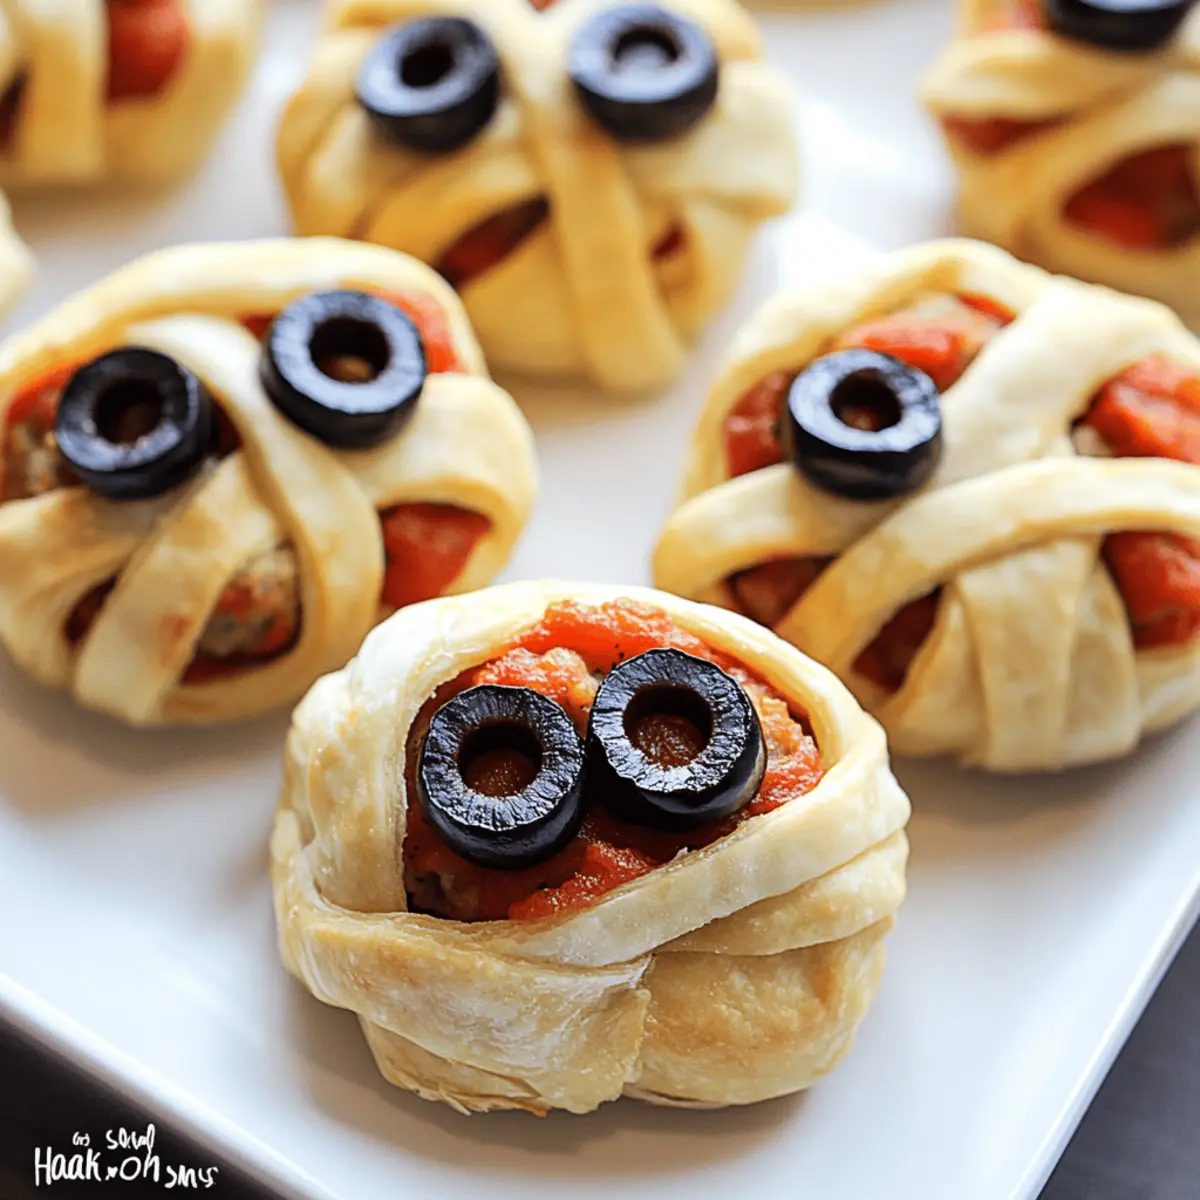
Take a frozen meatball and gently wrap one of the strips of dough around it, crisscrossing the dough for a mummified look, leaving a small space for the “eyes.” Place each wrapped meatball on the prepared baking sheet about an inch apart. Continue this process until all meatballs are encased in dough, ensuring a fun, spooky appearance.
Step 4: Add the Eyes
Using a teaspoon, take some marinara sauce and “glue” two sliced olives on top of each meatball for the eyes, pressing gently to secure them in place. This adds a playful and spooky touch to your Meatball Mummies, making them cute as well as delicious. Don’t be shy—get creative with eye placement, too!
Step 5: Bake the Mummies
Slide the baking sheet into the preheated oven, setting a timer for 15 to 20 minutes. Keep an eye on the mangled creations as they bake; they should become golden brown and the meatballs will heat through perfectly. The dough should look flaky and slightly puffed, adding to the mummy’s eerie charm.
Step 6: Serve and Enjoy
Once baked, remove the Meatball Mummies from the oven and let them cool for a few minutes. Serve them warm on a platter alongside a bowl of marinara sauce for dipping. The delightful combination of flaky dough and savory meatballs will be a fun addition to your Halloween feast, inviting everyone to enjoy these adorable snacks!
How to Store and Freeze Meatball Mummies
Fridge: Store leftover Meatball Mummies in an airtight container for up to 3 days. Reheat them in the oven to restore that delightful flakiness.
Freezer: Assemble the mummies and freeze them before baking. When ready to enjoy, bake them directly from frozen, adding a few extra minutes to the cooking time.
Reheating: For the best texture, reheat in the oven at 350°F for about 10-15 minutes. This keeps the dough crispy and ensures the meatballs are heated through.
Airtight Storage: Use airtight containers or freezer bags to prevent freezer burn and maintain the flavor and texture of your Meatball Mummies.
Meatball Mummies Variations & Substitutions
Feel free to unleash your creativity and customize your Meatball Mummies for a unique twist that will surprise your guests!
-
Turkey Meatballs: Swap frozen beef meatballs for turkey meatballs for a leaner option that still packs great flavor. Turkey will keep the mummies light and tender.
-
Vegetarian Delight: Use plant-based meatballs for a vegetarian twist. There’s an array of delicious alternatives available; it’s a fun way to include everyone in the Halloween fun!
-
Pepperoni Eyes: If olives aren’t your style, try using small circles of pepperoni or even bits of mozzarella cheese for the eyes—definitely a cheesy surprise!
-
Spicy Marinara: Add some heat by using a spicy marinara sauce for dipping. It gives a delightful kick that complements the savory meatball mummy beautifully.
-
Herb-Infused Dough: Before wrapping the meatballs, sprinkle some Italian seasoning onto the crescent dough. This simple addition will elevate the flavor of the crust and intrigue the taste buds.
-
Bacon-Wrapped Mummies: For meat lovers, consider wrapping the meatballs in bacon before applying the crescent dough. The smoky flavor adds an indulgent touch to these ghoulish treats.
-
Gluten-Free Option: Use gluten-free crescent roll dough for those with dietary restrictions. Pair it with homemade meatballs to ensure everyone can join the Halloween feast.
-
Garnish Goodies: Add a sprinkle of fresh parsley or grated parmesan after baking for added zing and a festive touch! This will not only amp up the flavor but also the visual appeal.
Enjoy making your Meatball Mummies your own, and if you’re looking for more inspiration, don’t forget to check out the delightful Pot Turkey Meatballs! Whatever variations you choose, these will surely delight your guests.
What to Serve with Meatball Mummies?
Elevate your Halloween gathering with delicious sides and beverages that complement these spooky, savory bites.
-
Crispy Potato Wedges: These golden wedges add a satisfying crunch and can be paired with various dips, making them a perfect sidekick.
-
Spooky Veggie Platter: Seasonal veggies like mini bell peppers and cucumbers carved into ghosts create a fresh contrast and encourage healthy snacking.
-
Cheesy Garlic Breadsticks: Soft, warm breadsticks brushed with garlic butter bring rich flavors to the table, perfect for dipping in marinara sauce too!
-
Witch’s Brew Punch: This refreshing beverage, with green fruit juice and soda, delights guests and adds a fun touch that’s fitting for your creepy theme.
-
Pumpkin Soup Shots: These creamy shots serve as a warm, comforting contrast to the flaky Meatball Mummies while maintaining a festive vibe. Serve in miniature cups for a charming touch.
-
Chocolate Mummy Cupcakes: End the meal on a sweet note with cupcakes decorated like little mummies, ensuring the fun continues through dessert!
Expert Tips for Meatball Mummies
-
Wrap Tightly: Ensure the crescent dough strips are wrapped snugly around the meatballs. Loose wrapping may cause them to unravel during baking.
-
Watch for Browning: Keep a close eye on the mummies while baking to prevent over-browning. A light golden hue is ideal for the perfect texture.
-
Chill the Dough: If your crescent rolls are too soft to handle, refrigerate them briefly. This helps create sharp, defined mummy shapes when wrapping.
-
Dipping Sauce Variety: Offer an assortment of dipping sauces alongside marinara. Ranch, garlic aioli, or spicy mustard could elevate your Meatball Mummies experience.
-
Meal Prep Ahead: As a great make-ahead option, assemble the Meatball Mummies and freeze them uncooked. Bake directly from the freezer, adding extra baking time for exquisite mummies!
Make Ahead Options
These Meatball Mummies are perfect for meal prep and can save you precious minutes on busy Halloween nights! You can prepare the mummies up to 24 hours in advance by wrapping each frozen meatball with crescent dough and placing them on a baking sheet. Cover tightly with plastic wrap and refrigerate until you’re ready to bake. To maintain their delicious quality, make sure the dough is wrapped snugly to prevent it from drying out. When you’re ready to serve, simply pop them into the preheated oven and bake for the same 15-20 minutes, ensuring they come out just as delightful and crispy. Enjoy your spooktacular feast with minimal last-minute effort!
Meatball Mummies Recipe FAQs
How do I choose the right frozen meatballs?
Absolutely! When selecting frozen meatballs, look for those with minimal fillers and preservatives. Check the package for whole ingredients and a focus on quality meats. Alternatively, homemade meatballs can provide a fresher flavor. I recommend using beef or turkey meatballs depending on your preference.
How long can I store leftover Meatball Mummies?
Very good question! You can store leftover Meatball Mummies in an airtight container in the fridge for up to 3 days. When you’re ready to enjoy them again, simply reheat in the oven at 350°F for about 10-15 minutes for that lovely, flaky texture to return.
Can I freeze Meatball Mummies before baking?
Absolutely! To freeze them, assemble the Meatball Mummies but do not bake. Place them on a baking sheet in a single layer and freeze until firm, about 1-2 hours. Once frozen, transfer them to a freezer bag or container. They can stay in the freezer for up to 3 months. When you’re ready to bake, just pop them directly into the oven from frozen, adding an additional 5-10 minutes to the baking time.
What should I do if the dough is too soft to work with?
No worries! If your crescent roll dough feels too soft and difficult to handle, simply chill it for about 15-20 minutes in the fridge. This helps the dough firm up and makes wrapping the meatballs easier, giving you those sharp, defined mummy shapes you’re looking for!
Are Meatball Mummies safe for kids with allergies?
Definitely! However, always inspect the ingredient list carefully, especially for potential allergens like gluten or dairy from the crescent rolls and meatballs. To accommodate various dietary needs, you can use gluten-free crescent rolls and substitute the meatballs with vegetarian options or allergen-free brands. Always best to check with your guests beforehand!
Can I use other ingredients for the “eyes”?
Of course! While sliced olives are fun and savory, you can get creative. Small pieces of pepperoni or even small chunks of cheese can work beautifully too. Feel free to experiment; after all, the more the merrier when it comes to Halloween fun!

Meatball Mummies: Spooky Finger Food for Halloween Fun
Ingredients
Equipment
Method
- Preheat the oven to 350°F (175°C) and line a baking sheet with parchment paper.
- Unroll the crescent roll sheet and slice it into thin strips, about 1/4-inch wide.
- Wrap a frozen meatball with a strip of dough, crisscrossing for a mummified appearance.
- Using marinara sauce, attach two sliced olives on top of each meatball for the eyes.
- Bake in the preheated oven for 15 to 20 minutes until golden brown and flaky.
- Let cool for a few minutes before serving with a bowl of marinara for dipping.