
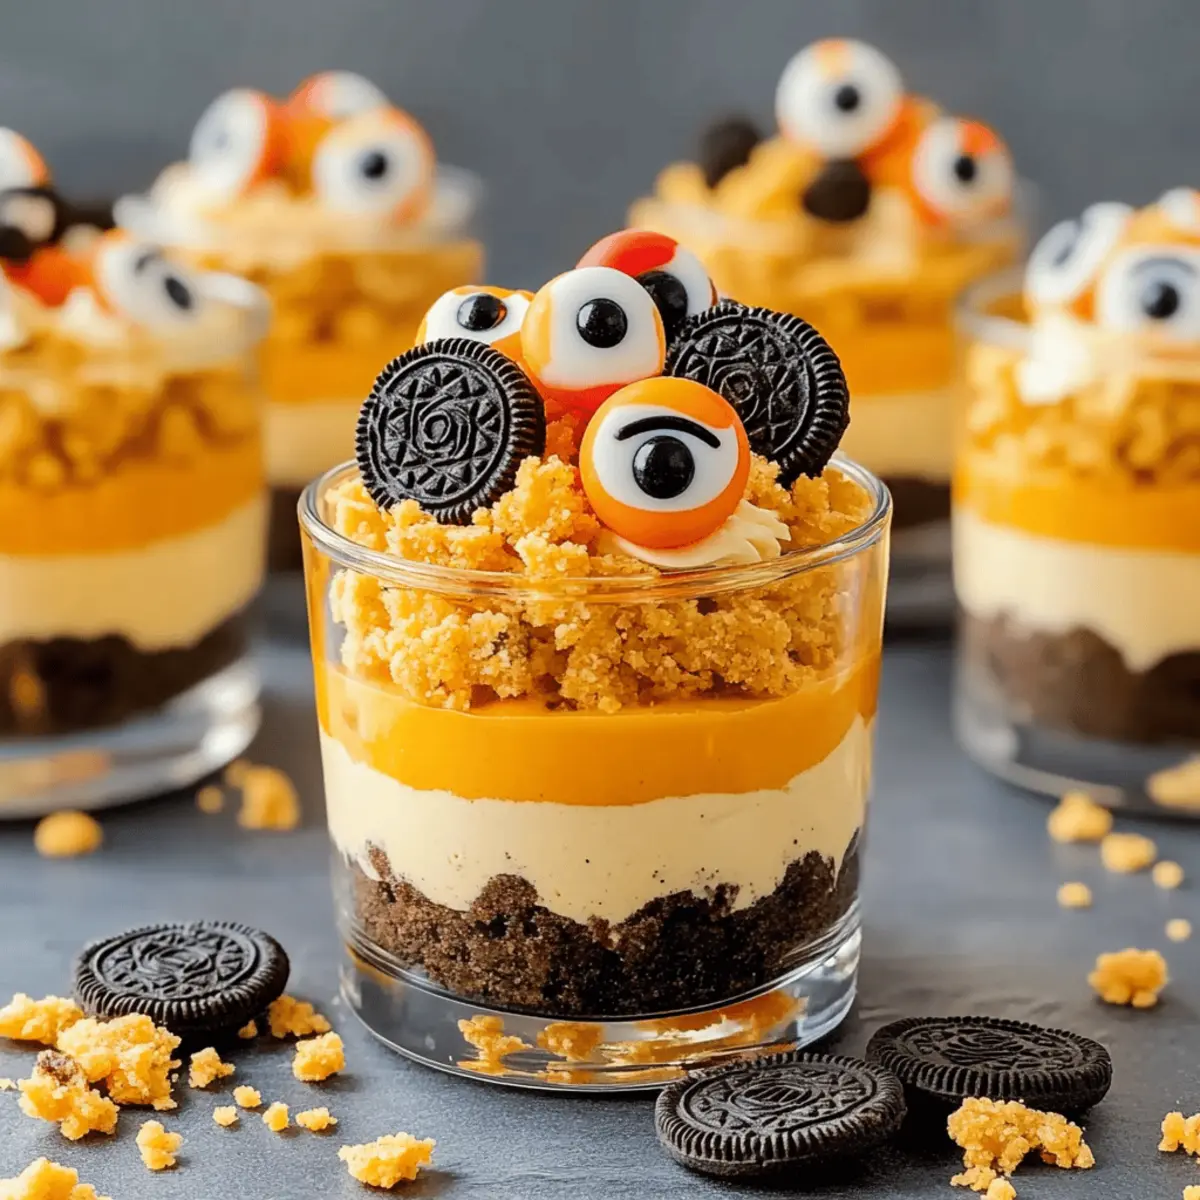
The air is crisp, and the nights are growing longer—perfect ingredients for a little Halloween magic in the kitchen. As I gather with friends and family, I find that nothing brings more joy than whipping up some spooky delights. This year, I’m thrilled to share my favorite recipe: No-Bake Halloween Cheesecake Parfaits. These charming desserts are not only a breeze to prepare but are a guaranteed crowd-pleaser at any gathering! With creamy layers of rich cheesecake delightfully adorned with colorful decorations, they expertly combine ease and festive flair. Whether you’re hosting a lively party or seeking a fun activity for the kids, these parfaits check all the boxes. Are you ready to make some hauntingly delicious memories? Let’s dive into our sweet Halloween adventure!
Why Will You Love These Parfaits?
No-Bake Joy: Effortlessly whip up these cheesecake parfaits without turning on the oven, leaving you more time for Halloween fun!
Visual Delight: Each layer bursts with color and spookiness, perfect for captivating kids and adults alike.
Customizable Toppings: Use a variety of festive decorations like candy eyes and sprinkles to add a personalized touch.
Creamy Dreaminess: The rich, creamy cheesecake filling pairs perfectly with a crunchy base, offering a delightful contrast in every bite.
Fun Activity: Involve the kids in assembling these parfaits for a memorable Halloween experience they won’t forget.
These No-Bake Halloween Cheesecake Parfaits are sure to become a new family tradition—just wait until you try them! For more fun ideas, you might like to check out my Mini Key Lime Cheesecakes or whip up some festive Oreo Cheesecake Cookies.
No-Bake Halloween Cheesecake Parfait Ingredients
For the Cheesecake Filling
• Cream Cheese – A must for that rich, traditional cheesecake flavor.
• Powdered Sugar – Sweetens the filling and ensures a smooth texture.
• Heavy Whipping Cream – Creates a light and airy consistency when whipped; don’t skip this step!
• Vanilla Extract – Adds depth to the cheesecake flavor; use pure extract for the best taste.
• Food Coloring – Fun for making vibrant layers! Use orange and green to enhance the Halloween theme.
For the Crunchy Base
• Graham Cracker Crumbs – Provides a delicious crunch and classic cheesecake taste.
• Butter – Binds the crumbs together; melted butter works best for mixing.
For Toppings
• Candy Eyes – Perfectly spooky and cute decoration for your parfaits!
• Sprinkles – Opt for Halloween-themed sprinkles to bring an extra festive flair.
• Gummy Worms – A fun and wormy addition, perfect for any Halloween dessert.
• Whipped Cream – Use as a topping for an extra dose of creamy goodness on each parfait.
These No-Bake Halloween Cheesecake Parfaits are not only simple to whip up but also perfect for impressing your guests with their deliciousness and aesthetic appeal!
Step‑by‑Step Instructions for No‑Bake Halloween Cheesecake Parfaits
Step 1: Prepare the Crunchy Base
In a medium bowl, combine 1 ½ cups of graham cracker crumbs with 5 tablespoons of melted butter. Mix until the crumbs are evenly coated and crumbly. Spoon about 2 tablespoons of the mixture into the bottom of each clear cup, pressing down lightly to create a solid base. This crunchy layer will add texture to your No-Bake Halloween Cheesecake Parfaits.
Step 2: Make the Cheesecake Filling
In a large mixing bowl, beat 8 ounces of softened cream cheese with ½ cup of powdered sugar until smooth and creamy. Add in 1 teaspoon of vanilla extract and mix well. In a separate bowl, whip 1 cup of heavy whipping cream until stiff peaks form, then gently fold it into the cream cheese mixture. This fluffy filling will be the star of your parfaits!
Step 3: Color the Cheesecake Layers
Divide the cheesecake filling into two bowls. In one bowl, add a few drops of orange food coloring and mix until well combined. In the other bowl, add green food coloring and stir until the color is even. These vibrant shades will make your No-Bake Halloween Cheesecake Parfaits visually striking and festive!
Step 4: Layer the Parfaits
Begin layering your parfait cups by adding a generous dollop of the orange cheesecake filling on top of the graham cracker base. Follow with another layer of the crunchy base, then add a layer of the green cheesecake filling. Repeat the layers until the cups are filled, finishing with a colorful cheesecake layer on top for a stunning presentation.
Step 5: Add Toppings
Once your No-Bake Halloween Cheesecake Parfaits are fully assembled, it’s time to get creative with decorations! Top each parfait with a swirl of whipped cream, then sprinkle with Halloween-themed sprinkles. Add candy eyes on top and place a few gummy worms for that spooky touch, ensuring each parfait looks festive and inviting.
Step 6: Chill Before Serving
Place the assembled parfait cups in the refrigerator and let them chill for at least 2 hours, allowing the flavors to meld and the cheesecake to firm up slightly. This step is crucial for achieving the perfect texture and ensuring your No-Bake Halloween Cheesecake Parfaits are refreshingly cool when served at your Halloween gathering.
Make Ahead Options
These No-Bake Halloween Cheesecake Parfaits are perfect for busy home cooks looking to save time during the spooky season! You can prepare the crunchy base and cheesecake filling up to 24 hours in advance. Simply mix the graham cracker crumbs with melted butter and store it in an airtight container in the fridge. The cheesecake filling can also be made ahead and refrigerated until you’re ready to assemble. When it’s time to serve, layer the components in clear cups, add vibrant toppings, and chill briefly right before presentation for that fresh taste. This method ensures your parfaits maintain their delicious creaminess while allowing you more time to enjoy the festivities!
What to Serve with No-Bake Halloween Cheesecake Parfaits
The perfect complement to your spooky dessert spread can elevate your Halloween gathering into something truly memorable.
- Fizzy Witch’s Brew: A fun, colorful soda punch that sparkles in the light, making it a festive choice for guests of all ages.
- Savory Spider Dip: A creamy dip topped with black olives to resemble a spider, balancing sweetness with salty goodness for varied flavors.
- Crispy Ghost Chips: Light, crispy tortilla chips shaped like ghosts, serving as a crunchy counterpart to the creamy parfaits, enhancing texture variety on the table.
- Pumpkin Spice Shortbread Cookies: Buttery cookies infused with fall spices, bringing a rich, cozy flavor that pairs well with the light parfaits.
- Edible Monster Cupcakes: Colorful cupcakes decorated to look like friendly monsters, adding a playful touch that echoes the fun of your parfaits.
- Themed Cheese Platter: A selection of spooky-themed cheeses decorated with festive fruit; the savory tang of cheese mellows the sweet desserts perfectly.
These delightful companions not only enhance your dessert presentation but also create a lively, festive atmosphere for your Halloween celebration.
Expert Tips for No-Bake Halloween Cheesecake Parfaits
-
Chill Properly: Always allow the parfaits to chill for at least 2 hours to achieve that perfect texture. This step is essential for no-bake Halloween cheesecake parfaits!
-
Avoid Lumps: Ensure the cream cheese is at room temperature before mixing to avoid lumps in your filling. A smooth cheesecake layer creates a delightful experience.
-
Layer Smartly: To avoid messy layers, use a piping bag to fill your cups. It helps maintain neat and even layers of color, enhancing visual appeal.
-
Mix Colors Wisely: When adding food coloring, start with a drop at a time. This way, you can control the vibrancy and avoid overly bright hues that may frighten away guests!
-
Get Creative with Toppings: Feel free to mix and match toppings according to your theme. Use different shaped candies or chocolate decorations to keep things exciting and festive.
These simple tips will elevate your no-bake Halloween cheesecake parfaits, ensuring they are a hit at your gathering!
No-Bake Halloween Cheesecake Parfait Variations
Feel free to get creative with these parfaits, and watch the smiles light up this Halloween!
-
Flavor Swap: Use flavored cream cheeses like pumpkin spice or caramel for a twist that adds a seasonal flair.
Why not embrace the fall season a bit more? A pumpkin spice cream cheese can elevate the classic cheesecake flavor into a festive delight. -
Fruit Layers: Incorporate layers of pureed fruits like strawberry or blackberry for a fresh twist.
Swapping in a berry layer can add a burst of fruity goodness, making your parfaits even more lively and bright! -
Gluten-Free Base: Replace graham cracker crumbs with almond flour or gluten-free cookie crumbs for a gluten-free treat.
Don’t let dietary restrictions rain on your parade! These gluten-free options ensure everyone can join in on the enjoyment. -
Chocolate Lover’s Parfait: Mix in cocoa powder with the cheesecake filling for a chocolatey version.
Who can deny the allure of chocolate? A little cocoa can transform these delightful layers into a rich chocolate masterpiece. -
Candy Coating: Instead of just topping, mix chopped candies like Reese’s or Snickers into your cheesecake layers for crunch.
This will add a delightful surprise in every bite and cater to those who crave extra sweetness! -
Nutty Flavor: Fold in crushed nuts like pecans or walnuts into the dairy layer for added texture and flavor.
Adding nuts can bring a lovely crunch, enhancing the contrast between creamy and crunchy. -
Spooky Color: Dabble with dark food coloring for an eerie black layer to mimic spooky dessert themes.
This will surely intrigue your guests and thrill the little ones, giving your parfaits an enchanting twist. -
Parfait Jars: Assemble parfaits in mason jars for a fun and rustic presentation that’s perfect for parties.
Bring a touch of charm by using jars, making it not only festive but also easy to grab and enjoy at your Halloween gathering!
These variations open the door to a world of creativity, showcasing that Halloween treats can be both delicious and visually captivating. Don’t hesitate to experiment! If you’re tempted to try more delightful desserts, be sure to check out my Bake Blueberry Cheesecake Bars or craft some Cheesecake Stuffed Chocolate Chips here.
Storage Tips for No-Bake Halloween Cheesecake Parfaits
Fridge: Keep your assembled parfaits in the refrigerator and consume them within 3–4 days for the best flavor and texture.
Airtight Containers: Store the parfaits in airtight containers if you’ve made them ahead of time to prevent any absorption of odors or loss of freshness.
Freezer (Optional): You can freeze the unassembled cheesecake filling and graham cracker base separately for up to 1 month; just assemble before serving.
Serving After Storage: Allow chilled parfaits to sit at room temperature for 10–15 minutes before serving to enhance the creamy texture of the no-bake filling.
No-Bake Halloween Cheesecake Parfaits Recipe FAQs
What kind of cream cheese should I use?
Absolutely! Use full-fat cream cheese for a richer and creamier texture in your no-bake Halloween cheesecake parfaits. Make sure it’s at room temperature before mixing to avoid lumps, which can create a less smooth filling.
How should I store the parfaits?
Keep your assembled parfaits in the refrigerator and consume them within 3–4 days for the best flavor and texture. I recommend storing them in airtight containers to prevent any odors from your fridge affecting their delightful taste.
Can I freeze the cheesecake parfaits?
Very! You can freeze the unassembled cheesecake filling and graham cracker base separately for up to 1 month. When you’re ready to serve, just thaw the filling in the fridge overnight, then assemble the parfaits before serving. This is a great way to prepare ahead of time!
How can I make these parfaits gluten-free?
Of course! To make no-bake Halloween cheesecake parfaits gluten-free, simply substitute graham cracker crumbs with gluten-free cookie crumbs, or use ground nuts. Be sure to check the labels on all your ingredients to avoid any hidden gluten.
What can I do if my cheesecake filling is too runny?
No worries! If your cheesecake filling is runny, try folding in an additional 1/4 cup of heavy whipping cream whipped to stiff peaks. This will help thicken it up. Another option is to chill it for a little longer until it firms up. You want that perfect creamy consistency!
Delicious No-Bake Halloween Cheesecake Parfaits
Ingredients
Equipment
Method
- In a medium bowl, combine 1 ½ cups of graham cracker crumbs with 5 tablespoons of melted butter. Mix until the crumbs are evenly coated and crumbly.
- Spoon about 2 tablespoons of the mixture into the bottom of each clear cup, pressing down lightly to create a solid base.
- In a large mixing bowl, beat 8 ounces of softened cream cheese with ½ cup of powdered sugar until smooth and creamy.
- Add in 1 teaspoon of vanilla extract and mix well. In a separate bowl, whip 1 cup of heavy whipping cream until stiff peaks form, then gently fold it into the cream cheese mixture.
- Divide the cheesecake filling into two bowls. In one bowl, add a few drops of orange food coloring and mix until well combined. In the other bowl, add green food coloring and stir until the color is even.
- Begin layering your parfait cups by adding a generous dollop of the orange cheesecake filling on top of the graham cracker base. Follow with another layer of the crunchy base, then add a layer of the green cheesecake filling.
- Repeat the layers until the cups are filled, finishing with a colorful cheesecake layer on top for a stunning presentation.
- Top each parfait with a swirl of whipped cream, then sprinkle with Halloween-themed sprinkles. Add candy eyes on top and place a few gummy worms for that spooky touch.
- Place the assembled parfait cups in the refrigerator and let them chill for at least 2 hours.