
The tempting aroma of warm, baked rolls fresh out of the oven has a magical way of gathering friends and family around the table. Today, I’m excited to share my recipe for Baked Tuna Rolls, a delightful dish that strikes the perfect balance between comfort and sophistication. These rolls come together effortlessly, making them an excellent option for busy weeknights or last-minute get-togethers. The beauty of Baked Tuna Rolls lies not only in their creamy, cheesy filling but also in their adaptability—feel free to mix up the ingredients with your favorite cheeses or even switch out the tuna for salmon. This versatility ensures that they’re as appealing to you as they are to your guests. Curious about how to create this scrumptious treat? Let’s dive in!
Why are Baked Tuna Rolls So Amazing?
Irresistible Aroma: The moment these rolls come out of the oven, your kitchen will be filled with a mouthwatering scent you can’t resist.
Quick and Easy: Perfectly suited for busy lives, these rolls come together in no time without sacrificing flavor.
Versatile Options: Whether you prefer tuna or want to experiment with salmon, the ingredient variations ensure everyone can enjoy them.
Crowd Pleaser: They’re visually stunning and delicious, making them ideal for parties or family gatherings. If you love comforting dishes, you might also like these Calorie Pizza Rolls as a fun alternative.
Cheesy Goodness: The combination of cream cheese and melted cheese creates a uniquely creamy texture that pairs beautifully with the crunchy rolls. Give them a try—you’ll be hooked!
Baked Tuna Rolls Ingredients
For the Filling
- Tuna – Use high-quality canned tuna for the best flavor in your baked tuna rolls.
- Cream Cheese – Ensure it’s at room temperature to easily mix into a creamy filling.
- Grated Cheese (Gouda or Mozzarella) – Substitute with any favorite melting cheese for a gooey topping.
- Fresh Herbs (Parsley or Chives) – Freshly chopped herbs enhance flavor and add a pop of color.
- Lemon Juice – Brightens the filling, balancing the richness of the cheeses.
For the Rolls
- Bread Rolls (Baguette or Ciabatta) – Choose fresh rolls for the perfect crunchy exterior and soft interior.
- Salt and Pepper – Essential seasonings that elevate the overall flavor—adjust to personal taste.
Feel free to mix and match ingredients to create your beloved version of these delicious Baked Tuna Rolls!
Step‑by‑Step Instructions for Baked Tuna Rolls
Step 1: Preheat the Oven
Begin by preheating your oven to 200°C (392°F). This step is crucial for ensuring your baked tuna rolls cook evenly and develop that perfect golden crust. While the oven warms up, gather your ingredients and kitchen tools, such as a mixing bowl and a baking sheet, to streamline the process.
Step 2: Prepare the Tuna Filling
In a large mixing bowl, combine the drained tuna and room-temperature cream cheese. Use a fork to mix until everything is well blended, creating a creamy texture. This combination is the heart of your baked tuna rolls, so make sure it’s smooth and even.
Step 3: Add Seasoning and Cheese
Stir in the grated cheese, chopped fresh herbs, and a splash of lemon juice to the tuna mixture. Season with salt and pepper to taste. The herbs will add freshness while the cheese contributes to that gooey, delicious finish. Mix until all ingredients are fully incorporated and vibrant.
Step 4: Prepare the Bread Rolls
Take your baguette or ciabatta rolls and slice them lengthwise, being careful to not cut all the way through. Hollow out the insides gently, creating a pocket for the tuna filling. This step ensures that each baked tuna roll is packed with flavor, making every bite irresistible.
Step 5: Fill the Rolls
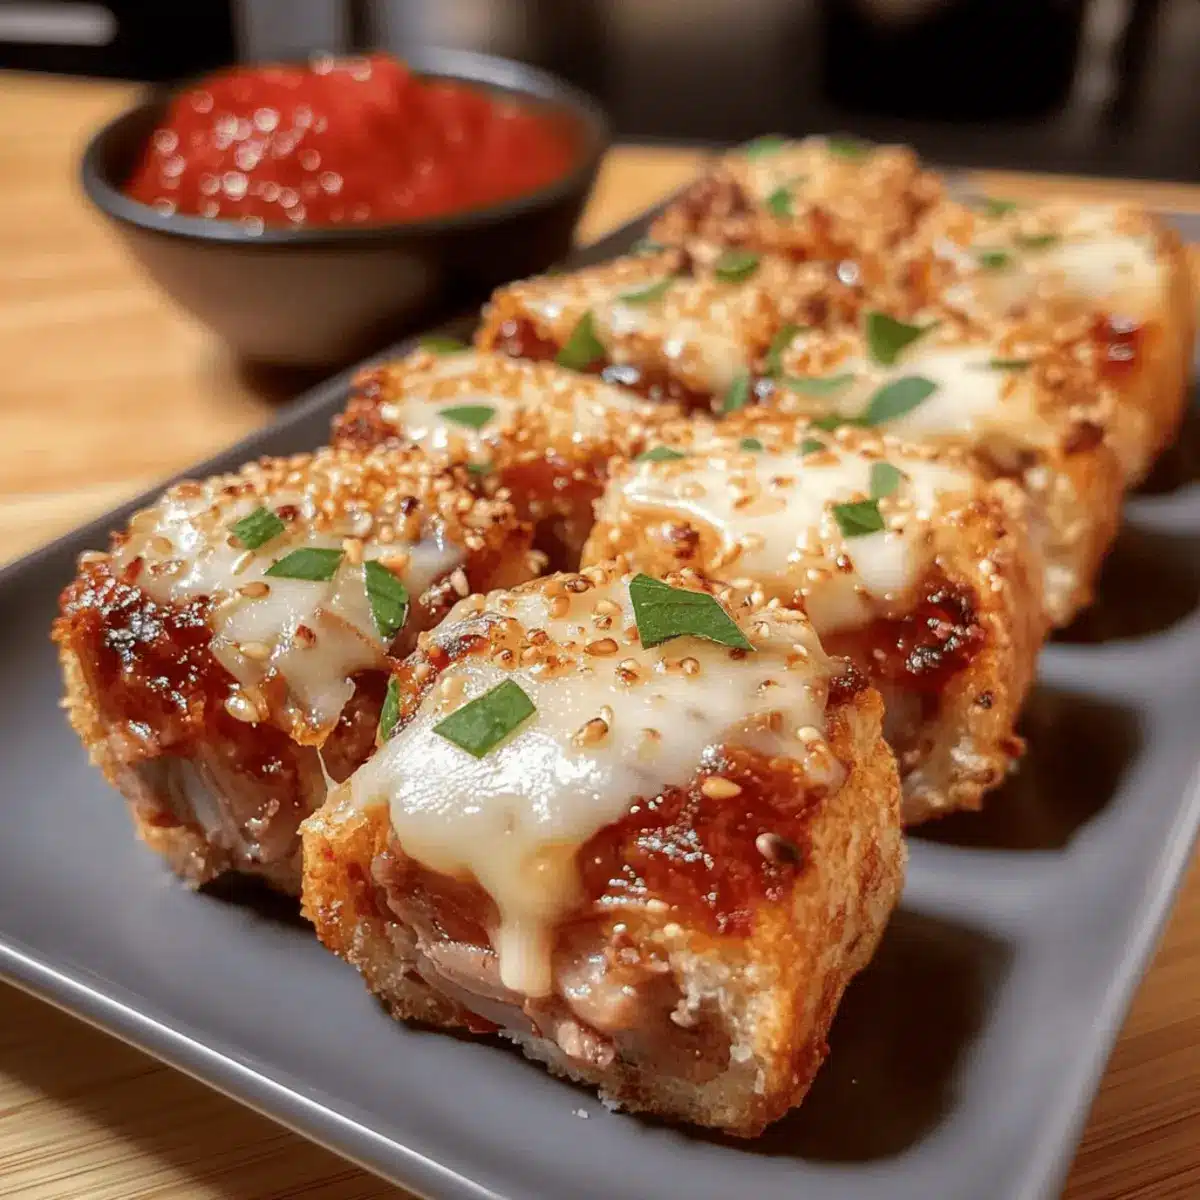
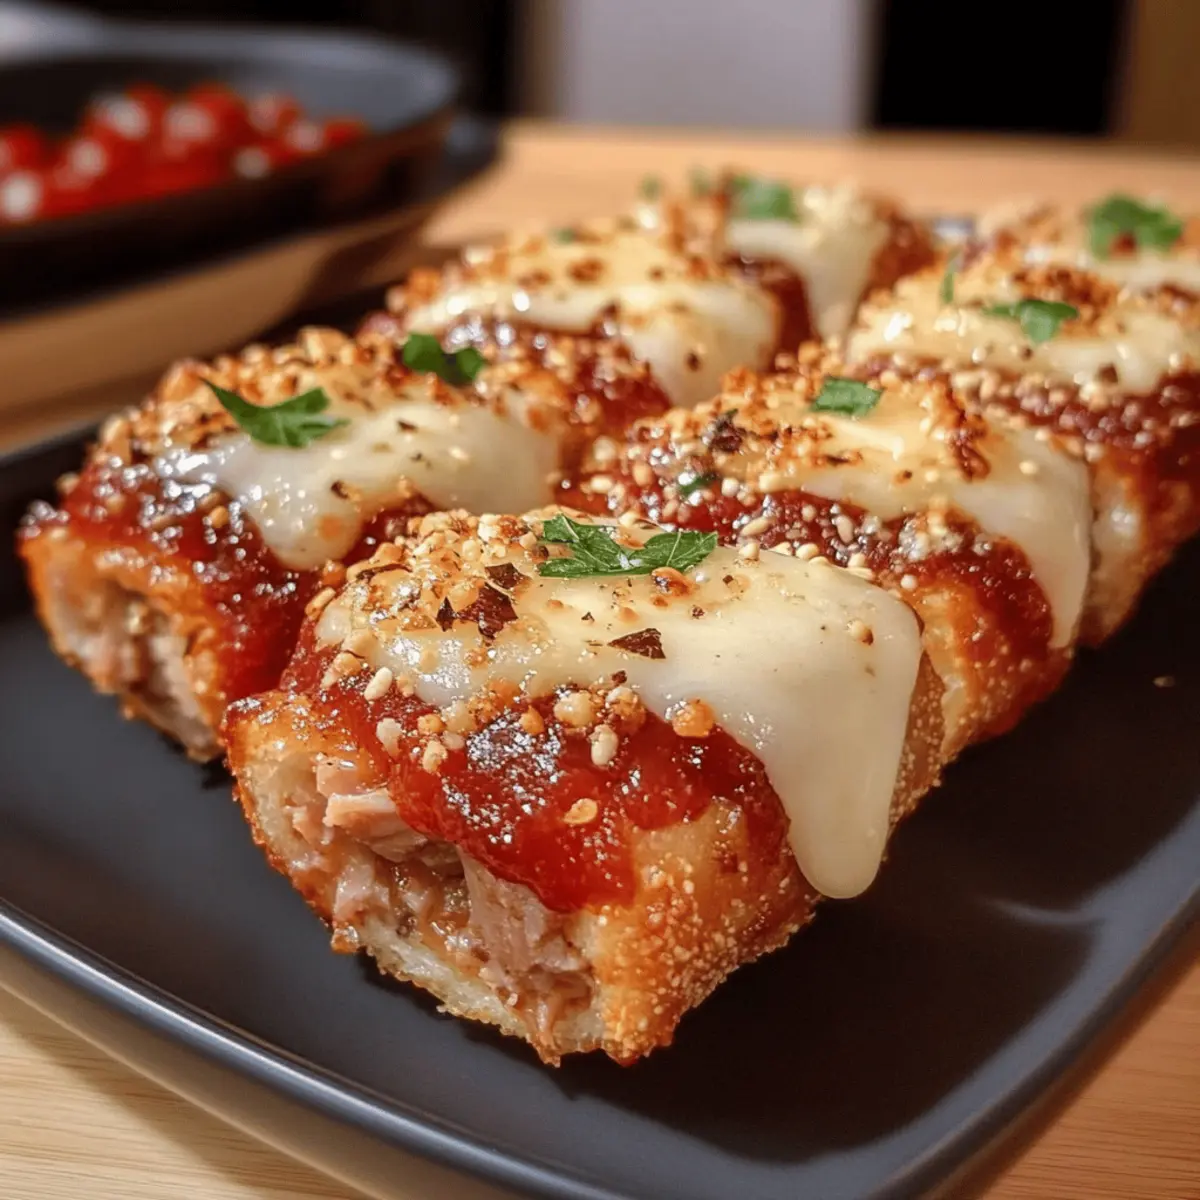
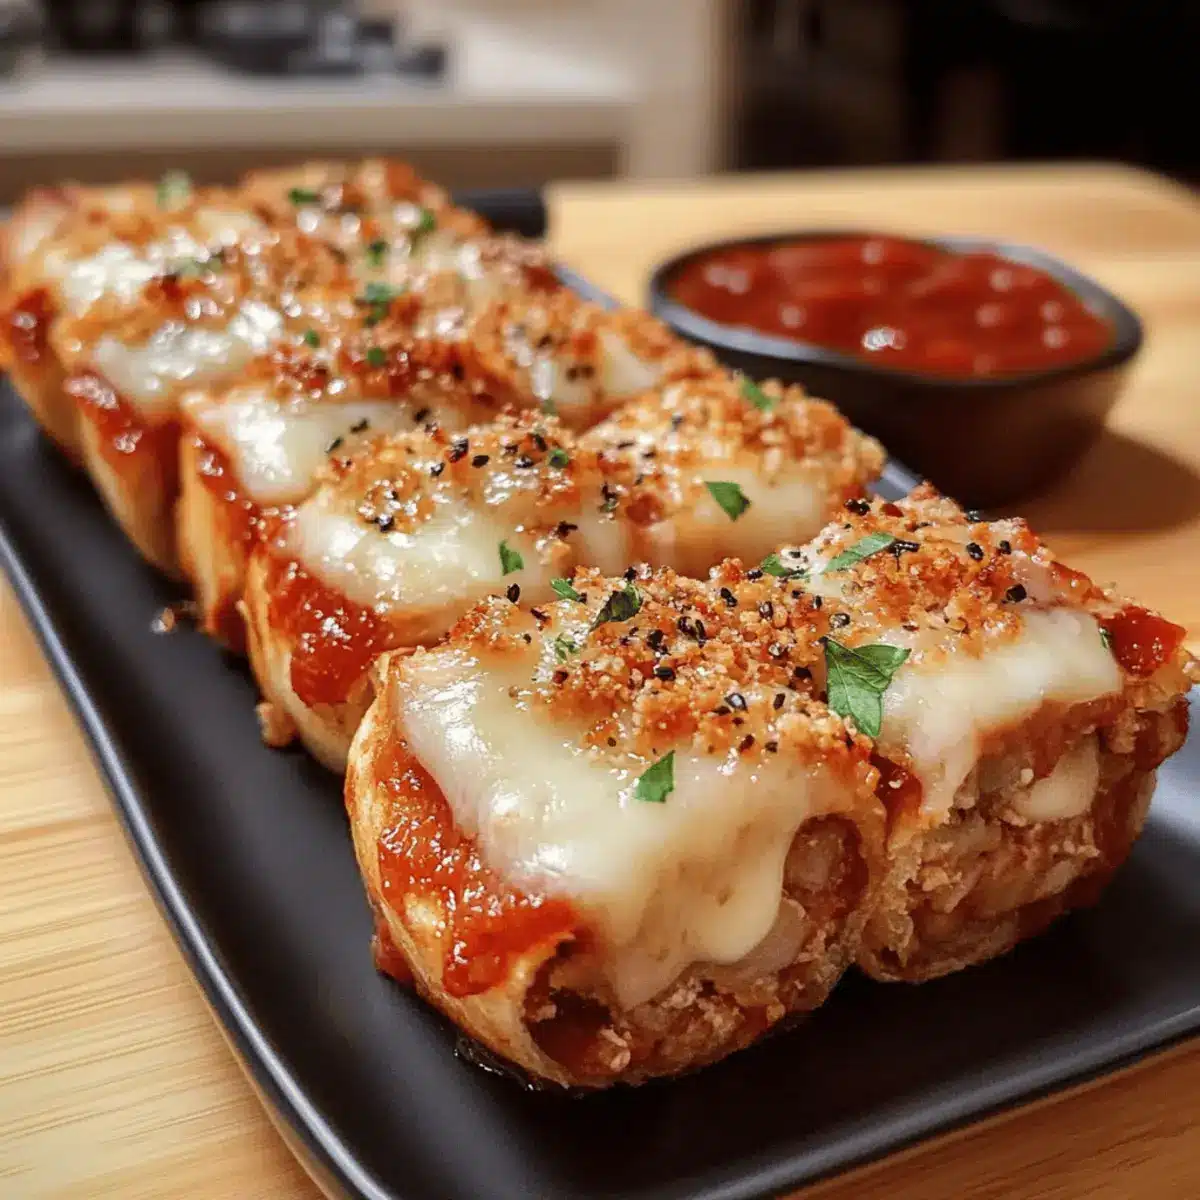
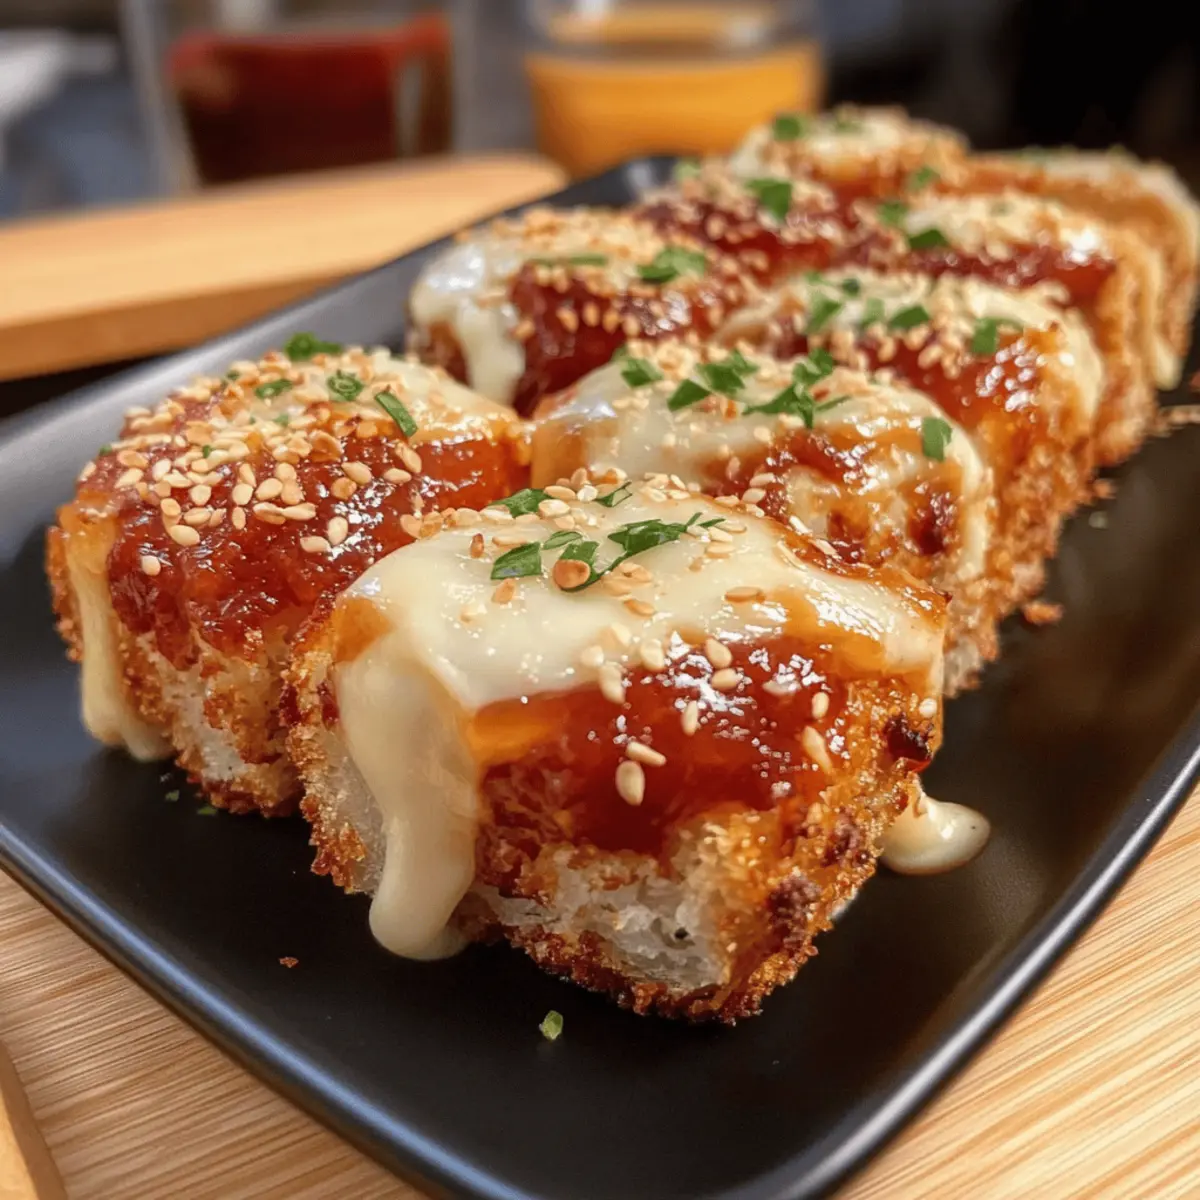
Place the hollowed rolls on a baking sheet, ready for loading. Generously fill each roll with the creamy tuna mixture, pressing down slightly to ensure they’re well stuffed. The visual of the overflowing filling will get everyone excited about the baked tuna rolls that are about to come out of the oven.
Step 6: Bake to Perfection
Now, place the baking sheet in your preheated oven and bake for 15-20 minutes. Keep an eye on the rolls as they bake, looking for a beautifully golden top and bubbling cheese. This is the moment when your kitchen will fill with the delightful scent of the baked tuna rolls, tantalizing everyone around.
Expert Tips for Baked Tuna Rolls
-
Ingredient Prep: Ensure all ingredients are prepared before starting. This keeps the process smooth and stress-free, leading to perfect baked tuna rolls every time.
-
Mixing Techniques: Use a fork to blend the tuna and cream cheese thoroughly. This gets rid of lumps and ensures a creamy filling that’s delightful in every bite.
-
Roll Selection: Opt for fresh baguette or ciabatta rolls. Stale bread can result in a dry texture that diminishes the overall joy of your baked tuna rolls.
-
Customize Flavor: Don’t hesitate to add diced bell peppers or olives for an extra flavor boost. These add-ons seamlessly integrate into the filling, enhancing your dish.
-
Watch the Oven: Oven temperatures can vary, so keep a close eye on the rolls while baking to prevent burning. You want that perfect golden-brown cheese topping!
-
Storage Tips: For leftovers, store in an airtight container and keep them in the fridge for up to three days. Reheat gently in the oven to restore their lovely texture.
What to Serve with Baked Tuna Rolls
The warm, cheesy goodness of Baked Tuna Rolls sets the stage for a delightful meal that brings smiles and satisfaction to your table.
- Fresh Green Salad: A crisp salad tossed with a light vinaigrette adds a refreshing crunch that highlights the creamy richness of the rolls.
- Roasted Vegetables: Sweet, caramelized veggies like bell peppers and zucchini create a savory contrast, complementing the flavors of the tuna beautifully.
- Garlic Bread: Crunchy, buttery garlic bread elevates the meal experience, offering an irresistible texture that pairs well with the soft, cheesy rolls.
- Light Dips: Serve with zesty dips such as tzatziki or a tangy yogurt sauce; they add an extra layer of flavor and a wonderful cooling effect.
- Wine Pairing: A chilled glass of white wine, like Sauvignon Blanc, enhances the dish’s flavors, balancing the richness of the cheese with its crisp acidity.
- Fruity Dessert: End the meal on a sweet note with a light fruit salad or sorbet, providing a refreshing finish to the warm, savory rolls.
Your Baked Tuna Rolls will shine even brighter when paired with these delightful sides and accompaniments!
Make Ahead Options
These Baked Tuna Rolls are a fantastic option for meal prep, ensuring that you have a delightful dish ready to go any day of the week! You can prepare the tuna filling up to 3 days in advance; simply mix the drained tuna with cream cheese, grated cheese, herbs, and lemon juice, and store it in an airtight container in the refrigerator. To maintain quality, keep the filling separate from the rolls until you’re ready to bake. When it’s time to enjoy, hollow out your bread rolls, fill them with the prepared mixture, and bake them directly from the fridge for 15-20 minutes. This approach allows busy home cooks to savor restaurant-quality Baked Tuna Rolls without the last-minute rush!
How to Store and Freeze Baked Tuna Rolls
Fridge: Store leftover baked tuna rolls in an airtight container for up to 3 days. This preserves their flavors and prevents drying out.
Freezer: If you want to freeze the rolls, wrap them tightly in plastic wrap and aluminum foil. They can be frozen for up to 2 months; just remember to thaw before reheating.
Reheating: For the best texture, reheat in the oven at 180°C (350°F) for about 10-15 minutes until warmed through and the cheese is melting again.
Separate Storage: To maintain freshness, keep the filling and rolls separate until ready to bake. This ensures that your baked tuna rolls remain delicious and crispy!
Baked Tuna Rolls Variations & Substitutions
Feel free to put your unique spin on these baked tuna rolls; let your creativity shine through each delicious bite!
-
Chicken Swap: Replace tuna with shredded chicken for a heartier alternative that doesn’t sacrifice flavor. It’s perfect for using up leftover roast chicken!
-
Salmon Twist: Use cooked salmon instead for a richer flavor. Its tender texture makes every bite delightful, bringing a different style to the classic roll.
-
Cheese Change: Try feta or goat cheese for a tangy twist. These cheeses lend a wonderful creaminess and distinct flavor that will surprise your taste buds.
-
Veggie Delight: For a vegetarian option, swap the tuna for mashed chickpeas or avocado. Season well with herbs and spices to keep the filling deliciously satisfying.
-
Spicy Kick: Add diced jalapeños or crushed red pepper for heat. This will elevate your rolls with a delightful zing that both spice lovers and adventurers will appreciate.
-
Extra Crunch: Toss in some finely chopped bell peppers or zucchini for added texture. These vegetables create a lovely crunch that complements the creamy filling beautifully.
-
Different Bread: Experiment with a variety of bread rolls like pita or flatbreads. Each option brings its unique flair to the dish, letting you discover new favorites.
Pair these scrumptious rolls with a fresh salad or enjoy them alongside the delicious Buffalo Tuna Salad for a delightful meal. There are endless ways to enjoy these baked tuna rolls, so let your imagination guide you!
Baked Tuna Rolls Recipe FAQs
How do I choose the best quality tuna for my Baked Tuna Rolls?
Absolutely! Opt for high-quality canned tuna packed in water or olive oil for the best flavor. Look for cans that mention “wild-caught” on the label, as they typically have a better taste and texture. To check the tuna, it should appear moist without any dry or dark spots.
What is the best way to store leftover Baked Tuna Rolls?
Very! Store any leftover rolls in an airtight container in the refrigerator for up to 3 days. To keep them fresh, separate the filling from the bread rolls before storing. This helps prevent the rolls from becoming soggy. When you’re ready to enjoy them again, you can reheat them in the oven at 180°C (350°F) for about 10-15 minutes until warmed through.
Can I freeze Baked Tuna Rolls, and how do I do it?
Yes, you can! Wrap the cooled rolls tightly in plastic wrap followed by aluminum foil to protect them from freezer burn. They can be frozen for up to 2 months. When you’re ready to enjoy, thaw them in the refrigerator overnight and then reheat in the oven as described above for the best results.
What can I do if my filling is too dry?
No worries! If your filling turns out too dry, you can easily remedy this. Try adding a bit more cream cheese or a splash of lemon juice to it. Mix well until you achieve your desired consistency. Alternatively, a drizzle of olive oil can add moisture and flavor without overpowering the tuna.
Are Baked Tuna Rolls safe for people with allergies?
To ensure safety, always check for allergies related to the ingredients. The primary allergens in this recipe would be fish and dairy. For a non-fish version, you can swap tuna with mashed chickpeas or avocado. If there are lactose concerns, using a dairy-free cream cheese or cheese alternative can also work well.
How can I enhance the flavor of my Baked Tuna Rolls further?
Very! For an extra kick, consider mixing in diced vegetables like bell peppers, onions, or even jalapeños into the filling. Fresh herbs can bring a delightful freshness—basil, dill, or cilantro are great options. Adjust the seasonings to your taste, and don’t hesitate to play around with spices for even more depth!
Baked Tuna Rolls: Irresistibly Cheesy and Quick to Make
Ingredients
Equipment
Method
- Preheat your oven to 200°C (392°F). Gather your ingredients and kitchen tools.
- In a large mixing bowl, combine the drained tuna and room-temperature cream cheese. Mix until smooth.
- Stir in the grated cheese, chopped fresh herbs, and lemon juice. Season with salt and pepper to taste.
- Slice the bread rolls lengthwise and hollow out the insides cautiously.
- Fill each roll with the creamy tuna mixture, pressing down to ensure they are well stuffed.
- Place the baking sheet in the oven and bake for 15-20 minutes until golden and bubbly.