
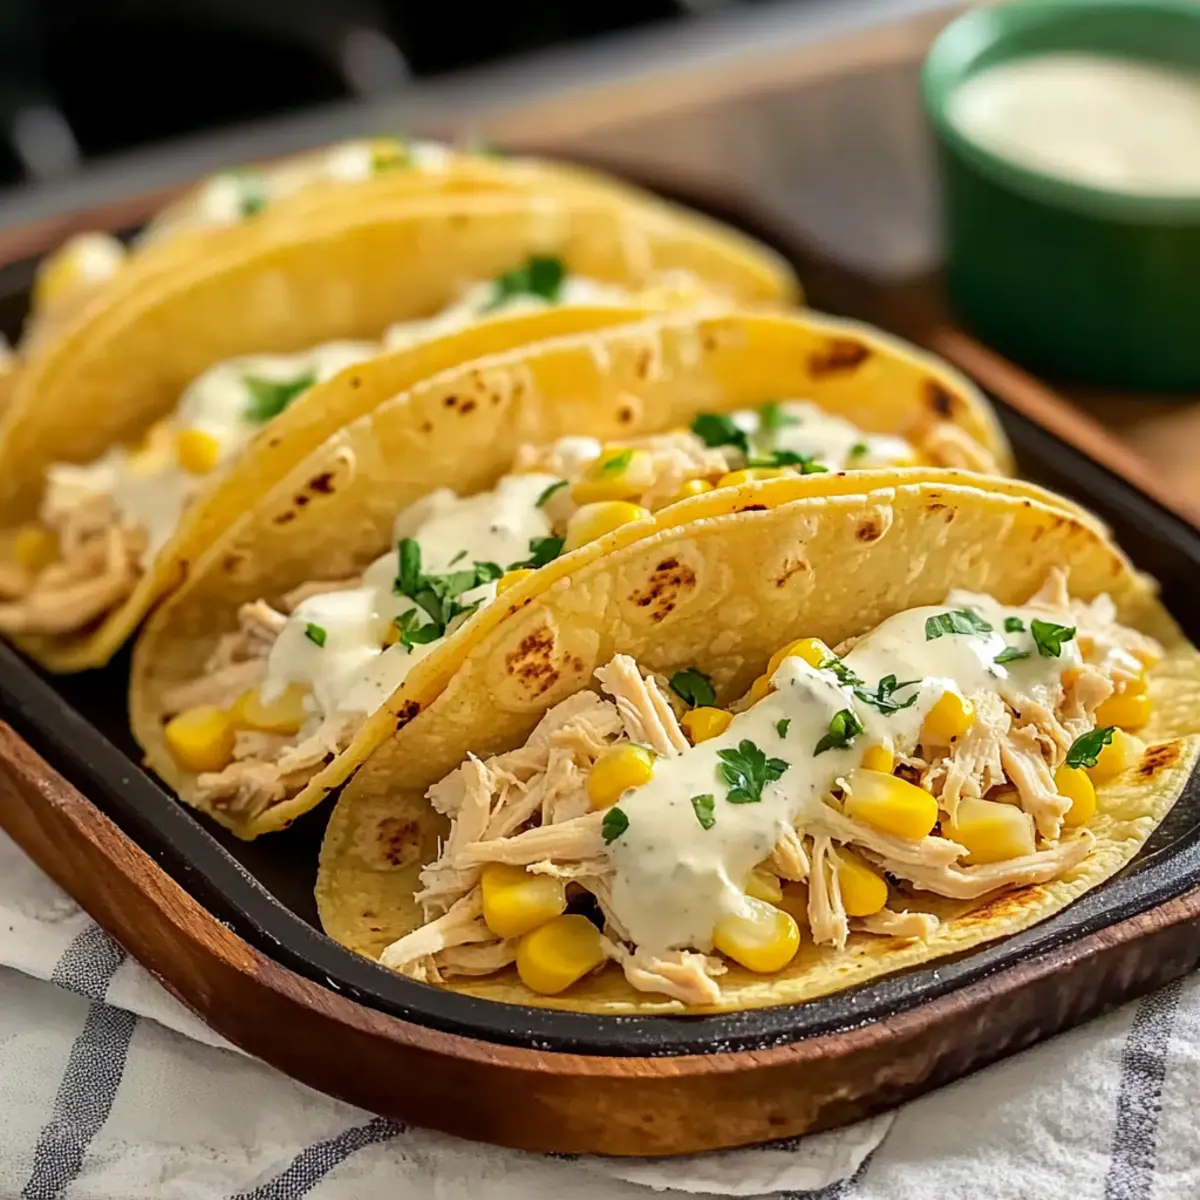
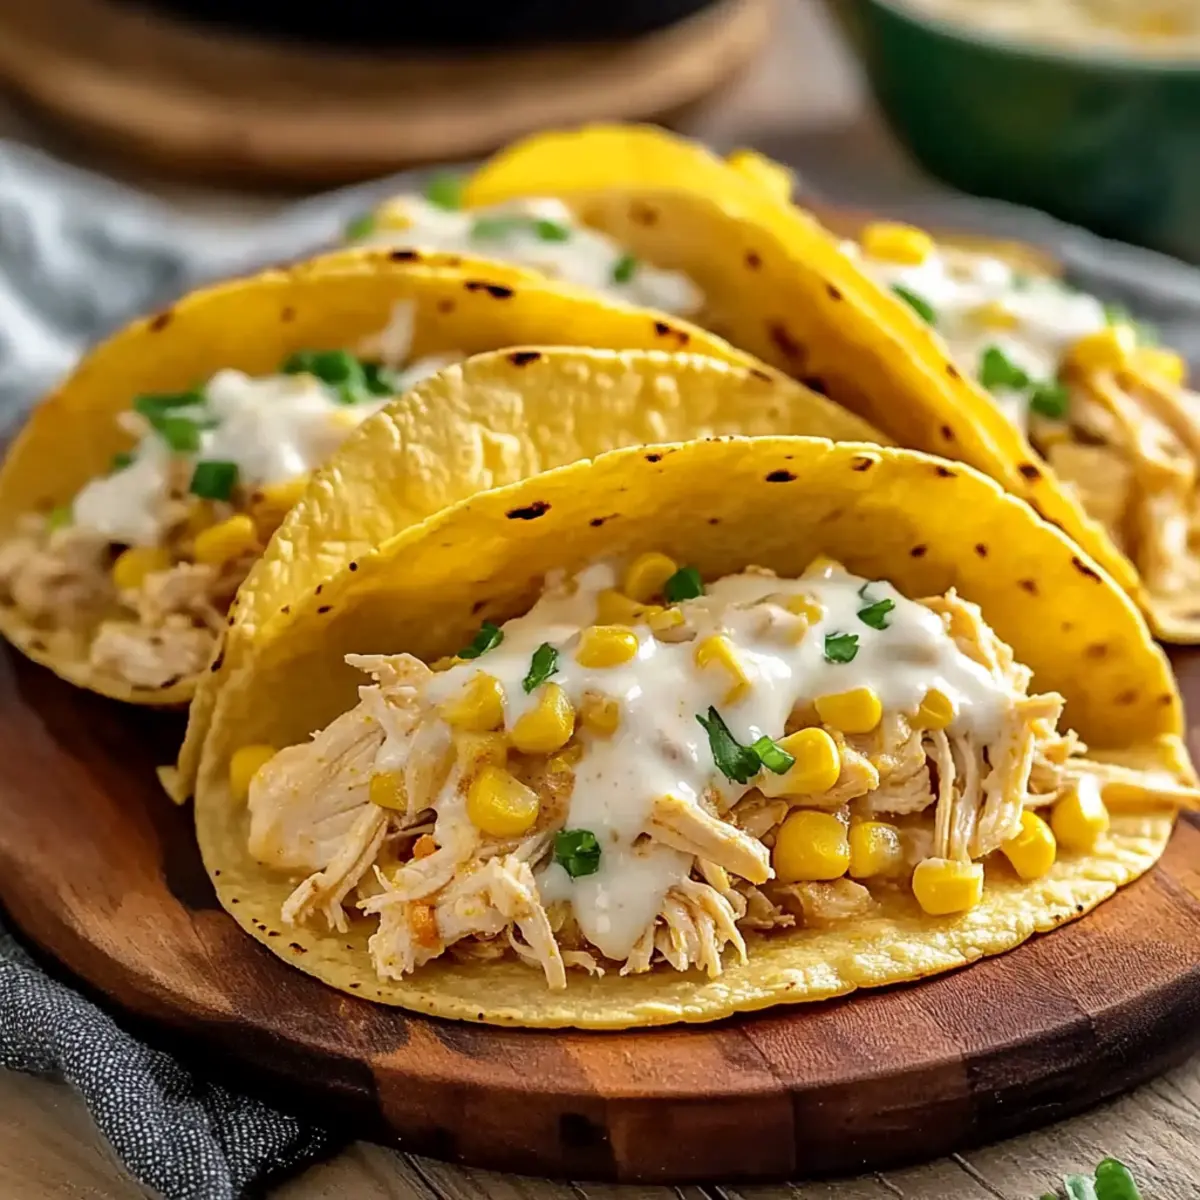
There’s a magical moment when you realize that an incredibly satisfying meal can come together in just minutes—like a secret superpower in the kitchen. My Creamy White Chicken Chili Tacos are the epitome of this revelation. With tender shredded rotisserie chicken, sweet corn, and a luscious creamy sauce nestled in warm corn tortillas, these tacos are not only quick to prepare but also offer a comforting, family-friendly option for busy weeknights. The beauty of this recipe lies in its simplicity and versatility, allowing you to savor a nutritious home-cooked dish with minimal fuss. Plus, your family will absolutely love the creamy, savory flavors! So, are you ready to whip up some taco magic tonight?
Why Are These Tacos a Must-Try?
Quick and Easy: These Creamy White Chicken Chili Tacos come together in a flash, making them perfect for busy weeknights.
Family-Friendly: With a blend of flavors and textures, even the pickiest eaters will adore them!
Versatile Options: Feel free to switch up the protein or spice levels; shredded beef or black beans work beautifully!
Comforting Delight: Each bite offers a creamy hug, thanks to the luscious sauce and tender chicken.
Serve with Mexican Chicken Rice or some tortilla chips for a complete meal that’s sure to impress. Enjoy the cozy vibes these tacos bring to your dinner table!
White Chicken Chili Tacos Ingredients
Get ready to delight your taste buds with these creamy tacos that everyone will love!
For the Creamy Sauce
- Sour Cream – Adds creaminess to the sauce. Use room temperature for smooth blending.
- Canned Green Chilis – Provides mild heat and flavor. Substitute with fresh chilis if preferred.
- Ground Cumin – Enhances the overall flavor profile with an earthy note. Freshly ground cumin is preferred for richer flavor.
- All-Purpose Flour – Used to create a roux for thickening the sauce. King Arthur brand recommended for consistent results.
- Chili Powder – Adds depth and spiciness to the sauce. Adjust the quantity based on heat preference.
- Skim Milk – Creates a creamy texture in the sauce. Can substitute with any milk or milk alternative.
- Chicken Broth – Infuses the sauce with chicken flavor. Low-sodium broth helps control saltiness.
- Unsalted Butter – Adds richness to the roux. Kerrygold is suggested for flavor.
For the Taco Filling
- Green Onions – Contributes freshness and a mild onion flavor to the filling. Shallots can be used as an alternative.
- Shredded Chicken – The main protein; cooked and cooled. Rotisserie chicken is ideal for convenience.
- Frozen Corn – Adds sweetness and texture to the filling. Can replace with fresh corn when in season.
For Assembling
- Corn Tortillas – The vehicle for the filling; must be warmed before use. Flour tortillas can be a gluten-free option.
- Shredded Mozzarella Cheese – Melts beautifully and enhances the creaminess. Substitute with other melting cheeses like Monterey Jack.
These White Chicken Chili Tacos will undoubtedly become a family favorite, effortlessly combining flavors that everyone can enjoy!
Step‑by‑Step Instructions for Creamy White Chicken Chili Tacos
Step 1: Preheat the Oven
Begin by preheating your oven to 400°F (200°C). This step is crucial as it ensures your Creamy White Chicken Chili Tacos will bake to perfection, resulting in warm, golden tortillas that have a delightful crispiness. While the oven heats, gather all your ingredients for a smooth cooking process.
Step 2: Prepare Your Ingredients
Next, prepare your ingredients by shredding the rotisserie chicken, dicing green onions, and measuring out the canned green chilis and frozen corn. Aim for an organized mise en place; this will make combining your filling easier and quicker as you start cooking, allowing the flavors to shine through in your tacos.
Step 3: Make the Roux
In a medium saucepan, melt 2 tablespoons of unsalted butter over medium heat. Once melted, whisk in 2 tablespoons of all-purpose flour, stirring constantly for about 1 minute until bubbly and lightly golden. This roux serves as the base for your creamy sauce, lending it a rich flavor and thickening texture for the White Chicken Chili Tacos.
Step 4: Add Liquid Ingredients
Gradually pour in 1 cup of skim milk and 1 cup of chicken broth into the roux while whisking continuously. Keep mixing until the mixture is smooth and free of lumps, which should take about 2-3 minutes. Once combined, allow the sauce to simmer gently, thickening beautifully and infusing that comforting flavor into your creamy taco filling.
Step 5: Incorporate Flavorful Additions
Stir in 1 cup of sour cream, 1 can of green chilis, 1 teaspoon of ground cumin, and 1 tablespoon of chili powder into the simmering sauce. Season with salt and pepper to taste. Allow this mixture to simmer for an additional 3-5 minutes until thickened to a luscious consistency, filling your kitchen with warm, inviting aromas that hint at the delicious White Chicken Chili Tacos to come.
Step 6: Combine Chicken Filling
In a large mixing bowl, combine the shredded rotisserie chicken, 1 cup of frozen corn, and half of the diced green onions. Add the warm creamy sauce to this mixture, folding it gently until all ingredients are well coated. This is where the magic happens—each bite will burst with flavor, making your tacos irresistibly nice and creamy.
Step 7: Warm the Tortillas
Heat a non-stick skillet over medium heat and warm your corn tortillas for about 20 seconds on each side until they are pliable. This step is essential; warmed tortillas will hold up better with your filling and enhance the overall eating experience of your Creamy White Chicken Chili Tacos.
Step 8: Assemble the Tacos
Place a generous spoonful of the chicken and creamy filling onto each tortilla, followed by a sprinkle of shredded mozzarella cheese. Fold the tortillas gently but securely and place them seam-side up on a baking sheet. This preparation ensures that every taco is packed with delicious flavors and neatly holds together during baking.
Step 9: Bake to Perfection
Once all your tacos are assembled, bake them in the preheated oven for 12-15 minutes. Watch closely until the cheese is bubbly and the tortillas turn golden brown. The result will be crispy tortillas enveloping a creamy, savory filling that will have your family eagerly awaiting dinner.
Step 10: Cool and Serve
Allow the tacos to cool for a couple of minutes before serving. This brief cooling time helps the filling set slightly, preventing any messy spills when you bite in. Serve your delicious Creamy White Chicken Chili Tacos with extra toppings of your choice, such as fresh avocado, salsa, or sliced jalapeños for a delightful family meal.

What to Serve with Creamy White Chicken Chili Tacos
Transform a simple dinner into a fiesta-worthy spread by pairing your tacos with delightful accompaniments!
-
Mexican Rice: A flavorful bed of seasoned rice complements the creamy tartness of the tacos, making each bite even more satisfying.
-
Tortilla Chips with Guacamole: Crunchy chips with a dollop of creamy guacamole offer a textural contrast while enhancing the overall flavor experience.
-
Avocado Salad: Fresh, vibrant, and crisp salads with diced avocado and a lime dressing balance the richness of the creamy chili tacos beautifully.
-
Corn on the Cob: Grilled or steamed corn provides a sweet and juicy element against the savory heat of the tacos, bringing a summer feel to the table.
-
Pico de Gallo: Fresh diced tomatoes, onions, and cilantro create a zesty topping that brings brightness and acidity, cutting through the creaminess of the tacos.
-
Margaritas: A refreshing citrusy drink that adds celebratory flair to the meal, perfectly complementing the flavors of the creamy tacos.
-
Churros for Dessert: End on a sweet note with cinnamon-sugar churros that offer a delightful finish to your taco night; the warm sweetness is irresistible!
Delight in mixing and matching these side dishes to enhance your family’s dinner experience with the perfectly comforting White Chicken Chili Tacos!
White Chicken Chili Tacos Variations
Get ready to enjoy your tacos in different delightful ways that will surprise and excite your taste buds!
-
Protein Swap: Replace shredded chicken with shredded beef or turkey for a rich alternative that still keeps delicious flavor.
-
Vegetarian Delight: Use black beans or lentils instead of chicken to create a tasty vegetarian meal that even meat lovers will appreciate.
-
Spicy Kick: Add diced jalapeños to the filling or as a topping to turn up the heat and enhance the flavor profile tantalizingly.
-
Extra Creaminess: For an even richer sauce, stir in a bit of cream cheese or more sour cream into the creamy sauce for a luscious twist.
-
Seasonal Twist: Incorporate diced bell peppers or zucchini for added freshness when they’re in season; they add great texture and nutrition.
-
Cheesy Variation: Swap shredded mozzarella for other melting cheeses like Monterey Jack or pepper jack for extra creaminess and a hint of spice.
-
Flavorful Toppings: Top your tacos with a drizzle of avocado crema or zesty lime crema for a delightful finishing touch.
And if you’re looking for more inspiration, try these pairings with your tacos, like Mexican Chicken Rice or whip up a batch of Chopped Chicken Bacon for a scrumptious side! The possibilities are endless when it comes to making your creamy white chicken chili tacos shine. Enjoy!
Expert Tips for Creamy White Chicken Chili Tacos
-
Perfect Roux: Allow the roux to cook fully for at least a minute to eliminate any raw flour taste, ensuring a rich base for your White Chicken Chili Tacos.
-
Smooth Sauce: Gradually whisk in milk and broth to prevent lumps; this will give your sauce a velvety texture that beautifully coats the filling.
-
Tortilla Warmth: Always warm the corn tortillas before filling. This step prevents them from tearing and helps them hold up better against the creamy filling.
-
Manageable Portions: Avoid overfilling your tortillas. Aim for about 2-3 tablespoons of filling to keep each taco manageable and easy to enjoy.
-
Flavor Enhancements: Experiment with spices like more chili powder or cumin based on your family’s taste preferences, giving your Creamy White Chicken Chili Tacos a personalized touch.
Make Ahead Options
These Creamy White Chicken Chili Tacos are ideal for meal prep, allowing you to enjoy a delicious, homemade dinner with minimal last-minute effort! You can prepare the creamy sauce and filling up to 3 days in advance; simply store them separately in airtight containers in the refrigerator. Just make sure the tortillas are kept sealed at room temperature to maintain their texture. When you’re ready to enjoy your tacos, warm the filling on the stove or in the microwave, fill the tortillas, and then bake them for 12-15 minutes until golden and bubbly. This smart prep keeps your flavors vibrant, ensuring your tacos are just as delicious as if you made them fresh!
Storage Tips for White Chicken Chili Tacos
Fridge: Store leftover filling in an airtight container for up to 4 days, keeping the tortillas separate to maintain their texture.
Freezer: The filling freezes well for up to 3 months; avoid freezing assembled tacos as they can become soggy when thawed.
Reheating: Reheat the filling on the stove or in the microwave, adding a splash of broth or milk if needed to restore creaminess before serving.
Airtight Container: Always use an airtight container for storage to prevent any unwanted moisture or odors from affecting your delicious White Chicken Chili Tacos!

Creamy White Chicken Chili Tacos Recipe FAQs
What should I look for when selecting rotisserie chicken?
Absolutely! When choosing a rotisserie chicken, look for one with a golden-brown color and seasoning that appeals to you. Make sure there are no dark spots all over the skin, which could indicate spoilage. If possible, pick one that’s freshly made, as it will be juicier and more flavorful.
How should I store leftover creamy filling after making the tacos?
Very! Store the leftover creamy filling in an airtight container in the refrigerator for up to 4 days. To maintain the texture of the tortillas, keep them separate and reheat them just before serving. This way, your tacos will taste just as delicious the next day!
Can I freeze the filling and how do I do it?
Yes, you can! To freeze the filling, place it in an airtight container or a freezer-safe bag, removing as much air as possible to prevent freezer burn. Label it with the date and freeze for up to 3 months. When you’re ready to enjoy it, simply thaw it in the fridge overnight, then reheat on the stove or in the microwave, adding a splash of broth if needed to restore its creaminess.
What if my sauce turns out too thick?
No worries! If your sauce is too thick, simply whisk in a little extra chicken broth or milk over low heat—about 1 tablespoon at a time—until the consistency is just right. Remember, it’s easier to thicken a sauce than to thin it out, so add gradually!
Are these tacos suitable for people with dairy allergies?
While this recipe contains dairy, you can easily adapt it for dairy-free diets. Substitute the sour cream and skim milk with dairy-free alternatives like cashew cream or coconut milk. For the cheesy goodness, try dairy-free shredded cheese—this way, everyone can enjoy the Creamy White Chicken Chili Tacos!
Can I use fresh corn instead of frozen?
Definitely! If fresh corn is in season, feel free to use it instead of frozen. Just cut the kernels off the cob and add them to the filling as you would with frozen corn. When cooked, fresh corn enhances the sweetness and texture of the tacos even more!
Creamy White Chicken Chili Tacos for Cozy Family Nights
Ingredients
Equipment
Method
- Preheat your oven to 400°F (200°C). Gather all ingredients for a smooth cooking process.
- Shred the rotisserie chicken, dice green onions, and measure out canned green chilis and frozen corn.
- In a medium saucepan, melt unsalted butter over medium heat. Whisk in all-purpose flour and stir constantly for about 1 minute until bubbly and lightly golden.
- Gradually pour in skim milk and chicken broth into the roux while whisking continuously until smooth. Allow the sauce to simmer gently.
- Stir in sour cream, green chilis, ground cumin, and chili powder. Season with salt and pepper to taste. Simmer for an additional 3-5 minutes.
- Combine shredded chicken, frozen corn, and half of the diced green onions in a large mixing bowl. Add warm creamy sauce and fold gently.
- Warm corn tortillas in a non-stick skillet for about 20 seconds on each side until pliable.
- Place a spoonful of chicken and creamy filling onto each tortilla. Top with shredded mozzarella cheese, then fold gently.
- Bake assembled tacos in the preheated oven for 12-15 minutes until cheese is bubbly and tortillas are golden brown.
- Allow tacos to cool for a couple of minutes before serving. Serve with toppings like avocado, salsa, or sliced jalapeños.