
As I rolled out my dough, the rich aroma of sharp cheddar tickled my senses, instantly transporting me back to cozy afternoons spent in the kitchen with loved ones. These Tasty Homemade Cheese Crackers are my go-to snack—simple to prepare and delightfully crispy. They’re not just another snack; they’re a little labor of love that excites both kids and adults alike, transforming mundane snack times into something special. Plus, with a gluten-free option, they fit right into any dietary preference without compromising on flavor. Want to see how a handful of ingredients can be turned into a deliciously addictive snack? Let’s dive into this easy, cheesy adventure!
Why You’ll Crave These Crackers
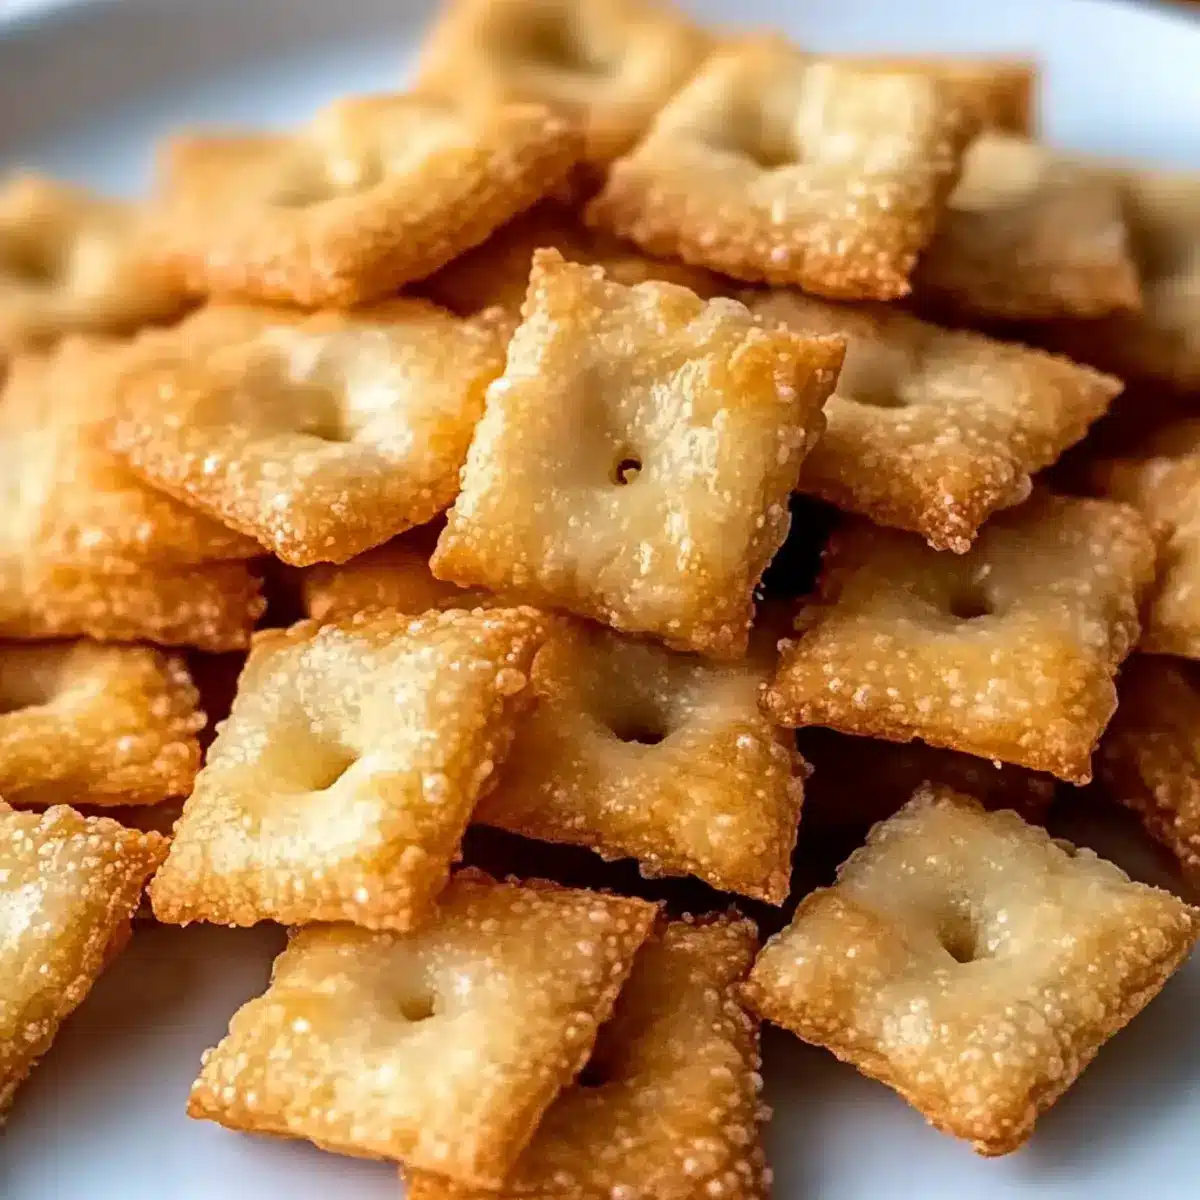
Bite-Sized Delights: Each cracker is a golden, crispy morsel that perfectly embodies the sharp, savory taste of cheddar. Homemade Goodness: Say goodbye to store-bought snacks; these are made with love, ensuring freshness in every bite. Kid-Approved: They are an instant hit with children, making snack time both fun and healthy. Flexibility: Feel free to explore other cheeses or spices, personalize them to your taste! Plus, they can easily be made gluten-free for friends with dietary restrictions. Quick Prep: In just a short time, you can whip up these delicious snacks and impress your family. Serve alongside Salad Bacon Cheese or enjoy them with soups for a delightful experience!
Tasty Homemade Cheese Crackers Ingredients
For the Crackers
- Sharp Yellow Cheddar – Provides an intense cheesy flavor; substitute with white cheddar if desired.
- All-Purpose Flour – Forms the dough’s base; opt for gluten-free flour for a gluten-free version.
- Cornstarch – Enhances crispiness and texture; tapioca starch can be a suitable alternative.
- Salt – Elevates the overall flavor; sea salt offers a deeper taste.
- Cold Butter – Adds richness and flakiness; use cold to avoid sticky dough.
- Cold Water – Binds the mixture; make sure it’s ice-cold for the best results.
Optional Seasoning
- Herbs/Spices – Add garlic powder, paprika, or rosemary to create unique flavor profiles; feel free to experiment!
Step‑by‑Step Instructions for Tasty Homemade Cheese Crackers
Step 1: Mix Dry Ingredients
In a food processor, combine the shredded sharp yellow cheddar, all-purpose flour, cornstarch, and salt. Pulse the mixture for about 30 seconds until everything is well blended, and you have a light, powdery texture. This base will create the crispy foundation of your Tasty Homemade Cheese Crackers, so ensure a thorough mix for even flavor distribution.
Step 2: Incorporate Cold Butter
Add the cold butter, cutting it into the dry mixture. Blend until the texture resembles wet sand, which should take around 20 seconds. The cold butter is key to achieving the desired flakiness in your crackers. Make sure no large chunks of butter remain, as this will affect the final texture of your cheese crackers.
Step 3: Bind with Cold Water
Drizzle in ice-cold water while pulsing the mixture just until large clumps begin to form—this should take about 10 pulses. Be careful not to overmix, as you want to maintain a tender texture in your Tasty Homemade Cheese Crackers. The cold water helps bring the dough together without heating it up, locking in that rich flavor.
Step 4: Chill the Dough
Transfer the clumpy dough onto a floured surface and divide it in half. Shape each half into a square about 6 inches wide and wrap them in plastic wrap. Refrigerate the dough squares for 45 minutes, allowing them to firm up. This chilling step is crucial for easy rolling and achieving crisp, perfectly baked crackers.
Step 5: Preheat and Prepare Baking Sheets
While the dough chills, preheat your oven to 350°F (177°C). Line your baking sheets with parchment paper, which will prevent sticking and make for easy cleanup. Preparing the baking sheets in advance ensures a smooth transition from rolling to baking, helping you achieve that lovely golden color on your Tasty Homemade Cheese Crackers.
Step 6: Roll and Cut the Dough
Once chilled, roll out each square of dough on a floured surface until it’s about 9 inches wide. Trim each rolled piece to an 8-inch square, then cut into 64 small squares. Don’t forget to poke holes in the centers of each square to prevent puffing during baking. These small squares will transform into delightful crispy snacks.
Step 7: Season and Bake
Sprinkle the cut squares with sea salt for an extra punch of flavor, if desired. Bake the crackers in the preheated oven for 16 to 20 minutes, rotating the baking sheets halfway through. Keep a close eye on them; you want them to be lightly golden around the edges—a perfect sign that your Tasty Homemade Cheese Crackers are nearing completion.
Step 8: Cool and Serve
Allow the freshly baked cheese crackers to cool completely on the baking sheets, which will help them crisp up even more. As the aroma fills your kitchen, these tantalizing Tasty Homemade Cheese Crackers will be ready to serve as delightful snacks. Enjoy them on their own or paired with your favorite dips or soups!
Expert Tips for Tasty Homemade Cheese Crackers
-
Choose the Right Cheese: Opt for sharp cheddar for maximum flavor. Mild cheeses may result in bland crackers; experiment with Gouda or Parmesan for different tastes.
-
Perfect Dough Consistency: Use cold butter and ice-cold water to prevent a sticky dough. This will ensure a flaky texture for your Tasty Homemade Cheese Crackers.
-
Mind the Thickness: Roll the dough to about 1/8-inch thickness before cutting. Thicker crackers could end up soft instead of crispy.
-
Watch the Baking Time: Keep an eye on your crackers as they bake. Remove them as soon as they turn golden to avoid over-browning.
-
Cool for Crunch: Let the crackers cool completely on the baking sheets to enhance their crunchiness and flavor before serving.
Storage Tips for Tasty Homemade Cheese Crackers
- Room Temperature: Store your baked crackers in an airtight container at room temperature for up to one week. Layer them with parchment paper to prevent sticking and maintain their crispiness.
- Fridge: If you want to keep them longer, refrigerate the crackers in an airtight container for up to 2 weeks. Just be aware that they might lose some crunch.
- Freezer: Freeze these delightful Tasty Homemade Cheese Crackers in a freezer-safe container for up to 2 months. Thaw at room temperature before enjoying, or reheat in a warm oven for added crispiness.
- Reheating: To revive their fresh-baked flavor, reheat frozen crackers in a preheated oven at 350°F (177°C) for about 5-7 minutes, until warmed through and crispy again.
Tasty Homemade Cheese Crackers Variations
Feel free to add your own twist to these crackers and elevate your snacking experience!
-
Cheese Swap: Try Gouda or Parmesan for different flavor profiles that will surprise your taste buds. The richness of Gouda offers a creamy alternative, while Parmesan brings sharpness that can take these crackers to new heights.
-
Herb-Infused: Mix in dried herbs like rosemary or thyme to enhance aroma and taste. The earthy notes of rosemary will create a delightful contrast to the sharp cheese, making each bite aromatic and unique.
-
Spicy Kick: Add a pinch of cayenne pepper or crushed red pepper flakes for a heat boost. You’ll love the zing that complements the cheesy goodness, making these snacks perfect for spicy food lovers!
-
Dairy-Free Option: Substitute olive oil for butter and use a dairy-free cheese alternative. With the right cheese, your snacks will be just as tasty and perfectly crispy, even without dairy!
-
Nutty Flavor: Incorporate finely ground nuts like almonds or cashews into the dough for added texture. The nutty crunch can elevate the experience, adding depth to each crispy bite.
-
Sesame Seed Top: Sprinkle sesame seeds on top before baking for a nutty finish and extra crunch. You’ll elevate your crackers to a new level of deliciousness, adding visual appeal and an interesting layer of flavor.
-
Sweet & Savory: Mix in a small amount of sugar or honey for a delightful sweet twist to contrast the cheese. This unexpected addition will create a palate-pleasing balance that your family will adore.
-
Cheesy Dip Delight: Serve these crackers alongside your favorite creamy dip or charcuterie board. Pair with Cheese Shrimp Penne or Homemade Grilled Octopus for a wholesome snack experience that brings everyone together!
Make Ahead Options
These Tasty Homemade Cheese Crackers are a fantastic meal prep option for busy days! You can prepare the dough and refrigerate it for up to 3 days; just remember to wrap it well in plastic wrap to prevent it from drying out. If you’re looking to store it for longer, feel free to freeze the dough for up to 2 months—simply thaw it in the refrigerator overnight before use. When you’re ready to bake, roll out the chilled dough, cut into squares, and bake according to the instructions. This way, you’ll have delicious, crispy snacks on hand that are just as flavorful and fresh as if made that day!
What to Serve with Tasty Homemade Cheese Crackers
Pair these delightful snacks with a variety of complementary flavors and textures to create a well-rounded experience.
-
Savory Charcuterie Board: Serve alongside slices of salami and prosciutto for an elegant touch that balances the cheese’s richness. These crackers add a satisfying crunch to your board.
-
Fresh Fruit: Pair with grapes or apple slices for a refreshing contrast to the rich, cheesy flavor. The sweetness enhances every bite while providing a vital burst of freshness.
-
Creamy Dips: Enjoy with a creamy ranch or herb dip to elevate the flavor profile. The cool dip adds a delicious creaminess that perfectly complements the crispy texture of the crackers.
-
Homemade Soup: Dip these crackers into tomato or butternut squash soup for a comforting snack. The crunchiness of the crackers balances the smoothness of the soup, creating a delightful bite.
-
Zesty Salsa: Pairing with a fresh salsa brings a wonderful explosion of flavors. The zing of tomatoes and cilantro cuts through the richness, making for an inviting snack option.
-
Sparkling Wine: A glass of sparkling wine or cider can elevate the snacking experience with its effervescence. It enhances the flavors and adds a celebratory touch to your gathering.
-
Mini Caprese Skewers: Combine with cherry tomatoes, basil, and mozzarella on skewers for a fun appetizer. The crunchy crackers serve as a perfect base, complementing the freshness of the ingredients.
-
Honey Drizzle: A light drizzle of honey on top offers an irresistible sweet-savory combination. This finishing touch is especially delightful for those with a sweet tooth.
Tasty Homemade Cheese Crackers Recipe FAQs
What type of cheese is best for these crackers?
Absolutely! Sharp yellow cheddar offers a wonderful intense flavor for these Tasty Homemade Cheese Crackers. However, feel free to swap it out for white cheddar, Gouda, or even Parmesan for different taste profiles. Just be mindful that milder cheeses can lead to a less flavorful cracker.
How should I store leftover cheese crackers?
I recommend keeping your baked crackers in an airtight container at room temperature for up to one week. To maintain their crispiness, layer them with parchment paper to prevent sticking. If you notice any signs of moisture, it’s best to enjoy them sooner to ensure maximum crunch!
Can I freeze the dough or the baked crackers?
Absolutely! You can freeze the dough for up to 2 months. Just wrap it in plastic wrap and place it in a freezer-safe container. When you’re ready to bake, simply thaw in the fridge overnight, roll it out, and bake as instructed. You can also freeze the baked crackers for up to 2 months; just thaw at room temperature and reheat in a preheated oven at 350°F (177°C) for 5-7 minutes for that fresh-baked taste.
Why are my cheese crackers not crispy enough?
Very! If your Tasty Homemade Cheese Crackers turn out softer than expected, ensure that your dough was rolled to a thickness of about 1/8 inch. Also, keep an eye on the baking time—removing them when they’re lightly golden around the edges is crucial for achieving that desired crispiness.
Can I make these crackers gluten-free?
Yes, you can! Substitute the all-purpose flour with your favorite gluten-free flour blend. Just make sure that it includes a binding agent to help achieve a similar texture. These delightful snacks can be enjoyed by everyone, regardless of dietary restrictions, without sacrificing flavor!
Tasty Homemade Cheese Crackers That Will Wow Your Tastebuds
Ingredients
Equipment
Method
- In a food processor, combine the shredded sharp yellow cheddar, all-purpose flour, cornstarch, and salt. Pulse for about 30 seconds until well blended.
- Add the cold butter, cutting it into the dry mixture until the texture resembles wet sand, around 20 seconds.
- Drizzle in ice-cold water while pulsing until large clumps form—about 10 pulses. Do not overmix.
- Transfer the dough onto a floured surface, shape into squares, wrap in plastic wrap, and refrigerate for 45 minutes.
- Preheat your oven to 350°F (177°C). Line baking sheets with parchment paper.
- Roll out each square of dough to about 9 inches wide. Trim to 8-inch squares and cut into 64 small squares, poking holes in the centers.
- Sprinkle with sea salt and bake for 16 to 20 minutes, rotating halfway until lightly golden.
- Let the crackers cool completely on the baking sheets to enhance crispiness before serving.