
Just when you think you’ve mastered dessert, a creation like Red Velvet Oreo Cheesecake swoops in to elevate your baking game. This layered beauty is the ultimate celebration dessert that artfully brings together the rich flavors of red velvet and the creamy indulgence of cheesecake, all resting on a delightfully crunchy Oreo crust. Whether you’re planning a birthday bash or simply want to impress friends and family, this showstopper is bound to steal the spotlight. Plus, with the option to customize the crust or try a natural color alternative, it’s not just visually stunning, but also flexible for your culinary whims. So, are you ready to dive into a slice of happiness?
Why Choose Red Velvet Oreo Cheesecake?
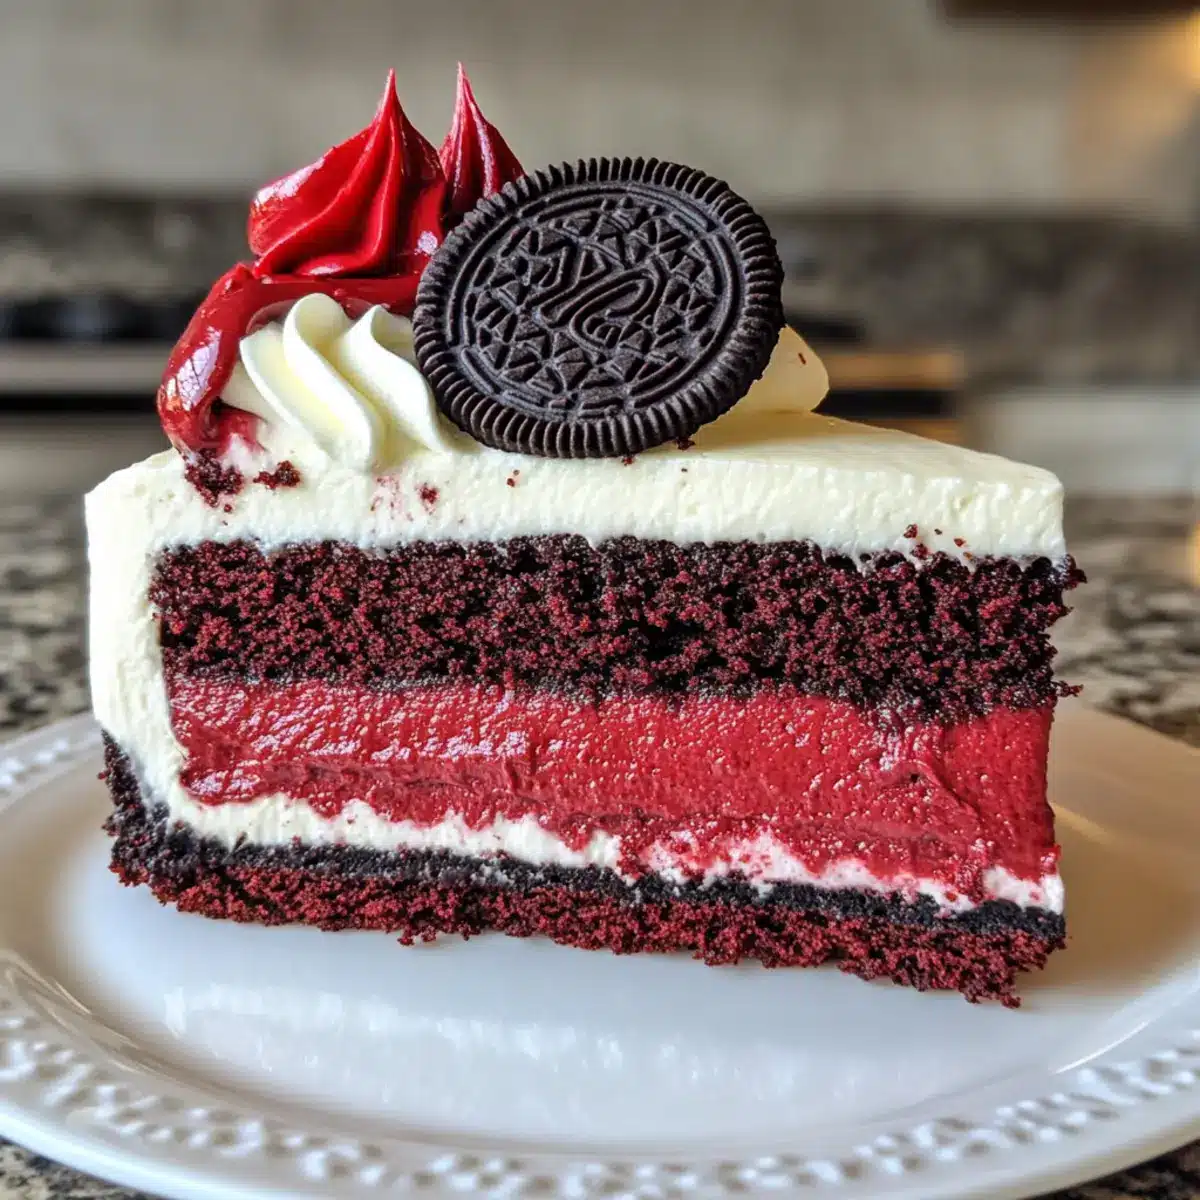
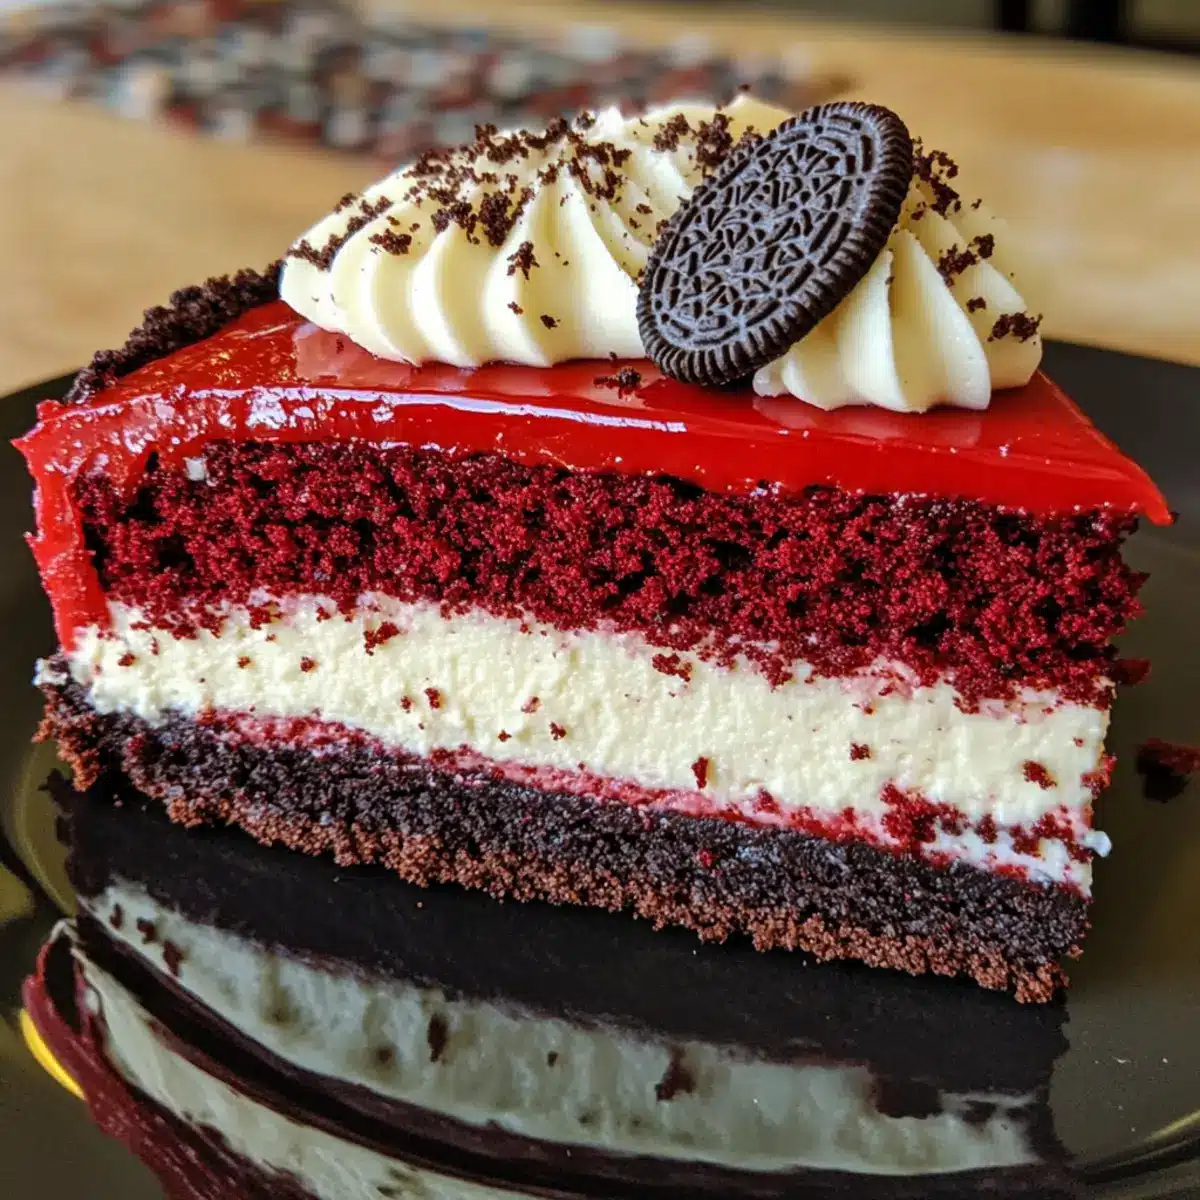
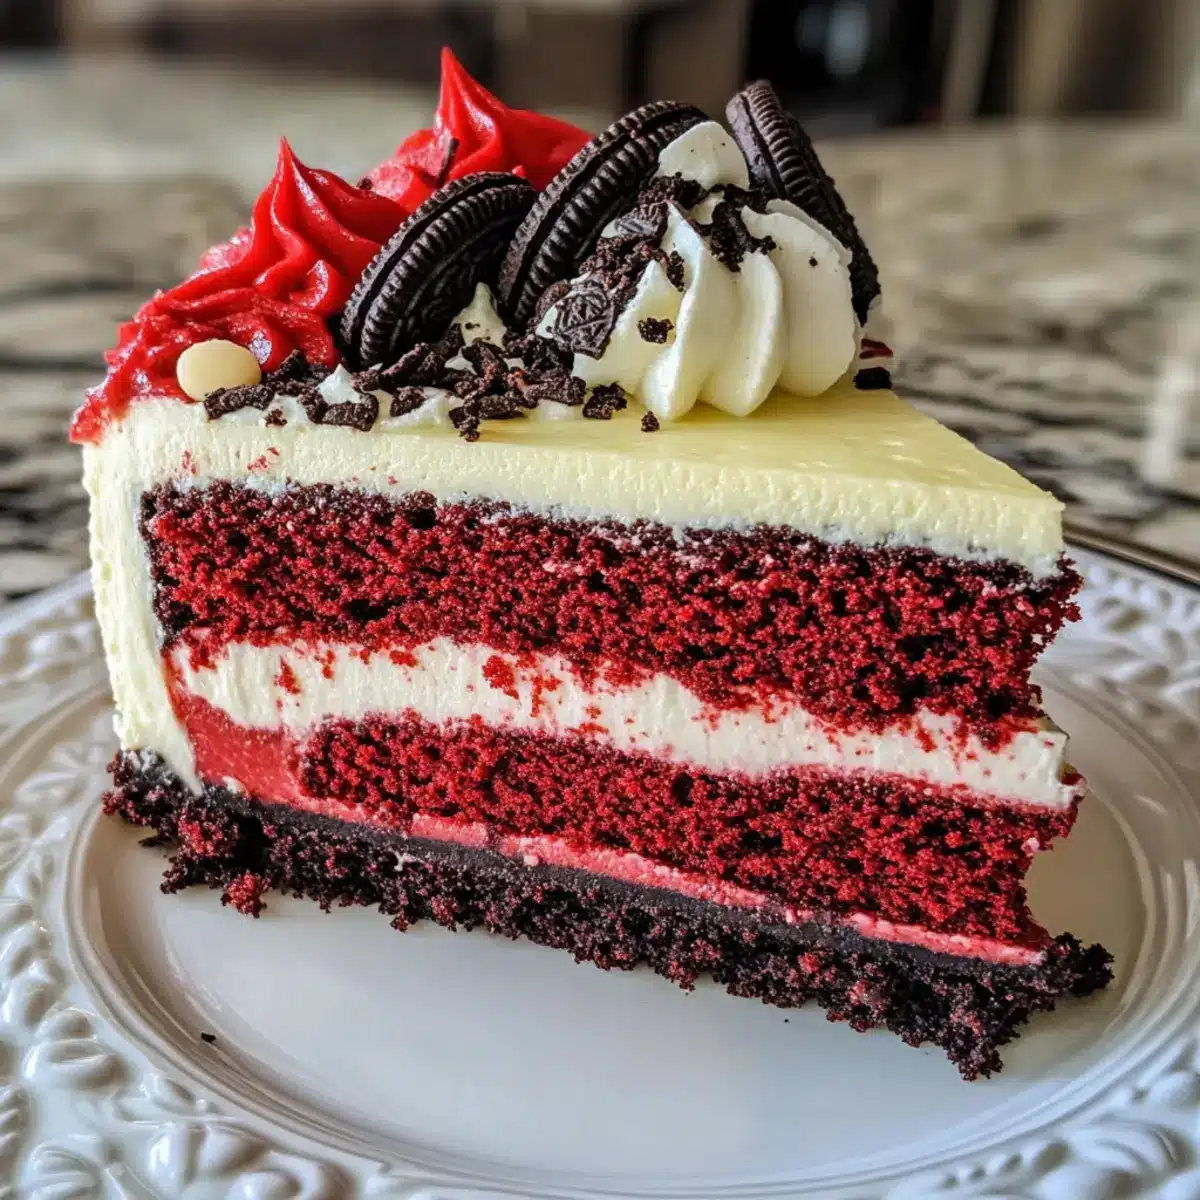
Irresistible Layers: Imagine the richness of red velvet intertwined with the creamy delight of cheesecake — it’s a flavor explosion!
Customizable Crusts: You can easily switch up the base; graham crackers or chocolate wafers make great alternatives to Oreos.
Visual Appeal: The stunning contrast of red and white layers will impress at any gathering.
Quick Prep: Ideal when you’re pressed for time; this dessert can be ready to chill while you focus on other party preparations.
Crowd-Pleaser: Expect smiles all around as this cheesecake serves as both a showstopper and a delicious treat, perfect for birthdays, holidays, and celebrations. If you love cheesecakes, you might also enjoy our Cheesecake Stuffed Chocolate or Sugar Free Cheesecake for more delightful indulgences!
Red Velvet Oreo Cheesecake Ingredients
• Elevate your baking with these essentials!
For the Oreo Crust
- Oreo Cookies – Provides a rich, chocolatey base that perfectly complements the cheesecake layers.
- Unsalted Butter – Binds the crust together; use melted for an even mix.
For the Red Velvet Cake Layer
- All-Purpose Flour – The main structure component of the cake, ensuring a light texture.
- Granulated Sugar – Sweetens the cake; feel free to adjust to your taste!
- Cocoa Powder – Adds depth to the red velvet flavor; ensure it’s unsweetened for the best profile.
- Baking Soda – Helps the cake rise for a fluffy finish.
- Salt – Balances sweetness and enhances flavors; a little goes a long way.
- Eggs – Provide moisture and bind all cake ingredients together; always use room temperature for better blending.
- Vegetable Oil – Keeps the cake moist; can substitute with melted butter if desired.
- Red Food Coloring – Gives that stunning red hue; try using natural beetroot powder for a healthier option.
- Vanilla Extract – Amplifies the flavors of the cake; opt for pure for the best taste.
For the Cheesecake Layer
- Cream Cheese – The star of the cheesecake, providing smooth richness; ensure it’s at room temperature for easy mixing.
- Granulated Sugar – Sweetens the cheesecake layer to balance the tanginess.
- Sour Cream – Adds creaminess and a slight tang; Greek yogurt is a lighter alternative.
- Eggs – Important for binding and ensuring a creamy cheesecake; use room temperature for best results.
- Vanilla Extract – Enhances the overall flavor profile of the cheesecake.
Now that you have all the ingredients beautifully laid out, let your creative culinary journey begin with this fabulous Red Velvet Oreo Cheesecake!
Step‑by‑Step Instructions for Red Velvet Oreo Cheesecake
Step 1: Prepare the Crust
Begin by preheating your oven to 350°F (175°C). In a mixing bowl, crush about 24 Oreo cookies into fine crumbs using a food processor or a sturdy rolling pin. Combine the cookie crumbs with 5 tablespoons of melted unsalted butter, then press this mixture evenly into the bottom of a 9-inch springform pan. Ensure it’s compact and level, then bake for 10 minutes until set.
Step 2: Make the Red Velvet Cake Layer
In a large bowl, beat together ½ cup of softened unsalted butter and 1 cup of granulated sugar until light and fluffy, about 3 minutes. Add 2 large eggs, one at a time, mixing in 1 teaspoon of pure vanilla extract. Gradually fold in 1 ½ cups of all-purpose flour, 1 tablespoon of cocoa powder, and ½ teaspoon of baking soda, followed by ½ cup of vegetable oil. Mix in red food coloring or beetroot powder until uniform in color, then pour this batter over the cooled Oreo crust.
Step 3: Prepare Cheesecake Layer
In a separate mixing bowl, blend 16 ounces of softened cream cheese with ¾ cup of granulated sugar until smooth and creamy. Incorporate 2 large eggs, one at a time, ensuring each is fully blended before adding the next. Lastly, mix in ½ cup of sour cream and 1 teaspoon of vanilla extract until just combined. This creamy mixture will form the decadent cheesecake layer of your Red Velvet Oreo Cheesecake.
Step 4: Assemble and Bake
Carefully pour the cheesecake layer over the red velvet cake layer in the springform pan, evenly spreading it out. Bake the assembled cheesecake in the oven for 60-70 minutes, until the edges are set but the center still has a slight jiggle. You want the top to start turning golden without cracking, signaling that it’s nearly done.
Step 5: Cool the Cheesecake
Once baked, turn off the oven and leave the cheesecake inside with the door slightly ajar for about 1 hour. This gradual cooling process helps prevent cracks in your beautiful Red Velvet Oreo Cheesecake. Afterward, transfer it to a wire rack to cool completely at room temperature for another hour, then refrigerate for at least 4 hours, preferably overnight.
Step 6: Decorate
Once the cheesecake is fully chilled, gently release it from the springform pan. Top your gorgeous Red Velvet Oreo Cheesecake with freshly whipped cream, sprinkle crushed Oreo cookies across the top, and if you’re feeling fancy, add a drizzle of red velvet cream. Serve slices chilled to maximize the flavors and textures in every bite!
Make Ahead Options
These Red Velvet Oreo Cheesecakes are perfect for busy home cooks looking to save time without sacrificing flavor! You can prepare the crust and the red velvet cake layer up to 24 hours in advance by storing them separately in the refrigerator. When you’re ready to finish the cheesecake, simply make the cheesecake layer and assemble the dessert as directed. This allows the layers to blend beautifully while also maintaining texture. If you wish to make the entire cheesecake ahead, it can be baked and refrigerated for up to 3 days; just make sure to cover it tightly with plastic wrap to prevent drying out. When ready to serve, add the finishing touches of whipped cream and Oreo crumbles!
Expert Tips for Red Velvet Oreo Cheesecake
-
Room Temperature Ingredients: Ensure your cream cheese and eggs are at room temperature for a smooth batter; this helps avoid lumps in your cheesecake layer.
-
Avoid Overmixing: Mix your cheesecake just until ingredients are combined to maintain a velvety texture. Overmixing can introduce too much air, leading to cracks.
-
Use a Water Bath: For an extra layer of protection against cracks, consider baking your cheesecake in a water bath. Wrap the springform pan in aluminum foil and place it in a larger pan filled with hot water.
-
Cool Gradually: Allow the cheesecake to cool in the oven with the door slightly ajar for about 1 hour to prevent sudden temperature changes that might cause cracks.
-
Chill Overnight: For the best flavor, prepare your Red Velvet Oreo Cheesecake a day ahead and let it chill overnight. This resting period allows flavors to meld beautifully.
-
Garnish Creatively: Top with fresh berries or chocolate shavings for a stunning presentation that also adds a delightful contrast to the richness of the cheesecake.
Red Velvet Oreo Cheesecake Variations
Feel free to explore these delightful twists to make this recipe your own, and let your creativity shine through!
-
Gluten-Free Crust: Use gluten-free Oreo cookies or almond flour for a delectable alternative. Everyone can indulge without worry!
-
Natural Coloring: Replace red food coloring with beetroot powder for a vibrant, natural hue. It provides a subtle earthiness that complements the flavors beautifully.
-
Cheesecake Swirl: Add dollops of your favorite fruit puree, like raspberry or cherry, into the cheesecake layer before baking for a splash of fruity flavor and color!
-
Chocolate Drizzle: Melt some dark chocolate and drizzle it over the top for an extra layer of rich flavor that perfectly complements the cheesecake.
-
Nutty Surprise: Fold in crushed pecans or walnuts into the cheesecake layer for a delightful crunch that pairs beautifully with the creamy texture.
-
Mini Cheesecakes: Use a muffin tin for mini versions of Red Velvet Oreo Cheesecakes. They’re perfect for parties and easy to share!
-
Spiced Version: Add a pinch of cinnamon or nutmeg to the cheesecake layer for a cozy warmth that adds depth to the flavors.
You can also experiment with different flavors by pairing this cheesecake with our delicious Cheesecake Cookie Dough Tacos for a unique dessert experience or explore the refreshing taste of our Mini Key Lime Cheesecakes for a delightful change!
Storage Tips for Red Velvet Oreo Cheesecake
Fridge: Store any leftovers in an airtight container in the refrigerator for up to 5 days to keep your Red Velvet Oreo Cheesecake fresh and delicious.
Freezer: For longer preservation, wrap individual slices tightly in plastic wrap and then store them in a freezer-safe container for up to 3 months.
Thawing: When ready to enjoy, transfer the cheesecake slices to the fridge to thaw overnight for the best texture.
Reheating: It’s best served chilled, but if you prefer a slightly softened texture, let it sit at room temperature for about 15 minutes before serving.
What to Serve with Red Velvet Oreo Cheesecake?
Indulge in the perfect balance of flavors and textures to elevate your dessert experience.
-
Creamy Mashed Potatoes: The richness of mashed potatoes offers a comforting contrast to the sweetness of the cheesecake.
-
Fresh Berries: A mix of tart raspberries and strawberries brightens the palate, balancing the rich flavors of the cheesecake.
-
Sparkling Wine: A light, bubbly Prosecco complements the dessert’s sweetness while adding a touch of sophistication to your celebration.
-
Chocolate Drizzled Strawberries: Juicy strawberries coated in chocolate make for an elegant, shareable treat that pairs beautifully with the cheesecake’s flavors.
-
Vanilla Ice Cream: Rich and creamy ice cream contrasts perfectly with the flavors of red velvet, creating a delightful combination in every bite.
-
Coffee: A steaming cup of brewed coffee will cut through the richness of the dessert, making for an invigorating pairing.
-
Mint Chocolate Chip Cookies: The coolness of mint offers a refreshing taste, providing a fun twist alongside the indulgent cheesecake.
-
Whipped Cream Topping: A dollop of freshly made whipped cream can add an airy lightness and make each slice even more indulgent.
Red Velvet Oreo Cheesecake Recipe FAQs
What type of Oreos should I use for the crust?
Absolutely! Regular Oreos work best for a classic taste, but feel free to experiment with different flavors like Double Stuff or even Mint Oreos for a unique twist.
How do I know when my cheesecake is baked perfectly?
Look for a firm edge and a slightly jiggly center that will firm up as it cools. The top should have a golden hue without any cracks, signaling that your Red Velvet Oreo Cheesecake is ready to be removed from the oven!
How should I store my leftover cheesecake?
For the best results, place leftover slices in an airtight container in the refrigerator for up to 5 days. If you want to preserve it for longer, wrap individual slices in plastic wrap and store them in a freezer-safe container for up to 3 months.
Can I make this cheesecake in advance?
Yes, you can! In fact, I often recommend preparing your Red Velvet Oreo Cheesecake a day ahead. Just let it chill in the fridge overnight to allow the flavors to meld beautifully. For best results, ensure it is tightly covered to maintain freshness.
Is there a way to substitute ingredients for dietary restrictions?
Very! For a lighter cheesecake, you can swap sour cream with Greek yogurt. If you’re avoiding gluten, a gluten-free cookie brand can replace Oreos for the crust. Whenever possible, check labels to ensure they’re safe for your specific dietary needs.
How can I prevent my cheesecake from cracking?
To minimize the risk of cracks forming, cool your cheesecake gradually by leaving it in the oven with the door slightly ajar for about an hour after baking. Additionally, avoid overmixing the batter to keep the texture smooth and creamy.

Indulge in Red Velvet Oreo Cheesecake Bliss for Every Occasion
Ingredients
Equipment
Method
- Preheat your oven to 350°F (175°C). Crush about 24 Oreo cookies into fine crumbs and combine with 5 tablespoons of melted unsalted butter. Press this mixture into the bottom of a 9-inch springform pan and bake for 10 minutes until set.
- In a large bowl, beat together ½ cup of softened unsalted butter and 1 cup of granulated sugar until fluffy. Add 2 large eggs and 1 teaspoon of vanilla extract. Gradually fold in 1.5 cups of all-purpose flour, 1 tablespoon of cocoa powder, and 0.5 teaspoon of baking soda, followed by 0.5 cup of vegetable oil. Mix in red food coloring until uniform, then pour over the cooled crust.
- In another bowl, blend 16 ounces of softened cream cheese with ¾ cup of granulated sugar until smooth. Incorporate 2 large eggs, then mix in ½ cup of sour cream and 1 teaspoon of vanilla extract. This will form the cheesecake layer.
- Pour the cheesecake layer over the red velvet cake layer, spreading it evenly. Bake for 60-70 minutes until the edges are set and the center has a slight jiggle.
- Turn off the oven and leave the cheesecake inside with the door slightly ajar for about 1 hour. Then cool completely at room temperature for another hour, refrigerate for at least 4 hours, preferably overnight.
- Once chilled, gently release from the springform pan, top with whipped cream and crushed Oreos, then serve slices chilled.