
As the leaves begin to crunch underfoot and the air turns crisp, there’s nothing quite like the warmth of cozy gatherings that celebrate autumn. Enter my Pumpkin Patch Deviled Eggs, a delightful twist on the classic appetizer that’s perfect for Halloween and Thanksgiving festivities. These eggs are not only visually appealing with their charming pumpkin shape, but they also offer an easy preparation that won’t stress you out in the kitchen. With a creamy filling that’s a crowd-pleaser and rich in flavor, each bite feels like a warm hug on a chilly day. Ready to impress your guests and bring a touch of whimsy to your table? Let’s roll up our sleeves and create these festive treats together!
Why are Pumpkin Patch Deviled Eggs a must-try?
Festive Appeal: These delightful deviled eggs are designed to wow! Their adorable pumpkin shape makes them a standout at any autumn gathering, instantly bringing a playful vibe.
Easy Preparation: You don’t need a culinary degree to whip these up! This recipe simplifies classic deviled eggs, ensuring you can enjoy more time with friends and family.
Rich, Creamy Flavor: Each bite delivers a perfectly balanced filling, thanks to the combination of mayonnaise and mustard, making them irresistibly savory.
Versatile Ingredients: Feel free to customize with your favorite herbs or spices, even consider switching up the mayo for Greek yogurt for a healthier twist, just like in my Eggs Benedict Casserole.
Perfect for Any Occasion: Whether it’s Halloween or Thanksgiving, these eggs fit right into any festive menu, making them an ultimate crowd-pleaser that guests will rave about!
Make-Ahead: These beauties can be prepared a day in advance, freeing you up for other essential tasks, letting you enjoy the celebrations stress-free!
Pumpkin Patch Deviled Eggs Ingredients
Discover the key ingredients for these festive delights!
For the Filling
- Large Eggs – Choose older eggs (7-10 days old) for easier peeling.
- Mayonnaise – This creamy element creates a rich filling; swap it with Greek yogurt for a lighter option.
- Yellow Mustard – Adds a tangy flavor; Dijon mustard gives a sharper bite if preferred.
- Salt – Essential for enhancing the overall flavor; using sea salt adds a gourmet touch.
- Black Pepper – A sprinkle for that mild kick; freshly ground gives the best flavor.
- Paprika – Adds warmth and visual appeal; smoked paprika brings a deeper, more aromatic flavor.
- Orange Food Coloring (optional) – Helps achieve that pumpkin hue; use sparingly to not overwhelm the taste.
- Fresh Chives – Perfect for garnish and adds adorable stems; parsley or dill can be great substitutions.
For Decoration
- Paprika (for dusting) – Adds an extra pop of color and flavor on top of the eggs.
- Extra Chive Pieces – Enhance the look with vivid green stems!
Elevate your gatherings with these charming Pumpkin Patch Deviled Eggs, and watch them disappear from the platter!
Step‑by‑Step Instructions for Pumpkin Patch Deviled Eggs
Step 1: Boil Eggs
Place twelve large eggs in a saucepan and cover them with cold water, ensuring there’s at least an inch of water above the eggs. Bring the water to a rolling boil over medium-high heat. Once boiling, cover the pan and remove it from heat. Let the eggs sit in the hot water for 10 minutes to achieve perfect hard-boiled eggs without a green ring around the yolk.
Step 2: Ice Bath
While the eggs are resting, prepare a large bowl filled with ice water. After 10 minutes, carefully transfer the hot eggs to the ice bath using a slotted spoon. Allow the eggs to cool for at least 5 minutes, which helps make peeling easier and ensures the deviled eggs are cool enough for serving.
Step 3: Peel Eggs
Once the eggs have cooled in the ice bath, gently tap each egg on a hard surface to crack the shell. Roll the egg between your hands to loosen the shell, then peel it under a stream of cold running water for a smooth finish. Take care not to damage the whites as you remove the shells, and set peeled eggs aside on a clean towel.
Step 4: Prepare Filling
Slice each peeled egg in half lengthwise and carefully scoop the yolks into a mixing bowl. Add about 1/4 cup of mayonnaise, 1 tablespoon of yellow mustard, a pinch of salt, and black pepper to taste. If desired, add a few drops of orange food coloring to achieve that festive pumpkin hue. Mash the mixture together until it’s perfectly smooth and creamy, ensuring the filling is well combined.
Step 5: Pipe Filling
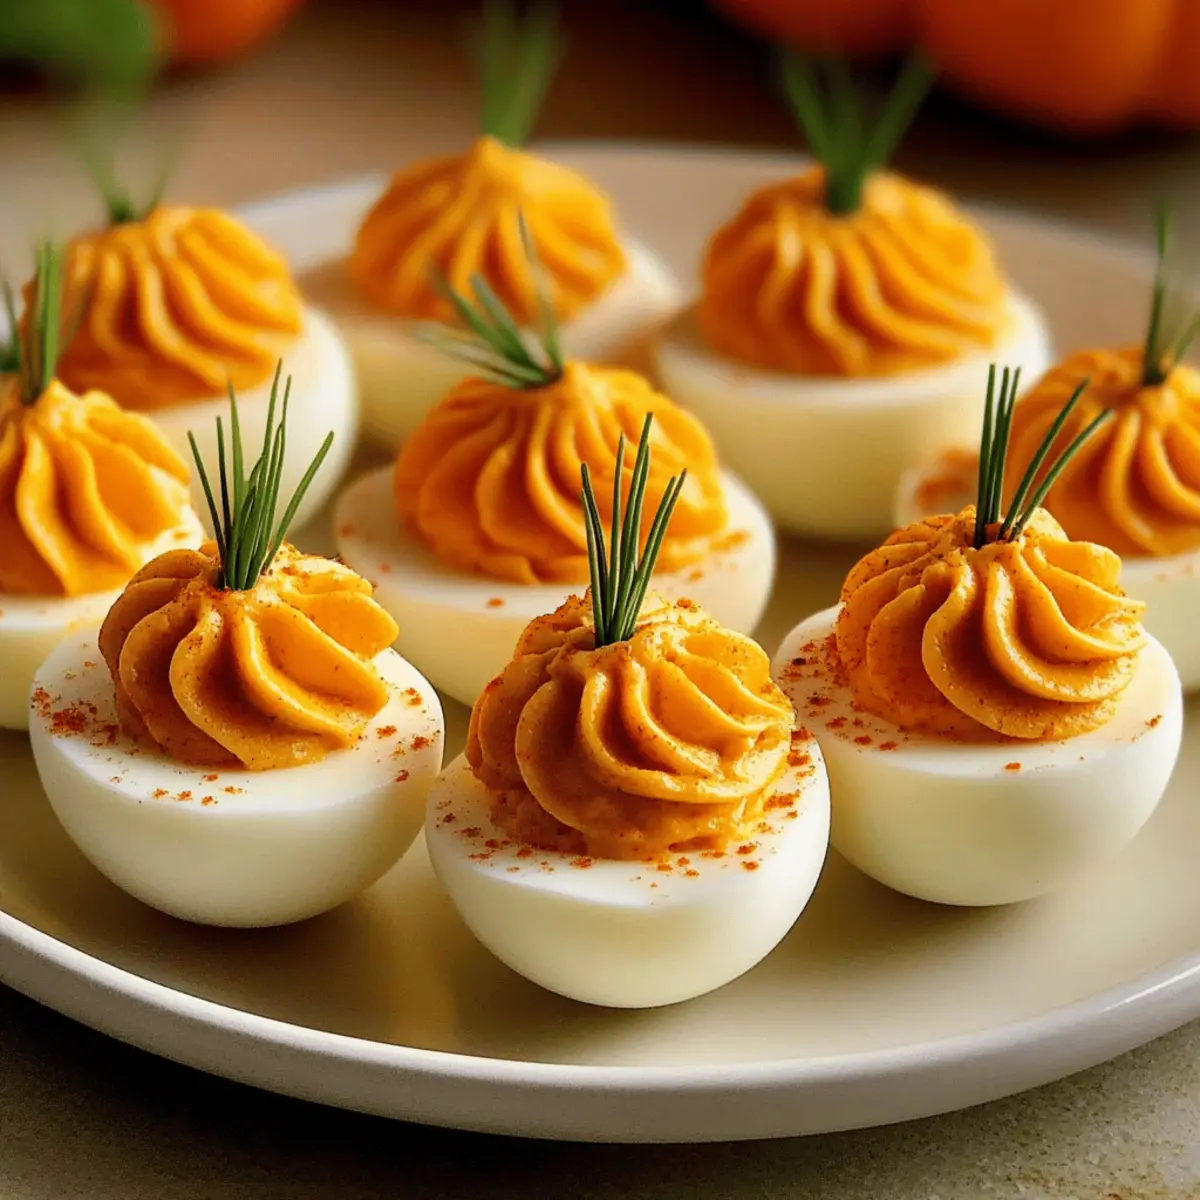
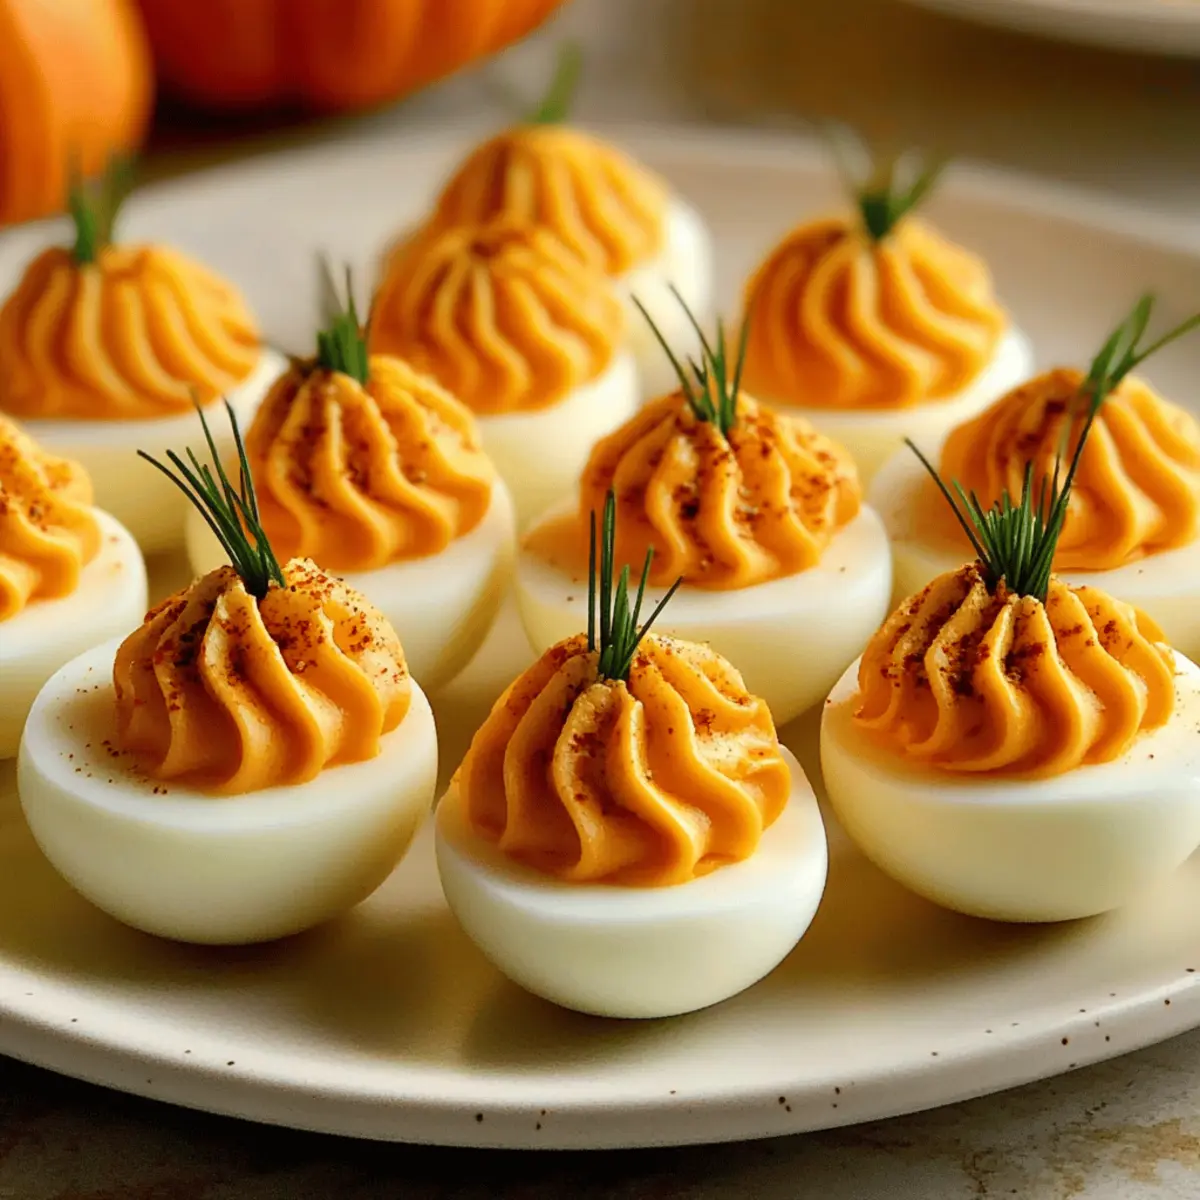
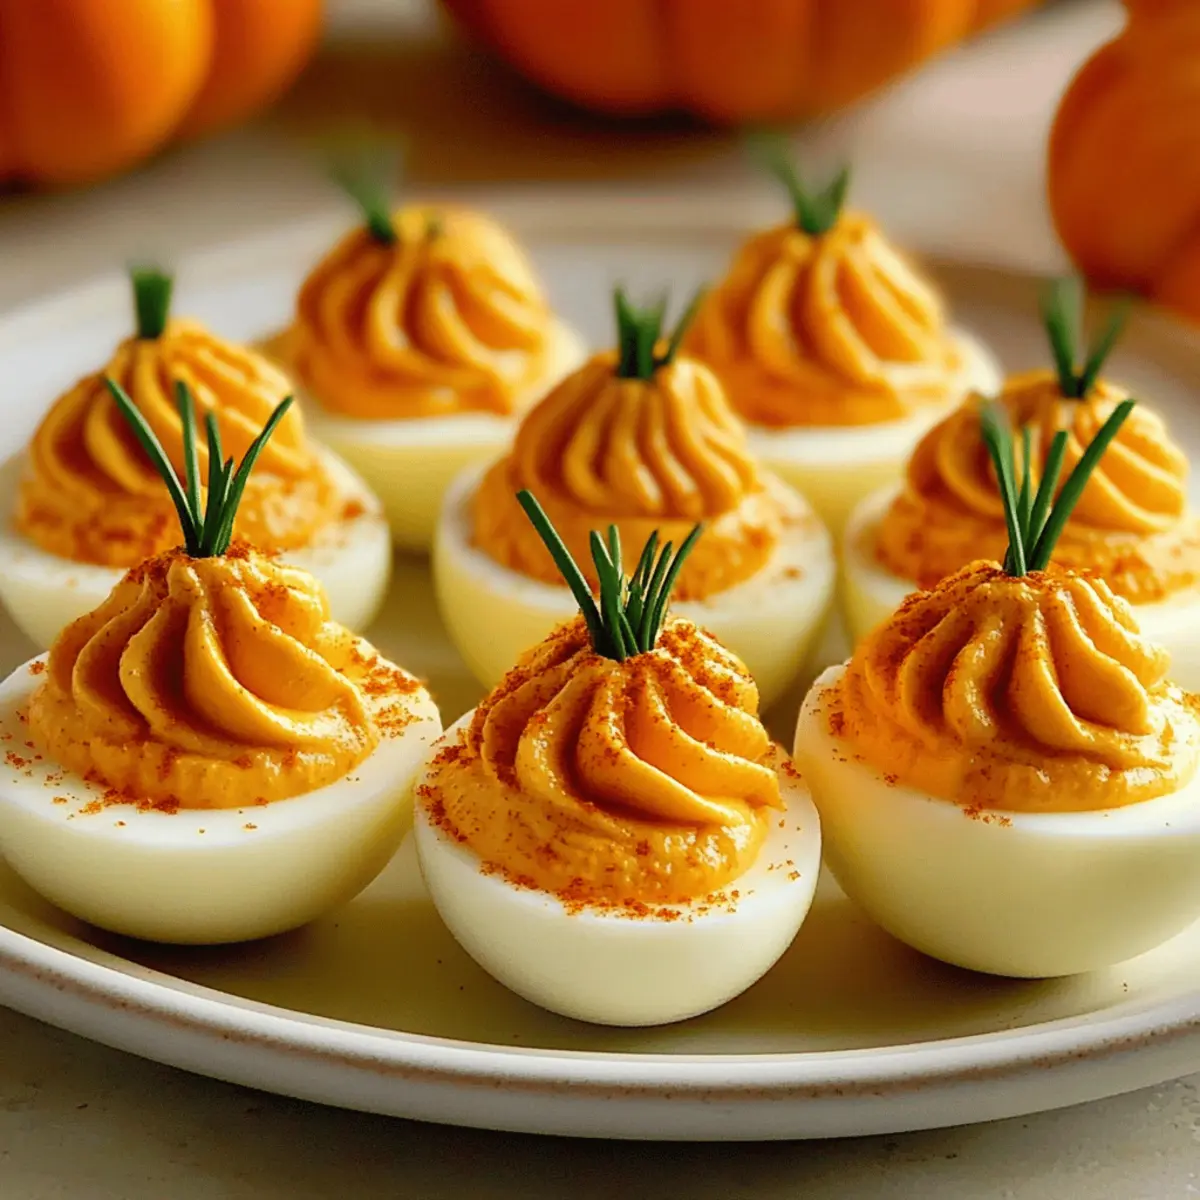
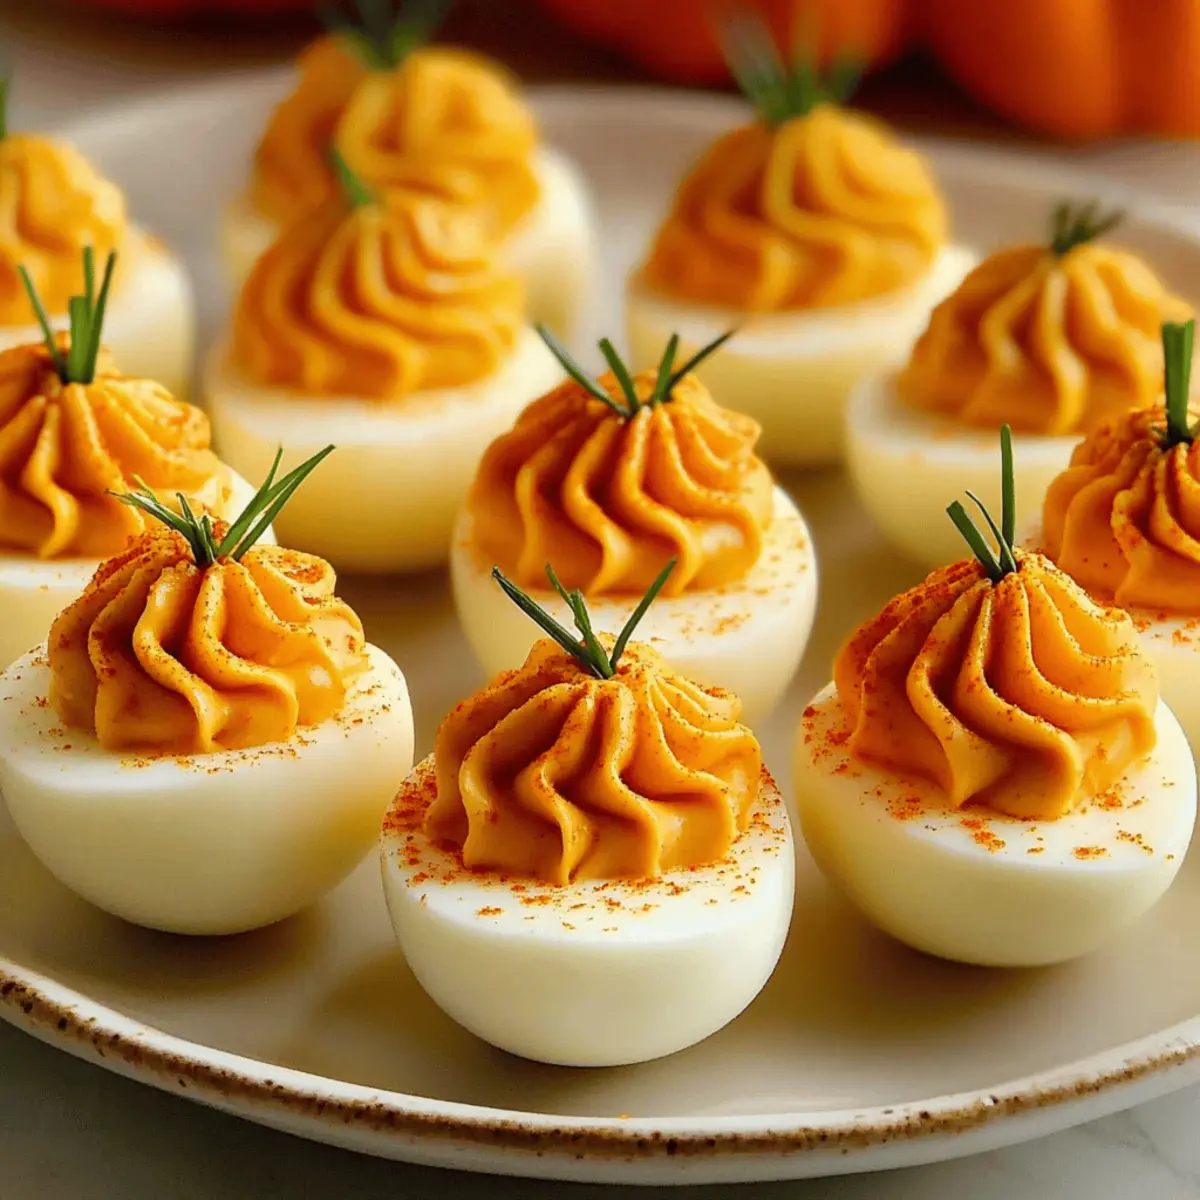
Fill a piping bag fitted with a star tip with the creamy yolk mixture. If you don’t have a piping bag, a corner-cut zip-top bag works just as well. Carefully pipe the filling into each egg white half, creating a lovely mound that mimics a small pumpkin shape, ensuring a festive presentation for your Pumpkin Patch Deviled Eggs.
Step 6: Decorate
To achieve an adorable pumpkin effect, use the back of a knife or a toothpick to gently create ridges on the piped filling. Next, cut fresh chives into small pieces to form the pumpkin stems and insert them into the top of each egg. Lightly dust the tops with paprika to enhance both color and flavor, giving your deviled eggs an extra pop.
Step 7: Chill
Once your Pumpkin Patch Deviled Eggs are beautifully decorated, place them on a serving platter and refrigerate for at least 30 minutes. Chilling allows the flavors to meld and the filling to firm up, resulting in the perfect texture when you’re ready to serve these charming autumn appetizers at your gatherings.
Pumpkin Patch Deviled Eggs: Customization Ideas
Feel free to get creative and make these delightful deviled eggs your own with these fun variations!
- Dairy-Free: Swap mayonnaise with avocado or a plant-based alternative for a creamy, dairy-free filling.
- Spicy Kick: Add a dash of cayenne pepper or a spoonful of sriracha to the filling to spice things up!
- Herb Infusion: Substitute fresh chives with dill or finely chopped parsley for a fresh flavor twist.
- Savory Sweet: Mix in caramelized onions or roasted garlic for a unique savory-sweet profile everyone will love.
- Cheesy Flavor Boost: Fold in some finely grated cheddar or parmesan for a richer and cheesier filling.
- Texture Change: Incorporate a few chopped pickles or capers for a delightful crunch that contrasts the creamy filling.
- Colorful Variation: Use beet juice instead of food coloring to tint the filling, adding a lovely reddish hue without artificial ingredients.
- Make-Ahead Delight: Prepare the eggs and filling in advance and assemble just before your gathering, saving precious time for mingling, much like my Eggs Benedict Casserole.
Embrace the flavors of autumn and make these Pumpkin Patch Deviled Eggs a centerpiece at your next gathering!
Storage Tips for Pumpkin Patch Deviled Eggs
-
Room Temperature: These deviled eggs should not be left out for more than 2 hours to ensure food safety. Keep them cool if serving for a long time.
-
Fridge: Store leftovers in an airtight container for up to 2 days. For best taste and texture, enjoy your Pumpkin Patch Deviled Eggs within the first 24 hours.
-
Freezer: It’s not recommended to freeze these deviled eggs as the texture of the filling can change, making them less enjoyable once thawed.
-
Reheating: If they need to be served after chilling, take them out of the fridge and let them sit at room temperature for about 15 minutes before serving to regain some creaminess.
Make Ahead Options
These Pumpkin Patch Deviled Eggs are ideal for meal prep, making your autumn gatherings a breeze! You can boil and peel the eggs up to 3 days in advance, storing them in the refrigerator to maintain freshness. Additionally, the creamy filling can be prepared up to 24 hours ahead and kept in an airtight container. When it’s time to serve, simply pipe the filling into the egg whites and create those adorable pumpkin shapes. For optimal flavor, be sure to chill the assembled eggs for at least 30 minutes prior to serving, allowing the ingredients to meld together beautifully. This way, your deviled eggs will be just as delicious and charming, saving you valuable time when entertaining!
What to Serve with Pumpkin Patch Deviled Eggs
As the flavors of autumn begin to fill the air, pairing these delightful bites with complementary dishes can create a stunning feast for your loved ones.
-
Creamy Mashed Potatoes: Rich and buttery, these potatoes offer the perfect silky contrast to the vibrant deviled eggs, making every bite a joy.
-
Festive Salad: A fresh salad with mixed greens, roasted beets, and candied pecans adds a crisp, sweet element that balances the savory eggs beautifully.
-
Roasted Vegetables: Seasonal veggies like carrots, Brussels sprouts, and squash bring a warm, earthy flavor that harmonizes with the creamy filling while providing a delightful crunch.
-
Herbed Bread Rolls: Soft and fluffy rolls, slathered with garlic herb butter, are perfect for complementing the creamy richness of the deviled eggs.
-
Crisp Apples or Pears: Slices of fresh fruit offer a sweet and juicy contrast that brightens the palate between savory bites, keeping the gathering lively.
-
Sparkling Cider: A chilled glass of sparkling cider pairs beautifully, its fizzy sweetness enhancing the flavor experience and keeping the festive atmosphere alive.
-
Pumpkin Spice Cheesecake: For dessert, this indulgent treat keeps the fall theme going, offering a sweet finale that echoes the flavors in your deviled eggs.
-
Charcuterie Board: A selection of cured meats, cheeses, and pickled vegetables creates a diversified grazing table alongside the deviled eggs, providing endless pairing possibilities.
Expert Tips for Pumpkin Patch Deviled Eggs
-
Egg Selection: Choose eggs that are 7-10 days old for easier peeling. Fresh eggs tend to stick to the shell, complicating your efforts.
-
Peeling Technique: Peel under running water to help remove the shell smoothly. This ensures that your egg whites remain intact and perfect for presentation.
-
Smoothing Filling: Use a fine-mesh sieve to pass the yolk mixture for an extra creamy filling. This step enhances the texture and flavor of your Pumpkin Patch Deviled Eggs.
-
Decoration Ideas: Don’t shy away from creativity! Use other herbs like dill or even edible flowers to add unique touches and make your spread visually captivating.
-
Avoid Overcooking: Be mindful of boiling times; overcooked eggs can develop green rings around the yolk, which affects both flavor and look. Stick to the recommended timing!
-
Make-Ahead Goodness: Prepare the eggs and filling a day ahead, but assemble them right before serving to maintain their freshness and appealing look.
Pumpkin Patch Deviled Eggs Recipe FAQs
What type of eggs should I use for the best results?
I recommend using large eggs that are 7-10 days old. This age makes peeling easier and helps achieve those beautiful, smooth egg whites. Fresh eggs tend to stick to the shell, so selecting slightly older eggs will save you the frustration during peeling.
How should I store leftover Pumpkin Patch Deviled Eggs?
Store any leftovers in an airtight container in the refrigerator for up to 2 days. For the best taste and texture, it’s ideal to enjoy them within the first 24 hours after preparation, as the filling tends to become less creamy over time.
Can I freeze Pumpkin Patch Deviled Eggs?
I wouldn’t recommend freezing these deviled eggs. Freezing can change the texture of the filling, making it less enjoyable when thawed. Instead, prepare in advance and keep them chilled in the fridge until serving!
What should I do if my filling is too thick?
If you’re finding your filling is too thick, simply add a teaspoon of extra mayonnaise or a splash of water to loosen it up! Mix well until you achieve a smooth and creamy consistency that’s easy to pipe.
Are there any dietary considerations I should be aware of?
Yes, if you’re serving guests with dietary restrictions, you can substitute mayonnaise with Greek yogurt for a lighter option. For those with egg allergies, you might consider making a filling using silken tofu or avocado instead, which can mimic the creamy texture while being entirely egg-free. Always be sure to check with your guests regarding any allergies!
How long can I keep the boiled eggs before I make the filling?
Boiled eggs can be stored in the fridge for up to 3-5 days before assembling your Pumpkin Patch Deviled Eggs. If you prepare the filling a day in advance, it can ease the assembly on the day of your gathering, allowing you to enjoy the festivities stress-free!
Pumpkin Patch Deviled Eggs: A Festive Twist for Fall Gatherings
Ingredients
Equipment
Method
- Boil the eggs in a saucepan covered with cold water, bring to a boil, cover, and let sit off heat for 10 minutes.
- Prepare an ice bath, and after 10 minutes, transfer eggs to cool for at least 5 minutes.
- Peel each egg under running cold water for a smooth finish and set aside.
- Slice each egg in half and scoop yolks into a mixing bowl. Add mayonnaise, mustard, salt, black pepper, and coloring if desired. Mash until smooth.
- Fill a piping bag with the creamy yolk mixture and pipe into each egg half.
- Create ridges on the piped filling with a knife or toothpick, add chive pieces for stems, and dust with paprika.
- Refrigerate decorated eggs for at least 30 minutes to allow flavors to meld.