
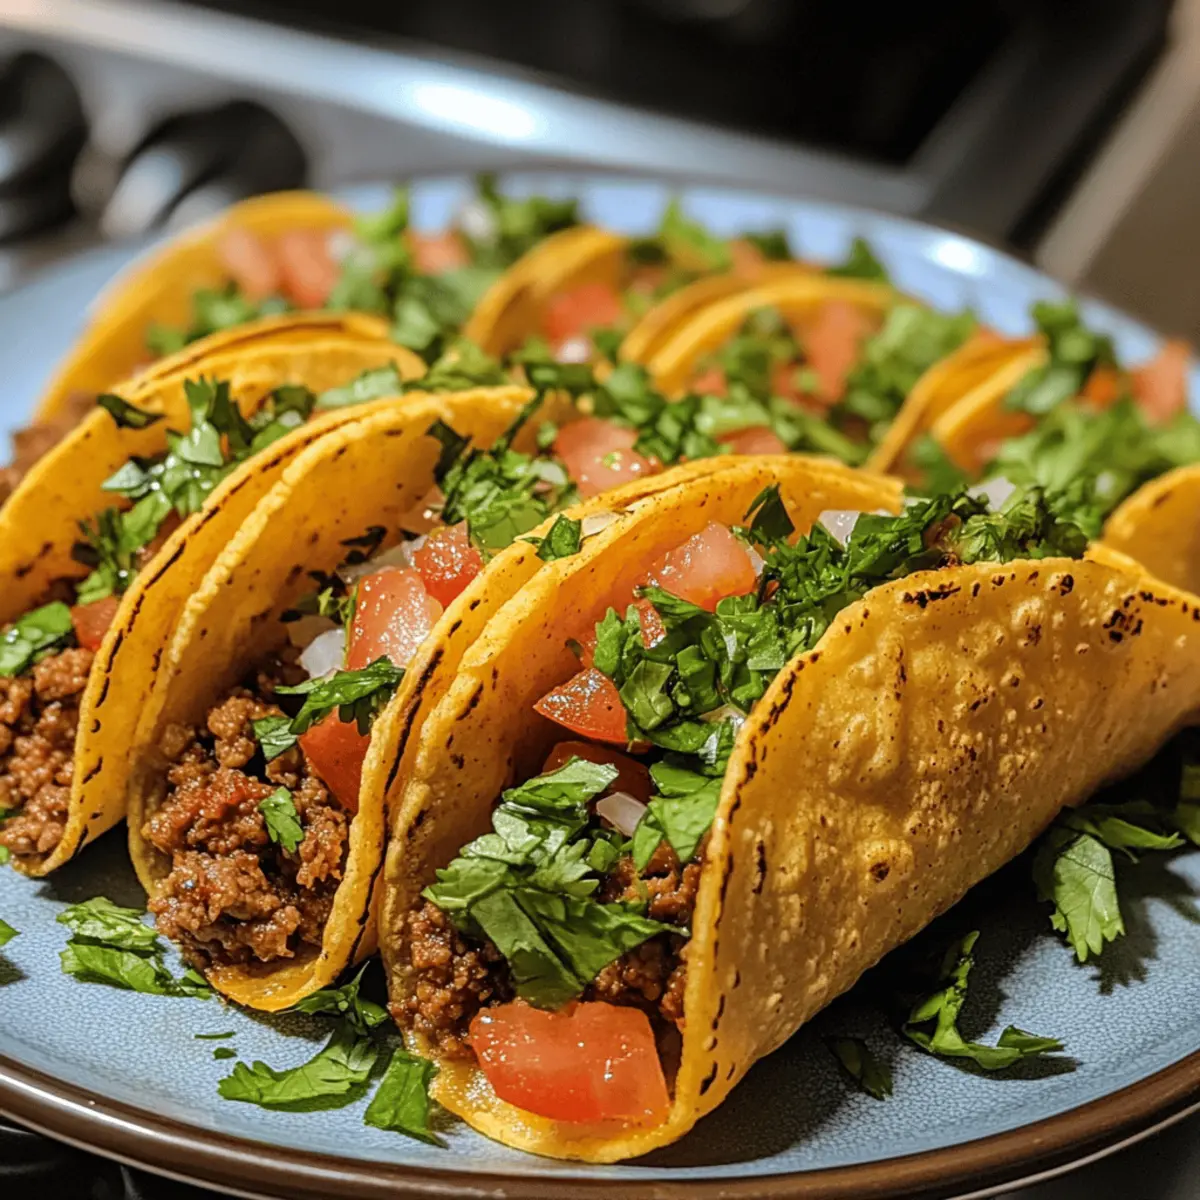
Who can resist the sizzling sound of your favorite ingredients coming together in the oven? That’s exactly how I felt the first time I made Oven-Baked Cheesy Tacos — a dish so simple yet packed with flavor and excitement. Ready in just 35 minutes, these crispy, loaded tacos are the perfect solution for busy weeknights when you crave comfort food without the fuss. With the ability to customize your toppings and swap proteins easily, this recipe caters to everyone’s preferences, making it a guaranteed crowd-pleaser. Whether you’re cooking for friends, family, or just indulging yourself, you’ll find these Oven-Baked Cheesy Tacos not only satisfy but also inspire creativity in your kitchen. Are you ready to dive in and create some taco magic?
Why Are These Tacos a Must-Try?
Crispy, these Oven-Baked Cheesy Tacos deliver a satisfying crunch that elevates your taco experience to new heights. Customizable, you can easily swap proteins or toppings, catering to every taste preference—from a classic ground beef to hearty black beans for a vegetarian option. Quick preparation in just 35 minutes means you can serve up deliciousness even on the busiest evenings. Nutritional flexibility allows you to embrace gluten-free shells, making this dish inclusive for all diets. For a real treat, pair these tacos with refreshing sides like guacamole or salsa to complement every bite. Grab your skillet and let the taco magic begin!
Oven-Baked Cheesy Tacos Ingredients
For the Taco Filling
- Ground Beef – The star protein that brings hearty satisfaction; replace it with ground turkey or chicken for a lighter option.
- Onion – Sweetens and deepens flavor; yellow or white onions work best, while red onions add a sharper taste.
- Garlic – Elevates flavor significantly; fresh minced garlic is preferred for an aromatic boost.
- Taco Seasoning – Provides vibrant flavor; consider a homemade mix to tailor the taste to your liking.
- Tomato Sauce – Adds moisture and tang; use salsa if you’re craving some extra heat.
For the Taco Shells
- Taco Shells – Essential for structure and crunch; opt for corn or gluten-free varieties to cater to dietary needs.
For Assembly
- Shredded Cheese – Delivers rich creaminess; a blend of cheddar and Monterey Jack is perfect for melty goodness.
- Olive Oil – Used for sautéing the filling; vegetable oil can be substituted if preferred.
For Fresh Toppings
- Fresh Toppings (lettuce, tomatoes, red onion, cilantro) – Enhance freshness and crunch; customize with your favorite ingredients.
Get ready to whip up delicious Oven-Baked Cheesy Tacos that will tantalize everyone’s taste buds!
Step‑by‑Step Instructions for Oven-Baked Cheesy Tacos
Step 1: Preheat the Oven
Begin by preheating your oven to 375°F (190°C). This crucial step ensures that your Oven-Baked Cheesy Tacos cook evenly and achieve that perfectly crispy texture. While the oven heats up, gather your ingredients and prepare your cooking space to streamline your taco-making adventure.
Step 2: Sauté the Vegetables
In a large skillet, heat a tablespoon of olive oil over medium heat. Once the oil shimmers, add finely chopped onion and minced garlic. Sauté for 3–5 minutes until the onion turns translucent and fragrant, creating a delicious base for your taco filling. Stir occasionally to prevent burning and ensure even cooking.
Step 3: Cook the Ground Beef
Add one pound of ground beef to the skillet, breaking it apart with a spatula as it cooks. Allow the beef to brown for about 5–7 minutes, stirring occasionally until no longer pink. Mix in taco seasoning, tomato sauce, salt, and pepper, and simmer for an additional 5 minutes, allowing the flavors to meld beautifully.
Step 4: Prepare the Taco Shells
While your meat mixture simmers, take your taco shells and warm them slightly to make them malleable. You can do this in the oven for a few minutes or in the microwave for about 30 seconds. Warm shells help hold up the hearty filling while preventing breaking, perfect for your Oven-Baked Cheesy Tacos.
Step 5: Assemble the Tacos
Now comes the fun part! Carefully fill each warmed taco shell with the savory meat mixture, ensuring each one is generously loaded. Top the filled shells with a good handful of shredded cheese, choosing your favorite mix; a combination of cheddar and Monterey Jack works wonderfully for that ultimate melted goodness.
Step 6: Bake to Perfection
Arrange the filled taco shells in a greased baking dish, ensuring they are snug but not overcrowded. Place the dish in the preheated oven and bake for 10–15 minutes. Keep an eye on them—you’re looking for the cheese to melt and bubble and the shells to become beautifully crispy and golden brown.
Step 7: Add Fresh Toppings
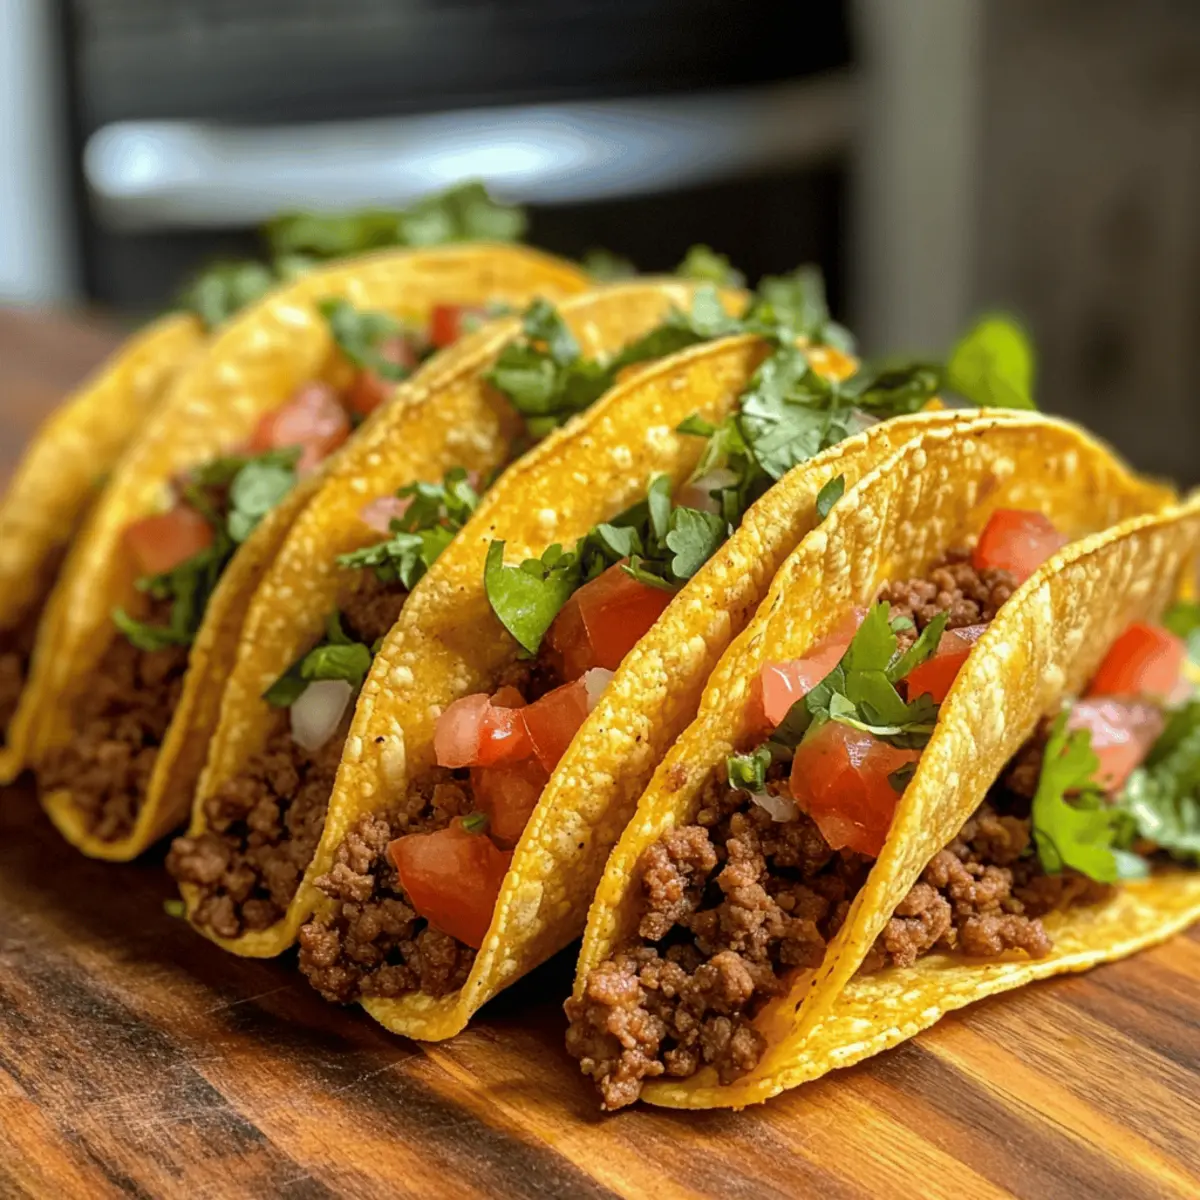
After baking, carefully remove the baking dish from the oven and let the tacos cool for a minute. Now, it’s time to add your favorite fresh toppings. Consider shredded lettuce, diced tomatoes, red onion, and cilantro for a delightful crunch and freshness that complements your delicious Oven-Baked Cheesy Tacos.
Step 8: Serve and Enjoy
Transfer your tempting Oven-Baked Cheesy Tacos to a serving platter, and let everyone dive in. Pair them with salsa, guacamole, or a refreshing side salad if desired. Gather around the table and enjoy this comforting, flavorful meal that will leave everyone asking for more!

Make Ahead Options
These Oven-Baked Cheesy Tacos are a fantastic choice for meal prep, allowing you to enjoy a delicious dinner even on your busiest nights! You can prepare the taco filling up to 3 days in advance—simply cook the ground beef mixture and let it cool before storing it in an airtight container in the refrigerator. Additionally, you can assemble the tacos (without baking them) and refrigerate for up to 24 hours; just cover them tightly to maintain their freshness. When you’re ready to enjoy, simply bake them straight from the refrigerator—there’s no need to thaw! This way, you’ll have warm, crispy tacos that are just as delicious and comforting as if they were made fresh.
Oven-Baked Cheesy Tacos Variations
Feel free to get creative with your ingredients and make these tacos truly your own!
-
Vegetarian: Substitute ground beef with black beans or lentils for a hearty, meatless option. This adds both texture and flavor while keeping it filling.
-
Spicy Twist: Incorporate diced jalapeños into the filling or top your tacos with sliced serrano peppers for an electrifying taste. A little heat can elevate the entire dish!
-
Cheese Lovers: Experiment with different cheeses like pepper jack for a spicy kick or queso fresco for a creamy touch. Each cheese will bring a unique layer to your taco experience.
-
Gluten-Free: Use corn tortillas or specific gluten-free taco shells to cater to dietary needs. Nobody will miss the gluten with all those tasty toppings!
-
Fresh & Flavorful: Boost freshness by adding zesty toppings like diced avocados or tangy pickled red onions. They add a delightful contrast to the rich filling.
-
Hearty & Filling: Try incorporating quinoa into the meat mixture for extra protein and a satisfying bite. It’s a great way to sneak some nutrition into your meal.
-
Flavorful Sauce: Drizzle your tacos with a homemade chipotle sauce or creamy cilantro dressing to elevate the flavor profile. It’s amazing how sauces can transform a dish!
-
Crunch Factor: Add crushed tortilla chips on top right before serving for extra texture and a delightful crunch. It’s all about the layers in each glorious bite!
For more cheesy and comforting recipes, be sure to check out Cheesy Loaded Meatloaf or the delicious Cheesy Hamburger Rice. Happy cooking!
How to Store and Freeze Oven-Baked Cheesy Tacos
Fridge: Store leftover Oven-Baked Cheesy Tacos in an airtight container for up to 3-4 days to keep them fresh and delicious.
Freezer: For longer storage, freeze the assembled but unbaked tacos. Wrap them tightly in plastic wrap, then in aluminum foil, and store for up to 2 months.
Reheating: To reheat, place the leftovers in a preheated oven at 350°F (175°C) for about 10-15 minutes, until heated through and crispy again.
Toppings Storage: Keep fresh toppings like lettuce and tomatoes in separate containers to maintain their crispness, adding them just before serving.
Expert Tips for Oven-Baked Cheesy Tacos
-
Preheat Properly: Always preheat your oven to avoid soggy taco shells. A well-heated oven ensures a crispy texture for your Oven-Baked Cheesy Tacos.
-
Filling Consistency: Avoid oily fillings by using lean meat or draining excess fat after cooking. This keeps your tacos from becoming greasy and allows the flavors to shine.
-
Use Quality Cheese: Opt for a good-quality cheese blend. Mixing cheddar and Monterey Jack not only melts well but adds depth to the flavor of your tacos.
-
Avoid Overfilling: Don’t overload your taco shells. A well-packed shell is essential, but too much filling can lead to bursts and messiness.
-
Customize Wisely: Feel free to mix and match toppings, but remember to balance flavors. Fresh veggies can cut through richness while spicy additions like jalapeños enhance the experience.
-
Leftover Storage: Store any leftover toppings separately in airtight containers for freshness, and reheat your baked tacos in the oven instead of the microwave to maintain crispness.
What to Serve with Oven-Baked Cheesy Tacos?
Elevate your taco night by pairing these cheesy delights with fresh and flavorful sides that complement every bite.
- Guacamole: This creamy avocado dip adds richness that balances the tacos’ crispiness, bringing a smooth, satisfying texture.
- Mexican Rice: A slightly spicy and seasoned rice side brings a hearty element to the meal, soaking up those delightful taco flavors.
- Fresh Salsa: Bursting with tomatoes, onions, and cilantro, this zesty salsa brightens up each bite and brings a fresh crunch to the table.
- Side Salad: A colorful salad with mixed greens, corn, and avocado drizzled with a lime vinaigrette refreshes the palate and balances the meal.
- Corn on the Cob: Grilled or roasted corn adds a sweet, smoky crunch that pairs perfectly with the savory flavors of the tacos.
- Pico de Gallo: This fresh, tangy topping enhances your Oven-Baked Cheesy Tacos with its vibrant flavors, adding a delightful contrast to the cheese.
- Black Bean Soup: A warm, hearty black bean soup provides a comforting bowl that complements the crispy tacos and adds a nutritious touch.
- Classic Margaritas: Pair your meal with a refreshing margarita for a fun, festive drink that enhances your taco experience and completes the celebration.
- Churros: For dessert, crispy churros dusted with cinnamon sugar offer a sweet ending that leaves everyone smiling after the savory feast!
Oven-Baked Cheesy Tacos Recipe FAQs
How do I select the right taco shells for my Oven-Baked Cheesy Tacos?
Absolutely! For the best results, opt for corn or gluten-free taco shells if you need a gluten-free option. Look for shells that are sturdy and free from dark spots or cracks, which can lead to breakage during filling and baking.
How should I store leftover Oven-Baked Cheesy Tacos?
Store leftovers in an airtight container, and they will remain fresh for 3-4 days in the refrigerator. To keep your tacos crisp, I recommend reheating them in the oven at 350°F (175°C) for about 10-15 minutes instead of using a microwave.
Can I freeze Oven-Baked Cheesy Tacos? If so, how?
Very! To freeze your tacos, assemble them without baking first. Wrap each taco tightly in plastic wrap, followed by aluminum foil, and store them in the freezer for up to 2 months. When you’re ready to enjoy them, simply bake from frozen at 375°F (190°C) for about 25-30 minutes until heated through and crispy.
What should I do if my taco shells are getting soggy?
To prevent soggy shells, make sure your oven is fully preheated before baking and avoid overfilling them. Opt for leaner meat in your filling to reduce excess moisture, and consider baking the shells lightly on their own for a few minutes before assembly if you’re worried.
Are there any dietary considerations for these Oven-Baked Cheesy Tacos?
Absolutely! You can make them gluten-free by using the right taco shells and opting for gluten-free taco seasoning. Additionally, if you have a dairy allergy, you can substitute cheese with dairy-free alternatives like cashew cheese or nutritional yeast for a cheesy flavor without the dairy.
Can I customize the protein in my Oven-Baked Cheesy Tacos?
The more the merrier! You can easily swap the ground beef for ground turkey, chicken, black beans, or lentils for a vegetarian option. For each substitute, use the same cooking method, adjusting the seasoning to match your protein choice for the best flavor.

Crispy Oven-Baked Cheesy Tacos to Satisfy Every Craving
Ingredients
Equipment
Method
- Preheat your oven to 375°F (190°C).
- In a large skillet, heat a tablespoon of olive oil over medium heat. Add finely chopped onion and minced garlic. Sauté for 3–5 minutes until the onion is translucent.
- Add ground beef to the skillet, breaking it apart with a spatula. Cook for 5–7 minutes until browned, then mix in taco seasoning, tomato sauce, salt, and pepper.
- Warm taco shells slightly in the oven or microwave to make them malleable.
- Fill each taco shell with the meat mixture and top with shredded cheese.
- Place filled taco shells in a greased baking dish and bake for 10–15 minutes until the cheese melts and shells are crispy.
- Remove from oven and add fresh toppings before serving.
- Transfer tacos to a serving platter, and enjoy with sides like salsa or guacamole.