
As I stood in my kitchen, the warm, inviting aroma of garlic sizzling in butter drifted through the air, instantly transporting me to my favorite coastal restaurant. Today, I’m diving into a delightful adventure with Creamy Seafood Stuffed Shells—an indulgent dish that wraps fresh flavors of lobster, crab, and shrimp in tender pasta shells. This recipe is a comforting treasure that not only satisfies your cravings but also elevates your dining experience, perfect for special occasions or cozy evenings. With its quick prep and the luxurious twist of seafood, these stuffed shells are bound to impress during your next gathering. Ready to transform an ordinary dinner into something extraordinary? Let’s get cooking!
Why are these Seafood Stuffed Shells special?
Irresistible Flavor: The rich combination of lobster, crab, and shrimp delivers a taste that’s both indulgent and satisfying, making each bite a mouthwatering experience.
Quick Prep: Despite its gourmet appeal, this recipe is easy to prepare, allowing you to create a restaurant-quality meal in your own kitchen.
Versatile Options: Customize the stuffing with your favorite seafood or even add ingredients like spinach for added nutrition.
Great for Gatherings: Whether it’s a holiday feast or a cozy dinner, these Creamy Seafood Stuffed Shells are sure to wow your guests, just like my Garlic Shrimp Pasta!
Plan Ahead: Make them in advance for a stress-free meal—just assemble, refrigerate, and bake when ready!
Crowd-Pleasing Comfort: With its creamy filling and cozy pasta shells, this dish is destined to become a favorite, just like my family’s beloved Cucumber Salad Bacon recipe.
Creamy Seafood Stuffed Shells Ingredients
• Dive into the deliciousness of these Creamy Seafood Stuffed Shells with this essential ingredient list.
For the Pasta
- Jumbo Pasta Shells – Perfect for holding the creamy seafood filling; smaller shells can be used if necessary.
For the Seafood Filling
- Lobster Meat – Adds an exceptional rich flavor to elevate the dish; imitation crab can be a budget-friendly substitute.
- Crab Meat – Provides sweetness and delightful texture; fresh lump crab is recommended for the best taste.
- Shrimp – Enhances the medley of seafood; feel free to substitute with scallops for a uniquely delicious twist.
- Cream Cheese – Creates a velvety, creamy filling; switch to light cream cheese for a guilt-free alterative.
- Shredded Mozzarella – Contributes a luscious stretchiness to the filling and sauce; a blend with Monterey Jack works wonderfully too.
For the Sauce
- Butter – Used for sautéing and making the savory sauce; olive oil is a great lightweight option if desired.
- Garlic – Infuses aromatic flavor into the dish; fresh garlic gives the best taste, although garlic powder can be used in a pinch.
- Flour – Acts as a thickening agent for the sauce; gluten-free flour can be used to cater to dietary needs.
- Heavy Cream – Provides that creamy richness to the sauce; half-and-half can be substituted for a lighter version, but it’ll be thinner.
- Grated Parmesan Cheese – Adds a rich, nutty flavor that enhances the sauce; consider using nutritional yeast as a dairy-free alternative.
To Season
- Salt and Pepper – Essential for bringing out all the flavors; adjust according to your personal taste.
Step‑by‑Step Instructions for Creamy Seafood Stuffed Shells
Step 1: Prepare the Seafood
In a skillet over medium heat, melt 2 tablespoons of butter and add 2 minced garlic cloves. Sauté until fragrant, about 1-2 minutes. Next, stir in 1 cup each of lobster and crab meat, cooking for an additional 2-3 minutes until heated through. Remove the skillet from the heat and set it aside to cool while you prep the next components of your Creamy Seafood Stuffed Shells.
Step 2: Make the Filling
In a large mixing bowl, combine the sautéed seafood mixture with 8 ounces of cream cheese, 1 cup of shredded mozzarella cheese, and a pinch of salt and pepper. Mix well until all ingredients are thoroughly combined and creamy. This flavorful filling is what makes your Creamy Seafood Stuffed Shells so irresistible.
Step 3: Cook the Jumbo Shells
Bring a pot of salted water to a boil and cook 12-15 jumbo pasta shells according to package instructions until al dente. Once cooked, drain the shells carefully and let them cool slightly on a clean kitchen towel. Be gentle to prevent any shells from breaking, as they will need to hold the rich seafood filling.
Step 4: Prepare the Sauce
In the same skillet used for the seafood, melt the remaining 2 tablespoons of butter over medium heat. Sprinkle in 2 tablespoons of flour, whisking steadily until a paste forms, then gradually pour in 1 cup of heavy cream. Continue whisking for about 3-4 minutes until the sauce thickens and bubbles gently. Stir in ½ cup of grated Parmesan cheese until melted and smooth.
Step 5: Assemble the Dish
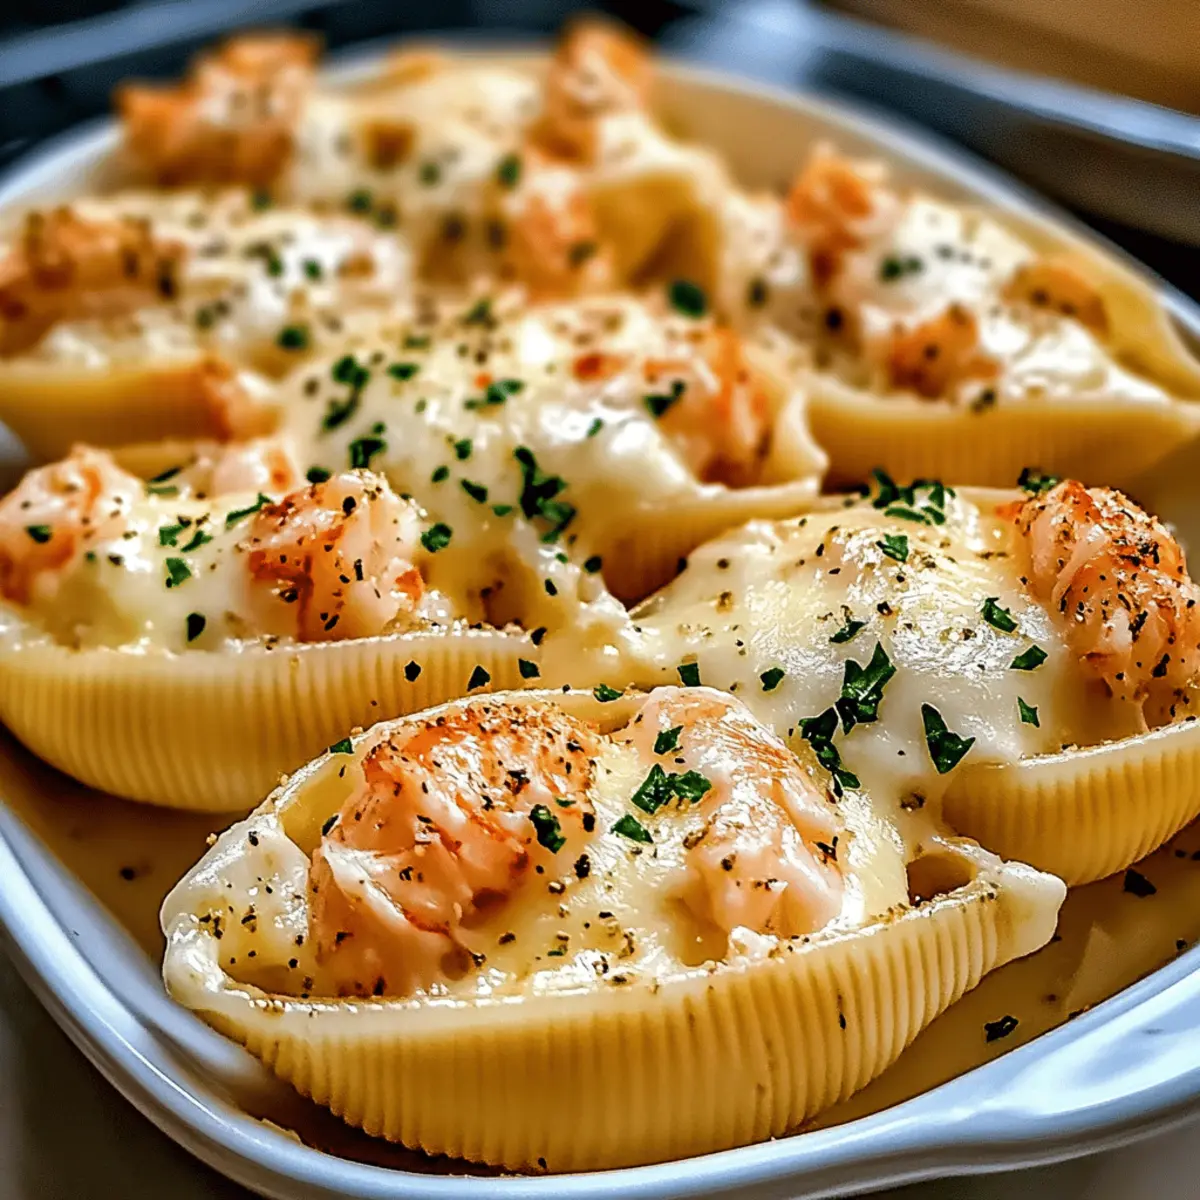
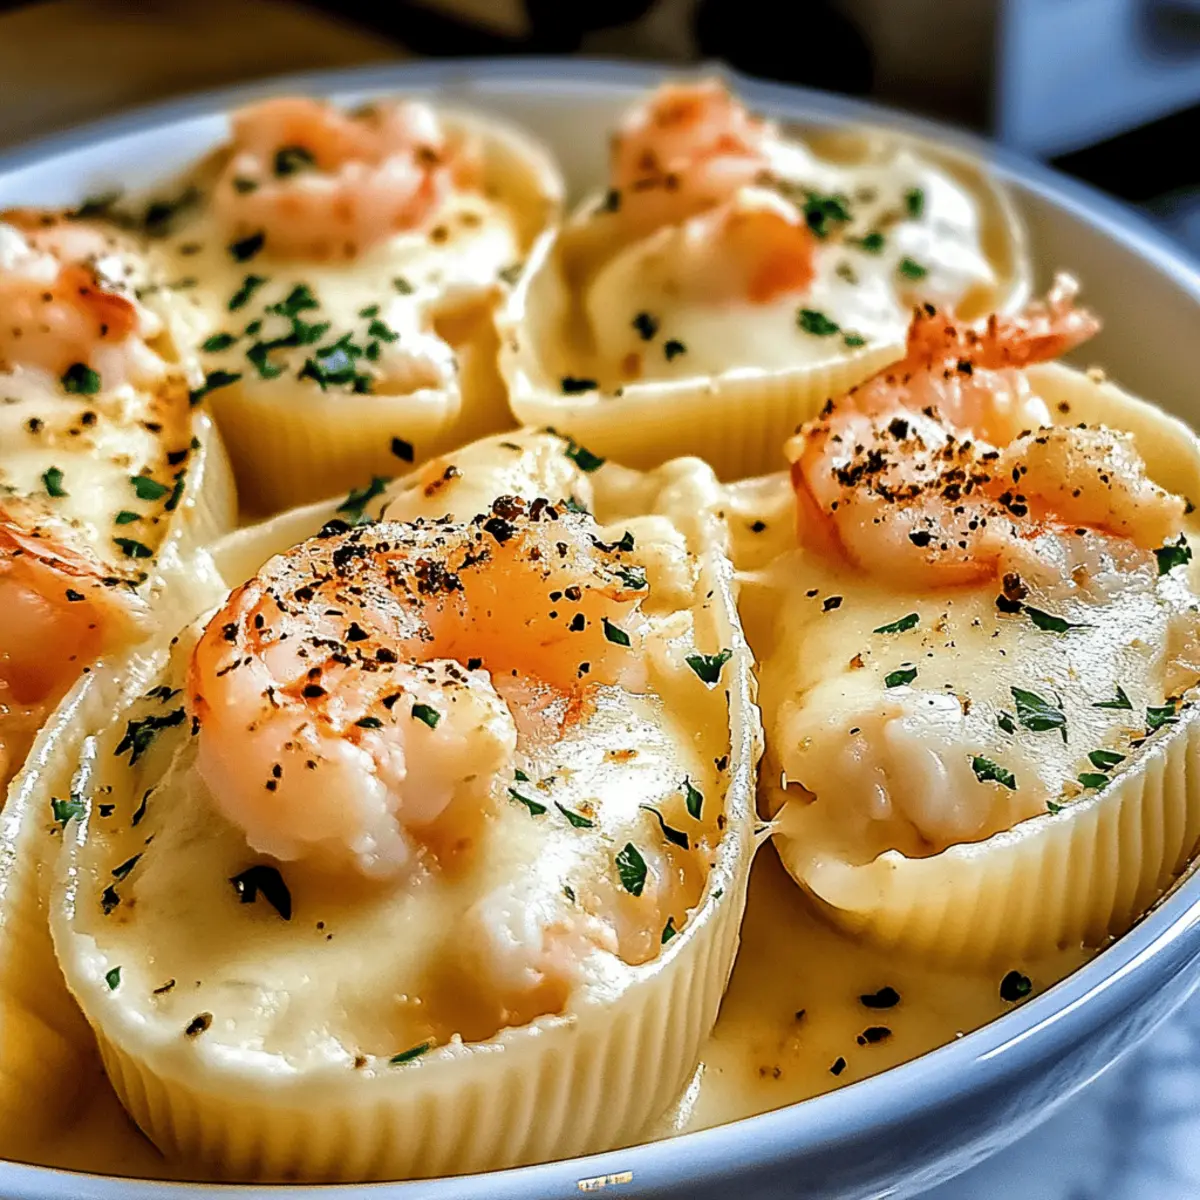
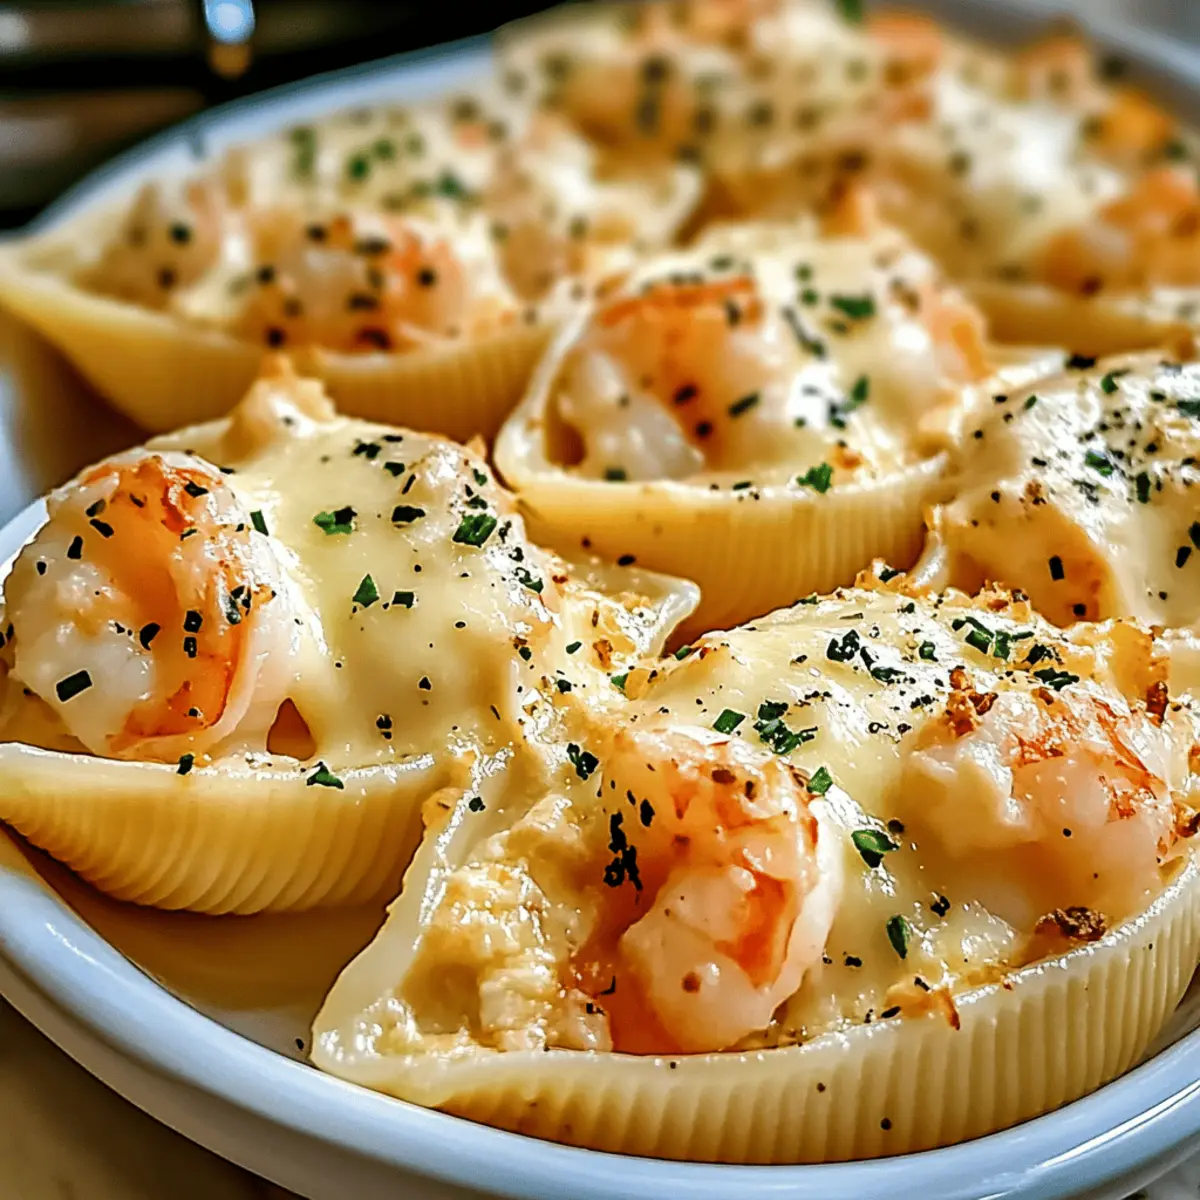
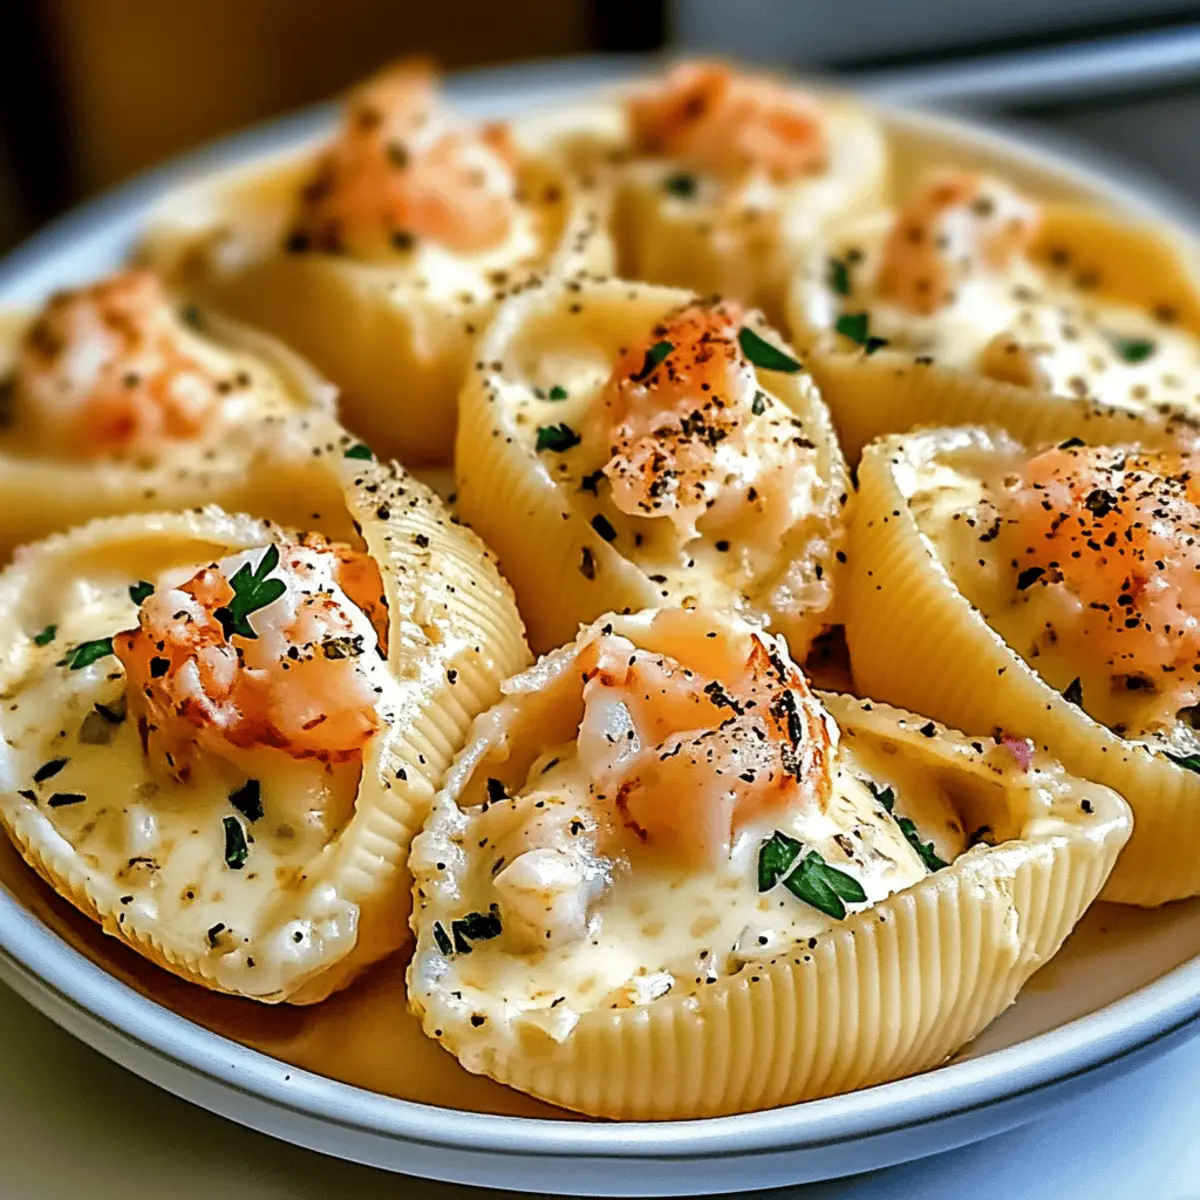
Preheat your oven to 375°F (190°C). In a greased baking dish, spread a layer of the creamy sauce over the bottom. Carefully stuff each pasta shell with the seafood filling and place them seam-side up in the dish. Pour the remaining sauce over the filled shells, ensuring they are well coated.
Step 6: Bake
Cover the baking dish with aluminum foil and bake in the preheated oven for 20 minutes. After this time, remove the foil and bake for an additional 10 minutes or until the tops are golden and bubbly. The aroma of your Creamy Seafood Stuffed Shells will fill your kitchen, making it hard to resist!
Step 7: Serve
Once baked, let the Creamy Seafood Stuffed Shells cool for a few minutes before serving. Optionally, garnish with extra Parmesan cheese or fresh herbs for added flavor. Serve warm, and enjoy the comfort of this indulgent dish with your friends and family!
Creamy Seafood Stuffed Shells Variations
Let your imagination run wild with these delightful twists that add an extra layer of excitement to your beefy pasta experience!
- Seafood Swap: Feel free to mix up the seafood! Add scallops or more shrimp for different flavor profiles.
- Vegetable Boost: Toss in fresh spinach or sun-dried tomatoes into the filling for a healthful and vibrant addition.
- Dairy-Free Delight: Swap cream cheese and heavy cream for coconut milk and dairy-free cream cheese for a luscious vegan version.
- Cheesy Choice: Experiment with different cheeses like Gruyère or a strong cheddar instead of mozzarella for a flavor kick.
- Spicy Twist: Spice it up! Add a pinch of red pepper flakes or a dash of hot sauce to elevate the heat.
- Lighten Up: Use low-fat cheese and half-and-half instead of heavy cream for a lighter, yet still creamy version of the dish.
- Herby Infusion: Incorporate fresh herbs like dill or tarragon into the filling for an aromatic boost that complements the seafood beautifully.
- Crunchy Topping: For added texture, sprinkle panko breadcrumbs mixed with a bit of olive oil and Parmesan on top before baking.
No matter which variation you choose, you’re sure to craft a dish that will impress, just like my Delicious Gravy Stuffed Stuffing Muffins or a comforting bowl of Gochujang Udon Noodles! Customize, create, and make this creamy seafood staple your own!
How to Store and Freeze Creamy Seafood Stuffed Shells
Fridge: Store leftovers in an airtight container for up to 3 days. Ensure they are covered well to maintain freshness and flavor.
Freezer: For longer storage, place the assembled but unbaked Creamy Seafood Stuffed Shells in a freezer-safe container. They can be frozen for up to 2 months; just remember to label with the date!
Reheating: To reheat, thaw in the refrigerator overnight then bake uncovered in a preheated oven at 350°F (175°C) for about 25 minutes, or until heated through and bubbly.
Make-Ahead: You can assemble the stuffed shells ahead of time, refrigerate them, and bake them later. This keeps mealtime stress-free while ensuring you enjoy this indulgent dish at its best!
Make Ahead Options
These Creamy Seafood Stuffed Shells are a fantastic option for busy home cooks looking to save time during hectic weeknights! You can prepare the stuffed shells up to 24 hours in advance. To do this, simply follow the recipe up to the baking step, then cover the assembled dish with plastic wrap and refrigerate it. This allows the flavors to meld beautifully while maintaining quality. When you’re ready to serve, simply preheat the oven and bake it straight from the fridge for about 30-35 minutes, uncovering it for the last 10 minutes to get that perfect golden top. Trust me, you’ll have a delicious meal with minimal effort!
What to Serve with Creamy Seafood Stuffed Shells
Elevate your dining experience with delightful pairings that complement the rich and indulgent flavors of Creamy Seafood Stuffed Shells.
- Garlic Bread: Crispy, buttery garlic bread is perfect for soaking up the decadent sauce, making every bite even more satisfying.
- Mixed Green Salad: A refreshing salad with a light vinaigrette adds a crisp contrast to the creamy richness of the stuffed shells. Incorporating ripe cherry tomatoes and crunchy cucumbers can enhance the freshness.
- Roasted Asparagus: Tender, roasted asparagus offers a nutty flavor and slight crunch that balances the softness of the pasta, adding a nutritious element to your meal.
- Creamy Coleslaw: A tangy, creamy coleslaw provides a delightful crunch and contrasting flavor that brightens the indulgent stuffed shells.
- White Wine: A chilled glass of Sauvignon Blanc or Chardonnay complements the seafood beautifully, enhancing the overall dining experience.
- Chocolate Mousse: End your meal on a sweet note with a rich, velvety chocolate mousse that provides the perfect contrast to the savory stuffed shells.
- Steamed Broccoli: Lightly steamed broccoli, seasoned with a hint of lemon, can provide a nutritious side that adds color and flavor without overwhelming the main dish.
These pairings will create a harmonious meal that highlights the luxurious taste of your Creamy Seafood Stuffed Shells!
Expert Tips for Creamy Seafood Stuffed Shells
-
Gentle Handling: Avoid breaking the shells by treating them delicately during cooking and stuffing. A broken shell may lead to messy filling escapades!
-
Flavor Boost: For an extra layer of flavor in your filling, consider adding a squeeze of lemon juice or a dash of hot sauce. Just don’t overdo it, as too much can overpower the delicate seafood.
-
Perfect Sauce Consistency: Watch the liquid ratio in your sauce—too much can make it soupy. Aim for a smooth, thick texture that clings to the shells nicely in your Creamy Seafood Stuffed Shells.
-
Make-Ahead Option: To save time, assemble the shells a day in advance and refrigerate. Just pop them in the oven when you’re ready to enjoy a cozy meal without the last-minute prep.
-
Garnish Delight: Elevate the presentation by garnishing with fresh herbs like parsley or chives right before serving. It adds a pop of color and freshness!
Creamy Seafood Stuffed Shells Recipe FAQs
What type of pasta shell should I use for this recipe?
Absolutely! Jumbo pasta shells are perfect for this recipe due to their size, which holds the rich seafood filling beautifully. If jumbo shells aren’t available, smaller shells can work, but you may need to adjust the amount of filling for each one to ensure every bite is indulgent.
How should I store leftover Creamy Seafood Stuffed Shells?
Store any leftovers in an airtight container in the refrigerator for up to 3 days. Make sure to cover them well to maintain their creaminess and prevent them from drying out. When you’re ready to enjoy them again, simply reheat in the oven or microwave until heated through.
Can I freeze Creamy Seafood Stuffed Shells?
Yes! To freeze, assemble the shells but do not bake them. Place them in a freezer-safe container and they can be stored for up to 2 months. Be sure to label the container with the date. When ready to cook, thaw them in the fridge overnight and then bake as usual.
What can I do if my sauce is too runny?
If your sauce turns out too thin, don’t worry! You can thicken it by cooking it a bit longer on the stove until it reduces to your desired consistency or by making a slurry with a little flour and cold water, then whisking it into the sauce. This will give it that luxurious, clingy texture we all love!
Are there any dietary considerations I should keep in mind?
If you or your guests have dietary restrictions, feel free to substitute ingredients as needed. For example, to make this dish gluten-free, opt for gluten-free pasta and flour. Additionally, if there’s a seafood allergy, consider using shredded chicken or a vegetarian filling like spinach and ricotta for a delightful alternative.
How long does it take to make these stuffed shells?
From start to finish, making these Creamy Seafood Stuffed Shells typically takes about 45 minutes to an hour. This includes prep time for the filling and sauce, cooking the shells, and the baking process. It’s a satisfying experience that rewards you with a gourmet meal right at home!
Rich and Creamy Seafood Stuffed Shells for Extra Indulgence
Ingredients
Equipment
Method
- In a skillet over medium heat, melt 2 tablespoons of butter and add 2 minced garlic cloves. Sauté until fragrant, about 1-2 minutes. Stir in 1 cup each of lobster and crab meat, cooking for an additional 2-3 minutes until heated through. Remove from heat and let cool.
- In a large mixing bowl, combine the sautéed seafood mixture with 8 ounces of cream cheese, 1 cup of shredded mozzarella cheese, and a pinch of salt and pepper. Mix until creamy.
- Bring a pot of salted water to a boil and cook the jumbo shells according to package instructions until al dente. Drain shells and let cool slightly.
- In the same skillet, melt the remaining 2 tablespoons of butter over medium heat. Sprinkle in 2 tablespoons of flour and whisk until a paste forms, then gradually pour in 1 cup of heavy cream, whisking for 3-4 minutes until thick. Stir in 0.5 cup of Parmesan cheese until melted.
- Preheat oven to 375°F (190°C). Spread a layer of sauce in a greased baking dish. Stuff each shell with seafood filling and place seam-side up in the dish. Pour remaining sauce over the shells.
- Cover with aluminum foil and bake for 20 minutes. Remove foil and bake for an additional 10 minutes until golden and bubbly.
- Let cool for a few minutes before serving. Optionally garnish with extra Parmesan or fresh herbs.