
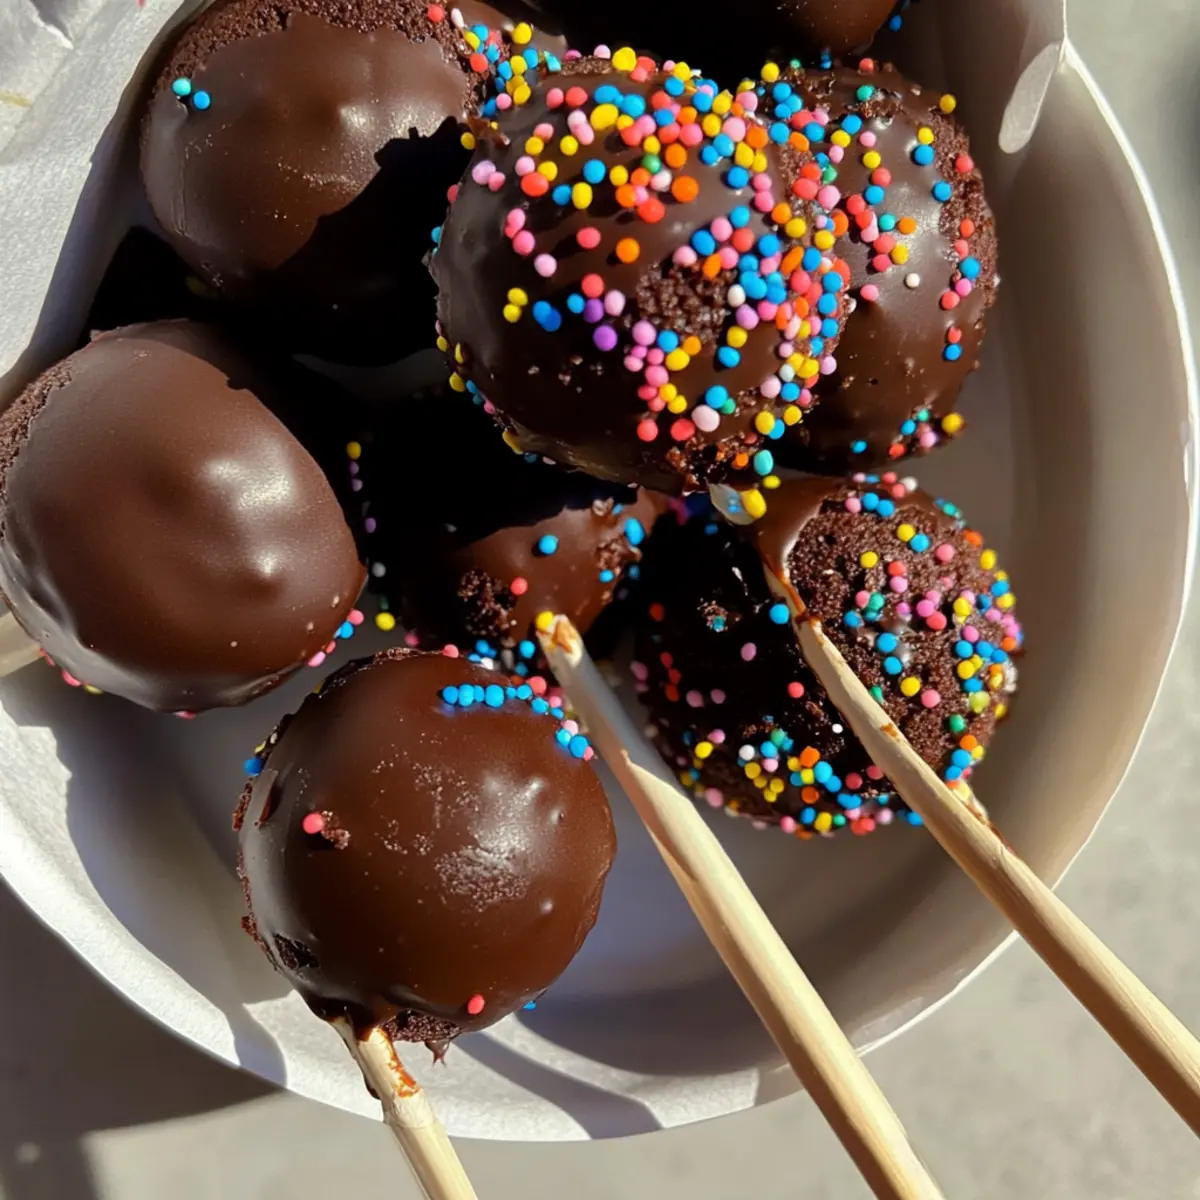
As I stood in my kitchen, the sweet aroma of melting chocolate wafted through the air, instantly lifting my spirits. That’s when I realized: making dessert doesn’t have to be complicated or time-consuming. Enter my Easy Chocolate Cake Pops with Cream Cheese Frosting—perfectly sized morsels that capture the essence of a rich, fudgy chocolate cake, all while being incredibly simple to whip up. Using a box cake mix, these delightful treats come together in no time, making them ideal for everything from birthday parties to cozy evenings at home. Plus, they’re a fantastic way to impress friends and family without breaking a sweat! So, are you ready to transform the ordinary into something extraordinary? Let’s dive into this delicious creation together!
Why are Chocolate Cake Pops a Must-Try?
Versatile Treat: Whether for a birthday, holiday gathering, or casual snacking, these cake pops fit every occasion seamlessly. Rich and Decadent: Each bite offers a fudgy center surrounded by a smooth chocolate shell, promising an indulgent experience. Easy to Make: With a simple box cake mix, you can create gourmet desserts without the fuss. Endless Variations: Swap in different cake flavors or frostings—think red velvet or buttercream! For a lighter option, give these Sugar Free Cheesecake Bars a try. Fun and Festive: Their vibrant sprinkle topping and bite-sized form make them a hit with both kids and adults alike. Treat yourself to the joy of baking—these cake pops will delight everyone!
Chocolate Cake Pops Ingredients
• Let’s gather what you need to create these delightful treats!
For the Cake
- Chocolate Cake Mix – Provides the base flavor and structure; use any brand, ideally about 15 oz.
- Eggs – Essential for binding; generally, three eggs are needed as per package instructions.
- Oil – Adds moisture; vegetable oil works well for this recipe.
- Water – Required for the cake; substituting with milk is recommended for added richness.
For the Coating
- Chocolate Melting Wafers – Creates a smooth outer coating; candy wafers yield the best results.
- Sprinkles – For decoration and added texture; optional but significantly enhances visual appeal.
For the Frosting
- Salted Butter – Adds richness; make sure it is softened to room temperature for easy mixing.
- Plain Cream Cheese – Provides the perfect creaminess; it should be softened for easy blending.
- Vanilla Extract – Adds depth of flavor; high-quality extract enhances the overall taste.
- Powdered Sugar – Sweetens and helps achieve the desired consistency; sifted for a smooth mix.
Step‑by‑Step Instructions for Easy Chocolate Cake Pops with Cream Cheese Frosting
Step 1: Prepare the Cake
Begin by preheating your oven to 350°F (175°C) and grease a baking pan. In a large bowl, combine the chocolate cake mix, eggs, oil, and water (or milk for richness) according to the package instructions. Pour the batter into the prepared pan and bake for approximately 30 minutes or until a toothpick inserted comes out clean. Once baked, allow the cake to cool completely on a wire rack.
Step 2: Make the Frosting
While your cake cools, prepare the cream cheese frosting. In a mixing bowl, combine the softened salted butter, plain cream cheese, vanilla extract, and powdered sugar. Whip the mixture on medium speed until it becomes light and fluffy, about 3-5 minutes. Set this creamy delight aside to use after the cake has cooled and crumbled.
Step 3: Crumble the Cake
Once the cake is completely cooled, crumble it into a large bowl using your hands or a fork, breaking it into fine crumbs. Add around 1 cup of the prepared cream cheese frosting to the cake crumbs, mixing thoroughly until they are well combined and stick together. Adjust the amount of frosting if necessary to achieve a moldable consistency for the cake pops.
Step 4: Chill the Mixture
Cover your bowl with plastic wrap and place it in the refrigerator for about 30-45 minutes to allow the mixture to firm up. This chilling step makes it easier to roll the cake mixture into balls without them falling apart. While you wait, prepare your workspace for shaping the cake pops and gather your supplies.
Step 5: Form Cake Balls
After chilling, scoop out about 1.5 tablespoons of the cake mixture and roll it into a tight ball between your palms. Place each ball onto a parchment-lined baking sheet, leaving a little space between them. Repeat this process until all the mixture is formed into cake balls. Once complete, return them to the fridge for another 15-20 minutes to set.
Step 6: Melt the Chocolate Wafers
While the cake balls chill, melt the chocolate melting wafers. Use a microwave-safe bowl to heat the wafers in 30-second intervals, stirring in between until smooth and creamy. Be cautious not to overheat, as this can cause the chocolate to clump. Once melted, remove the cake balls from the fridge, ready for dipping.
Step 7: Insert Sticks
Dip the tip of each cake pop stick into the melted chocolate, about half an inch deep, before inserting it into the center of each cake ball. This helps “glue” the stick into place. Return the cake pops to the parchment-lined baking sheet and chill them in the fridge for another 30-45 minutes, or place them in the freezer for 20-30 minutes until the chocolate is set.
Step 8: Coat the Cake Pops
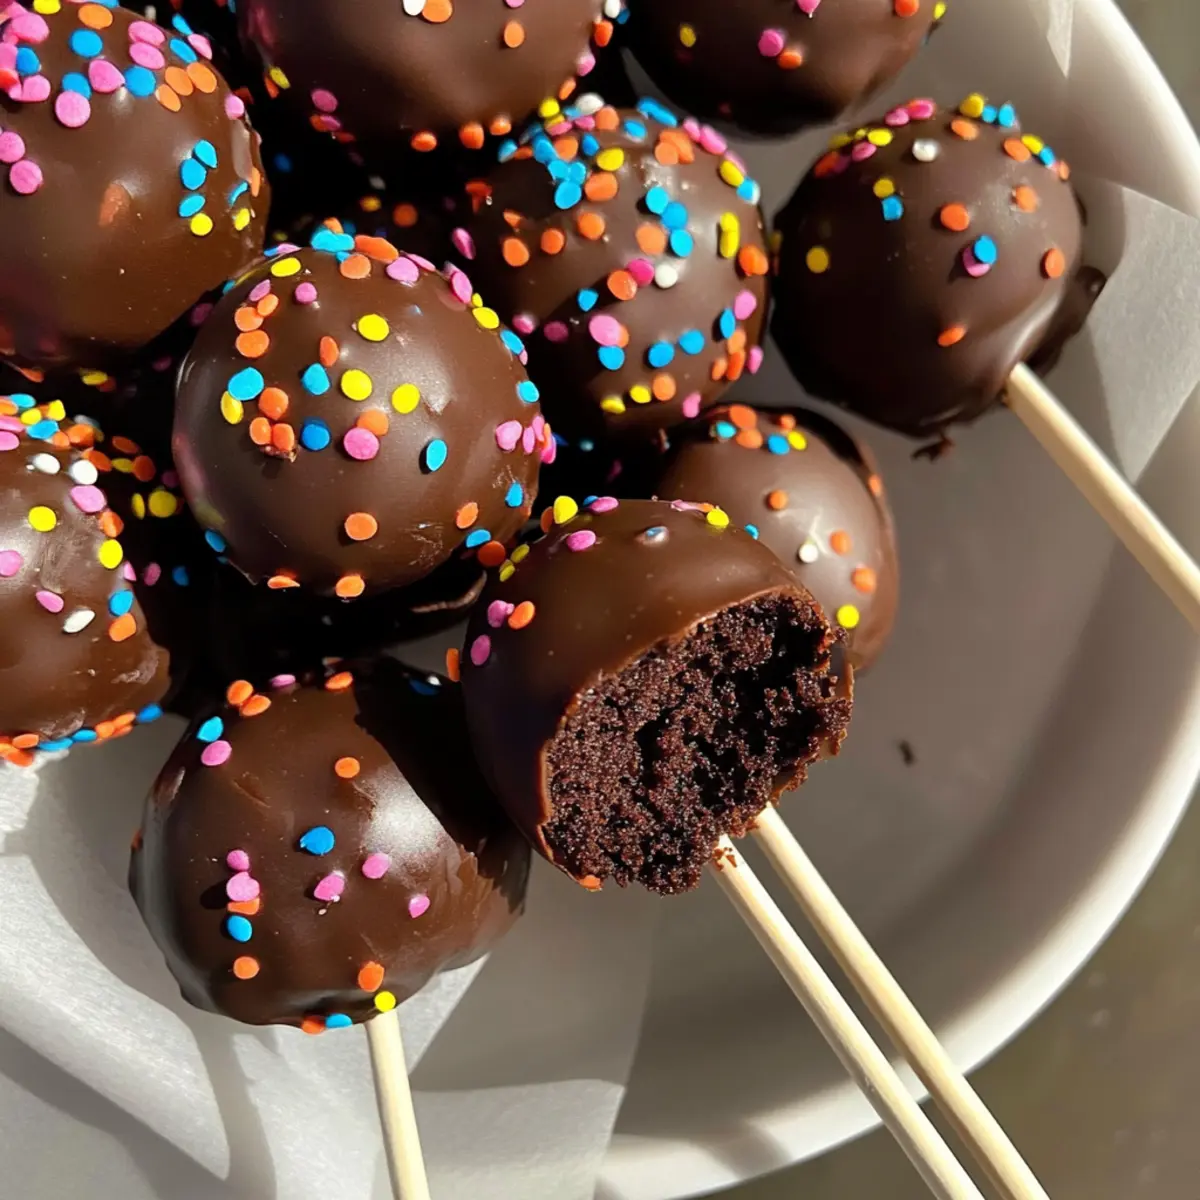
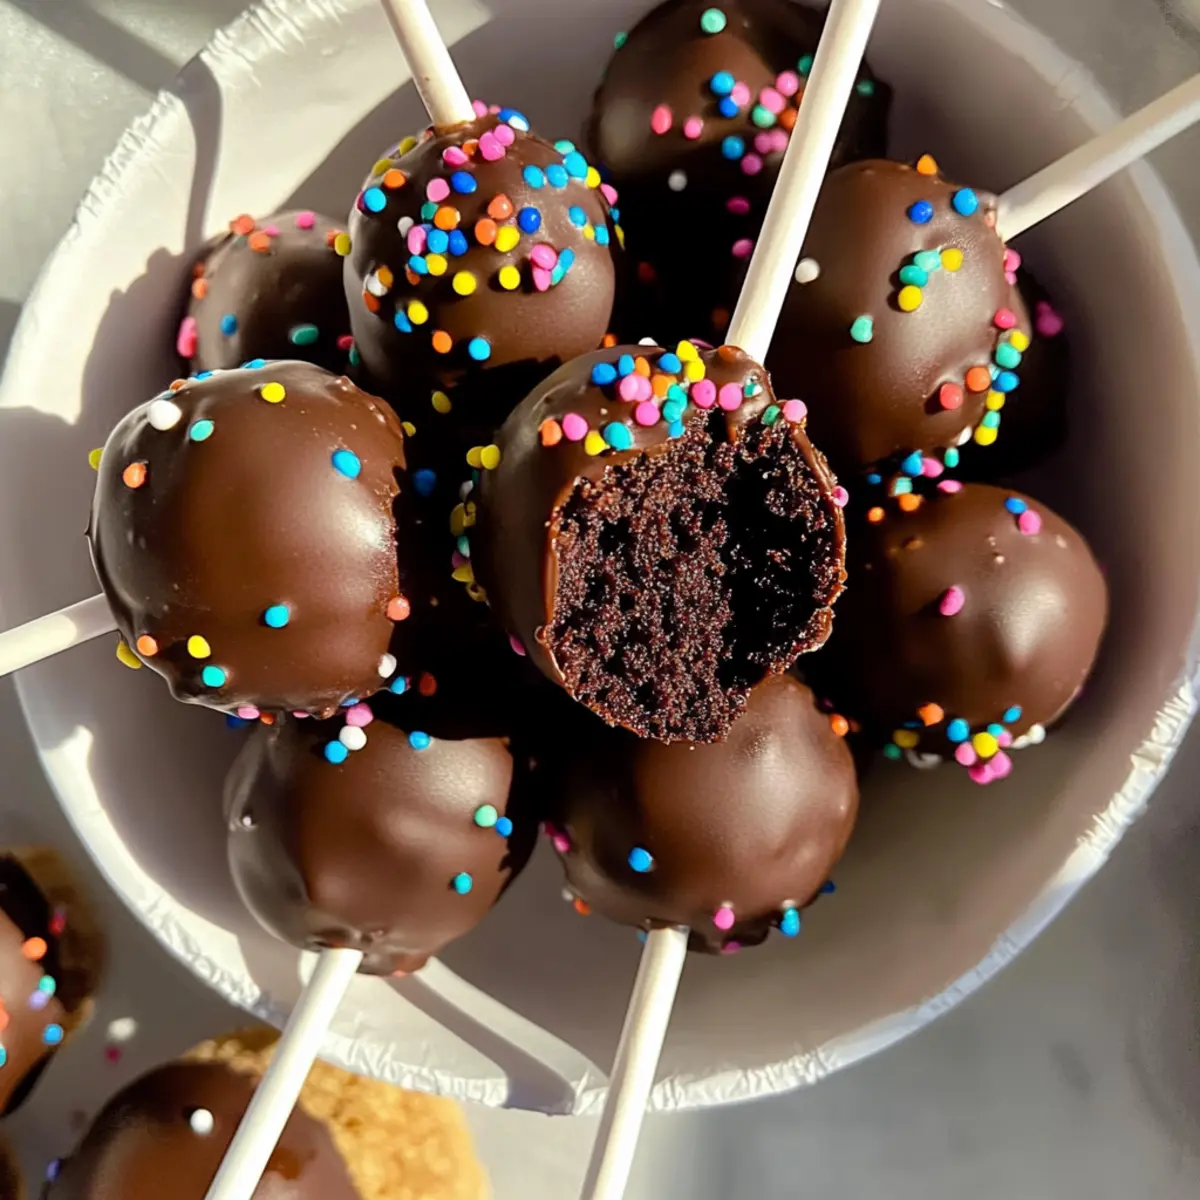
Once the sticks are secured, dip each cake pop fully into the melted chocolate. Allow the excess chocolate to drip off, gently tapping the stick to remove any thick globs. Carefully place the coated cake pops back on the parchment paper, keeping them upright.
Step 9: Decorate with Sprinkles
While the chocolate is still wet, immediately add your choice of sprinkles on top for decoration. This not only enhances their visual appeal but adds an extra fun texture. Allow the chocolate coating to set at room temperature or chill them in the fridge for a bit if you prefer a firmer finish.
Step 10: Serve and Enjoy
Once the chocolate has fully set, your Easy Chocolate Cake Pops are ready to be served! They can be stored in an airtight container in the fridge for up to seven days. Enjoy these delightful treats at gatherings, parties, or cozy evenings at home—they’re sure to impress family and friends!

Storage Tips for Chocolate Cake Pops
Fridge: Store your chocolate cake pops in an airtight container in the refrigerator for up to 7 days. This keeps them fresh and moist for longer enjoyment.
Freezer: For longer storage, freeze the cake pops in a single layer on a parchment-lined baking sheet until solid, then transfer them to a freezer-safe bag for up to 3 months.
Thawing: To enjoy frozen chocolate cake pops, simply transfer them to the fridge for several hours or let them sit at room temperature for about 30 minutes before serving.
Tip: Avoid stacking in the container to maintain their shape and coating.
What to Serve with Easy Chocolate Cake Pops
Elevate your dessert table with delightful pairings that complement these fudgy, chocolatey treats!
-
Vanilla Ice Cream: A classic pairing, the creamy vanilla flavor contrasts beautifully with the rich chocolate, creating a harmonious balance.
-
Fresh Berries: Strawberries or raspberries add a refreshing tartness that cuts through the sweetness of the cake pops, making each bite feel lighter.
-
Milkshake: Dive into nostalgia with a thick chocolate milkshake; the two together create a dreamy dessert experience that adults and kids will love.
-
Coffee: A rich cup of coffee enhances the chocolate flavors, making it the perfect afternoon pick-me-up alongside your cake pops.
-
Nutella Dip: For the chocolate lovers, a gooey Nutella dip brings an extra layer of indulgence that pairs perfectly with the cake pops’ texture.
-
Sparkling Water with Lemon: A refreshing twist, this bright and bubbly drink provides the ideal cleanse between sweet bites, ensuring your taste buds stay alive and tingling!
Expert Tips for Chocolate Cake Pops
- Cool Completely: Always allow the cake to cool completely before mixing to avoid melting the frosting and making it difficult to mold.
- Chill for Firmness: Chilling the cake ball mixture is crucial. It helps in forming perfect shapes without crumbling and makes it easier to insert sticks.
- Melt with Care: When melting chocolate wafers, do so in short intervals. Too much heat can cause clumping, leading to an uneven coating on the chocolate cake pops.
- Stick Insertion: Dip the cake pop sticks in melted chocolate before inserting them into the cake balls. This “glue” will help keep them intact.
- Decorate Promptly: Add sprinkles or decorations while the chocolate is still wet. This ensures they stick and adds a beautiful finish to your delightful treats.
Make Ahead Options
These Easy Chocolate Cake Pops are perfect for busy home cooks who enjoy meal prepping! You can prepare the chocolate cake and allow it to cool up to 24 hours in advance—just wrap it tightly in plastic wrap to keep it fresh. The frosting can also be made ahead of time and stored in the refrigerator for up to 3 days. When ready to finish your cake pops, follow the rolling and melting steps as usual; just ensure your cake balls are well chilled for easy handling. By prepping these components ahead, you’ll save valuable time and still enjoy indulgent, homemade treats that are just as delicious!
Chocolate Cake Pops Variations & Substitutions
Feel free to personalize these delicious chocolate cake pops, making them even more delightful to your taste buds!
- Cream Cheese Swap: Replace cream cheese frosting with buttercream for a sweet, buttery flavor twist. The creaminess of buttercream offers a different texture, pleasing everyone at your gathering.
- Cake Flavor Adventure: Use flavored cake mixes like vanilla, red velvet, or lemon for unique variations. Try a lemon cake mix for a refreshing spin on this classic treat!
- Alternative Coatings: Swap chocolate melting wafers for white or colored chocolate for a fun new look. This colorful option makes for eye-catching presentation, especially for parties.
- Add Spice: Mix in a dash of cinnamon or espresso powder into your cake batter for a warm flavor boost. A hint of spice complements the chocolate beautifully, creating a cozy ambiance.
- Nutty Delight: Stir in chopped nuts or mini chocolate chips to add texture to your cake batter. This twist creates a delightful crunch, which contrasts nicely with the smooth chocolate coat.
- Fruit Infusion: Incorporate fresh or dried fruits, such as raspberry or orange zest, into the cake mix for a fruity flavor upgrade. The added sweetness from the fruits will create a refreshing burst in every bite.
- Decadent Topping: Try drizzling caramel or chocolate sauce over the coating for an indulgent finish. This added layer of chocolate or caramel richness will leave your guests wanting more!
- Try a Low-Sugar Option: For those watching their sugar intake, try using a sugar-free cake mix or frosting. Treat yourself to a sweet delight without the guilt, perfect for everyone at your table.
For more delightful recipes, check out these ideas: Lemon Ricotta Pancakes for a cozy brunch, or enjoy some Sugar Free Cheesecake Bars that are sure to satisfy your sweet tooth!
Chocolate Cake Pops Recipe FAQs
What type of chocolate cake mix should I use?
Absolutely! You can use any brand of chocolate cake mix you prefer, but I recommend looking for one available in a 15 oz box for optimal results. The cake mix will serve as the foundation of flavor and structure for your cake pops.
How should I store my chocolate cake pops?
For best freshness, store your chocolate cake pops in an airtight container in the refrigerator. They will remain delicious for up to 7 days! Be sure to place them in a single layer to prevent any damage to their coating.
Can I freeze chocolate cake pops?
Yes, you can freeze chocolate cake pops! First, freeze them on a parchment-lined baking sheet until solid, then transfer them to a freezer-safe bag. They can last up to 3 months in the freezer. When ready to enjoy, just move them to the fridge for several hours to thaw or leave them at room temperature for about 30 minutes.
What if my cake pops fall apart when I dip them?
Very! If your cake pops are crumbling or falling apart, it might be due to two common issues: the cake mixture is too warm or has too little frosting. Ensure that you chill the cake batter for 30-45 minutes before rolling into balls. If they still crumble, try adding a little more frosting to bind the mixture better.
Are chocolate cake pops suitable for people with allergies?
Absolutely! However, you should consider the specific ingredients in the cake mix and frosting, as they may contain common allergens like gluten, dairy, and eggs. If you’re making these for someone with allergies, look for gluten-free cake mix or dairy-free substitutes so everyone can enjoy these treats!
Decadent Chocolate Cake Pops That Everyone Will Love
Ingredients
Equipment
Method
- Preheat your oven to 350°F (175°C) and grease a baking pan. Combine the chocolate cake mix, eggs, oil, and water (or milk) in a large bowl.
- Pour the batter into the prepared pan and bake for approximately 30 minutes or until a toothpick comes out clean. Cool completely on a wire rack.
- Prepare the frosting by mixing the softened butter, cream cheese, vanilla, and powdered sugar in a bowl until light and fluffy, about 3-5 minutes.
- Crumble the cooled cake into fine crumbs in a large bowl. Mix in about 1 cup of cream cheese frosting until well combined.
- Chill the mixture in the refrigerator for about 30-45 minutes to firm it up.
- Roll about 1.5 tablespoons of the chilled mixture into balls and place them on a parchment-lined baking sheet.
- Melt the chocolate melting wafers in a microwave-safe bowl in 30-second intervals until smooth.
- Dip the tip of each cake pop stick into the melted chocolate, then insert into the center of each cake ball.
- Chill the cake pops until the chocolate is set, about 30-45 minutes.
- Dip each cake pop into the melted chocolate, tapping off excess chocolate, and place back on the parchment paper.
- Add sprinkles on top while the chocolate is still wet, then allow to set at room temperature.
- Once set, serve your chocolate cake pops or store them in an airtight container in the fridge for up to 7 days.