
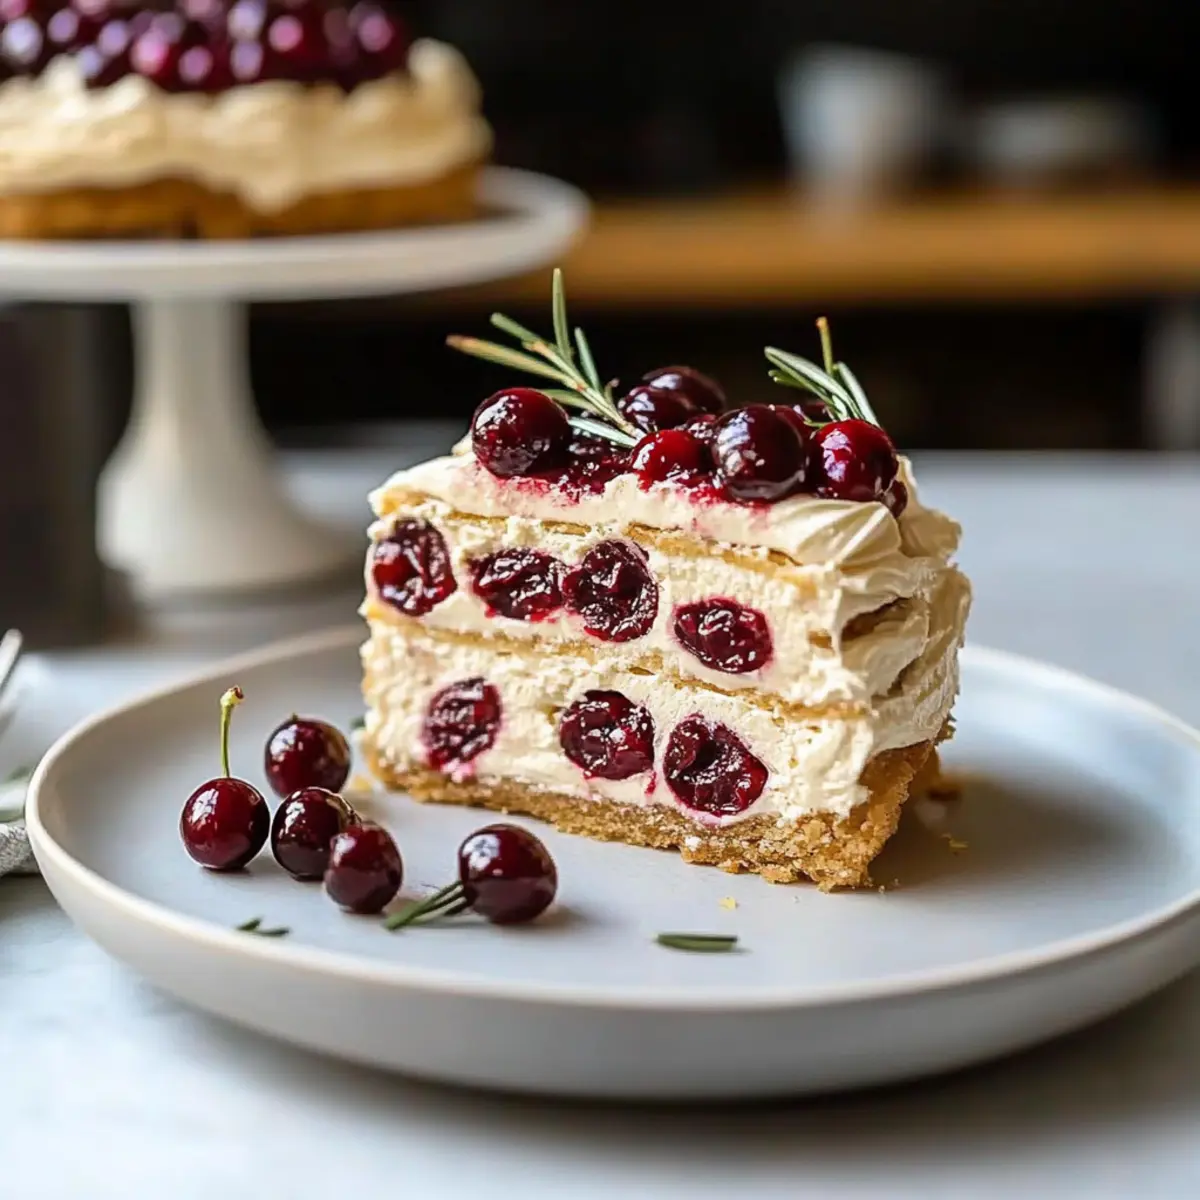
As I stood in my kitchen surrounded by the sweetest aromas, I realized that baking can turn an ordinary day into a delightful experience. This Cherry Cake recipe is a testament to that joy, capturing the essence of simplicity with just four ingredients. It’s not only an easy dessert that can be whipped up in no time, but it also makes for a fantastic make-ahead treat, perfect for gatherings or cozy nights in. Imagine serving a slice of this luscious cake, with its buttery puff pastry, tart cherries, and rich layers of whipped cream, to your loved ones—pure bliss! If you’re ready to impress without stress, let’s get started on this cherry-infused adventure. What are your favorite ways to enjoy cherries in dessert?
Why is this Cherry Cake irresistible?
Simplicity is key: With just four ingredients, this Cherry Cake is a breeze to prepare, making it ideal for both novice and experienced bakers alike.
Flavors that pop: The tangy cherries beautifully complement the creamy dulce de leche and light whipped cream, creating a delightful taste explosion in every bite.
Make-ahead magic: This cake is perfect for those who love to plan in advance—just prepare it up to two days ahead for flavors that meld together beautifully.
Versatile delight: While this recipe highlights cherries, feel free to experiment with other fruits like peaches or apricots for a fun twist.
Crowd-pleaser: Whether at a dinner party or a casual gathering, this cake is sure to impress your guests, offering a unique dessert that stands out.
Pair it with a warm cup of coffee or tea, and you’re set for the perfect dessert moment!
Cherry Cake Ingredients
For the Cake
- Puff Pastry Sheets – Provide the structure and flaky texture; opt for store-bought for ease.
- Sour Cherries in Syrup – These add tartness and moisture; canned fruit is recommended—drain excess syrup to avoid sogginess.
- Dulce de Leche – This brings creaminess and sweetness to the cake; substitute with sweetened condensed milk for a milder flavor.
- Heavy Whipping Cream – Essential for creating those creamy layers; ensure it’s very cold for achieving stiff peaks.
Optional Toppings
- Additional Cherries – Use as a beautiful garnish that echoes the main flavors; fresh or canned work great.
- Powdered Sugar – Dust on top for an elegant finish and added sweetness to complement the Cherry Cake’s flavors.
Step‑by‑Step Instructions for Cherry Cake
Step 1: Prepare the Puff Pastry
Start by preheating your oven to 400°F (200°C). Roll out the thawed puff pastry sheets on a lightly floured surface, then slice them into 3-inch wide strips. These will be the base for your Cherry Cake, so ensure they are evenly cut. Lay them flat and keep them ready for the next step.
Step 2: Drain and Arrange the Cherries
Open the can of sour cherries in syrup and drain the excess syrup. Carefully arrange the cherries in a tight row along one edge of each pastry strip. This will ensure that when you roll the pastry, the cherries stay neatly enclosed. Seal the edges of the pastry by pressing them together to encase the cherries securely.
Step 3: Create the Spiral Cake Layers
Next, take the filled pastry strips and start layering them in a spiral formation in an 8-inch lined baking pan. Start from the center and work your way outward, making sure the layers are snug but not overly compressed. This spiral design will create a beautiful presentation for your Cherry Cake once it’s baked.
Step 4: Bake the Cherry Cake
Once your Cherry Cake is assembled, place the baking pan in the preheated oven and bake for 25 minutes. Keep an eye on it—you’re aiming for a golden-brown color on the pastry. When done, remove the pan from the oven and let it cool on a wire rack for about 10 minutes before handling.
Step 5: Whip the Cream and Dulce de Leche
While the cake is cooling, grab a mixing bowl and combine the cold heavy whipping cream with dulce de leche. Using an electric mixer, beat the mixture on medium-high speed until stiff peaks form, which should take about 3-5 minutes. The cream should be thick and spreadable, perfect for layering in your cake.
Step 6: Layer the Cake
On a serving plate, carefully place the first layer of your cooled Cherry Cake. Spread a generous layer of the whipped cream mixture evenly on top. Next, add the second layer of pastry, pressing down gently to secure it. This stack will create rich layers in your delightful Cherry Cake.
Step 7: Decorate and Chill
Finish off your Cherry Cake by spreading any remaining whipped cream on top and decorating it with additional cherries. For the best flavor, cover the cake and refrigerate it overnight, allowing the flavors to meld beautifully. This will elevate each bite of your Cherry Cake to delicious perfection.
Cherry Cake Variations & Substitutions
Feel free to get creative with this delightful recipe and make it uniquely yours!
-
Fruit Swap: Substitute sour cherries with peaches or apricots for a sweeter, fruity twist that still shines. Imagine the sunny flavor of fresh peaches melding with cream!
-
Dairy-Free: Use coconut cream instead of heavy whipping cream and maple syrup in place of dulce de leche for a rich, non-dairy alternative. The coconut adds a subtle tropical flair!
-
Nutty Delight: For a crunchy texture, sprinkle slivered almonds or chopped walnuts between layers for a delightful contrast to the soft cream. It makes each bite a bit more exciting!
-
Flavor Boost: Add a teaspoon of almond extract to the cream mix for depth and a heavenly aroma. The nutty essence pairs beautifully with cherries and will surely become a favorite change.
-
Chocolate Lovers: Drizzle melted dark chocolate over the finished cake for an indulgent twist that adds richness and beautiful contrast to the bright cherries. Who could resist chocolate and cherries together?
-
Less Sweet: Swap dulce de leche for a blend of unsweetened Greek yogurt and a splash of honey to reduce sweetness while maintaining a creamy texture. It adds a tang that elevates the cake.
-
Herbal Infusion: Add a pinch of fresh mint or basil leaves to your cream layer for an unexpected herbaceous twist that brightens the flavors. It’s a refreshing surprise!
-
Saucy Option: Create a simple cherry compote by cooking fresh cherries with a bit of sugar and lemon juice, and serve it warm over the cake. It’s divine and adds a lovely homemade touch!
If you’re in the mood for exploring even more scrumptious flavors, don’t miss out on these tasty recipes: check out our Iced Cherry Earl for a refreshing drink or dive into our rich Cheesecake Stuffed Chocolate cookies for another delightful treat!
Make Ahead Options
This Cherry Cake is a fantastic option for meal prep, allowing you to prepare components ahead of time, making your life easier on busy days! You can assemble the cake up to 24 hours in advance—just keep it tightly covered in the refrigerator to maintain its freshness. For best results, drain the cherries and layer them in the pastry the day before; this gives the taste a chance to meld. When you’re ready to serve, simply whip up the cream and dulce de leche layer, then construct your Cherry Cake with the cooled pastry. You’ll have a delightful dessert that’s just as delicious as if it were made fresh that day!
What to Serve with 4-Ingredient Cherry Cake
Indulging in this delightful dessert calls for perfect complements that heighten the experience of flavor and texture.
-
Fresh Vanilla Ice Cream: The creaminess of vanilla ice cream beautifully balances the tartness of the cherries, making every bite a delightful contrast.
-
Crushed Almonds: Sprinkling crushed almonds provides a lovely crunch that enhances the softness of the cake, adding an inviting nutty flavor.
-
Lemon Zest Whipped Cream: A hint of lemon in your whipped cream adds a refreshing brightness, perfectly lifting the dense richness of dulce de leche.
-
Sautéed Apples: Warm, sautéed apples offer a sweet, caramelized touch that pairs wonderfully with cherry, adding warmth and a homely essence to your meal.
-
Chocolate Drizzle: A light drizzle of melted chocolate brings a touch of decadence and balances the cake’s flavors, creating an elegant dessert experience.
-
Mint-Infused Tea: A cup of fresh mint tea serves as a refreshing palate cleanser, perfectly complementing the sweetness of the cherry as you savor each bite.
-
Lemon Sorbet: Light and refreshing, lemon sorbet acts as a delightful palate refresher with a tart twist that enhances your cherry cake experience.
-
Pineapple Salsa: This fruity salsa’s vibrant flavors and textures can play off the creamy cake delightfully, adding an unexpected sweet and tangy zing.
-
Sparkling Water with Lime: A splash of lime in sparkling water keeps your palate clean and offers a crisp contrast to the rich flavors of the Cherry Cake.
Expert Tips for Cherry Cake
-
Chill Your Cream: Ensure your heavy whipping cream is very cold before whipping; this helps achieve light, fluffy peaks that enhance the Cherry Cake’s texture.
-
Don’t Skimp on Draining: Properly drain the syrup from the cherries to prevent a soggy pastry. A little moisture is okay, but too much can dampen your cake.
-
Roll Carefully: When rolling the pastry around the cherries, be gentle to avoid tearing. A tight roll helps keep the filling secure and enhances presentation.
-
Monitor Baking Time: Every oven is different; check your Cherry Cake around 20 minutes to avoid overbaking. Look for a golden-brown color as a sign it’s done.
-
Flavor Variations: Feel free to experiment with different fruits, such as peaches or apricots; just remember to keep them well-drained for the best results in your Cherry Cake!
How to Store and Freeze Cherry Cake
Fridge: Store your Cherry Cake in an airtight container in the fridge for up to 3 days. This will maintain its freshness and prevent drying out.
Freezer: If you need to keep it longer, you can freeze the cake tightly wrapped in plastic wrap and aluminum foil for up to 2 months. Thaw in the fridge overnight before serving.
Reheating: For best results, enjoy your Cherry Cake chilled or at room temperature. If you prefer warm cake, reheat individual slices in the microwave for about 10-15 seconds, ensuring you don’t overheat the cream topping.
Make-Ahead: This Cherry Cake can be prepared a couple of days in advance, making it ideal for planning ahead for gatherings or special occasions!
Cherry Cake Recipe FAQs
What type of cherries should I use for the Cherry Cake?
I recommend using sour cherries in syrup, as they provide the perfect balance of tartness and moisture. If using fresh cherries, make sure they are pitted, and tightly packed, which helps maintain structure in the cake.
How should I store my Cherry Cake?
Store your Cherry Cake in an airtight container in the fridge for up to 3 days. This keeps it fresh and prevents any drying out from the cream or pastry.
Can I freeze the Cherry Cake?
Absolutely! You can freeze the Cherry Cake tightly wrapped in plastic wrap and then aluminum foil for up to 2 months. Just make sure to thaw it in the fridge overnight before serving to ensure optimal texture and flavor.
What if my cherries make the pastry soggy?
To avoid a soggy pastry, ensure you drain the syrup from the cherries thoroughly. It’s also helpful to use store-bought puff pastry, which will help absorb any excess moisture without compromising the cake’s lightness.
Are there any dietary considerations for this Cherry Cake?
If you’re concerned about allergies, be mindful of the heavy cream and dulce de leche, which may contain dairy. For a dairy-free option, you can substitute heavy cream with a coconut cream alternative and make a vegan dulce de leche to accommodate different dietary needs.
What can I do if my whipped cream doesn’t achieve stiff peaks?
If your whipped cream isn’t stiffening, it could be that the cream isn’t cold enough or it hasn’t been whipped long enough. I recommend making sure your heavy cream is very cold and using an electric mixer to beat the mixture on medium-high speed, which usually takes about 3-5 minutes to reach those fluffy peaks.
Deliciously Easy Cherry Cake with Just 4 Ingredients
Ingredients
Equipment
Method
- Preheat your oven to 400°F (200°C). Roll out the thawed puff pastry sheets on a lightly floured surface, then slice them into 3-inch wide strips.
- Open the can of sour cherries in syrup and drain the excess syrup. Carefully arrange the cherries in a tight row along one edge of each pastry strip.
- Layer the filled pastry strips in a spiral formation in an 8-inch lined baking pan, starting from the center and working outward.
- Bake the Cherry Cake for 25 minutes until golden brown. Let cool on a wire rack for about 10 minutes.
- Combine the cold heavy whipping cream with dulce de leche in a mixing bowl. Beat using an electric mixer until stiff peaks form.
- Place the first layer of your cooled Cherry Cake on a serving plate and spread a layer of the whipped cream mixture on top. Add the second layer of pastry and press down gently.
- Spread remaining whipped cream on top and decorate with additional cherries. Cover and refrigerate overnight for the best flavor.