
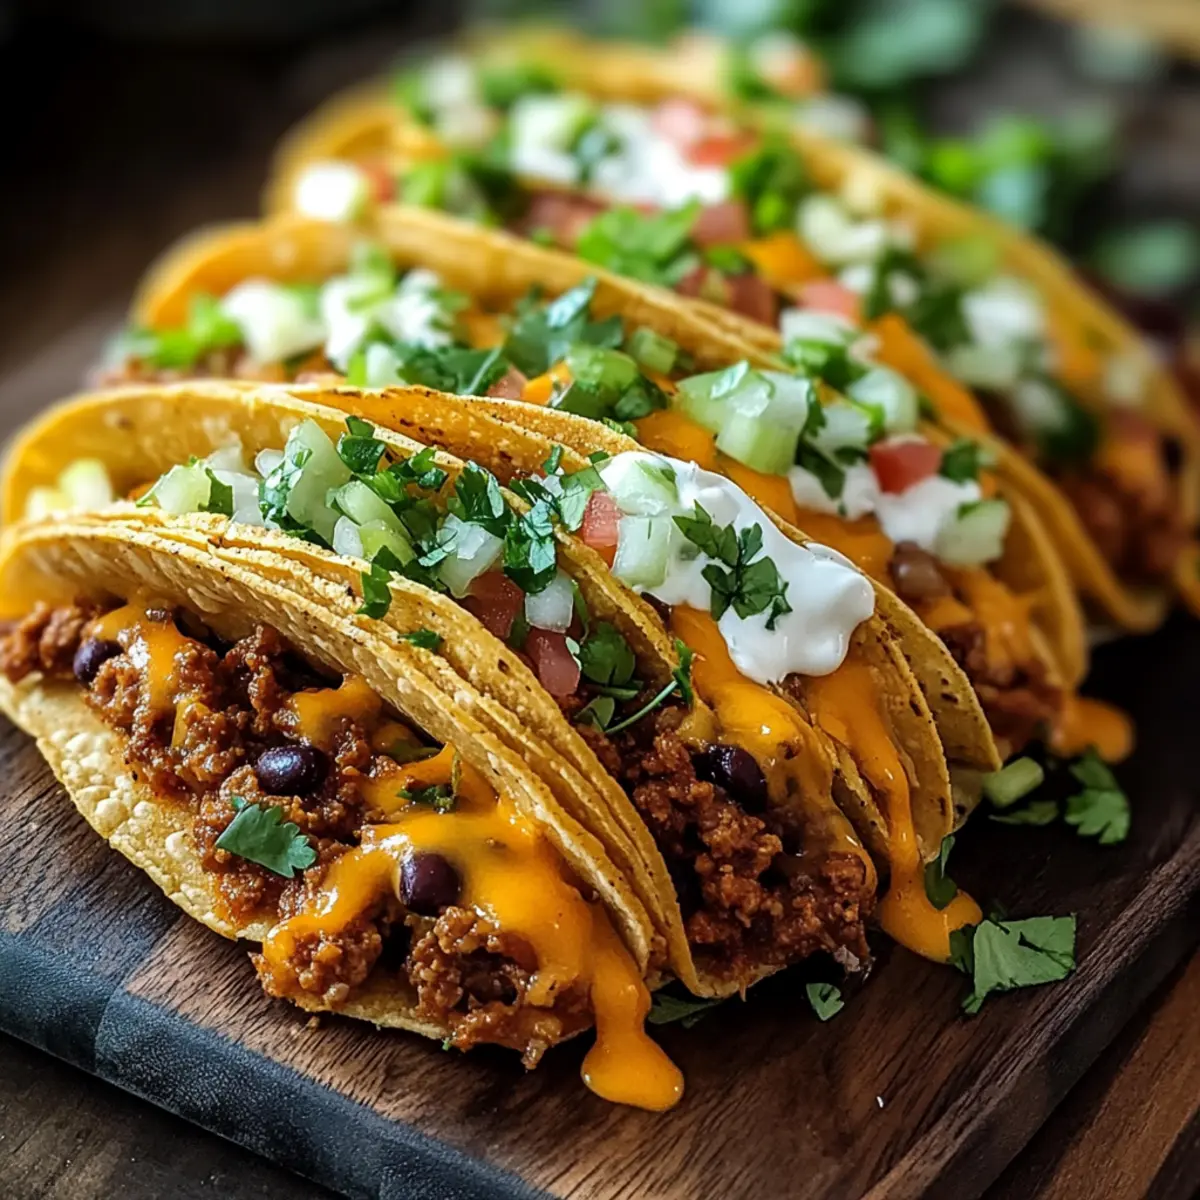
“Have you ever found yourself craving something crunchy yet ooey-gooey that wraps up comfort and convenience in one delicious package? These Loaded Cheesy Pocket Tacos are my go-to solution for a quick dinner, combining the best of Tex-Mex flavors in a customizable delight. With options for savory meats or colorful veggies, each bite is a satisfying experience that’s perfect for busy weeknights or laid-back family meals. Plus, whether you prefer gluten-free tortillas or a vegan twist, this recipe caters to everyone at the table. Ready to unleash your creativity and explore endless filling possibilities? Let’s dive into how to bring these tasty taco pockets to life!”
Why Are These Tacos So Irresistible?
Customizable options make these Loaded Cheesy Pocket Tacos a winner for every palate; choose from meats, veggies, or even a mix to please everyone! Quick preparation means you can whip them up in no time, ideal for busy weeknights. Melted cheese creates a gooey center that brings comfort to each bite, ensuring satisfaction. Versatile enough for gluten-free or vegan diets, they fit all dietary preferences beautifully. Plus, serving them with a variety of toppings like guacamole or hot sauce adds a personal touch—elevating your meal to a crowd-pleaser. If you love to switch things up, check out my recipes for Cheesy Loaded Meatloaf and Cheesy Hamburger Rice for even more delicious options!
Cheesy Pocket Tacos Ingredients
• Here’s everything you’ll need for these deliciously customizable Cheesy Pocket Tacos!
For the Filling
- Ground beef or turkey – A hearty protein base; substitute with lentils or chickpeas for a vegan option.
- Shredded cheddar cheese – Delivers creamy goodness; mix it with Monterey Jack for a flavor adventure.
- Shredded mozzarella cheese – Adds extra meltiness; feel free to swap with any melting cheese you adore.
- Taco seasoning – Infuses the filling with zesty flavor; consider making your own for a milder kick.
- Black beans – Enhance protein and fiber; pinto beans are a fantastic alternative or omit for a lighter version.
- Corn kernels – A touch of sweetness and crunch; use fresh or frozen depending on what you have.
- Diced tomatoes – Brightness and acidity to balance your filling; canned tomatoes can work just as well.
- Chopped green onions – A fresh garnish that adds flavor; chives can be a delicious substitute if you’re out.
For the Tortillas
- Small flour tortillas – The perfect vessel for your tasty filling; swap for gluten-free corn tortillas if needed.
For Serving
- Sour cream – Creaminess that complements the tacos; Greek yogurt is a lighter option that’s equally delightful.
- Chopped fresh cilantro – Adds brightness and herbal notes; feel free to omit or replace with parsley for a milder taste.
- Olive oil or cooking spray – Ensures crispiness when frying your taco pockets; any cooking oil can be used in a pinch.
Get ready to create a taco experience that’s not only delicious but also tailored to your taste buds!
Step‑by‑Step Instructions for Cheesy Pocket Tacos
Step 1: Cook the Protein
In a skillet, heat a drizzle of olive oil over medium heat. Add your ground beef or turkey and cook for about 7-10 minutes, stirring occasionally, until browned and cooked through. Make sure to break it up as it cooks to achieve an even texture. You’ll know it’s ready when there is no pink remaining and it’s nicely caramelized.
Step 2: Spice it Up
Once the meat is browned, stir in your taco seasoning along with a splash of water. Allow everything to simmer for about 3-4 minutes, giving the flavors time to meld together. The mixture should become saucy and fragrant, creating a savory filling for your Loaded Cheesy Pocket Tacos.
Step 3: Preheat the Oven
While your filling is simmering, preheat your oven to 350°F (175°C). This step ensures that once your taco pockets are assembled, they’ll bake evenly. If you’re using a baking sheet, line it with parchment paper for easy cleanup and to prevent sticking.
Step 4: Assemble the Tacos
Take your small flour tortillas and lay them flat. Spoon a generous amount of the meat mixture onto one side of each tortilla, then layer in black beans, corn, diced tomatoes, and an enticing mix of shredded cheddar and mozzarella cheese. Fold the tortilla over to create a pocket and gently press to seal, ensuring the filling stays inside.
Step 5: Fry the Taco Pockets
In the same skillet, pour a little olive oil and heat over medium. Place the taco pockets seam-side down in the skillet. Cook them for about 2-3 minutes on each side, until golden brown and crispy. The crunchy exterior will contrast beautifully with the creamy cheese inside, making your Cheesy Pocket Tacos irresistible.
Step 6: Bake for Extra Melty Goodness
Transfer the fried taco pockets to your prepared baking sheet and place them in the preheated oven. Bake for 5-10 minutes, until the cheese has fully melted and the tortillas are crisp. Keep an eye on them for that perfect golden color, which signals that they’re ready to be enjoyed.
Step 7: Serve with Toppings
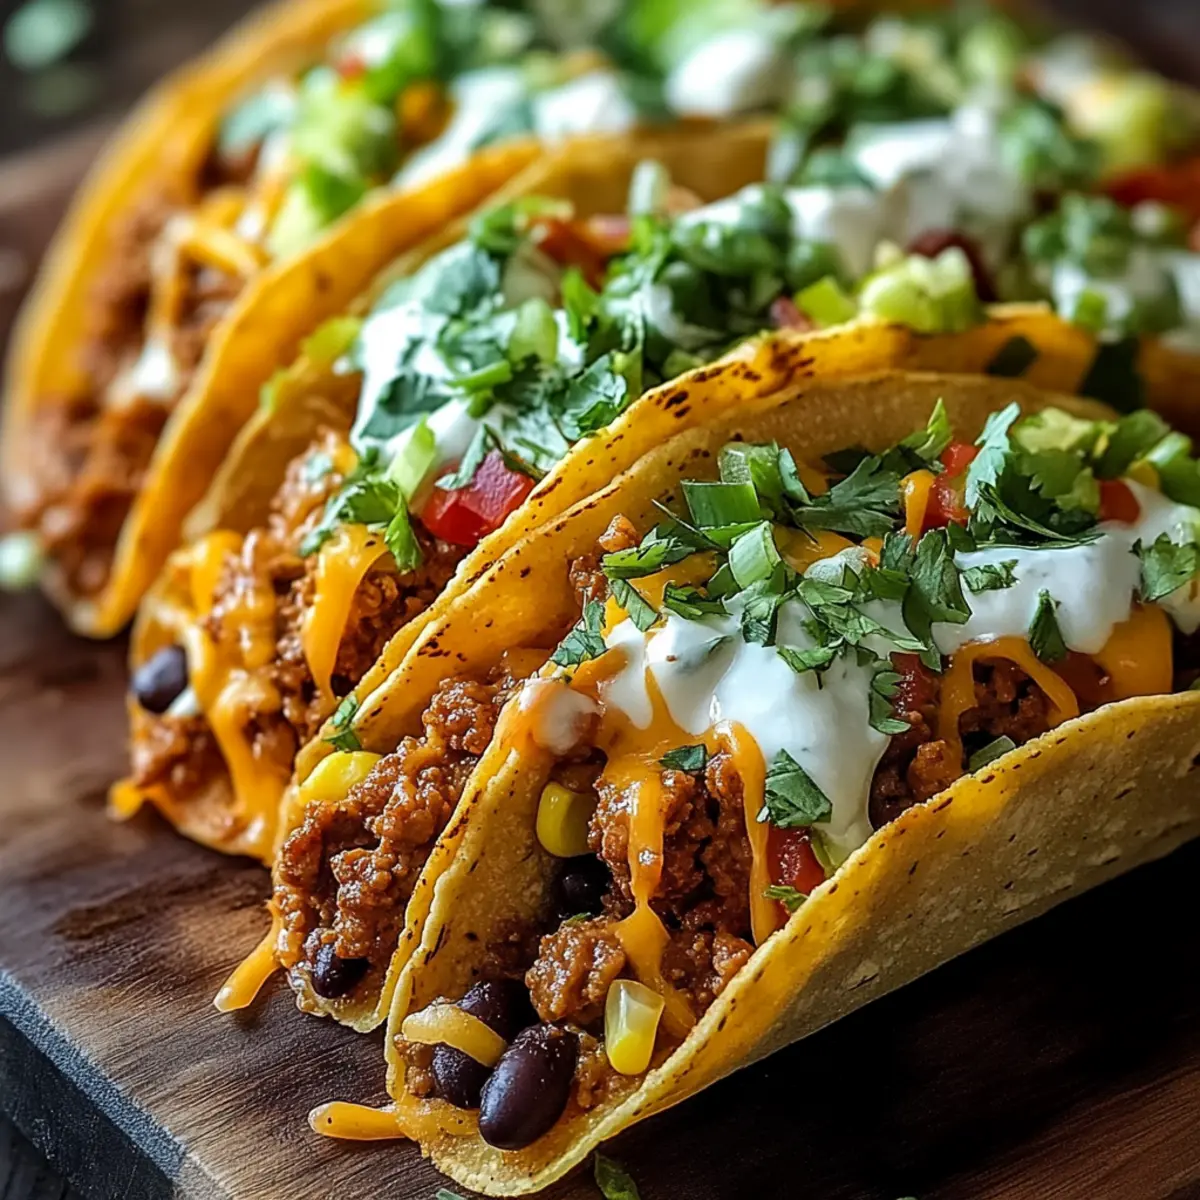
Once out of the oven, serve your warm Cheesy Pocket Tacos topped with finely chopped green onions, a dollop of sour cream, and a sprinkle of fresh cilantro. Feel free to add any additional toppings you love, such as guacamole or hot sauce, to enhance these delightful taco pockets even more.
How to Store and Freeze Cheesy Pocket Tacos
Fridge: Keep your leftover Cheesy Pocket Tacos in an airtight container for up to 3 days; this keeps them fresh and ready to enjoy.
Freezer: For longer storage, freeze assembled tacos in a single layer on a baking sheet before transferring them to a freezer-safe bag or container. They can last up to 1 month.
Reheating: To reheat, bake in the oven at 350°F (175°C) for 10-15 minutes until warmed through and crispy again. Avoid microwave reheating to maintain that delicious texture.
Make Ahead Options
These Loaded Cheesy Pocket Tacos are perfect for savvy meal prep, saving you time on busy weeknights! You can prepare the filling (meat, beans, corn, and tomatoes) up to 3 days in advance and store it in an airtight container in the fridge. To maintain the fabulous flavors and textures, allow the filling to cool completely before refrigerating. When you’re ready to enjoy, simply reheat the filling in a skillet until warm, assemble the tacos with your favorite cheeses, and fry them as directed. Baking them afterward for 5-10 minutes will ensure the cheese is perfectly melted. Enjoy freshly made tacos with minimal effort!
Cheesy Pocket Tacos Variations & Substitutions
Feel free to get creative with these delightful taco pockets by mixing and matching different ingredients to suit your taste!
- Vegan Option: Substitute ground beef with lentils or chickpeas, along with vegan cheese for a delightful twist.
- Gluten-Free: Use corn tortillas instead of flour for a gluten-free version that still packs all the flavor.
- Spicy Kick: Add jalapeños or spicy taco seasoning for those who like a bit of heat in their tacos.
- Cheese Lovers: Mix in cream cheese for extra creaminess or swap mozzarella for pepper jack for a zesty flavor.
- Veggie Delight: Incorporate sautéed bell peppers, zucchini, or mushrooms to create a healthy and colorful filling.
- Savory Swaps: Replace black beans with chickpeas or kidney beans for a different texture and taste experience.
- Crunch Factor: Add crushed tortilla chips inside the taco for an added crunch that pairs perfectly with melted cheese.
- Garnish Variations: Top with diced avocado or a drizzle of chipotle sauce for an exciting finish that elevates each bite.
These diverse variations ensure your Loaded Cheesy Pocket Tacos never become boring! Remember, if you’re in the mood for more cheesy goodness, check out my Cookie Dough Tacos for a sweet twist on a classic treat!
Expert Tips for Cheesy Pocket Tacos
-
Keep It Medium Heat: Cooking at medium heat prevents burning the tortillas while ensuring the cheese melts thoroughly for those gooey cheesy pocket tacos.
-
Cheese Mix Magic: Combine cheeses like cheddar and Monterey Jack for an optimal melt and flavor blend; avoid using only one cheese type for best results.
-
Fold Securely: Make sure to fold and seal the tortillas well; a tight seal keeps the filling intact and lets you bite into deliciously crispy taco pockets without spills.
-
Prep Ahead: To save time, prepare your taco filling a day in advance; this allows flavors to deepen and makes assembling the cheese pockets a breeze.
-
Reheat Strategically: If you have leftovers, reheat your cheesy pocket tacos in the oven instead of the microwave to preserve their crispy texture.
What to Serve with Loaded Cheesy Pocket Tacos
Complement your Loaded Cheesy Pocket Tacos with delightful sides and drinks for a meal that sparks joy and flavor!
- Spanish Rice: A flavorful and hearty addition that complements the Tex-Mex theme beautifully, providing a perfect balance to cheesy tacos.
- Guacamole: Creamy and fresh, this dip adds a rich avocado flavor that enhances every cheesy bite. Plus, it’s a fun, interactive addition to the meal!
- Corn Salad: A bright medley of sweet corn, bell peppers, and lime adds a crunchy, refreshing texture that contrasts nicely with the warm, cheesy fillings.
- Refried Beans: Smooth and creamy, they create a satisfying, protein-packed side that pairs wonderfully with every taco pocket.
- Pico de Gallo: This fresh salsa brings a burst of juicy acidity and spice, cutting through the richness of the cheese and complimenting the deep flavors.
- Mexican Beer or Limeade: A chilled lime-flavored drink or a refreshing beer enhances the casual vibe, making your meal feel like a celebration.
- Churros: For dessert, these sweet, cinnamon-dusted treats offer a delightful crunch and satisfy any lingering sweet tooth after your savory feast.
- Hot Sauce: Enhance each bite of your tacos with the heat that suits your palate. It’s an easy way to add a personal touch to your meal!
Cheesy Pocket Tacos Recipe FAQs
What type of tortillas should I use for Cheesy Pocket Tacos?
You can use small flour tortillas for these cheesy delights. If you’re looking for a gluten-free option, corn tortillas work just as well. Both types will hold the filling beautifully, so choose based on your dietary preferences!
How should I store leftover Cheesy Pocket Tacos?
Store your leftover tacos in an airtight container in the fridge for up to 3 days. This keeps them fresh and ready for a quick bite. Just remember to let them cool completely before sealing to prevent humidity from affecting their texture.
Can I freeze Cheesy Pocket Tacos?
Absolutely! For freezing, first, lay your assembled taco pockets in a single layer on a baking sheet and place them in the freezer until firm (about 1-2 hours). Once they’re set, transfer them to a freezer-safe bag or container. They can be kept frozen for up to 1 month.
What’s the best way to reheat Cheesy Pocket Tacos?
To reheat, preheat your oven to 350°F (175°C) and bake the tacos for 10-15 minutes until they’re warmed through and crispy again. This method maintains their delicious texture—definitely steer clear of the microwave, as it can make them soggy!
How can I make Cheesy Pocket Tacos vegan?
You can easily customize these tacos to be vegan by substituting ground beef or turkey with lentils or plant-based meat alternatives. Use vegan cheese instead of dairy cheese and ensure your tortillas are free from animal products. It’s a delightful meal option for everyone!
What should I do if my taco pockets are leaking during cooking?
If you find your taco pockets leaking, it might be due to the filling being overstuffed or not sealed properly. Ensure to fold and press the edges firmly to create a tight seal. If you’re having more trouble, try using a bit of water to moisten the seal; it helps stick better.
Cheesy Pocket Tacos: Melty Goodness in Every Bite
Ingredients
Equipment
Method
- In a skillet, heat a drizzle of olive oil over medium heat. Add your ground beef or turkey and cook for about 7-10 minutes, stirring occasionally, until browned and cooked through.
- Once the meat is browned, stir in your taco seasoning along with a splash of water. Allow everything to simmer for about 3-4 minutes.
- While your filling is simmering, preheat your oven to 350°F (175°C). Line a baking sheet with parchment paper.
- Take your small flour tortillas and lay them flat. Spoon a generous amount of the meat mixture onto one side of each tortilla and layer in black beans, corn, diced tomatoes, and shredded cheddar and mozzarella cheese.
- In the same skillet, pour a little olive oil and heat over medium. Place the taco pockets seam-side down in the skillet and cook them for about 2-3 minutes on each side.
- Transfer the fried taco pockets to your prepared baking sheet and place them in the preheated oven. Bake for 5-10 minutes, until the cheese has fully melted.
- Once out of the oven, serve your warm Cheesy Pocket Tacos topped with chopped green onions, sour cream, and fresh cilantro.