
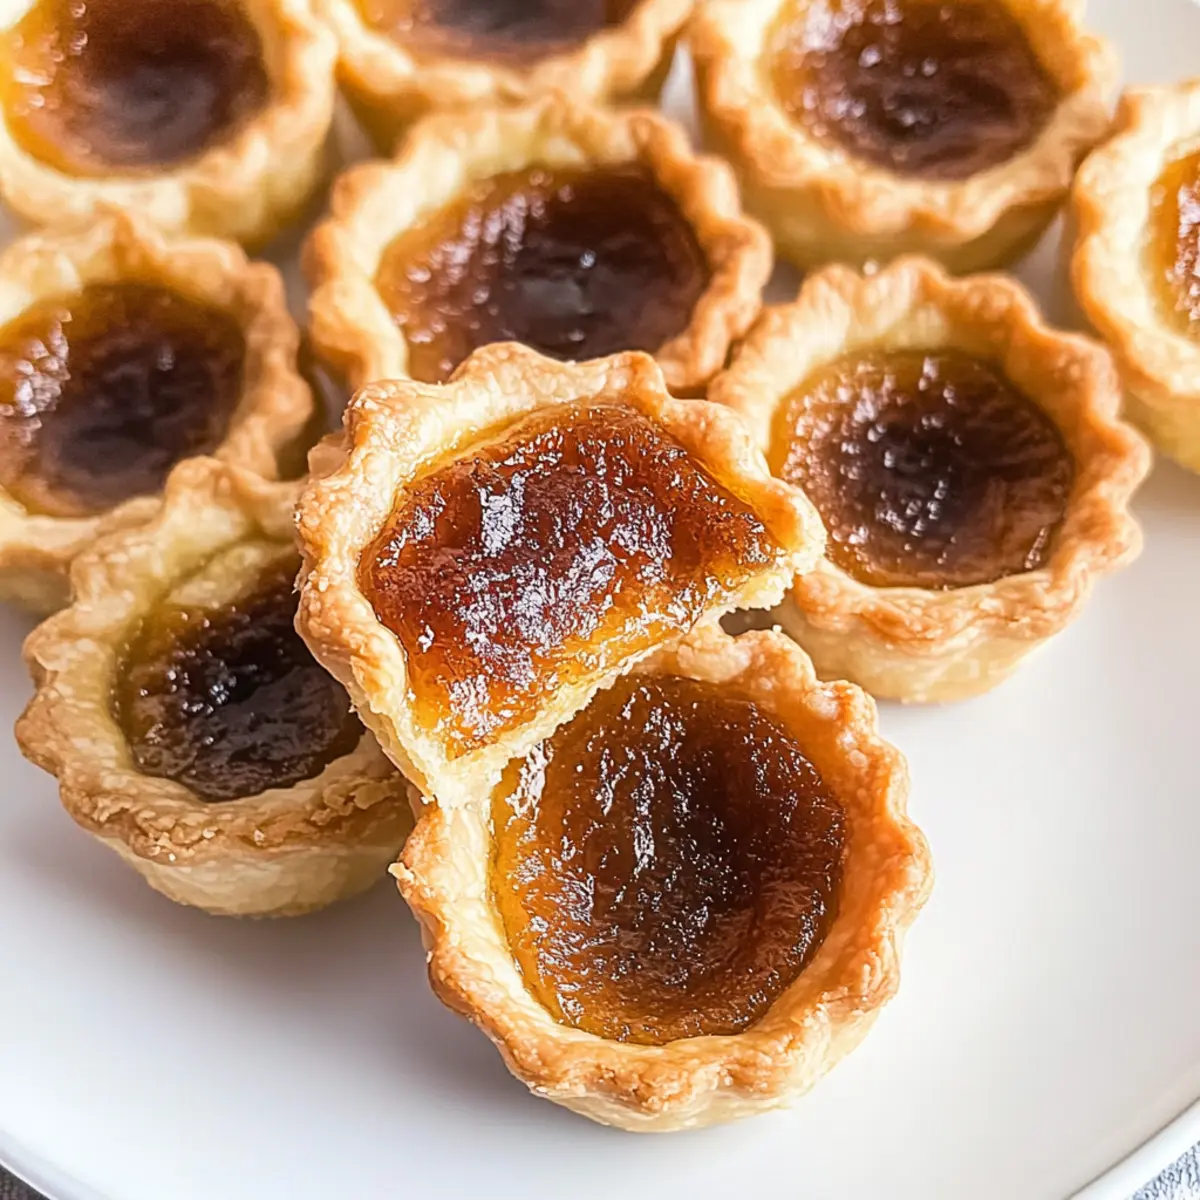
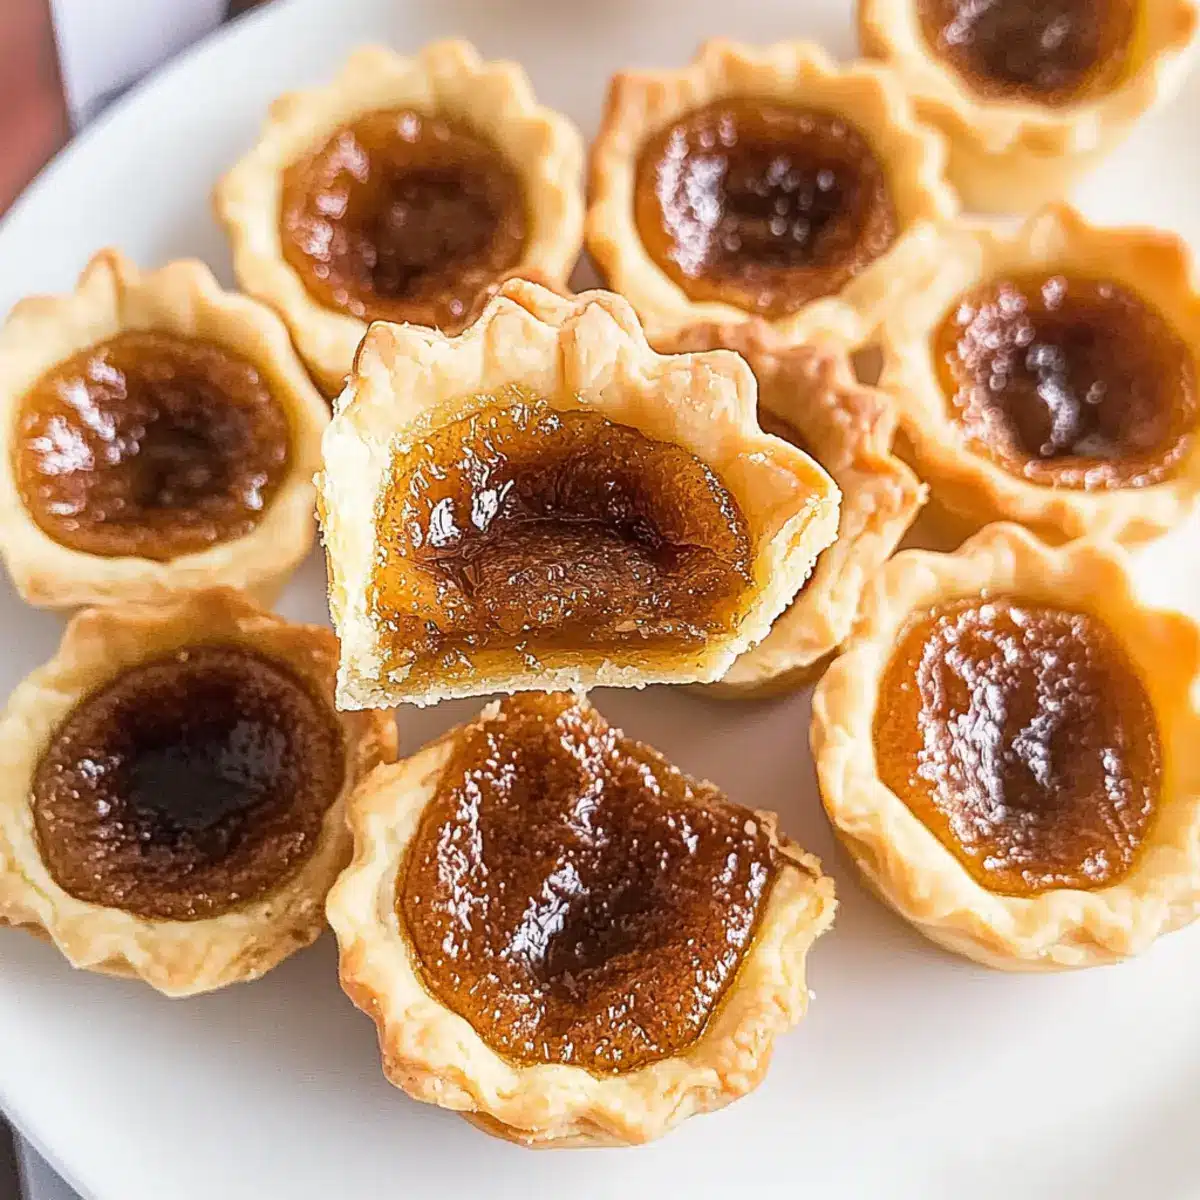
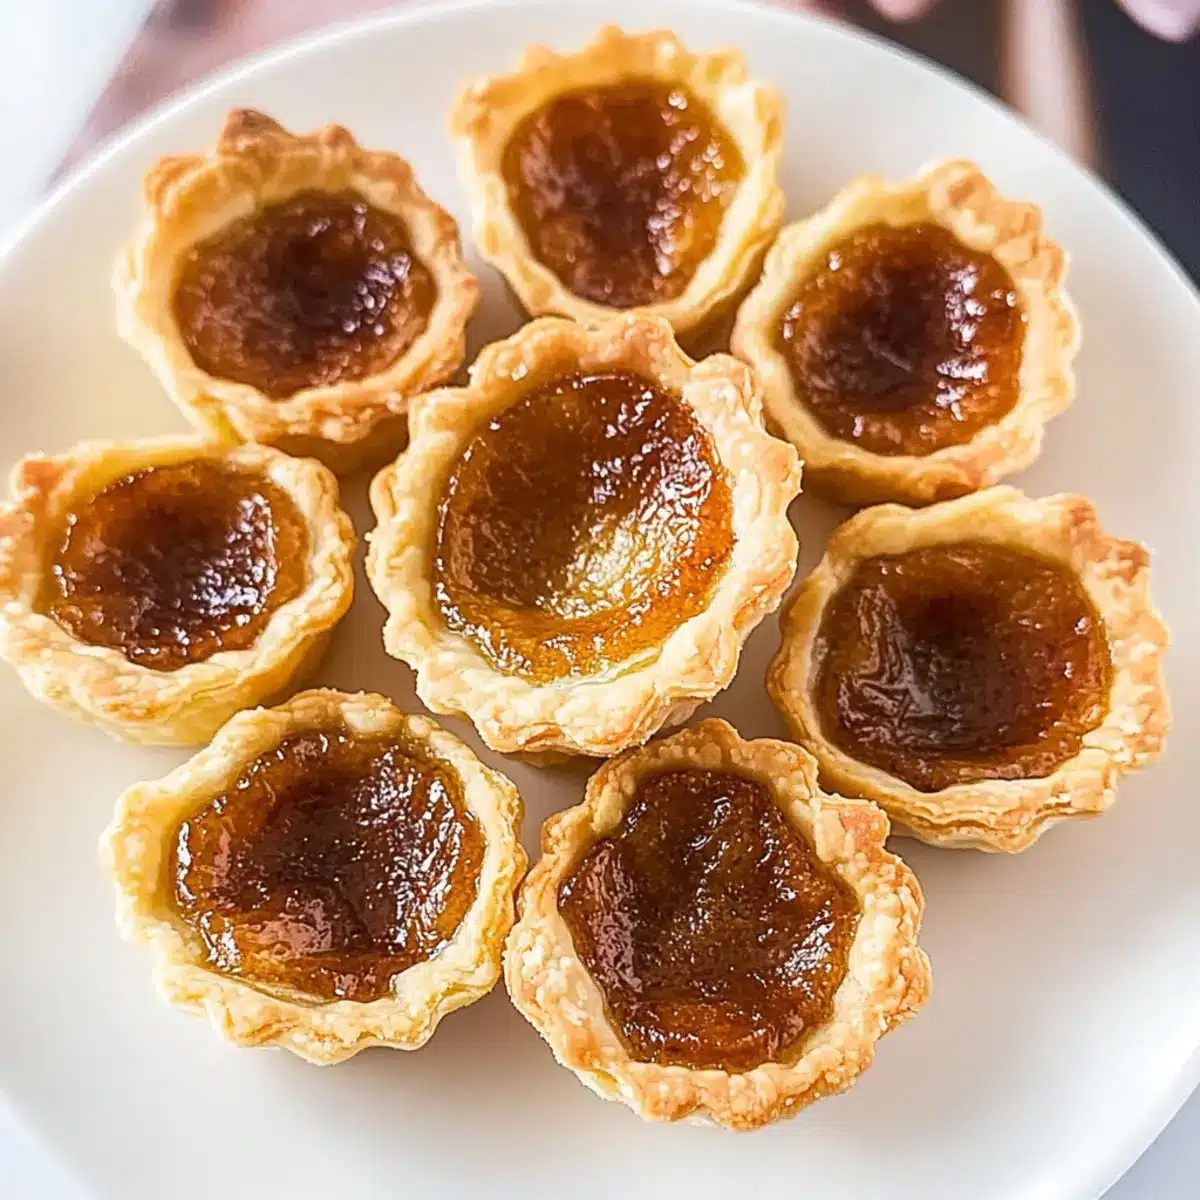
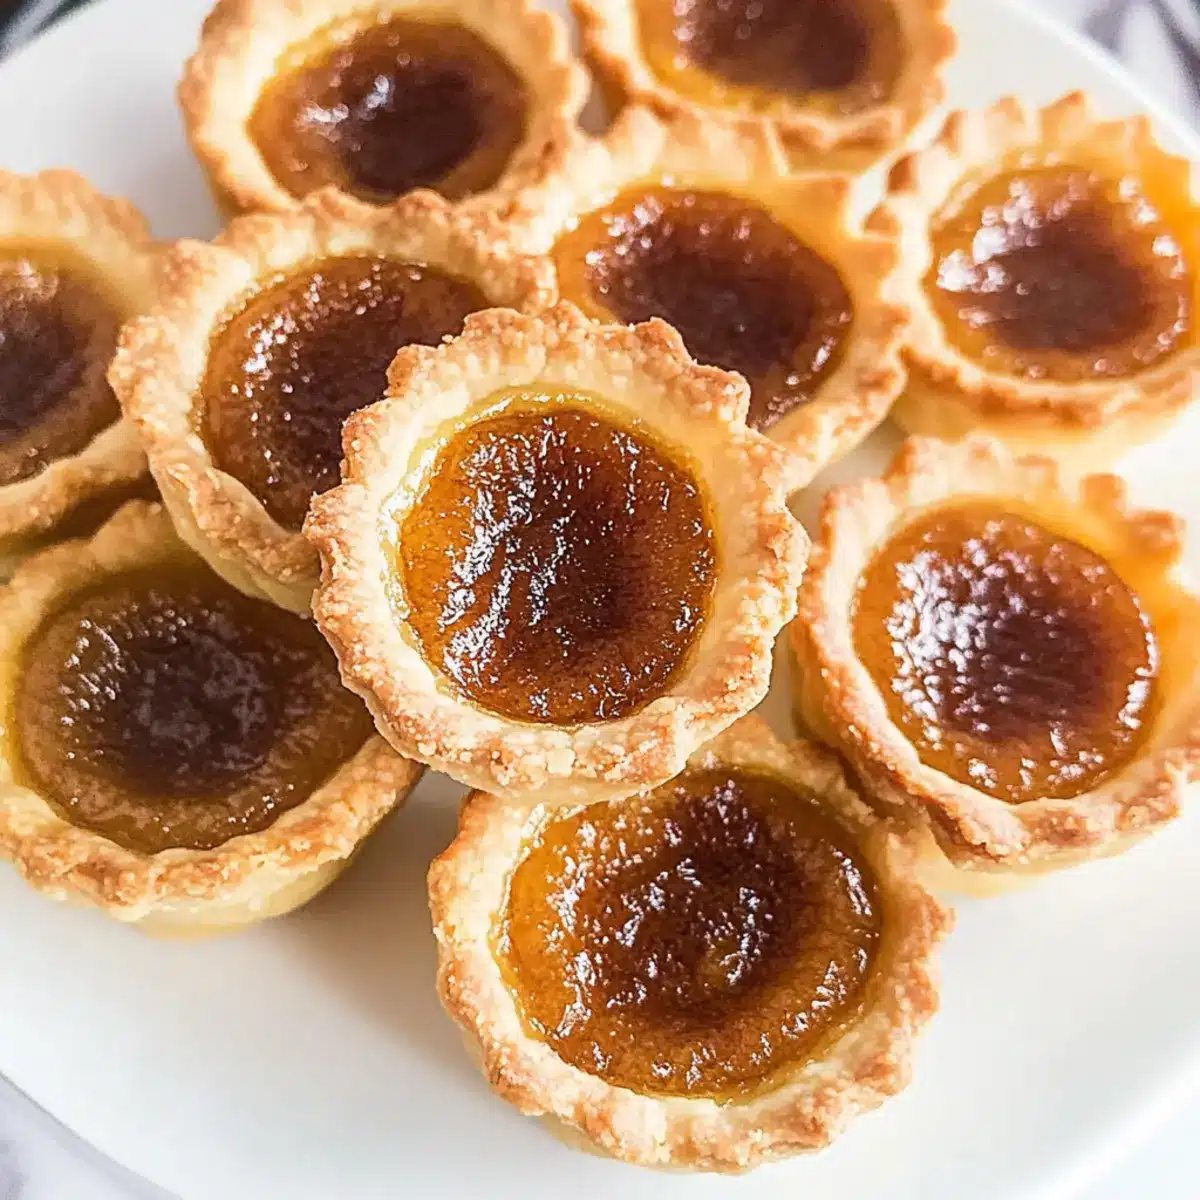
As I sat down with a steaming cup of coffee, I couldn’t help but be transported to the cozy tea rooms of Canada, where the aroma of freshly baked Canadian Butter Tarts fills the air. These delightful little treats, with their ultra-flaky crust and gooey maple filling, are not only a nod to my love for homemade desserts but also incredibly simple to whip up. Perfect for impressing guests or satisfying a sweet tooth after dinner, this butter tart recipe is a fabulous way to embrace your culinary passion without spending hours in the kitchen. Whether you choose to keep it classic or add a twist with chocolate chips or nuts, each bite offers a comforting blend of sweetness that will warm your heart. Ready to dive into this scrumptious journey of flavors? Let’s bake some magic together!
Why You’ll Crave These Butter Tarts?
Easy to Make: With just a few simple ingredients, you can create the perfect Canadian Butter Tarts in no time. They’re a fantastic option for both novice bakers and seasoned chefs looking for a quick yet impressive dessert.
Customize Your Creation: These tarts offer delightful versatility—feel free to add raisins, nuts, or even chocolate chips! Explore variations that suit your taste, like Maple Glazed Butternut for a side dish or just enjoy them as they are.
Decadent Flavor: The gooey filling, made with maple syrup and brown sugar, delivers a rich sweetness with every bite that will keep you coming back for more. Their inviting aroma is sure to captivate everyone at your table.
Perfect for Any Occasion: Whether it’s a cozy family dessert or a festive gathering, these butter tarts will impress your guests. Serve them with coffee or vanilla ice cream for an extra touch of indulgence.
Crowd-Pleasing Delight: With their flaky crust and luscious filling, these tarts are not just a treat for you but a delight for your family and friends too, ensuring they’re always the star of the dessert table!
Canadian Butter Tarts Ingredients
For the Crust
• All-Purpose Flour – The backbone of the crust; substitute with gluten-free flour for a gluten-free version.
• Sugar – Adds sweetness to the crust; coconut sugar can be used for a lower glycemic option.
• Fine Sea Salt – Enhances the crust’s flavor; regular salt serves as an acceptable substitute.
• Unsalted Butter – Ensures the crust’s richness; be sure to use cold butter for a flaky texture.
• Cold Water – Helps bind the dough; keep it icy cold to maintain the dough’s firmness.
For the Filling
• Brown Sugar – Richness and depth of sweetness in the filling; light brown sugar offers a milder flavor.
• Eggs – Contributes to structure and richness; use room temperature eggs for better mixing.
• Maple Syrup – The star ingredient that brings gooey goodness to these Canadian butter tarts; light corn syrup can be substituted if needed.
• Vanilla Extract – Adds delightful aromatic flavor; opt for pure extract over imitation for the best results.
• Fine Sea Salt – Balances sweetness in the filling; ensure you use it to enhance the overall taste.
Optional Add-Ins
• Raisins or Nuts – For additional texture in your butter tarts; try pecans or walnuts for a delightful crunch!
• Chocolate Chips – A sweet twist to the filling; consider using dark or semi-sweet for a richer flavor.
Let’s gather these ingredients and get ready to create some irresistible Canadian Butter Tarts that will leave everyone asking for the recipe!
Step‑by‑Step Instructions for Canadian Butter Tarts
Step 1: Dough Preparation
In a food processor, combine all-purpose flour, sugar, and fine sea salt. Add cold unsalted butter cut into chunks, pulsing until the mixture resembles coarse crumbs. Gradually drizzle in cold water, mixing until the dough just comes together. Shape it into a disc, wrap in plastic, and refrigerate for at least 1 hour to firm up, ensuring a flaky texture for your Canadian Butter Tarts.
Step 2: Rolling and Shaping
On a lightly floured surface, roll out the chilled dough to about 1/8-inch thickness. Use a round cutter to create 15 rounds, then gently press them into the cups of a greased muffin pan. Once all the dough is fitted into the pan, pop it back in the fridge while you prepare the gooey maple filling, helping it to stay firm during baking.
Step 3: Prepare Filling
In a mixing bowl, cream together softened unsalted butter and brown sugar until smooth. Add room temperature eggs one at a time, mixing thoroughly after each addition. Pour in pure maple syrup, fine sea salt, and vanilla extract, stirring until well combined. Let this filling sit for a few minutes to dissolve the sugars, creating the rich, gooey goodness that defines these Canadian Butter Tarts.
Step 4: Assemble Tarts
Remove the muffin pan from the refrigerator and, if desired, place a few raisins or chopped nuts in the bottom of each crust for added texture. Carefully pour the prepared filling into each tart shell, filling them about three-quarters full to prevent overflow. Slide the muffin pan into a preheated oven set to 350°F and bake for 25 minutes, or until the filling is set and lightly browned on top.
Step 5: Cool and Serve
Once baked, remove the Canadian Butter Tarts from the oven and allow them to cool in the pan for about 10 minutes. Carefully transfer the tarts to a wire rack to cool completely, ensuring the gooey filling firms up nicely. Serve these delightful treats warm or at room temperature, and enjoy the rich, sweet flavors that make them a cherished favorite!
Make Ahead Options
These Canadian Butter Tarts are perfect for meal prep, saving you time on busy weeknights! You can prepare the crust dough up to 24 hours in advance; simply wrap it tightly in plastic wrap and refrigerate. If you’d like, you can also mix the filling ingredients and store it in the fridge for up to 3 days. When you’re ready to bake, roll out the chilled dough, press it into your muffin pan, and fill it with the prepared mixture. Just pop them in the oven as directed, and you’ll have delicious, gooey butter tarts that are just as delightful as if you made them on the spot. Enjoy the ease of homemade desserts without the last-minute rush!
Canadian Butter Tarts Variations & Substitutions
Feel free to explore different options that will make these tarts uniquely yours; your creativity will be deliciously rewarded!
-
Gluten-Free: Substitute all-purpose flour with a gluten-free blend for a suitable adaptation. Enjoy the same flaky goodness without gluten!
-
Lower Sugar: Use coconut sugar instead of regular sugar to create a lower glycemic version that still delights the senses. You’ll be amazed at how tasty it becomes!
-
Nutty Delight: Add chopped pecans or walnuts into the filling for a delightful crunch. The nutty flavor complements the gooey center perfectly, creating a satisfying bite.
-
Fruity Twist: Mix in raisins or dried cranberries for a fruity surprise. This addition balances the sweet filling with its tartness, elevating your butter tarts!
-
Chocolate Lovers: Stir in semi-sweet or dark chocolate chips into the filling for a rich and decadent experience. Each bite is bound to excite any choco-holic at your gathering!
-
Maple Syrup Variations: Experiment with different syrups by swapping maple syrup with honey or agave nectar for a unique flavor profile. It’s a sweet surprise that will keep everyone guessing!
-
Adult Version: For a sophisticated flair, add a splash of bourbon to the filling before baking. The warmth of the bourbon harmonizes beautifully with the sweetness of the tarts.
-
Savory Surprise: Try incorporating a dash of sea salt in the filling for that sweet-and-salty contrast, especially when paired with chocolate or caramel. This twist adds depth to each bite!
Feel free to try these variations in combination or alone—they’ll transform your Canadian Butter Tarts into something truly special! While you’re at it, don’t forget to check out my delicious Oatmeal Peanut Butter or even Peanut Butter Spider treats for more inspiration!
What to Serve with Canadian Butter Tarts?
Indulging in the sweet delights of a buttery, gooey tart is just the beginning—here’s how to create a full, delectable meal!
-
Fresh Fruit Salad: A medley of seasonal fruits brings a refreshing contrast, cutting through the sweetness of the tarts while offering vibrant colors.
-
Classic Vanilla Ice Cream: Creamy and cool, a scoop of vanilla ice cream complements the warm, rich filling, bringing out its sweet notes beautifully.
-
Whipped Cream: Light and airy, a dollop of freshly whipped cream adds a luscious touch, enhancing the buttery goodness of each tart.
-
Coffee or Espresso: The deep, roasted flavors of coffee balance the sweetness, while a splash of milk or cream creates a cozy drink for pairing.
A cup of freshly brewed coffee will enhance the dessert experience, providing a warm embrace against the sugary delight. Nestled together, the combination is just heartwarming!
-
Maple Glazed Pecans: Adding a crunchy twist, these pecans echo the maple flavor in the tarts while introducing a satisfying texture.
-
Chocolate Drizzle: For the ultimate indulgence, a light drizzle of chocolate over your tarts can elevate them to a baker’s masterpiece that is visually stunning and scrumptious.
-
Spiced Hot Chocolate: A rich, spiced hot chocolate mirrors the gooeyness of the tarts, creating a decadent duo that satisfies the sweet tooth in the coziest way.
-
Bourbon Caramel Sauce: Drizzling a bit of this sauce introduces a rich, warm flavor that pairs beautifully with the tarts, perfect for a grown-up treat.
-
Cheese Board: A selection of creamy and sharp cheeses provides a sophisticated touch, balancing the sweetness of the tarts with savory notes.
How to Store and Freeze Canadian Butter Tarts
Room Temperature: Store your butter tarts in an airtight container at room temperature for up to 2 days, keeping them soft and gooey for a quick treat.
Fridge: If you want to enjoy your tarts for longer, refrigerate them in an airtight container for up to 1 week to maintain their rich flavors.
Freezer: For longer storage, wrap the Canadian Butter Tarts tightly and place them in a freezer-safe container. They can be frozen for up to 2 months while retaining their delicious gooeyness.
Reheating: To enjoy your tarts warm, heat them in a preheated oven at 350°F for about 10 minutes, allowing the filling to become delightful again!
Expert Tips for Canadian Butter Tarts
-
Soft Brown Sugar: Ensure your brown sugar is soft to prevent lumps in the filling; if it’s hard, microwave it briefly to soften.
-
Avoid Overfilling: To prevent overflow, fill the tart shells only three-quarters full; the filling will puff up while baking.
-
Chill the Dough: Always refrigerate the dough after mixing. This step is crucial for achieving a light, flaky crust in your butter tarts.
-
Measuring with Care: Use a glass measuring cup with a spout for easy pouring of the filling into each tart shell, minimizing mess.
-
Sticky Dough Fix: If the dough becomes sticky while rolling, sprinkle a little flour on the surface to help manage it without overworking the dough.
Canadian Butter Tarts Recipe FAQs
How do I select the best ingredients for my butter tarts?
Choosing the right ingredients can elevate your Canadian Butter Tarts! Use fresh, cold unsalted butter for a flaky crust and ensure your brown sugar is soft to integrate smoothly into the filling. For the maple syrup, opt for pure maple syrup for the best flavor; avoid imitation syrup for an authentic taste.
What is the best way to store Canadian Butter Tarts?
Store your butter tarts in an airtight container at room temperature for up to 2 days to keep them soft and gooey. If you want them to last longer, refrigerate them for up to 1 week. Just make sure to seal them well to prevent drying out!
Can I freeze my butter tarts, and how?
Absolutely! For freezing, allow the tarts to cool completely, then wrap each one individually in plastic wrap. Place them in a freezer-safe container or a heavy-duty zip-top bag. They can be frozen for up to 2 months. To enjoy them, simply thaw in the fridge overnight, then reheat in a preheated oven at 350°F for about 10 minutes until warmed through.
What if my dough is too sticky to roll out?
If your dough is sticky, don’t worry! Lightly flour your work surface and sprinkle a tiny bit of flour on the dough itself as you roll it out. Work quickly and avoid over-manipulating the dough, as this can cause it to become tough rather than flaky.
Are there any dietary considerations for making these tarts?
When making Canadian Butter Tarts, consider any dietary needs. You can substitute all-purpose flour with gluten-free flour to accommodate gluten sensitivities. Keep in mind that these tarts contain eggs, sugar, and butter, so they may not be suitable for vegans. For nut allergies, you can skip adding nuts and chocolate chips, as these ingredients are optional.
Delicious Canadian Butter Tarts with Gooey Maple Filling
Ingredients
Equipment
Method
- In a food processor, combine all-purpose flour, sugar, and fine sea salt. Add cold unsalted butter and pulse until it resembles coarse crumbs. Gradually drizzle in cold water until the dough comes together. Shape into a disc, wrap in plastic, and refrigerate for 1 hour.
- On a floured surface, roll out the chilled dough to 1/8-inch thickness. Use a round cutter to make 15 rounds and press them into a greased muffin pan. Refrigerate again while preparing filling.
- Cream together softened unsalted butter and brown sugar until smooth. Add eggs one at a time, mixing thoroughly. Pour in maple syrup, fine sea salt, and vanilla extract, stirring until well combined. Let sit for a few minutes.
- Add optional raisins or nuts to each crust. Carefully pour the filling into each tart shell, filling three-quarters full. Bake in a preheated oven at 350°F for 25 minutes or until filling is set.
- Remove tarts from oven and cool in the pan for 10 minutes. Transfer to a wire rack to cool completely. Serve warm or at room temperature.