
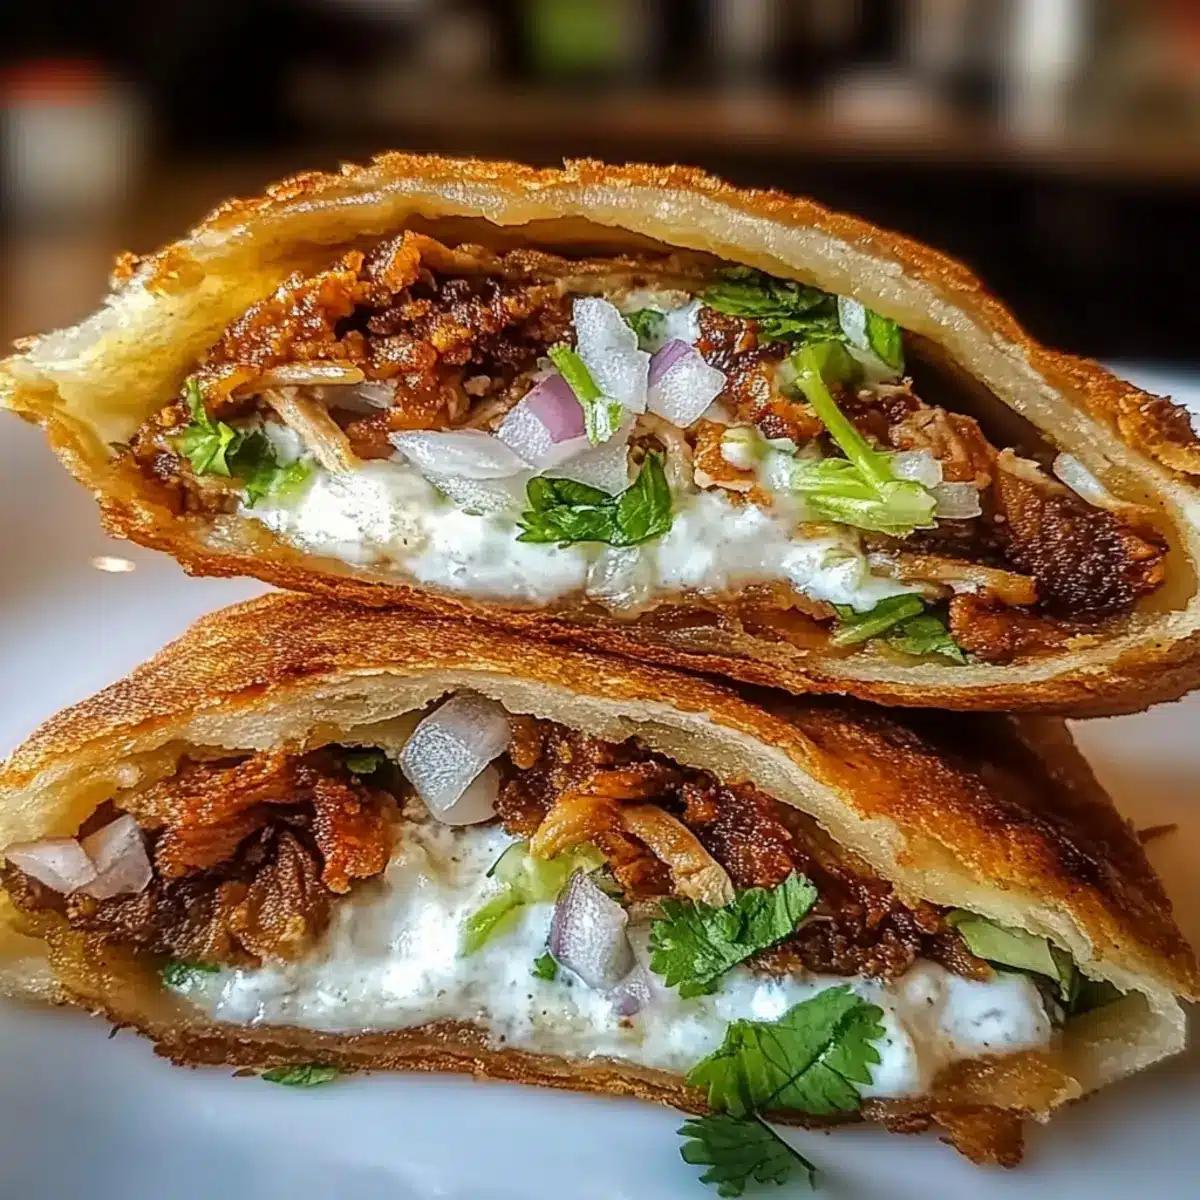
As I flipped through my well-loved recipe book, the tantalizing scent of warm tortillas and savory fillings wafted through my mind, igniting a craving for authentic Mexican gorditas. These crispy, pocket delights are more than just food; they are a canvas for creativity and tradition. With their golden-brown exterior and soft, fluffy interior, these gorditas are ready to be filled with everything from shredded chicken to roasted vegetables, making the cooking process both fun and customizable. In under an hour, you’ll have a dish that not only satisfies your hunger but also brings people together for a beautiful home-cooked meal. Plus, with gluten-free and vegetarian options on the table, there’s something for everyone to enjoy. Are you ready to dive into the delicious world of making gorditas and impress your loved ones with this delightful twist on comfort food?
Why Are Mexican Gorditas So Special?
Authenticity: These gorditas deliver genuine Mexican flavor, bringing a taste of traditional cuisine right into your kitchen.
Versatility: You can customize fillings, accommodating meat lovers, vegetarians, or those needing gluten-free options.
Quick & Easy: Ready in under an hour, making them perfect for busy weeknights or spontaneous gatherings with friends.
Crowd Pleaser: Topped with zesty salsas, creamy avocados, or hearty proteins, they appeal to everyone’s taste buds.
Cultural Connection: Each bite connects you to rich Mexican heritage, encouraging family gatherings and shared joy around the table.
To elevate your meal, pair these delicious gorditas with some refreshing Iced Mexican Coffee or a side of Mexican Chicken Rice.
Authentic Mexican Gorditas Ingredients
Here’s everything you’ll need to create your own delicious batch of authentic Mexican gorditas!
For the Dough
• Masa Harina – Base of the gorditas; provides structure and a wonderful corn flavor.
• Warm Water – Hydrates masa harina to form dough; essential for achieving the right texture.
• Salt – Enhances flavor; don’t skip this crucial ingredient!
• Vegetable Oil – Used for frying; ensures a crispy texture; can be substituted with canola oil if preferred.
For the Filling
• Shredded Chicken or Beef – Main filling protein; add heartiness to your gorditas; consider refried beans for a vegetarian option.
• Diced Onion – Adds aromatic flavor and crunch; can swap for scallions for a milder profile.
• Fresh Cilantro – Brings fresh, herbal notes; optional for those who may not enjoy cilantro’s strong flavor.
For Serving
• Lime Wedges – Enhance the gorditas with a splash of acidity for a fresh kick.
Get ready to enjoy the warmth and comfort of these authentic Mexican gorditas; they’re a true crowd-pleaser!
Step‑by‑Step Instructions for Authentic Mexican Gorditas
Step 1: Make the Dough
In a mixing bowl, combine 2 cups of masa harina with a pinch of salt and gradually add 1 to 1.5 cups of warm water. Use your hands to knead the mixture until a smooth, cohesive dough forms, which should take about 5 minutes. Let the dough rest for at least 30 minutes to improve the texture and prevent cracking.
Step 2: Shape the Gorditas
Once the dough has rested, divide it into 8-12 equal pieces. Roll each piece into a ball, then flatten it into a disc about 1/4 inch thick. The discs should be uniform to ensure even cooking, making them look delightful and ready for filling once fried.
Step 3: Heat the Oil
In a large skillet, pour in 1-2 inches of vegetable oil and heat it to 350°F (175°C). Use a kitchen thermometer for accuracy, as the right temperature is crucial for achieving that golden-brown crispy exterior. Be patient while the oil heats, ensuring it’s hot enough before frying the gorditas.
Step 4: Fry the Gorditas
Carefully place the discs into the hot oil, ensuring not to overcrowd the skillet. Fry each gordita for 2-3 minutes on one side until they turn golden-brown, then flip and repeat on the other side. The sizzling sound will signal they’re cooking perfectly.
Step 5: Drain the Gorditas
Once fried, remove the gorditas from the skillet using a slotted spoon and let them drain on a plate lined with paper towels. This helps absorb any excess oil, leaving you with a crispy and flavorful shell that’s perfect for the fillings ahead.
Step 6: Create the Pockets
After allowing the gorditas to cool slightly, use a sharp knife to carefully cut a pocket into each fried gordita. Be gentle to avoid tearing the crispy exterior, ensuring a perfect vessel for your delicious fillings, whether it’s shredded chicken, beef, or veggies.
Step 7: Fill and Serve
Fill each gordita pocket with your desired toppings, such as seasoned shredded chicken, diced onions, and fresh cilantro. Serve them warm with lime wedges on the side for that extra pop of flavor, offering your family and friends a delightful taste of authentic Mexican gorditas.
Expert Tips for Authentic Mexican Gorditas
- Dough Resting Time: Let your dough rest for at least 30 minutes. This crucial step prevents cracking and improves texture, leading to better authentic Mexican gorditas.
- Uniform Discs: Roll each dough piece into uniform discs to ensure even frying. Uneven shapes can lead to inconsistent cooking, leaving some parts soggy.
- Oil Temperature: Use a kitchen thermometer to maintain oil at 350°F. This ensures your gorditas have that perfect crispy exterior without being greasy.
- Poking Holes: Poke a few holes in each disc before frying. This allows steam to escape and prevents excessive puffing, resulting in a perfect pocket.
- Creative Fillings: Don’t hesitate to get creative with fillings! Experiment with different proteins or vegetarian options like spiced beans for a delicious twist.
- Serving Suggestions: Enhance your meal experience by serving these gorditas with fresh lime wedges for that zesty pop of flavor, elevating your authentic Mexican gorditas.
What to Serve with Authentic Mexican Gorditas
Elevate your dining experience with delightful sides and drinks that complement these crispy pocket delights beautifully.
-
Creamy Guacamole: This rich dip adds a refreshing, creamy texture, balancing the crispy gorditas with a smooth flavor burst.
-
Zesty Salsa Verde: The tangy brightness of salsa verde enhances the flavors of the gorditas, providing a perfect contrast to the warm fillings.
-
Refried Beans: Creamy and hearty, refried beans make a comforting addition, providing a traditional touch that pairs delightfully with every bite.
-
Mexican Street Corn (Elote): Grilled corn slathered in creamy sauce offers a sweet and savory note that complements the spice of the gorditas beautifully.
-
Ensalada de Nopalitos: This refreshing cactus salad adds a vibrant crunch with its tangy lime dressing, perfect for balancing the richness of the gorditas.
-
Mango Margaritas: Cool and fruity, these cocktails are a festive complement that enhances the celebratory feel of your Mexican meal.
-
Chips and Salsa: Crunchy tortilla chips with fresh salsa are an addictive starter, paving the way for the main event—your delicious gorditas.
Consider these options to create a harmonious and memorable meal that celebrates the joy of cooking and sharing great food with loved ones.
Authentic Mexican Gorditas Variations
Feel free to explore these delicious twists on your authentic Mexican gorditas to tantalize your taste buds!
-
Gluten-Free: Substitute masa harina with gluten-free corn flour for a delightful twist that everyone can enjoy.
-
Vegetarian Delight: Opt for sautéed veggies or refried beans instead of meat fillings to create a hearty vegetarian version.
-
Spicy Heat: Add diced jalapeños to your filling for an exciting kick that elevates the flavor profile and awakens your senses.
-
Cheesy Goodness: Sprinkle some shredded cheese inside the pockets before frying for a melty, gooey experience that warms the soul.
-
Sweet & Savory: Experiment with dessert-style gorditas by filling them with cinnamon-sugar dusted fruits like sliced strawberries or peaches, drizzling with honey or agave nectar on top.
-
Herb Infusion: Mix freshly chopped herbs like cilantro or parsley into the dough for added aroma and flavor, making each bite even more delightful.
-
Unique Sauces: Pair your gorditas with zesty sauces like spicy crema, tangy salsa verde, or avocado crema for an extra layer of flavor that brings your dish to life.
-
Variety of Toppings: Create a toppings bar with sour cream, guacamole, pickled onions, or crumbled queso fresco, allowing everyone to customize their gorditas just the way they like!
As you explore these variations, don’t forget to pair your gorditas with refreshing beverages like an invigorating Iced Mexican Coffee or a savory scoop of Mexican Chicken Rice for a complete meal that everyone will cherish!
Make Ahead Options
These Authentic Mexican Gorditas are a fantastic choice for meal prep! You can prepare the dough up to 3 days in advance by mixing the masa harina and salt with warm water, then storing it in an airtight container in the refrigerator. This helps the dough develop flavor while keeping it fresh. If you prefer, you can also shape the gordita discs ahead of time and refrigerate them, ensuring they are layered with parchment paper to prevent sticking. When you’re ready to fry, simply heat the oil to 350°F and cook each disc for about 2-3 minutes on each side until golden-brown. With these make ahead tips, you’ll enjoy the same delicious, crispy pockets with minimal effort during busy weeknights!
How to Store and Freeze Authentic Mexican Gorditas
Fridge: Store leftover gorditas in an airtight container for up to 3 days. Allow them to cool completely before sealing to prevent sogginess.
Freezer: Place cooled gorditas in a zip-top freezer bag, separating layers with parchment paper, and freeze for up to 3 months.
Reheating: To restore crispness, reheat gorditas in a 350°F oven for 5-7 minutes. You can also heat them in a skillet over medium heat for a few minutes on each side.
Make-Ahead Tip: Prepare the dough in advance and refrigerate it for up to 3 days before frying. This allows for easy, quick cooking later!
Authentic Mexican Gorditas Recipe FAQs
How do I choose the right masa harina for my gorditas?
Absolutely! Look for masa harina that is labeled specifically for tortillas or gorditas. It should have a fine texture and be a vibrant yellow color, indicating freshness. Brands like Maseca are widely trusted, but don’t hesitate to explore local alternatives. If you’re opting for a gluten-free version, select a gluten-free corn flour designed for tamales or tortillas.
How should I store leftover gorditas?
You can store your leftover gorditas in an airtight container in the refrigerator for up to 3 days. Ensure they have cooled completely before sealing to keep them from becoming soggy. Reheat them in a 350°F oven for 5-7 minutes to restore their delightful crispness, making them taste almost as good as freshly fried!
Can I freeze gorditas for later use?
Yes, indeed! To freeze your authentic Mexican gorditas, allow them to cool completely first. Place them in a zip-top freezer bag, separating layers with parchment paper to prevent sticking. They can be stored in the freezer for up to 3 months. When you’re ready to enjoy them, just reheat in a 350°F oven for 5-7 minutes or use a skillet over medium heat.
What can I do if my gorditas puff up too much during frying?
No worries here! If your gorditas puff excessively, make sure to poke a few holes in each disc before frying. This allows steam to escape and prevents the pockets from over-inflating. Also, ensure the oil temperature is correctly set at 350°F using a thermometer. This way, you’ll achieve that perfect crispy exterior without too much puff.
Are there any dietary considerations for making gorditas?
Very much so! For those with gluten sensitivities, simply use a gluten-free masa harina or corn flour. Additionally, if anyone in your household has a cilantro allergy, you can easily omit the fresh cilantro and instead use another herb like parsley for added freshness without the risk. There are options available for vegetarians as well—substituting fillings with seasoned sautéed vegetables or refried beans is an excellent alternative!
Can I prepare the dough in advance?
Absolutely! Preparing the dough ahead of time is a fantastic idea. You can refrigerate the dough for up to 3 days before frying. Just make sure it’s wrapped tightly to prevent it from drying out. When you’re ready to enjoy your gorditas, let the dough sit at room temperature for about 15-20 minutes before shaping and frying for the best texture!
Authentic Mexican Gorditas: Fluffy, Crispy Flavor-Packed Delights
Ingredients
Equipment
Method
- In a mixing bowl, combine masa harina with salt and add warm water gradually. Knead until smooth and let it rest for 30 minutes.
- Divide the dough into 8-12 pieces, roll into balls, then flatten into discs about 1/4 inch thick.
- Heat vegetable oil in a skillet to 350°F (175°C) using a thermometer.
- Fry the discs in the hot oil for 2-3 minutes on each side until golden-brown.
- Remove gorditas with a slotted spoon and allow them to drain on paper towels.
- Cut a pocket into each fried gordita without tearing the exterior.
- Fill each pocket with desired toppings and serve warm with lime wedges.