
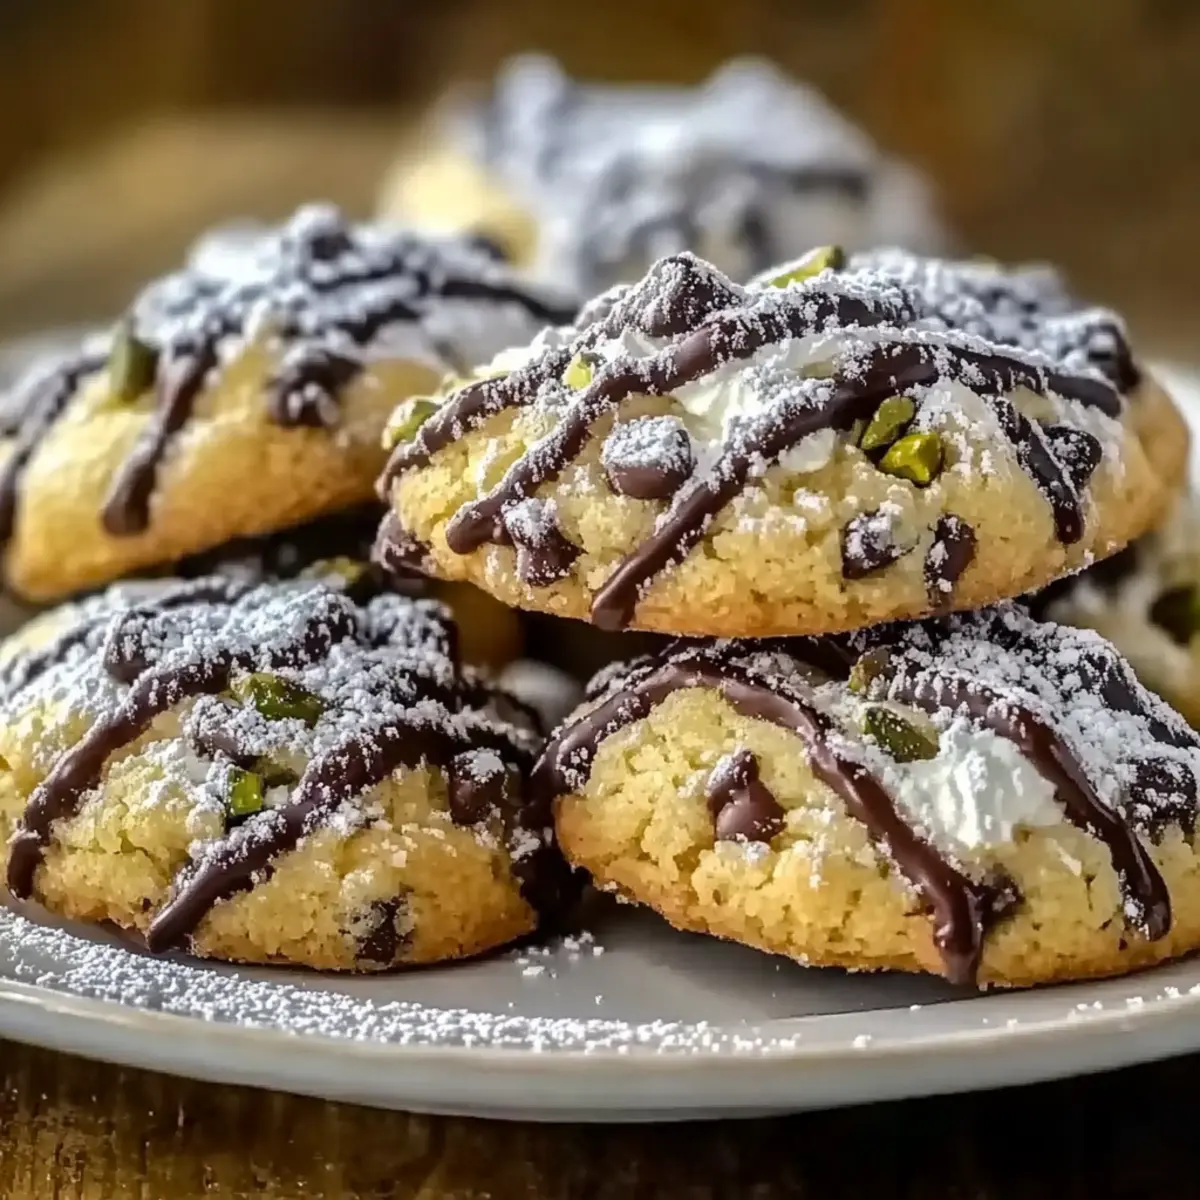
As I rolled out the delicate dough, the aroma of freshly zested lemon and warm vanilla filled the air, making it impossible to resist. These Traditional Cannoli Cookies are an ode to Italian tradition, marrying a crispy exterior with a rich, creamy filling of ricotta, chocolate chips, and crunchy pistachios. Not only are they a delightful treat that transforms any gathering into a festive occasion, but they also bring the comforting warmth of family kitchens right to your home, without the fuss of a complicated recipe. Perfect for a cozy afternoon snack or a show-stopping dessert, these cookies are both easy to make and indulgent. Ready to embark on this sweet journey with me and create a batch of these delightful Cannoli Cookies?

Why are Cannoli Cookies so irresistible?
Simplicity at Its Finest: You’ll love how easy it is to whip up these Cannoli Cookies, making them perfect for bakers of all skill levels.
Authentic Flavor: The delightful blend of ricotta, lemon zest, and chocolate brings a genuinely Italian taste right to your kitchen.
Versatile Treat: Enjoy them as a sweet snack, elegant dessert, or even a festive addition to gatherings; they effortlessly adapt to any occasion.
Texture Delight: This recipe ensures a crispy exterior balanced with a creamy, melt-in-your-mouth filling that satisfies every craving.
Crowd-Pleasing Appeal: Serve them on a platter paired with coffee or dessert wine, just like I do with my Panko Cookies Chewy, and watch them vanish!
Cannoli Cookies Ingredients
• The perfect blend for Italian delight!
-
For the Dough
-
All-Purpose Flour – Provides structure and a light texture; substitute with gluten-free flour for a variation.
-
Granulated Sugar – Adds sweetness to the dough; feel free to reduce the amount for a less sweet treat.
-
Ricotta Cheese – Used in both the dough (¼ cup) and filling (¼ cup) for moisture and flavor; mascarpone makes a rich substitute.
-
Large Egg – Binds the ingredients together and adds richness; for a vegan option, use a flax egg instead.
-
Vanilla Extract – Imparts a warm, sweet aroma; opt for pure vanilla for the best flavor.
-
Lemon Zest – Adds a vibrant, citrusy flavor that brightens the dough; orange zest provides a lovely twist when substituted.
-
For the Filling
-
Mini Chocolate Chips – Offers sweetness and a delightful contrast in texture; dark chocolate chips work beautifully too.
-
Chopped Pistachios – Contributes crunch and nuttiness; to enhance their flavor, toast them lightly or swap with almonds.
-
For Dusting
-
Powdered Sugar – Sprinkled on top before serving for an attractive finish; it adds a touch of sweetness to each bite.
With these ingredients ready, you’re just a step away from baking the most delectable Cannoli Cookies that will transport your loved ones straight to Italy!
Step‑by‑Step Instructions for Cannoli Cookies
Step 1: Preheat the Oven
Begin by preheating your oven to 350°F (175°C). This ensures that your Cannoli Cookies will bake evenly and develop that perfect golden color. While the oven is warming up, gather your baking sheets and line them with parchment paper to prevent the cookies from sticking.
Step 2: Mix Dry Ingredients
In a large mixing bowl, whisk together the all-purpose flour and granulated sugar until well combined. This only takes a minute or two but is crucial for ensuring even sweetness throughout your Cannoli Cookies. Set this flour mixture aside, letting it rest while you prepare the wet ingredients.
Step 3: Combine Wet Ingredients
In a separate bowl, mix ¼ cup of ricotta cheese, a large egg, vanilla extract, and fresh lemon zest until smooth and creamy. Whisking vigorously will help incorporate air, leading to a lighter cookie texture. The fragrant aroma of lemon and vanilla will surely entice you as you prepare the filling!
Step 4: Form the Dough
Gradually add the flour mixture to the wet ingredients, stirring gently until a soft dough forms. Aim for a smooth consistency; avoid overmixing to keep your Cannoli Cookies tender and delicious. Once combined, cover the dough with plastic wrap or a kitchen towel, allowing it to rest for 30 minutes to relax the gluten.
Step 5: Prepare for Rolling
After the dough has rested, lightly dust a clean surface with flour and roll it out to about ¼ inch thick. Use a rolling pin for an even thickness, ensuring all areas are uniform. The dough should be pliable without sticking; you might see a lovely sheen on its surface as you work.
Step 6: Cut the Dough
Using a sharp knife or pizza cutter, cut the rolled-out dough into rectangles measuring 2×3 inches. Aim for clean edges that will help seal the Cannoli Cookies beautifully when folded. Lay the cut pieces on your prepared baking sheets, leaving some space between them.
Step 7: Prepare the Filling
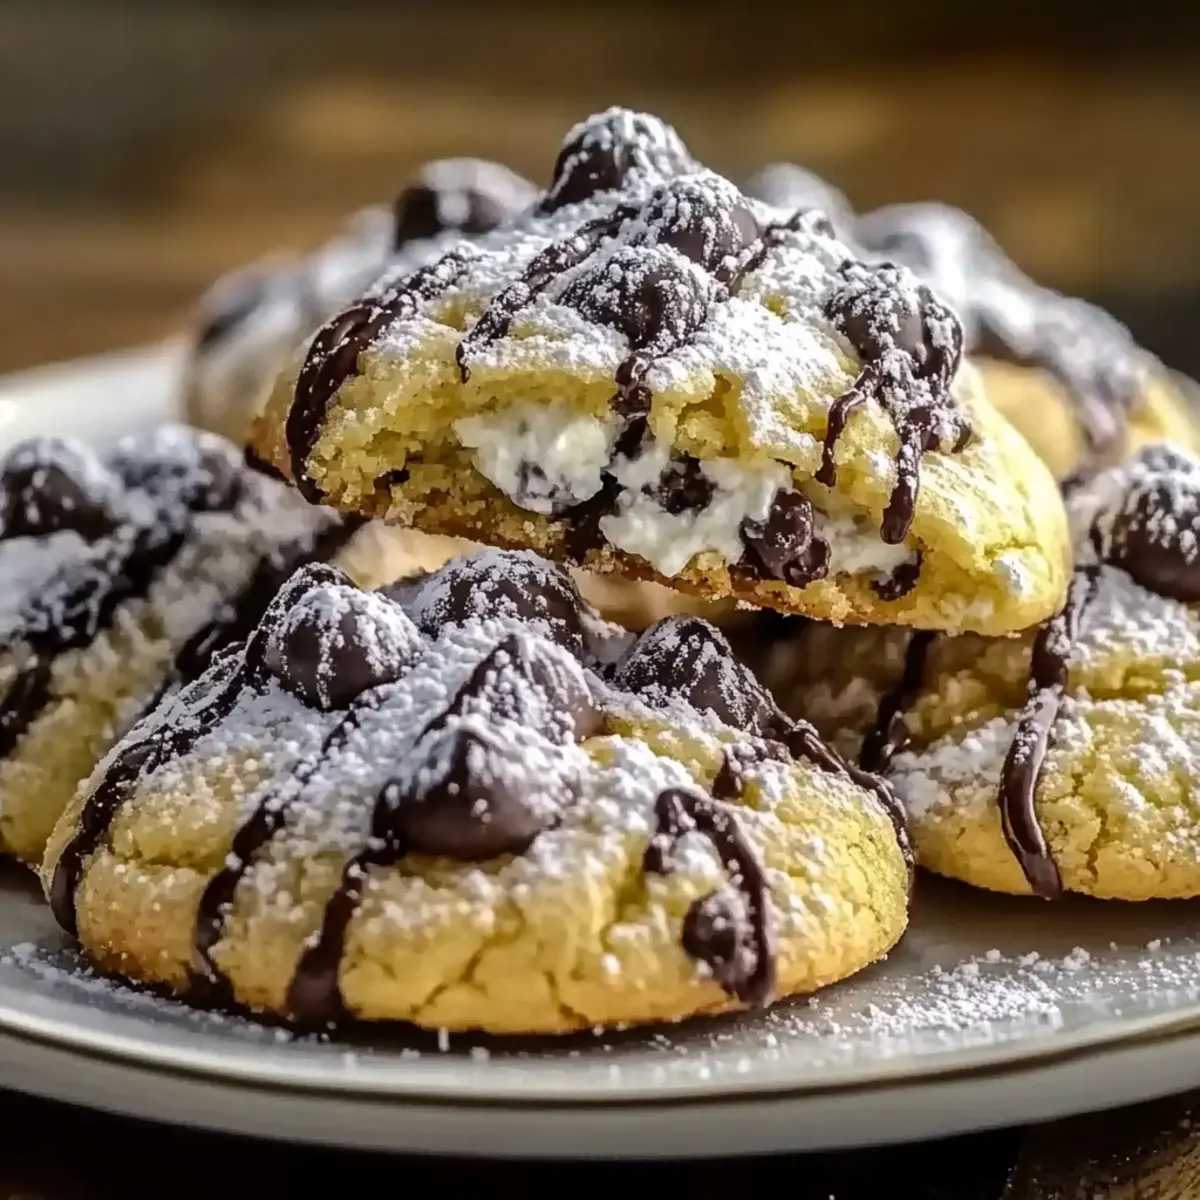
In a smaller bowl, mix the remaining ¼ cup of ricotta with mini chocolate chips and chopped pistachios until well combined. This mixture should be creamy with bits of crunchy nuts and sweet chocolate, reminiscent of classic Cannoli filling. Spoon a generous but controlled amount onto the center of each rectangular piece of dough.
Step 8: Fold and Seal
Gently fold each dough rectangle over the filling, pinching the edges securely to seal the cookies. Ensure that the edges are tightly pressed together to prevent any filling from leaking during baking. The shape should resemble a small pocket, inviting and ready for a flavorful crunch.
Step 9: Bake the Cookies
Place the filled cookies in your preheated oven and bake for 15 to 18 minutes, or until they turn a lovely golden-brown color. Keep a close eye towards the last few minutes to avoid over-baking; the aroma will fill your kitchen with an enticing scent of sweetness.
Step 10: Cool and Dust
Once baked, allow the Cannoli Cookies to cool on the baking sheets for a few minutes before carefully transferring them to a wire rack. This cooling process helps them set completely. Before serving, dust each cookie lightly with powdered sugar for a beautiful finish that adds a touch of sweetness.
Step 11: Serve
Present your delightful Cannoli Cookies on a decorative platter, enjoying them fresh and warm. They make the perfect treat for any occasion, bringing a taste of Italian tradition right to your table. Be prepared; they will inevitably vanish quickly among family and friends!

What to Serve with Traditional Cannoli Cookies
These delightful cookies pair wonderfully with a variety of complementary dishes that enhance their flavors and textures.
- Espresso Coffee: The rich, bold flavor of espresso complements the sweetness of the Cannoli Cookies, creating a perfect after-dinner treat.
- Vanilla Ice Cream: The creaminess of vanilla ice cream contrasts beautifully with the crispy shell of the cookies, making each bite a refreshing delight.
- Fresh Berries: A medley of strawberries, raspberries, and blueberries adds a burst of freshness, balancing the richness of the cookies with tart notes.
- Chocolate Sauce: Drizzling warm chocolate sauce over the Cannoli Cookies enhances the chocolate chips in the filling, creating an indulgent dessert experience.
- Limoncello: This sweet Italian lemon liqueur offers a bright citrusy flavor that pairs beautifully with the cookies’ lemon zest and creamy filling.
- Pistachio Gelato: The nutty pistachio gelato harmonizes with the chopped pistachios in the cookies, providing a cohesive flavor that is both refreshing and rich.
- Italian Wine: A light, sparkling wine like Prosecco brings a bubbly quality, making it a festive addition to any gathering where Cannoli Cookies are served.
Indulging in these pairings will elevate your Cannoli Cookies to a truly memorable culinary experience!
Expert Tips for Cannoli Cookies
- Room Temperature Ricotta: Ensure the ricotta cheese is at room temperature for easy mixing. This prevents clumps in your Cannoli Cookies filling.
- Gentle Mixing: Avoid overmixing the dough after adding the flour to maintain a tender texture in the cookies.
- Secure Sealing: Make sure to pinch the edges tightly when folding the cookies to avoid any filling leakage during baking.
- Watch the Bake: Keep a close eye on the cookies during the last few minutes of baking to achieve a perfectly golden color without burning.
- Creative Variations: Feel free to experiment with flavored extracts or nuts for unique twists on your Cannoli Cookies.
Cannoli Cookies Variations & Substitutions
Feel free to get creative with these Cannoli Cookies! The possibilities will surely make your taste buds sing with excitement.
- Dairy-Free: Substitute ricotta with cashew cream or a dairy-free cream cheese for a plant-based treat.
- Nut-Free: Skip the pistachios entirely or replace them with sunflower seeds for a deliciously crunchy alternative.
- Cinnamon Twist: Add a teaspoon of cinnamon to the dough for a warm, inviting flavor that complements the filling beautifully.
- Fruit-Infused: Mix in chopped dried fruit like cherries or figs for a lovely fruity contrast to the rich filling. These thoughtful additions will create a memorable taste experience.
- Double Chocolate: Use chocolate dough by adding cocoa powder and dark chocolate chips for a decadent twist that chocolate lovers will adore.
- Spicy Kick: Incorporate a pinch of cayenne or chili powder into the filling for a surprising heat that enhances the overall flavor profile.
- Gluten-Free: Use a 1:1 gluten-free flour blend instead of all-purpose flour for an equally satisfying, gluten-free version.
- Specialty Flavor: Experiment with almond or hazelnut extract instead of vanilla for a unique flavor twist that gives a hint of Italian inspiration.
Feel free to let your imagination run wild with these variations, and for more creative cookie ideas, why not also check out my delicious Cheesecake Stuffed Cookies or the delightful Oreo Cheesecake Cookies?
Make Ahead Options
These Cannoli Cookies are perfect for preparing in advance, allowing you to enjoy their delightful flavors with minimal effort! You can make the dough and refrigerate it up to 24 hours before rolling and cutting. Alternatively, prepare the filling (ricotta, chocolate chips, and pistachios) and store it in an airtight container in the fridge for up to 3 days. When you’re ready to serve, simply roll out the chilled dough, stuff it with the pre-made filling, and bake as directed. This two-step process not only saves time but ensures your Cannoli Cookies are just as delicious, providing the same fresh, crispy texture and rich filling. Enjoy the convenience without compromising on flavor!
How to Store and Freeze Cannoli Cookies
Room Temperature: Store Cannoli Cookies in an airtight container at room temperature for up to 3 days to maintain their crispy texture and fresh flavors.
Fridge: For longer freshness, refrigerate in an airtight container for up to one week, allowing them to soften slightly as they chill.
Freezer: Freeze Cannoli Cookies in a single layer on a baking sheet before transferring to a freezer bag; they can be stored for up to one month.
Reheating: To enjoy warm cookies, simply reheat in the oven at 350°F (175°C) for 5-10 minutes, bringing back their delightful crispiness without sacrificing the creamy filling.
Cannoli Cookies Recipe FAQs
How do I choose the right ricotta cheese for my Cannoli Cookies?
Absolutely! When selecting ricotta cheese, look for one that’s creamy with a smooth texture. I recommend choosing whole milk ricotta for the best flavor and richness in your filling. Avoid any that appear watery or grainy, as they won’t yield the same delicious consistency in your Cannoli Cookies.
What’s the best way to store leftover Cannoli Cookies?
For fresh Cannoli Cookies, store them in an airtight container at room temperature for up to 3 days. If you want to keep them longer, you can refrigerate them for a week. Just know that the cookies might soften slightly in the fridge, but they will still be delightful!
Can I freeze Cannoli Cookies, and if so, how?
Absolutely! To freeze them, first, arrange the assembled Cannoli Cookies in a single layer on a baking sheet and place them in the freezer for about 1-2 hours. Once frozen solid, transfer them to a freezer-safe bag or container. They’ll keep well for up to 3 months. When you’re ready to enjoy them again, simply reheat at 350°F (175°C) for 5-10 minutes until warm and crispy.
Why did my Cannoli Cookies split open during baking?
This can happen if the edges of the cookies aren’t sealed properly. It’s essential to pinch the edges firmly after folding them over to prevent the filling from leaking out. If you experience this issue, check your sealing technique next time to ensure a beautiful, intact cookie!
Are these Cannoli Cookies suitable for those with nut allergies?
Great question! The original recipe includes chopped pistachios, which can be a concern for individuals with nut allergies. To adapt, simply omit the nuts entirely or substitute with sunflower seeds for that desired crunch without the allergens. Enjoying Cannoli Cookies without any worries is key!
Delightful Cannoli Cookies: A Slice of Italian Tradition
Ingredients
Equipment
Method
- Preheat your oven to 350°F (175°C) and line baking sheets with parchment paper.
- In a large mixing bowl, whisk together the flour and sugar until well combined.
- In a separate bowl, mix ¼ cup of ricotta, egg, vanilla, and lemon zest until smooth.
- Gradually add the flour mixture to the wet ingredients, stirring until a soft dough forms.
- Lightly dust a surface with flour and roll out the dough to about ¼ inch thick.
- Cut the dough into rectangles measuring 2x3 inches and place them on prepared baking sheets.
- In a bowl, mix together the remaining ricotta, chocolate chips, and pistachios for the filling.
- Spoon the filling onto the center of each rectangle and fold to seal.
- Bake for 15 to 18 minutes until golden brown, keeping an eye on them.
- Allow cookies to cool on the baking sheets, then dust with powdered sugar before serving.
- Serve warm on a decorative platter.