
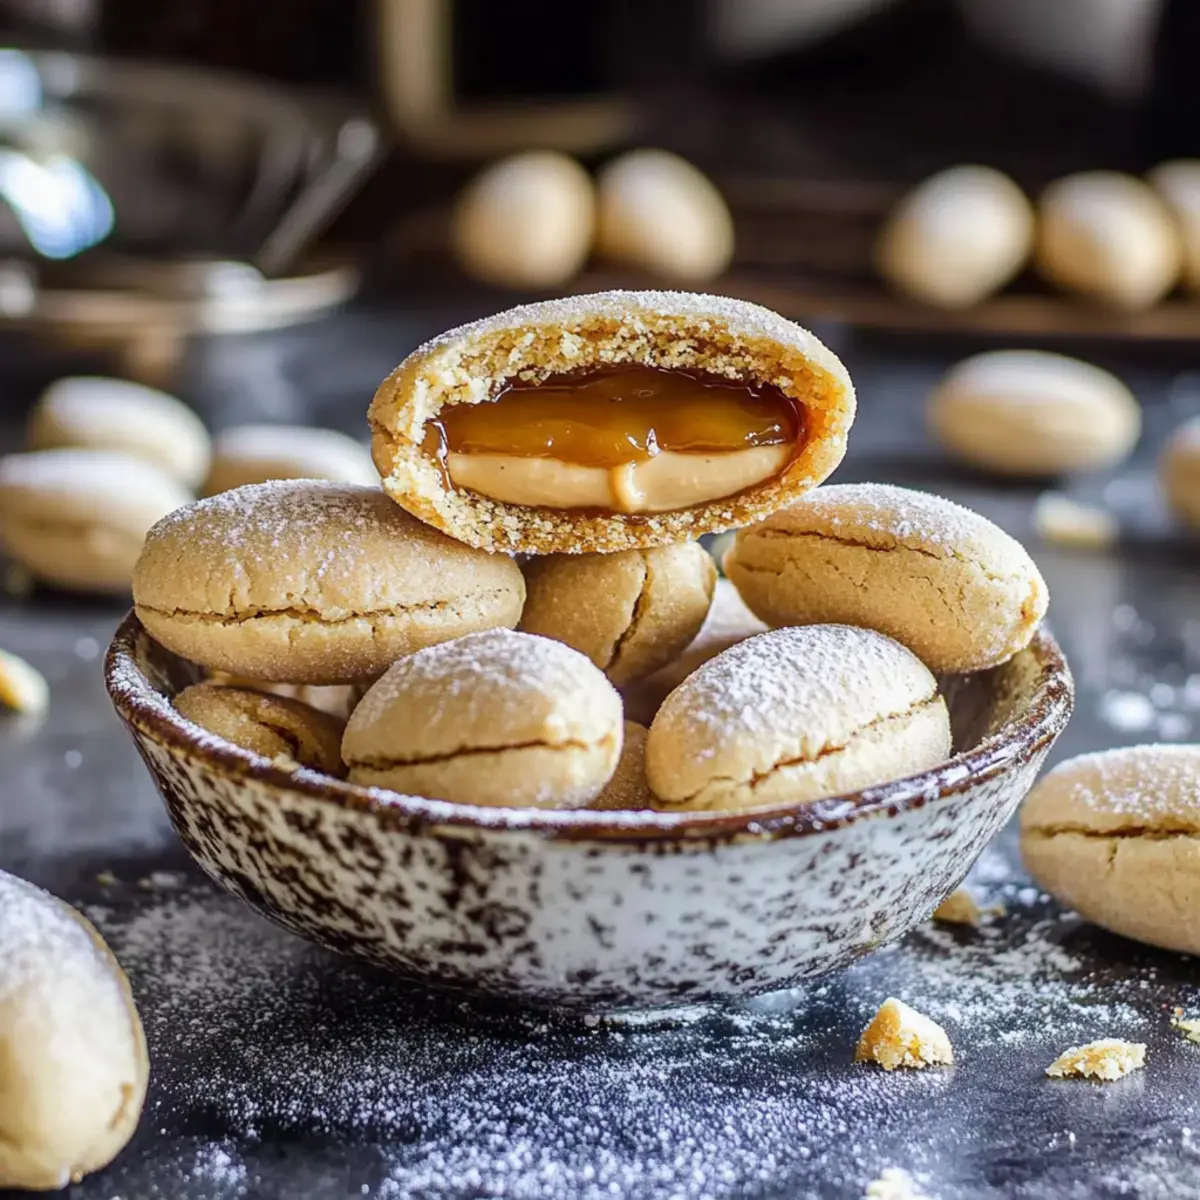
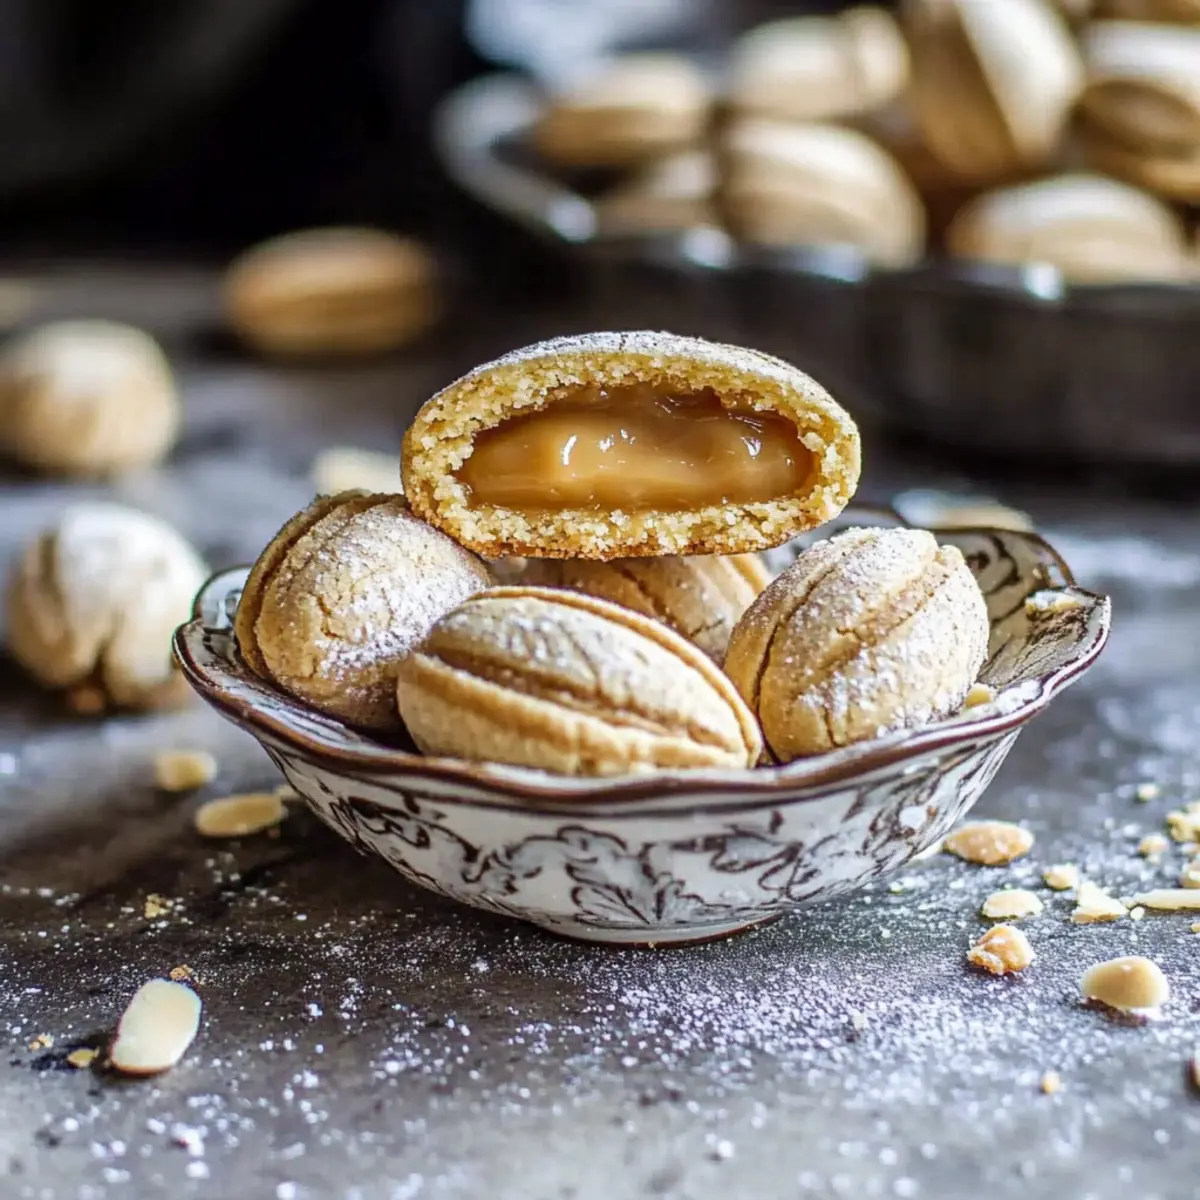
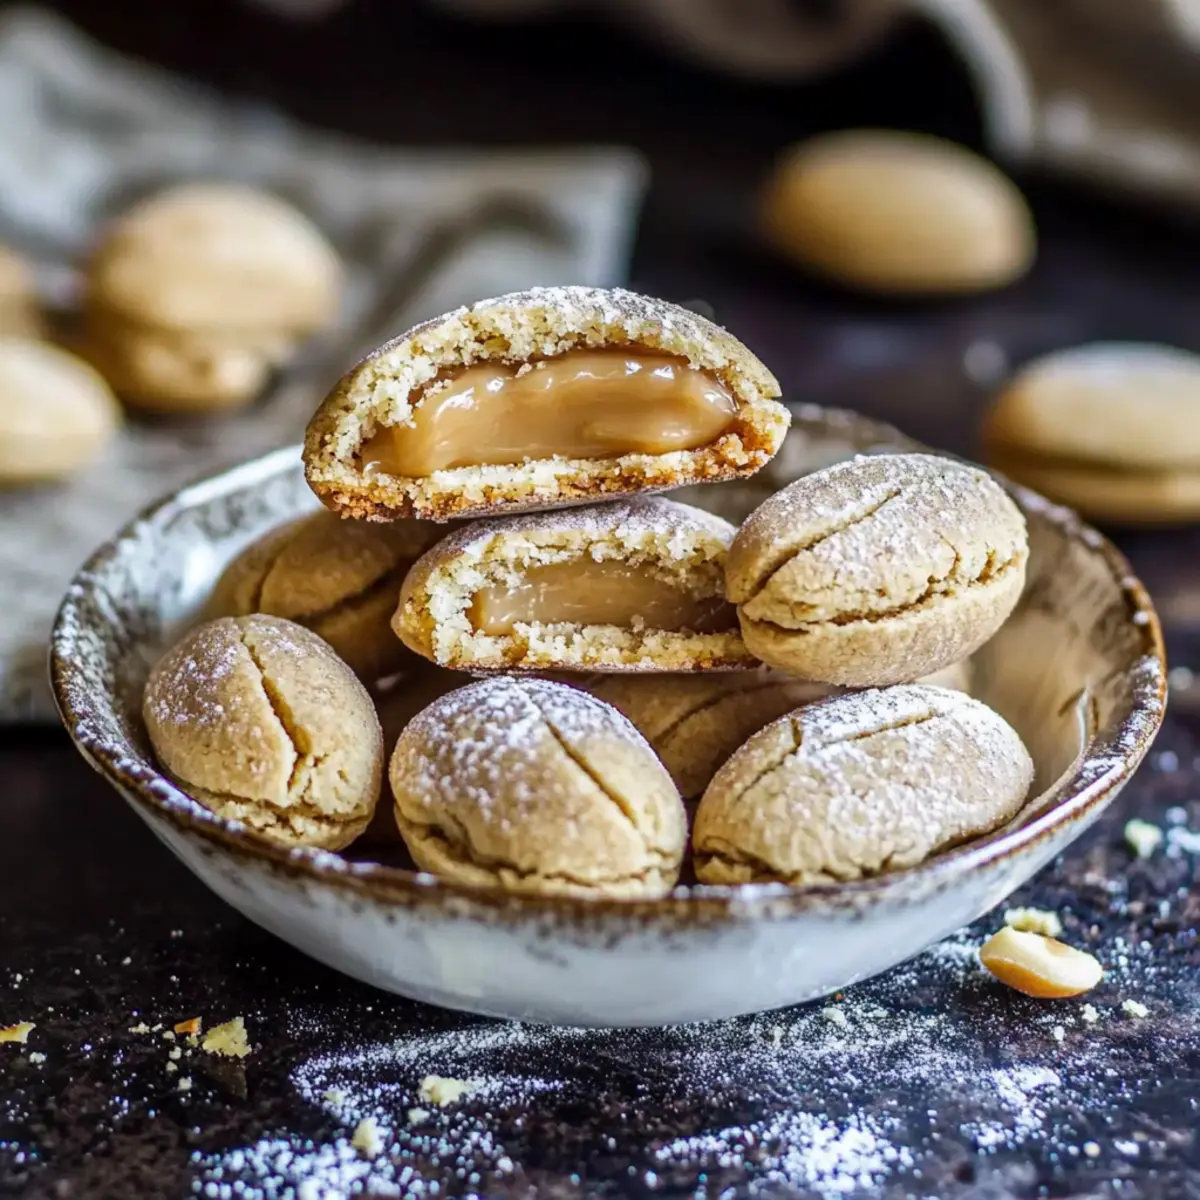
As I sifted flour for my latest baking adventure, I stumbled upon an old family recipe that spans generations—Oreshki, or Walnut Cookies. These delightful little treats combine the comfort of crumbly, buttery dough with a luscious, creamy dulce de leche filling, forming the perfect pairing for cozy afternoons or festive gatherings. What I love most about these cookies is not only their rich flavor and melt-in-your-mouth texture but also their charming walnut shape that brings a touch of nostalgia to every bite. With quick prep time and freezer-friendly convenience, they’re ideal for busy bakers looking to impress. So, are you ready to dive into this traditional Ukrainian delicacy that’s sure to become a cherished staple in your home? Let’s get started!
Why Are Oreshki Cookies So Irresistible?
Uniquely Delicious: These Oreshki cookies boast a rich, buttery flavor that’s truly unforgettable, thanks to their creamy dulce de leche filling which melts in your mouth.
Quick and Easy: With straightforward instructions, even novice bakers can whip them up in no time, making homemade treats accessible for everyone.
Versatile Variations: You can easily experiment with fillings like chocolate ganache or fruit preserves to suit your taste buds, ensuring a delightful surprise every time.
Perfect for Sharing: Their charming walnut shape makes them a showstopper on holiday dessert trays, sure to impress family and friends at your next gathering.
Make Ahead and Store: Easily freezable, these cookies can be baked in advance, saving you time without sacrificing flavor or freshness!
Walnut Cookies Ingredients
For the Dough
- Unsalted Butter – Provides rich flavor and tender texture; feel free to substitute with margarine.
- Margarine – Helps achieve a moist, soft cookie; can be replaced with additional butter, but texture may vary.
- All-Purpose Flour – Essential for structure; ensure it’s properly measured to avoid a sticky dough.
- Sugar – Adds sweetness and promotes browning; stick with granulated sugar for the best results.
- Large Eggs – Binds all ingredients together and adds moisture; don’t skip this ingredient for optimum texture.
- Mayonnaise – Contributes moisture for a tender texture; you may swap it for yogurt or sour cream, which will slightly change the flavor.
- Baking Powder – Provides lightness and airiness; make sure it’s fresh for the best rise.
For the Filling
- Dulce de Leche – A sweet, creamy filling that contrasts delightfully with the dough; alternatively, try chocolate ganache or nut butters for different flavors.
Get ready to savor these melt-in-your-mouth Walnut Cookies aka Oreshki, as they bring warmth and joy to every festive occasion!
Step‑by‑Step Instructions for Walnut Cookies aka Oreshki
Step 1: Prepare the Dry Ingredients
In a large mixing bowl, sift together 2 cups of all-purpose flour and 1 cup of granulated sugar to ensure even distribution and eliminate lumps. This step is crucial for the texture of your Walnut Cookies aka Oreshki, so take your time. Set aside the bowl while you prepare the wet ingredients.
Step 2: Cream the Butters
Using a handheld mixer, combine ½ cup of unsalted butter and ½ cup of margarine in a separate bowl. Beat until the mixture is creamy and light in color, about 2-3 minutes. Be careful not to over-mix; you want a smooth consistency that will blend well with your dry mixture.
Step 3: Mix in the Wet Ingredients
Make a well in the center of the flour mixture and add 2 large eggs, 3 tablespoons of mayonnaise, and 1 teaspoon of baking powder. Mix these ingredients until a soft, slightly sticky dough forms, aiming for a cohesive blend of flavors. If the dough feels too sticky, chill it in the refrigerator for 15 minutes before proceeding.
Step 4: Mold the Dough
Divide the dough into small pieces, roughly the size of a walnut. Preheat your oreshki mold on the stovetop over medium heat. Lightly grease the mold with non-stick spray if desired. Fill each cavity with dough, pressing it firmly while leaving a bit of space for expansion.
Step 5: Bake the Cookie Shells
Close the oreshki mold and cook for about 1½ to 3 minutes on each side, or until the cookies turn a golden brown color. Check frequently to prevent burning, as heat levels may vary. Once perfectly golden, carefully remove the cookie halves and place them on a cooling rack.
Step 6: Assemble the Cookies
After the cookie shells have cooled completely, trim any excess dough for a neat appearance. Take half of the cooled cookie shells and generously fill them with dulce de leche. Place another half on top of each filled shell to create the classic walnut shape. Gently press to ensure they stick together.
Step 7: Let the Flavors Meld
For the best flavor experience, allow your assembled Walnut Cookies aka Oreshki to sit for at least 1 hour or, ideally, overnight. This resting time lets the creamy filling seep into the cookie dough, enhancing their deliciousness and making each bite even more delightful.
Expert Tips for Walnut Cookies aka Oreshki
- Dough Consistency: Ensure your dough is soft but manageable; if it feels too sticky, chill in the refrigerator before molding to make handling easier.
- Mold Care: Lightly grease the oreshki molds with non-stick spray to avoid sticking; this will enhance the release of your delicate cookies.
- Perfect Bake Time: Monitor cooking time closely; undercooked cookies will be too soft, while overcooked ones will burn easily. Aim for golden brown on each side.
- Flavor Development: Allow filled Walnut Cookies aka Oreshki to rest for at least an hour, but overnight is best; it lets the flavors meld for a richer taste experience.
- Storage Tips: Store cookies in an airtight container to maintain freshness; they can last up to a month in the refrigerator or be frozen for longer storage.
Make Ahead Options
These melt-in-your-mouth Walnut Cookies, aka Oreshki, are perfect for meal prep enthusiasts! You can prepare the cookie shells up to 24 hours in advance; simply bake and allow them to cool completely before storing them in an airtight container at room temperature. The dulce de leche filling can also be made up to 3 days ahead and refrigerated until you’re ready to assemble. When it’s time to serve, just fill the cooled cookies and let them sit for at least an hour, or ideally overnight, to meld the flavors beautifully. By prepping ahead, you’ll have these delightful treats ready to impress your family or guests without any last-minute stress!
What to Serve with Walnut Cookies aka Oreshki
These delightful cookies beckon to be paired with something equally warm and charming for a full experience.
- Freshly Brewed Coffee: The rich, roasted flavors of coffee beautifully complement the buttery sweetness of Oreshki, making every bite a cozy indulgence.
- Herbal Tea: Soft floral notes from herbal teas provide a refreshing contrast, enhancing the cookie’s creamy filling while soothing the palate.
- Vanilla Ice Cream: A scoop of creamy vanilla ice cream alongside the warm cookies creates a delightful textural contrast and a sweet, indulgent treat.
- Fruit Compote: A dollop of tart fruit compote can elevate the sweetness of the cookies, balancing flavors for a more sophisticated dessert experience.
- Chocolate Sauce: A drizzle of warm chocolate sauce adds an extra layer of decadence, turning your Oreshki into an ultra-satisfying dessert.
- Cheese Platter: Pairing Oreshki with creamy cheeses like brie or goat cheese creates a sweet and savory balance, perfect for festive gatherings.
- Sparkling Wine: The effervescence of sparkling wine adds a celebratory touch to your dessert table, enhancing the flavors of the cookies in each bubbly sip.
- Dark Chocolate Ganache: For those who love a rich twist, using chocolate ganache as an additional dip renews your Oreshki, creating an exquisite flavor fusion.
- Lemonade: A glass of chilled lemonade’s zesty brightness can cut through the richness of the cookies, making it an unexpected yet delightful pairing.
Walnut Cookies aka Oreshki Variations
Feel free to get creative with these cookies to suit your taste buds and occasion!
-
Chocolate Twist: Add 2 tablespoons of cocoa powder to the dough for a delicious chocolate version, balancing perfectly with the creamy filling.
-
Fruit-Filled: Swap dulce de leche for fruit preserves like raspberry or apricot for a fresh, tangy surprise inside your cookies!
-
Nutty Additions: Mix in chopped walnuts or pecans into the cookie dough for added crunch and a delightful nutty flavor.
-
Spiced Version: Sprinkle in a pinch of cinnamon or nutmeg to the dough for a warm, cozy twist that evokes the feel of holiday baking.
-
Vegan Alternative: Replace eggs with flaxseed meal mixed with water, and use coconut oil instead of butter or margarine for a vegan version that still tastes incredible.
-
Coffee Infusion: Add a teaspoon of espresso powder to the filling for a coffee-flavored kick, perfect for pairing with your afternoon brew.
-
Cream Cheese Filling: Replace the dulce de leche with a sweetened cream cheese filling for a tangy twist that complements the cookie’s buttery texture. A touch of vanilla will elevate the flavor!
-
Semi-Sweet Delight: Use semi-sweet chocolate chips instead of a filling for an indulgent chocolate-chip treat that will surely become a new family favorite.
By experimenting a little, you can create various flavors that keep the tradition alive and bring joy to your cookie jar. For more delicious cookie ideas, consider trying my Cheesecake Stuffed Cookies or Oreo Cheesecake Cookies. Happy baking!
How to Store and Freeze Walnut Cookies aka Oreshki
Fridge: Keep assembled Walnut Cookies in an airtight container for up to 1 week, allowing flavors to deepen while remaining fresh.
Freezer: For longer storage, freeze unfilled cookie shells for up to 3 months. After cooling, place them in a zip-top bag, ensuring the air is squeezed out to prevent freezer burn.
Reheating: To enjoy from frozen, thaw at room temperature and fill with dulce de leche before serving. For a warm treat, you can reheat the filled cookies in a 300°F (150°C) oven for about 5 minutes.
Make-Ahead: Prepare the dough in advance and store it wrapped in plastic wrap in the fridge for up to 3 days, or freeze it for up to 2 months. This allows you to whip up fresh Walnut Cookies whenever the craving strikes!
Walnut Cookies aka Oreshki Recipe FAQs
How do I choose the right walnuts for my Oreshki cookies?
Look for walnuts that are fresh, with no dark spots or rancid smell. They should be firm and have a rich, buttery aroma. If you can, buy walnuts in bulk from a reliable store rather than pre-packaged, as they tend to stay fresher longer!
How should I store leftover Walnut Cookies aka Oreshki?
Store your cookies in an airtight container at room temperature for up to 1 week. This will keep them fresh while allowing the flavors to deepen. If you prefer, you can refrigerate them for even longer preservation, but be mindful they might lose some of their original texture.
Can I freeze Walnut Cookies aka Oreshki? How?
Absolutely! To freeze your unfilled cookie shells, allow them to cool completely, then place them in a zip-top bag, squeezing out any excess air to prevent freezer burn. They can be stored for up to 3 months. When ready to enjoy, simply thaw them at room temperature, fill them with dulce de leche, and serve!
What if my dough is too sticky to work with?
No worries! If your dough feels too sticky, chill it in the refrigerator for about 15 minutes. This will firm it up and make it easier to handle. You can also add a bit more flour if needed, but be careful not to overdo it, as this could affect the cookie’s texture.
Are Walnut Cookies aka Oreshki suitable for people with nut allergies?
Unfortunately, these cookies contain walnuts, so they are not safe for individuals with nut allergies. If you’re looking for a similar recipe without nuts, consider using sunflower seed butter or chocolate fillings, which would provide a tasty alternative without the allergy concerns.
How long should filled Walnut Cookies sit before serving?
For the best flavor experience, I recommend letting the assembled cookies rest for at least 1 hour before enjoying them. However, if you can wait overnight, that allows the dulce de leche to meld beautifully with the cookie, enhancing each delightful bite even more!

Melt-in-Your-Mouth Walnut Cookies aka Oreshki Delight
Ingredients
Equipment
Method
- In a large mixing bowl, sift together 2 cups of all-purpose flour and 1 cup of granulated sugar to ensure even distribution and eliminate lumps. Set aside.
- In a separate bowl, combine 0.5 cup of unsalted butter and 0.5 cup of margarine using a handheld mixer. Beat until creamy and light in color, about 2-3 minutes.
- Make a well in the center of the flour mixture and add 2 large eggs, 3 tablespoons of mayonnaise, and 1 teaspoon of baking powder. Mix until a soft, slightly sticky dough forms.
- Divide the dough into small pieces, roughly the size of a walnut. Preheat your oreshki mold on the stovetop over medium heat and lightly grease.
- Fill each cavity with dough, pressing it firmly while leaving space for expansion. Close the mold and cook for about 1½ to 3 minutes on each side, until golden brown.
- After cooking, carefully remove the cookie halves and place them on a cooling rack.
- Once cooled, fill half of the cookie shells with dulce de leche and place another half on top to create the walnut shape. Press gently to adhere.
- For best flavor, allow the assembled cookies to sit for at least 1 hour or ideally overnight.