
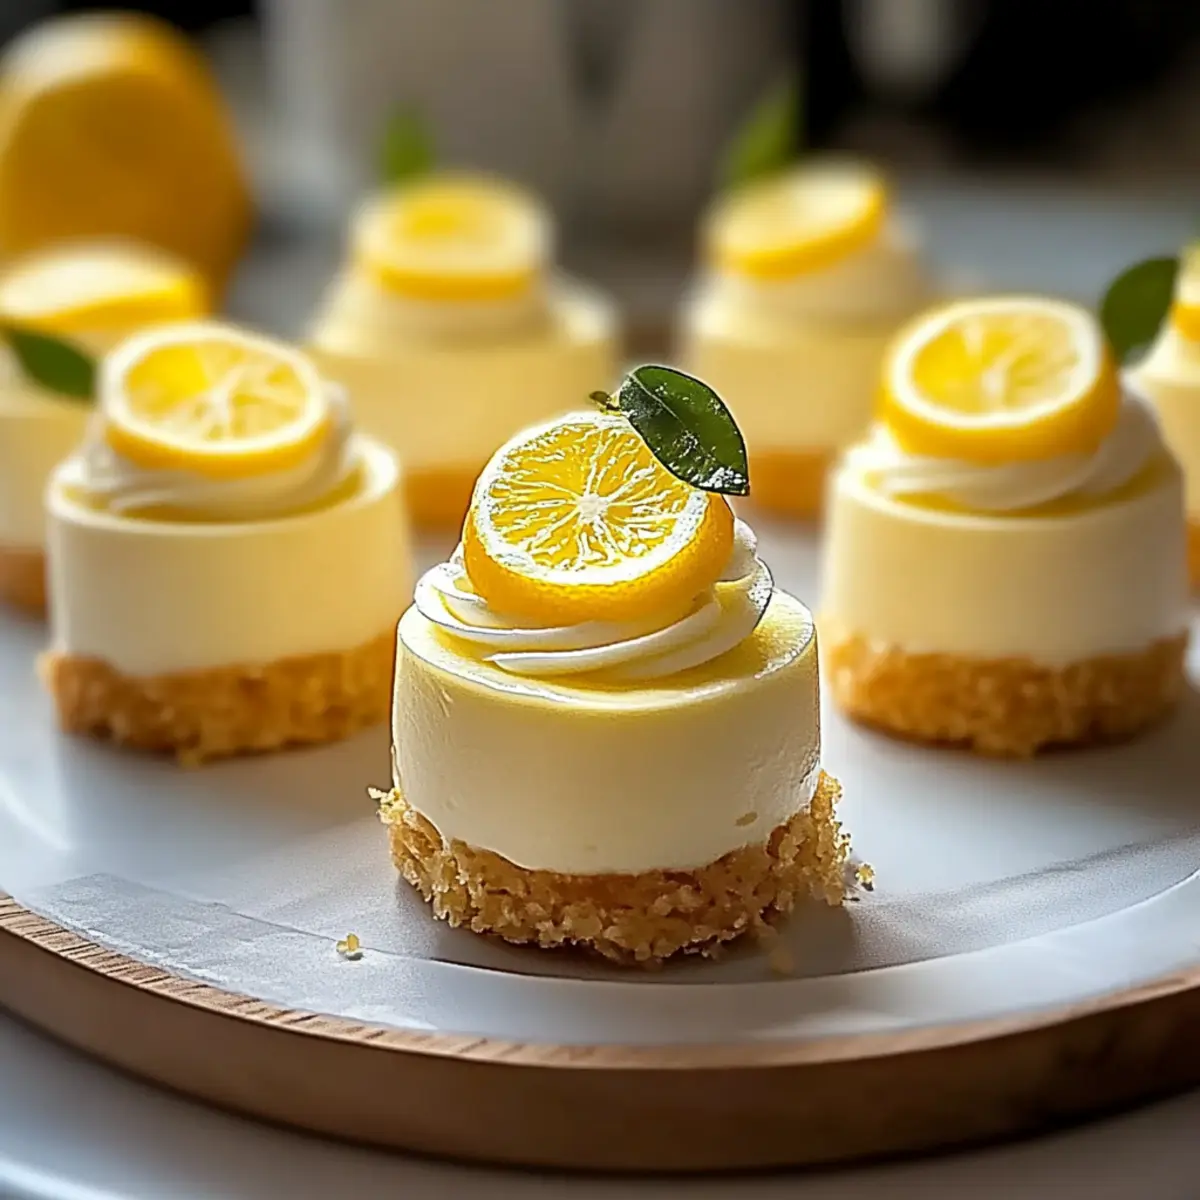
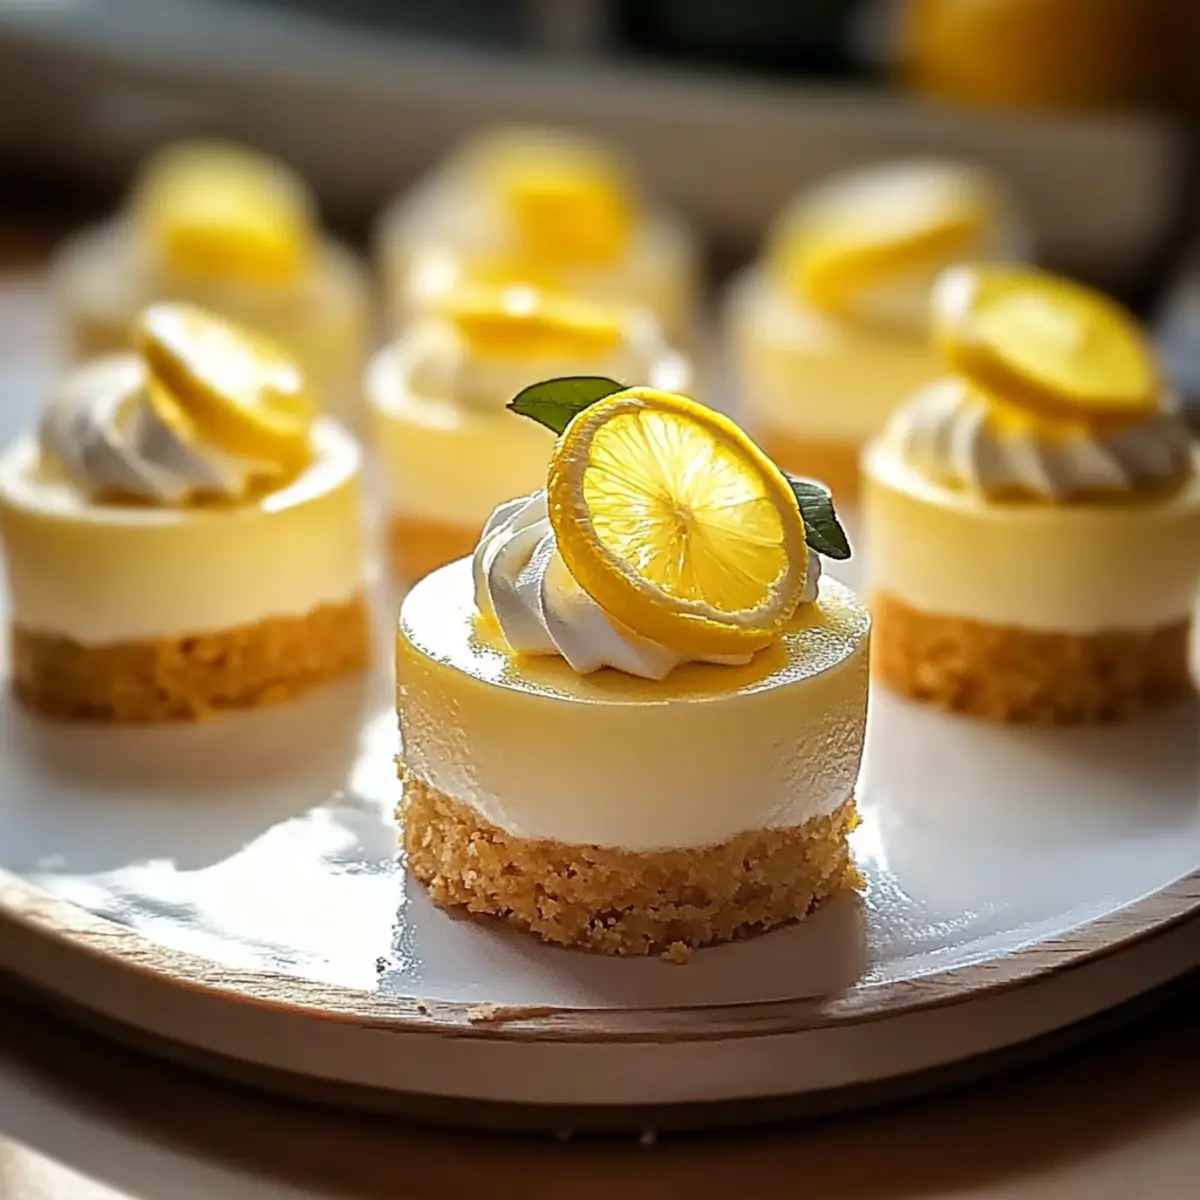
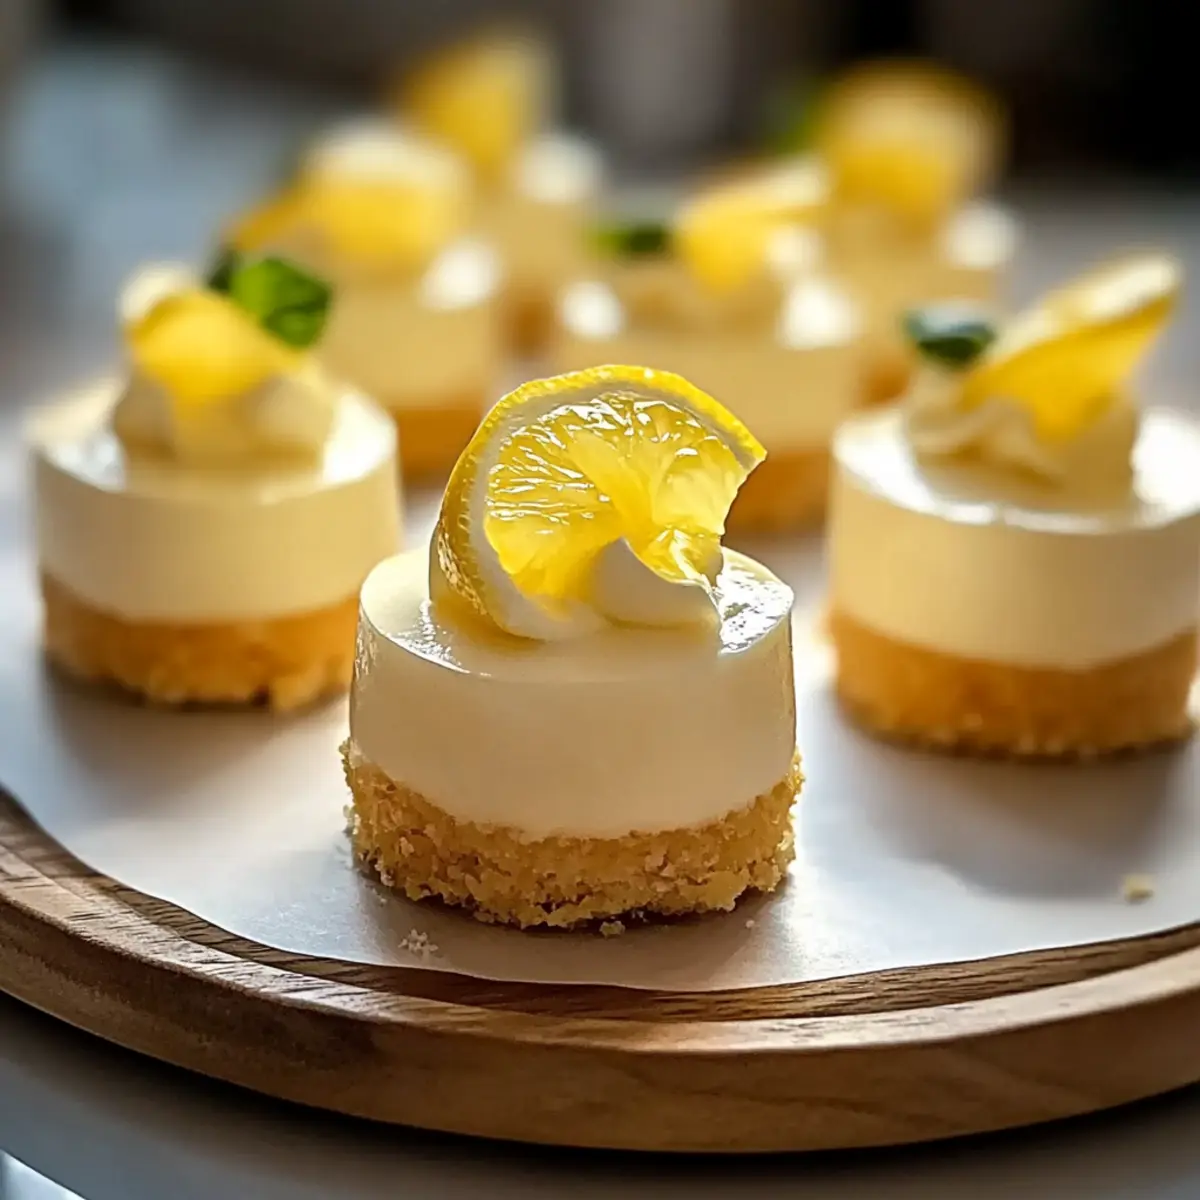
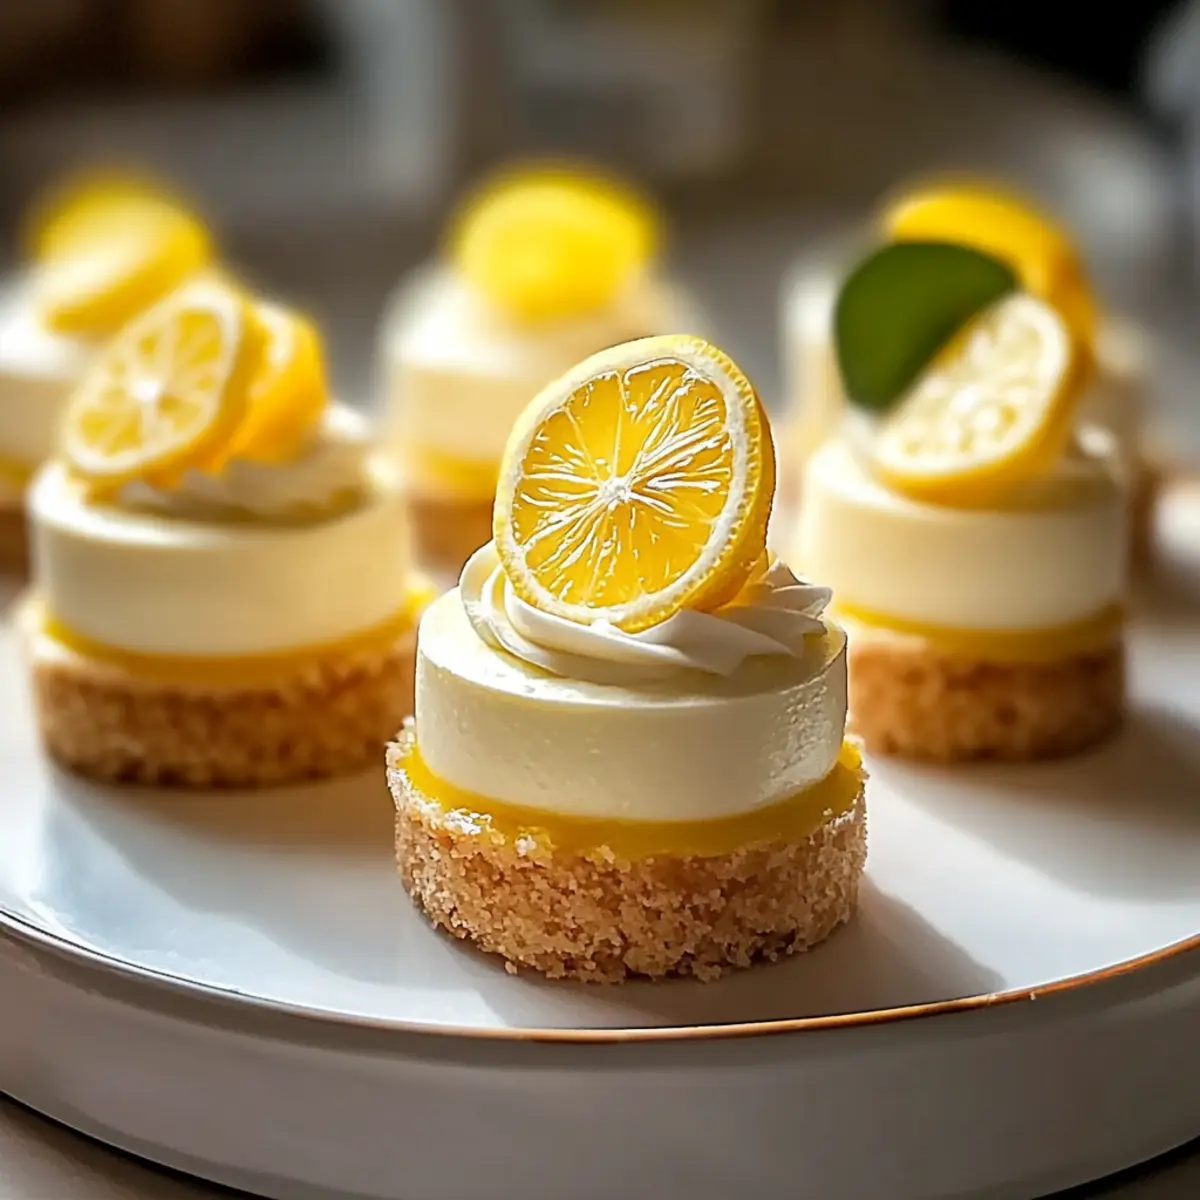
“You won’t believe how easy it is to create these Mini Lemon Cheesecakes—from the first buttery bite to that zesty burst of flavor, they’re a delightful twist on traditional desserts. Perfectly portable and undeniably cute, these little gems are not just an easy dessert option; they can be made ahead of time, allowing you to enjoy stress-free entertaining. With their creamy texture and refreshing lemony goodness, they’re also a hit for those looking to swap heavy sweets for something a bit lighter. Ready to elevate your dessert game and impress your friends? Let’s dive into this simple yet customizable recipe that’s bound to become your new favorite!”
Why Are Mini Lemon Cheesecakes So Irresistible?
Delightfully Tangy: These mini lemon cheesecakes burst with vibrant lemon flavor, offering a refreshing alternative to traditional desserts.
Incredibly Easy: With straightforward steps, even novice bakers can whip these up effortlessly.
Make-Ahead Magic: Prepare them in advance for parties or gatherings, reducing stress when hosting.
Endless Customization: Try variations like substituting lemon with lime or adding fresh berries for a unique twist. Consider pairing with Lemon Ricotta Pancakes for a brunch spread!
Charming Presentation: Their cute, bite-sized form makes them perfect for sharing, ensuring your guests leave with smiles.
Crowd-Pleasing Treat: Whether it’s a family dinner or an elegant party, they’re bound to impress—everyone loves a good cheesecake!
Mini Lemon Cheesecakes Ingredients
• For the Crust
- Graham Cracker Crumbs – Provides a buttery base for your mini lemon cheesecakes. Substitution: Use crushed vanilla wafers or digestive biscuits for variety.
- Melted Butter – Binds the crumb mixture for a firm texture. Note: Ensure butter is fully melted to avoid clumping.
• For the Filling
- Cream Cheese (16 oz) – The star of the filling, adding creaminess and tanginess. Note: Use full-fat cream cheese for the best results; ensure it’s softened to prevent lumps.
- Sugar (½ cup) – Sweetens the filling and balances the tartness of lemon. Substitution: Use powdered sugar for a smoother texture.
- Eggs (2) – Acts as a binder for a silky filling. Note: Beat eggs well before adding to ensure even incorporation.
- Sour Cream (¼ cup) – Enhances richness and a creamy texture. Substitution: Greek yogurt can be used for a lighter option.
- Lemon Juice (2 tbsp) – Provides acidity and the primary lemon flavor for those mini lemon cheesecakes. Note: Freshly squeezed juice is recommended for the best taste.
- Lemon Zest (1 tsp) – Elevates the lemon flavor and aroma. Tip: Use a microplane for finely grating the zest.
- Vanilla Extract (1 tsp) – Complements and adds depth to the filling flavors. Substitution: Use almond extract for a different flavor twist.
Step‑by‑Step Instructions for Mini Lemon Cheesecakes
Step 1: Preheat the Oven
Begin by preheating your oven to 325°F (163°C). This ensures that your mini lemon cheesecakes will bake evenly and develop that perfect creamy texture. While the oven warms up, gather all your ingredients and equipment, including a muffin tin, mixing bowls, and a whisk.
Step 2: Prepare the Crust
In a mixing bowl, combine the graham cracker crumbs and melted butter until well blended. The mixture should resemble wet sand. Press this crumb mixture firmly into the bottoms of the muffin tin cups, creating a flat and even base. Be sure to compact it enough to form a solid crust that holds its shape when removed later.
Step 3: Bake the Crust
Place the muffin tin in the preheated oven and bake for about 8 minutes. You’ll know the crust is done when it turns lightly golden around the edges and feels firm to the touch. Once baked, remove the tin from the oven and allow the crusts to cool slightly while you prepare the filling.
Step 4: Make the Filling
In a large mixing bowl, beat the softened cream cheese and sugar together until the mixture is completely smooth and creamy, about 2-3 minutes. Add the eggs one at a time, mixing well after each addition to ensure a silky consistency. Finally, fold in the sour cream, lemon juice, lemon zest, and vanilla extract until fully incorporated.
Step 5: Fill & Bake
Spoon the creamy filling over the cooled crusts in the muffin tin. Fill each cup nearly to the top, but be careful not to overflow. Place the tin back in the oven and bake for 18-20 minutes. The mini lemon cheesecakes should be just set in the center, with a slight jiggle indicating they will firm up as they cool.
Step 6: Cool the Cheesecakes
After baking, let the mini lemon cheesecakes cool in the tin for about 10 minutes. This resting time helps them stabilize. Afterward, gently transfer them to a wire rack to cool completely. Be careful while removing them to ensure your delightful cheesecakes maintain their shape.
Step 7: Chill Before Serving
Once cooled, refrigerate the mini lemon cheesecakes for at least 2 hours, or until they are thoroughly chilled. This chilling time not only enhances the flavors but also allows the creamy texture to develop beautifully. Serving them cold adds to their refreshing appeal, making each bite even more enjoyable.
Mini Lemon Cheesecakes: Customization Ideas
Embrace your creativity and personalize these delightful mini lemon cheesecakes with these fun variations that elevate flavors and cater to everyone’s taste preferences!
- Fruit Toppings: Add a refreshing touch by topping with fresh berries, such as strawberries or blueberries, or delicate lemon slices. Their burst of color creates an appealing presentation!
- Citrus Swap: Experiment with flavors by using lime or orange juice and zest in place of lemon for a unique twist that still maintains the cheesecakes’ delightful creaminess.
- Chocolate Twist: Stir in some melted chocolate for an indulgent chocolate lemon combination—this fusion offers a surprising richness that many will adore.
- Nutty Crust: Use finely ground nuts in place of some graham cracker crumbs for a gluten-free option and a delightful crunch. Almonds or pecans add a lovely depth of flavor!
- Sweetener Substitution: For a healthier version, try substituting the sugar with honey or maple syrup; just be sure to adjust the amounts to maintain the right texture.
- Mini Servings: For extra presentation flair, bake these cheesecakes in mini mason jars for an adorable dessert that’s perfect for parties. Just layer the crust and filling in each jar!
- Spice It Up: Add a pinch of cinnamon or nutmeg within the filling for a warm note that beautifully contrasts the zesty lemon flavor.
- Dessert Pairing: Consider serving these mini lemon cheesecakes alongside Mini Key Lime Cheesecakes for a delightful dessert spread that features both refreshing flavors!
Whether you’re leaning toward a light and fruity variant or a decadent, chocolatey twist, these ideas encourage you to put your unique spin on a classic dessert!
What to Serve with Mini Lemon Cheesecakes?
Elevate your dessert spread by pairing these delightful treats with complementary flavors and textures that tantalize the taste buds.
- Fresh Berries: Juicy strawberries, blueberries, or raspberries add a burst of color and sweetness that balances the tanginess of the cheesecake. Their natural juiciness enhances each bite!
- Minted Fruit Salad: A mix of seasonal fruits tossed with mint creates a refreshing side, providing a lighter palate cleanser that enhances the bright lemon flavor.
- Whipped Cream: Light and fluffy whipped cream adds a creamy texture that pairs beautifully, transforming every mini cheesecake into an indulgent treat. You can even infuse it with a hint of vanilla!
- Sparkling Lemonade: This fizzy drink offers a playful contrast to the creamy cheesecakes, complementing the tartness while keeping things refreshing and fun. A lovely sip alongside each bite!
- Iced Tea: Lightly sweetened iced tea, especially in lemon or peach flavors, provides a gentle sweetness that pairs well without overpowering the mini cheesecakes’ delicate flavors.
- Chocolate Drizzle: For a lavish touch, a drizzle of dark chocolate or a chocolate sauce can add an indulgent twist, enhancing the mini lemon cheesecakes with rich depth.
How to Store and Freeze Mini Lemon Cheesecakes
Fridge: Store mini lemon cheesecakes in an airtight container in the refrigerator for up to 5 days. This keeps them fresh and delicious, ready for whenever you crave a creamy treat.
Freezer: You can freeze unadorned mini lemon cheesecakes for up to 3 months. Make sure they’re well-wrapped in plastic wrap or in a freezer-safe container to prevent freezer burn.
Thawing: To enjoy frozen cheesecakes, simply transfer them to the fridge overnight to thaw. This ensures they maintain their lovely creamy texture as you prepare to serve!
Reheating: These delightful treats are best served cold, so there’s no need to reheat—enjoy them straight from the fridge for that refreshing taste!
Make Ahead Options
These Mini Lemon Cheesecakes are perfect for meal prep enthusiasts! You can prepare the crust up to 24 hours in advance; simply mix the graham cracker crumbs and melted butter, press them into the muffin tin, and refrigerate to maintain their crispness. The filling can also be made up to 3 days ahead—just store it covered in the refrigerator until you’re ready to fill the crusts. When it’s time to bake, spoon the filling over the chilled crusts and bake as directed. Chilling them for at least 2 hours before serving ensures they’re just as delicious and creamy, making your gathering stress-free and delightful!
Expert Tips for Mini Lemon Cheesecakes
- Soften Cream Cheese: Make sure your cream cheese is at room temperature beforehand to avoid lumps in your filling. This will ensure a smooth and creamy texture in your mini lemon cheesecakes.
- Avoid Overbaking: Keep an eye on them as they bake; they should be slightly jiggly in the center when you take them out. Overbaking can lead to a dry texture.
- Chill Thoroughly: Refrigerate your cheesecakes for at least two hours, ideally overnight, to enhance their flavor and texture. Chilling makes a world of difference!
- Try Different Zests: Experiment with other citrus zests, like lime or orange, to give a fun twist to your mini lemon cheesecakes and keep things interesting.
- Easily Removable: Line your muffin tin with paper liners to make removal a breeze, especially if you want to serve these at a party or gathering.
Mini Lemon Cheesecakes Recipe FAQs
How do I choose ripe lemons for my mini lemon cheesecakes?
Absolutely! To pick the best lemons, look for ones that feel heavy for their size and have a smooth, shiny skin. Bright yellow lemons without dark spots or blemishes will offer the best flavor. If they yield a bit to pressure, they are likely juicy and perfect for squeezing.
How long can I store mini lemon cheesecakes in the fridge?
You can store mini lemon cheesecakes in an airtight container in the refrigerator for up to 5 days. Just make sure they are properly covered to maintain their creamy texture and deliciousness. I often make a batch on a Sunday, and they are perfect for enjoying throughout the week!
Can I freeze mini lemon cheesecakes?
Yes, indeed! The cheesecakes can be frozen for up to 3 months. To freeze, wrap each unadorned cheesecake tightly in plastic wrap or place them in a freezer-safe container. When you’re ready to enjoy them, simply transfer them to the fridge overnight to thaw. They’ll be just as creamy and delicious!
What should I do if the centers of my mini lemon cheesecakes are not firm after baking?
Very good question! If your cheesecakes are still jiggly in the center after baking, don’t worry. It’s important to allow them to cool completely before chilling in the fridge. They will firm up nicely as they cool down and set. Just keep an eye on the baking time to avoid overbaking, which can lead to dryness.
Are there any allergens I should be aware of when making mini lemon cheesecakes?
Indeed! This recipe contains dairy (cream cheese, sour cream) and eggs, which can be allergens for some individuals. If you’re serving guests with dietary restrictions, consider using dairy-free cream cheese and egg substitutes. There are great alternatives available that can still deliver a delicious cheesecake experience.
Can I use bottled lemon juice instead of fresh for my mini lemon cheesecakes?
While bottled lemon juice can be convenient, I recommend using freshly squeezed lemon juice for the best flavor. Fresh lemons bring a brighter, more vibrant taste to your mini lemon cheesecakes that bottled varieties simply cannot replicate due to differing acidity levels. Trust me; it makes a significant difference!
Mini Lemon Cheesecakes: A Creamy, Tangy Bite of Bliss
Ingredients
Equipment
Method
- Preheat your oven to 325°F (163°C). Gather your ingredients and equipment.
- Combine the graham cracker crumbs and melted butter in a mixing bowl and press into the muffin tin bases.
- Bake the crust in the preheated oven for about 8 minutes until lightly golden around the edges.
- In a mixing bowl, beat the softened cream cheese and sugar until smooth. Add eggs one at a time, then fold in sour cream, lemon juice, zest, and vanilla.
- Spoon the filling over the cooled crusts in the muffin tin and fill nearly to the top. Bake for 18-20 minutes until just set.
- Let the cheesecakes cool in the tin for about 10 minutes, then transfer them to a wire rack to cool completely.
- Refrigerate the mini lemon cheesecakes for at least 2 hours before serving.