
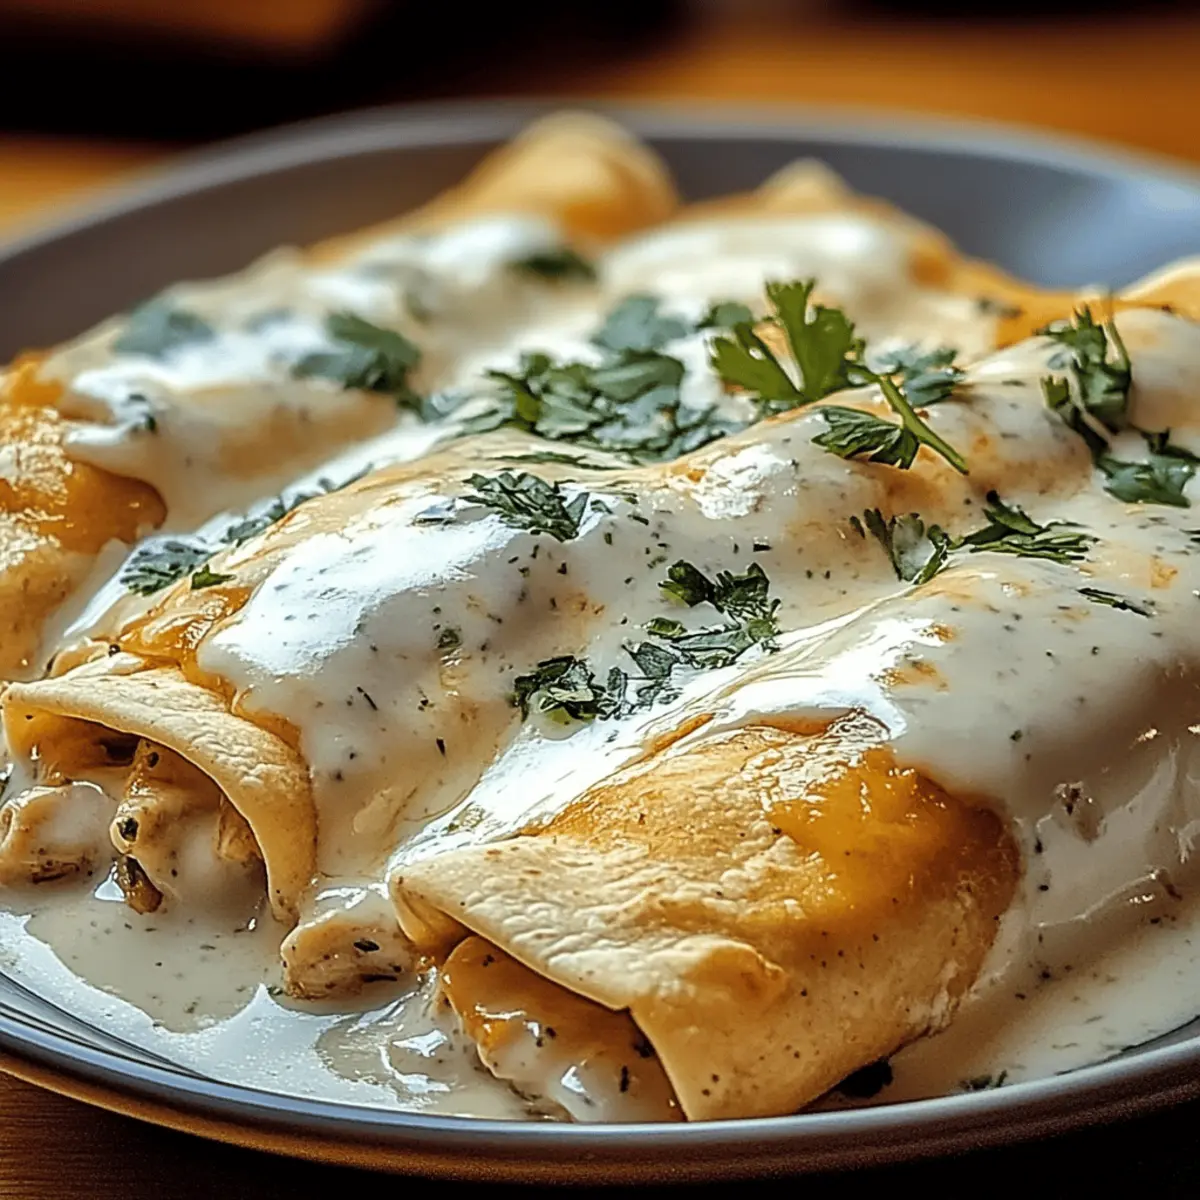
I still recall the first time I bit into a chicken enchilada—soft tortillas enveloping tender chicken, all smothered in a luscious sour cream white sauce. These Creamy Chicken Enchiladas are the comfort food you didn’t realize you were missing. Whether you’re preparing for a cozy weeknight dinner or hosting friends at a festive gathering, the ease of this dish makes it a standout choice. With just a handful of ingredients and the ability to customize the spice level, they cater to all palates. Not to mention, they offer that satisfying “homemade” touch without the fuss of elaborate cooking. Ready to dive into a creamy, cheesy experience that wraps you in a warm, flavorful embrace? Let’s get cooking!
Why Are These Chicken Enchiladas Special?
Comfort Food at its finest: These Creamy Chicken Enchiladas are truly a warm hug on a plate!
Customizable to your taste: Adjust the spice with jalapeños or keep it mellow for the kiddos.
Quick & Easy: With rotisserie chicken, you can whip this up in no time, perfect for busy weeknight dinners.
Crowd-Pleaser: Serve it at gatherings, and watch your friends rave about the flavors!
Endless Variations: Feel free to switch out chicken for beef or turkey and add black beans for a nutrient boost. For more delicious ideas, try Chopped Chicken Bacon or the flavorsome Mexican Chicken Rice.
These enchiladas are a guaranteed way to elevate any meal!
Chicken Enchiladas Ingredients
• You’ll love how simple it is to gather what you need for these delicious Chicken Enchiladas!
For the Filling
- Shredded Chicken – Provides the main protein; using rotisserie chicken makes prep a breeze.
- Roasted Green Chilies – Adds mild heat and flavor to the filling; fresh jalapeños can be swapped for a spicier kick.
- Shredded Cheese – A blend of Monterey Jack and cheddar melts perfectly, creating a luscious topping.
For the Sauce
- Sour Cream – This creamy ingredient provides a tangy sauce; Greek yogurt can be a healthier alternative.
- Chicken Broth – Adds moisture to the sauce; substitute with vegetable broth for a vegetarian option.
- Spices (e.g., cumin, garlic powder) – Essential for enhancing flavor; adjust the spices to suit your spice preference.
For the Tortillas
- Tortillas – Flour tortillas yield a softer bite, while corn tortillas offer a gluten-free choice.
Feel free to mix and match according to your tastes, because these Chicken Enchiladas are all about comfort and customization!
Step‑by‑Step Instructions for Creamy Chicken Enchiladas
Step 1: Prepare the Filling
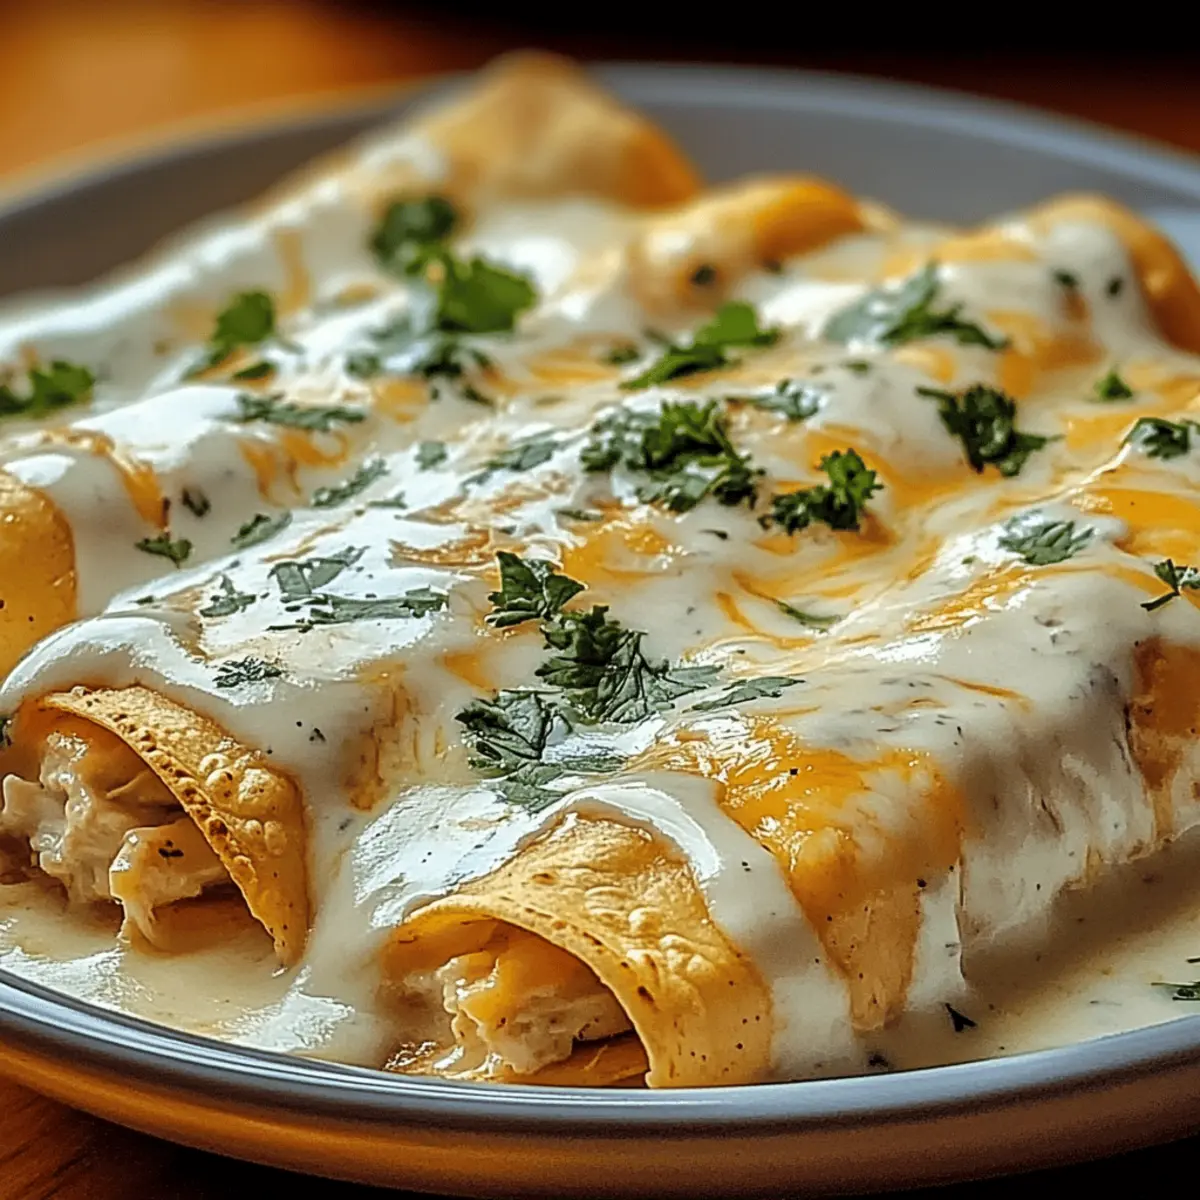
Begin by shredding your rotisserie chicken into a large mixing bowl. Combine the shredded chicken with roasted green chilies and half of the shredded cheese, mixing thoroughly until evenly incorporated. This filling should appear uniform and fragrant, showcasing a delicious blend of flavors. Set the bowl aside while you move on to make the creamy sauce.
Step 2: Make the Sauce
In a medium-sized saucepan, carefully combine the sour cream, chicken broth, and your chosen spices like cumin and garlic powder. Warm over medium heat, stirring continuously for about 5-7 minutes until the sauce is velvety and smooth; it should have a light simmer and not boil. Once well blended, remove from heat and set aside before you assemble the enchiladas.
Step 3: Assemble Enchiladas
Preheat your oven to 350°F (175°C) for baking the enchiladas. Take a flour or corn tortilla and lay it flat on a clean surface. Spoon a generous amount of the chicken filling into the center, then carefully roll it up, tucking in the sides to prevent spilling. Repeat this process until all tortillas are filled, ensuring they’re seam-side down in a greased 9×13 inch baking dish to create a cozy nest for your enchiladas.
Step 4: Top with Sauce
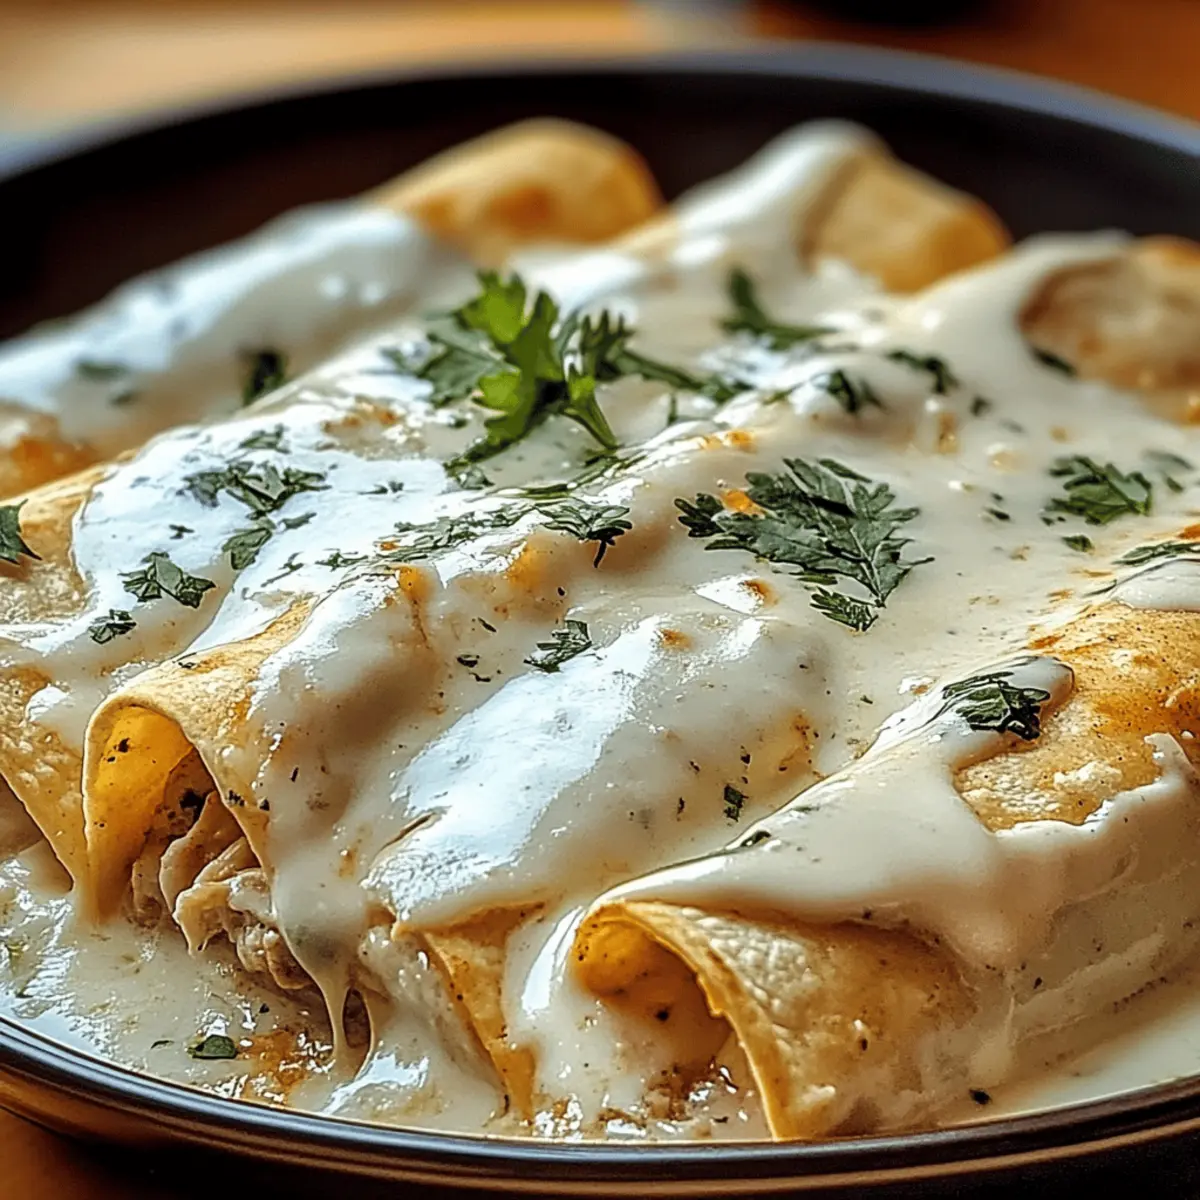
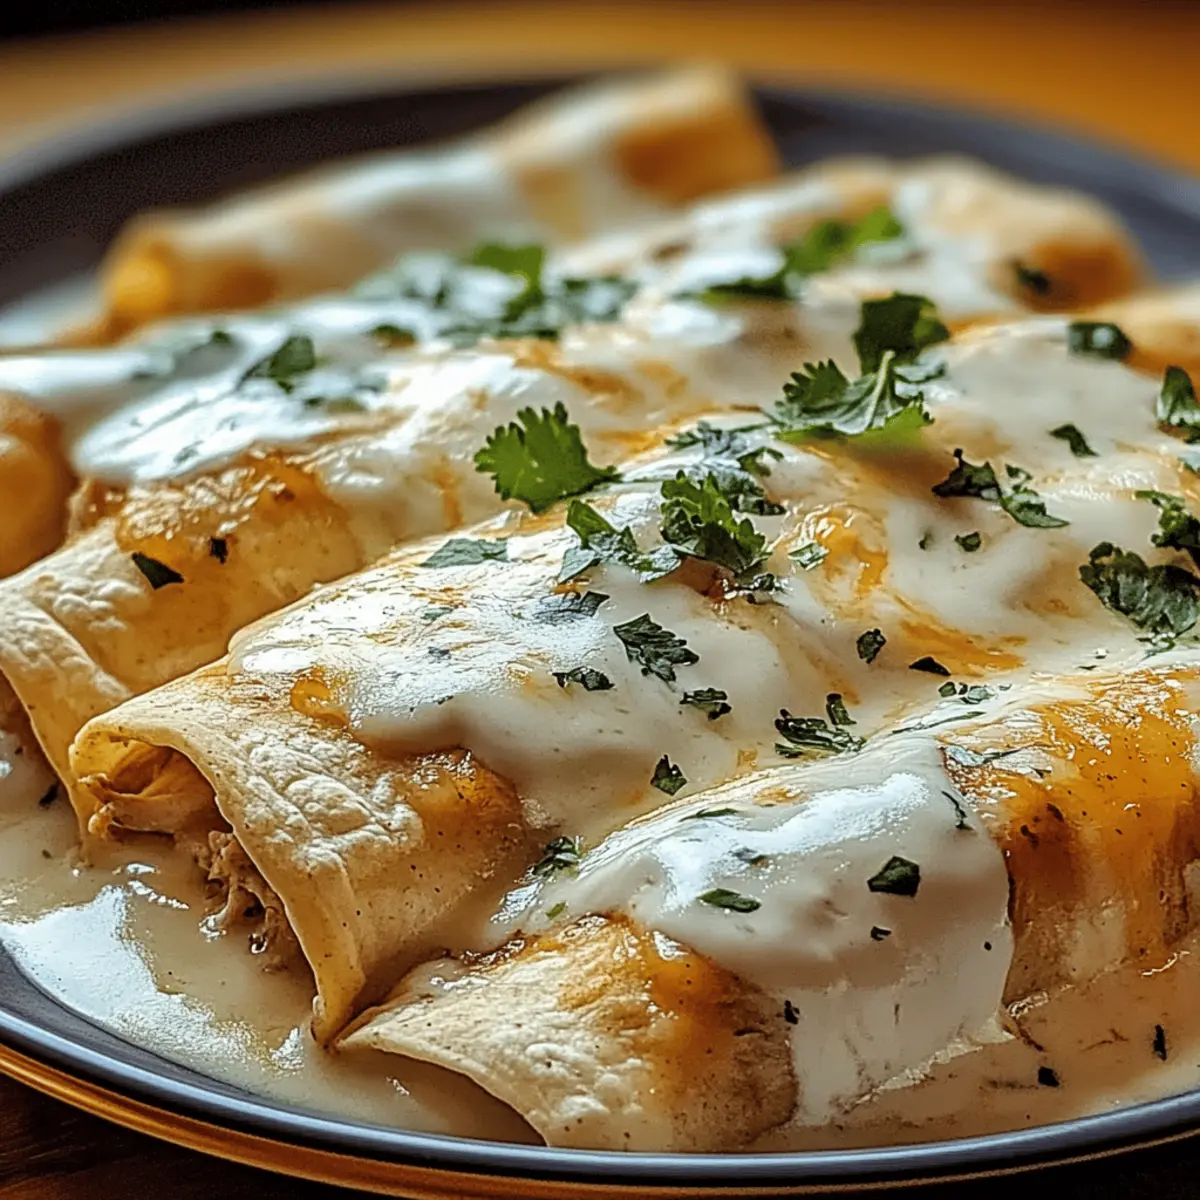
Once all the enchiladas are snugly placed in the baking dish, pour the creamy sour cream sauce generously over the top. Make sure every enchilada is well-covered; this will create that indulgent, melty finish you crave! Sprinkle the remaining shredded cheese evenly across the surface, glistening with promise of gooey goodness.
Step 5: Bake
Slide the baking dish into your preheated oven and bake for 25-30 minutes, or until the cheese is bubbly and beautifully golden brown. Keep an eye on them; when the edges start to crisp, and the aroma fills your kitchen, you know they’re ready to serve!
Step 6: Serve
Once cooked, allow the creamy chicken enchiladas to rest for about 5 minutes before serving. This short wait helps the flavors meld together. Serve them alongside your favorite sides, such as Spanish rice or a crisp green salad, and enjoy the comforting warmth of this homemade dish!
How to Store and Freeze Chicken Enchiladas
Fridge: Store leftover chicken enchiladas in an airtight container for up to 3 days. Ensure they are covered with the sauce to retain moisture and flavor.
Freezer: For longer storage, freeze chicken enchiladas before baking. Wrap tightly in plastic wrap, then foil, and they can last up to 3 months.
Reheating: When ready to enjoy, thaw in the fridge overnight, then reheat in the oven at 350°F (175°C) until warmed through, about 20-25 minutes. This helps maintain the creamy texture.
Reviving Leftovers: If reheating leftovers that have already been baked, sprinkle a bit of extra cheese and a splash of broth for added moisture before placing them in the oven.
Chicken Enchiladas Variations & Substitutions
Feel free to explore new dimensions of flavor and nutrition with your Chicken Enchiladas—the possibilities are endless!
- Dairy-Free: Use cashew cream or a vegan sour cream alternative to create a creamy base without dairy. Your enchiladas will still shine with that delightful texture!
- Spicy Twist: Incorporate diced jalapeños or a splash of hot sauce into the filling for an extra kick. Transform your cozy dish into a fiery delight that puts a smile on spice lovers’ faces.
- Vegetarian Delight: Replace chicken with black beans, lentils, or grilled veggies to create a hearty vegetarian version. This twist maintains richness while providing a wholesome plant-based option.
- Added Crunch: Mix in some toasted corn or crushed tortilla chips to the chicken mixture for a satisfying crunch. It’s a simple way to elevate texture and elevate the dish for an exciting bite!
- Flavorful Sauces: Experiment with enchilada sauces like red or green salsa for a fun flavor alternative to the sour cream sauce. Different sauces can completely change the vibe and bring Latin-inspired flair.
- Herbaceous Freshness: Top with fresh cilantro or a squeeze of lime juice right before serving. This addition adds brightness and elevates the overall flavor profile—perfect for a pop of freshness!
- Nutty Flavor: Incorporate a sprinkle of toasted pine nuts or slivered almonds on top before baking for a unique twist. The nutty flavor complements the creamy sauce beautifully and adds an unexpected surprise!
- Southern Charm: Swap chicken for shredded rotisserie pork and replace sour cream with a barbecue sauce for a delicious Southern twist. Try it alongside flavors like the Peach Glazed Chicken for even more flavor inspiration!
Your kitchen adventure awaits—making these Chicken Enchiladas truly personal can turn a comforting meal into an unforgettable feast!
What to Serve with Creamy Chicken Enchiladas?
Complete your meal with delightful sides that perfectly balance flavors, adding color and texture to your table.
- Spanish Rice: Fluffy and fragrant, it absorbs the creamy sauce while adding a comforting heft to your plate.
- Crisp Green Salad: A refreshing mix of greens with a tangy vinaigrette contrasts beautifully with the rich enchiladas, providing a satisfying crunch.
- Fresh Guacamole: Creamy, zesty guacamole enhances the dish with its rich texture and cooling notes, perfect for a comforting finish.
- Roasted Corn on the Cob: Sweetness from the corn complements the savory enchiladas, while the smoky char adds a lovely depth of flavor.
- Black Beans: Rich in protein, these beans create a hearty addition; season them with lime and garlic for a zesty sidekick.
- Chips and Salsa: Crispy tortilla chips with a fresh, zesty salsa are perfect for scooping up the cheesy goodness, adding a playful element to the meal.
- Margaritas: For a festive touch, serve with a refreshing margarita; the citrus notes cut through the creamy sauce, enhancing every bite.
- Flan: End on a sweet note with a silky flan; its caramel richness complements the savory enchiladas, making for a well-rounded dinner experience.
Make Ahead Options
These Chicken Enchiladas are perfect for meal prep enthusiasts looking to save time during busy weeknights! You can prepare the filling and the creamy sour cream sauce up to 24 hours in advance; just refrigerate them separately to maintain freshness. To assemble, simply lay the tortillas flat, fill them with the mixed ingredients, and roll them tight before placing seam-side down in your baking dish. When it’s time to eat, pour the sauce over the enchiladas and sprinkle with cheese. Bake as directed, and you’ll enjoy restaurant-quality flavors with minimal effort—just as delicious as if made fresh!
Expert Tips for Chicken Enchiladas
- Warm Tortillas: Always warm your tortillas briefly before filling; this prevents them from cracking and ensures a smooth rolling process.
- Avoid Overfilling: Be careful not to overstuff your enchiladas, as this will lead to bursting during baking. You want them snug, not overflowing!
- Perfect Sauce Consistency: Aim for a smooth sauce by simmering it gently; boiling can lead to separation. Stir continuously for the best results.
- Flavor Boost: Let your enchiladas sit for a few minutes after baking before serving; this brief resting time enhances the flavors as they meld together.
- Mix It Up: Feel free to substitute chicken with beans or beef for a unique twist on these chicken enchiladas, catering to your taste preferences.
- Garnish for Flair: Don’t forget a sprinkle of fresh cilantro or a squeeze of lime before serving to elevate your dish’s flavor profile and presentation!
Chicken Enchiladas Recipe FAQs
What type of tortillas should I use for chicken enchiladas?
For the best texture, flour tortillas are ideal as they yield a softer bite. If you’re looking for a gluten-free option, corn tortillas work beautifully too! Just make sure to warm them slightly before filling to prevent cracking.
How should I store leftover chicken enchiladas?
Leftover chicken enchiladas can be stored in an airtight container in the fridge for up to 3 days. Be sure to cover them with the sauce to keep them moist and flavorful!
Can I freeze chicken enchiladas for later?
Absolutely! To freeze chicken enchiladas, wrap them tightly in plastic wrap, then in aluminum foil. This method protects them from freezer burn and can keep them fresh for up to 3 months. When you’re ready to enjoy them, thaw overnight in the fridge and reheat in the oven at 350°F (175°C) for about 20-25 minutes until heated through.
What ingredients can I substitute for a healthier version?
You can lighten up your chicken enchiladas by using Greek yogurt instead of sour cream and opting for low-fat cheese. Additionally, incorporating black beans or additional vegetables can enhance nutrition while still delivering on flavor.
How do I prevent my enchiladas from bursting while baking?
To prevent bursting, be cautious not to overfill your tortillas, as snug is the way to go! Also, warming your tortillas slightly before filling them can help them roll neatly and maintain their shape during baking.
What’s the best way to reheat leftover chicken enchiladas?
For the best results, sprinkle a little extra cheese and splash some chicken broth over your enchiladas before reheating them in the oven at 350°F (175°C). This method helps revive their creamy texture and keeps them moist.
Creamy Chicken Enchiladas That'll Warm Your Heart
Ingredients
Equipment
Method
- Begin by shredding your rotisserie chicken into a large mixing bowl. Combine the chicken with roasted green chilies and half of the shredded cheese, mixing thoroughly until incorporated.
- In a saucepan, combine the sour cream, chicken broth, and spices. Warm over medium heat for 5-7 minutes, stirring until smooth.
- Preheat your oven to 350°F (175°C). Take a tortilla, spoon the chicken filling into the center, and roll it up, placing seam-side down in a greased baking dish.
- Pour the sauce over the enchiladas and sprinkle with the remaining shredded cheese.
- Bake for 25-30 minutes until the cheese is bubbly and golden brown.
- Allow to rest for 5 minutes before serving with your favorite sides.