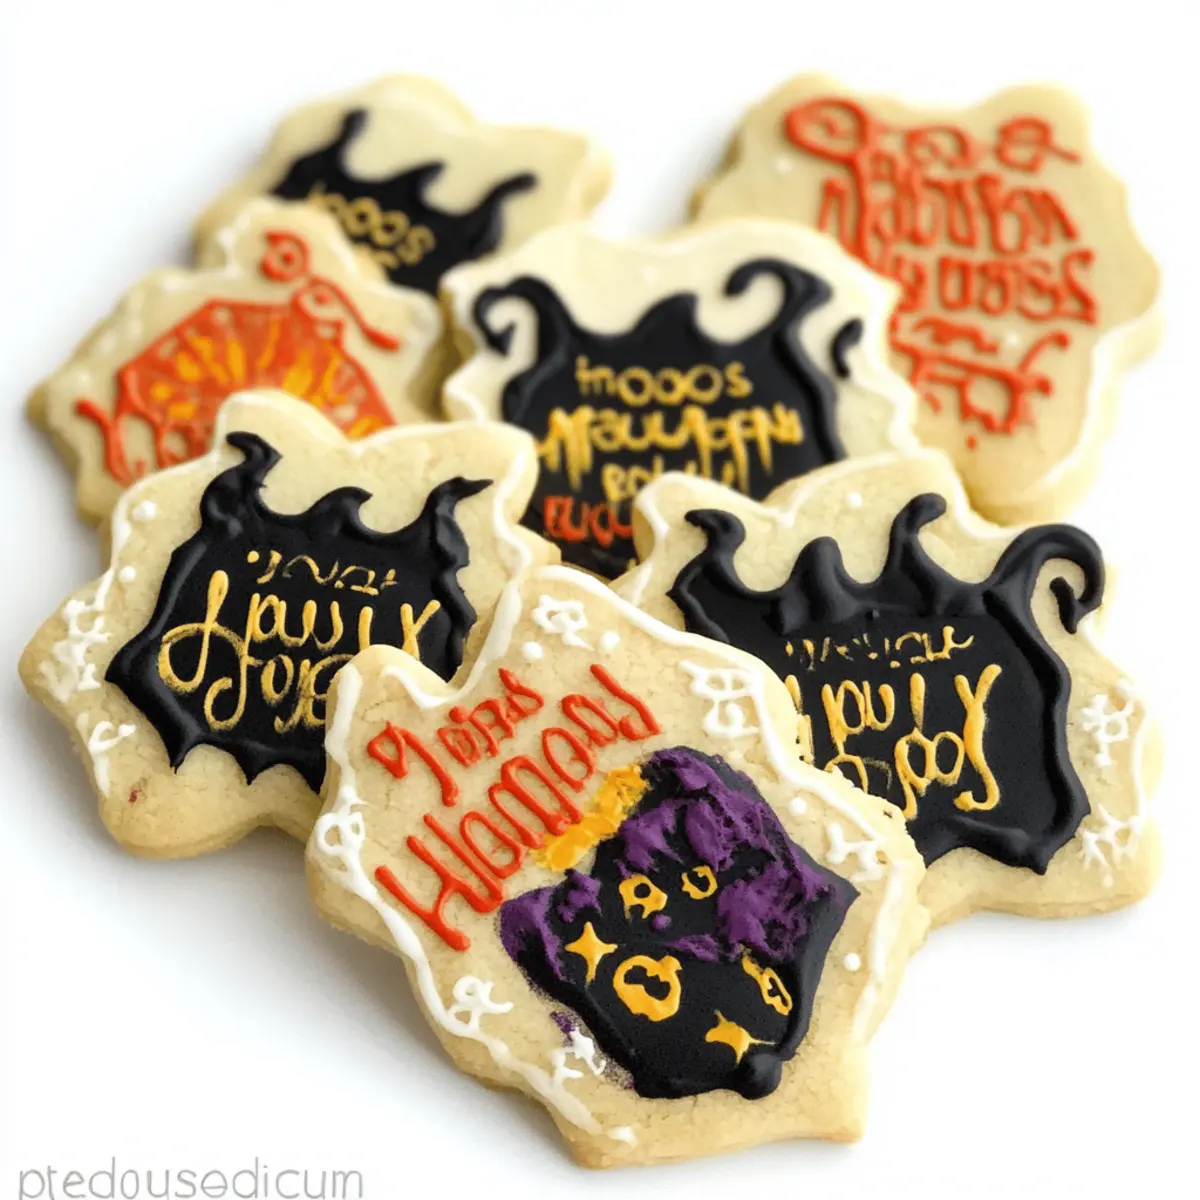
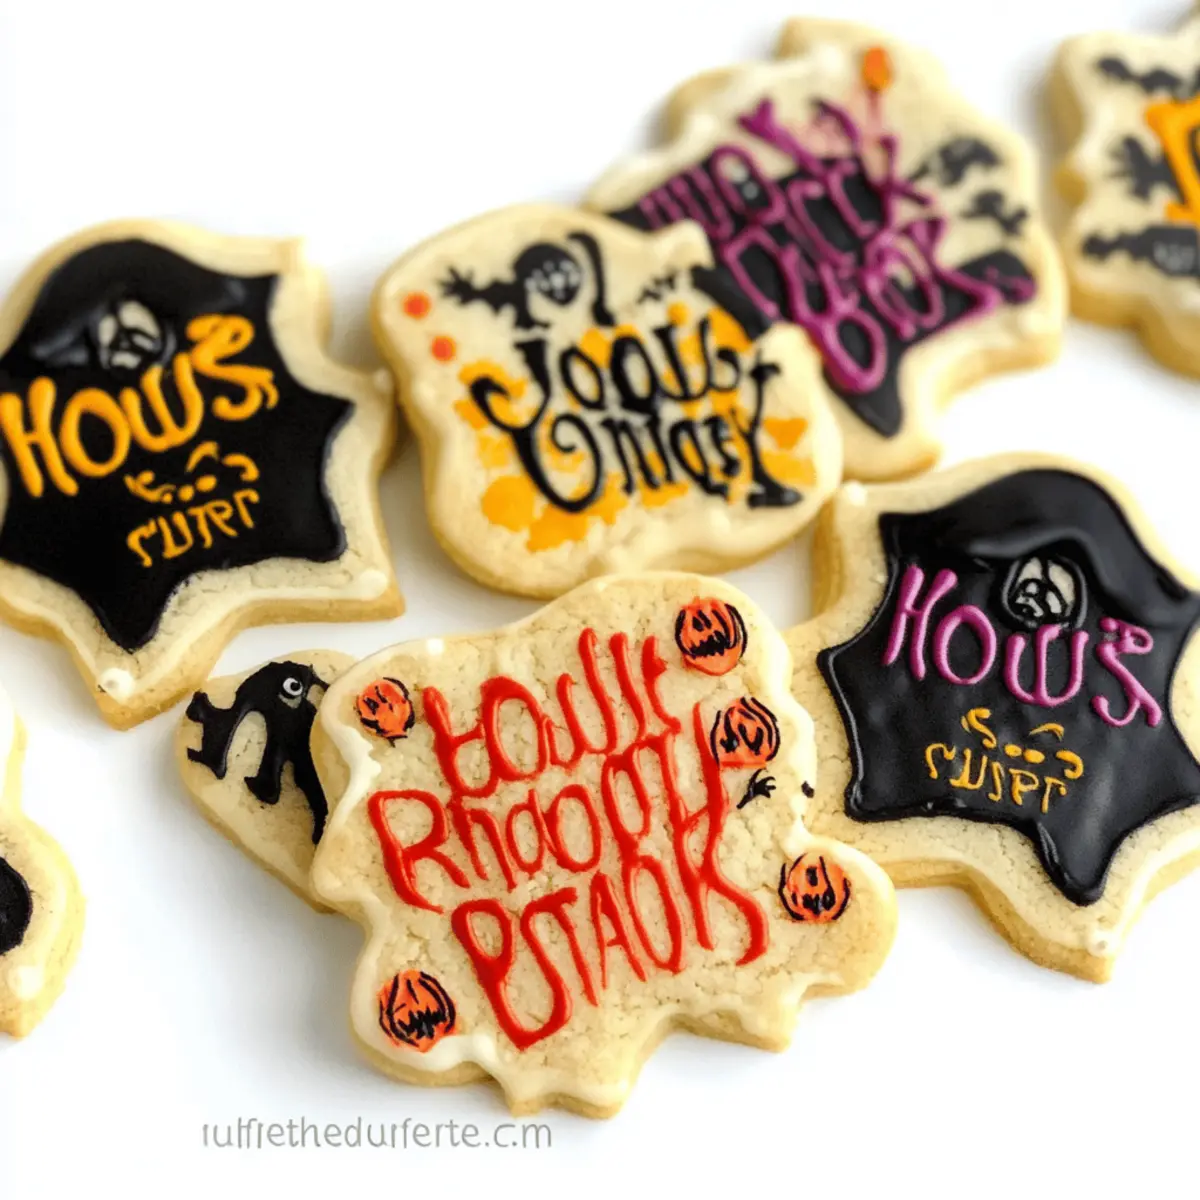
As the crisp autumn air settles in and whispers of Halloween approach, I find myself drawn to the kitchen to conjure some magic in the form of Hocus Pocus Cookies. These whimsical cut-out sugar cookies are not only delightful to behold but also incredibly fun to decorate. With a soft, buttery texture and endless customization possibilities using vibrant edible paints, they become a fantastic canvas for both creativity and taste. Plus, they’re a breeze to whip up and make for a marvelous addition to your spooky gatherings or movie nights. Curious about how to unleash your inner artist and create these enchanting treats? Let’s get started!

Why Are These Cookies So Magical?
Enchanting, these Hocus Pocus Cookies are a feast for the eyes and the taste buds! The soft, buttery texture melts in your mouth, while the vibrant colors bring your Halloween celebrations to life. Customizable, each cookie can become a masterpiece as you paint with edible colors, perfect for family-friendly activities. Not a fan of plain sugar cookies? Try variations with different extracts or cookie shapes from ghosts to pumpkins for added charm. Time-saving and easy to make, these cookies will surely be the highlight at your spooky gatherings or movie nights. Need more ideas? Check out my Cheesecake Stuffed Cookies for another delicious twist!
Hocus Pocus Cookies Ingredients
• Get ready to bake some magic!
For the Cookie Dough
- Unsalted Butter – Provides richness; ensure it’s just softened for the best texture.
- Granulated Sugar – Sweetens the dough while keeping the interior soft and tender.
- Large Eggs – Acts as a binder; always use room temperature eggs for better mixing.
- Vanilla Extract – Elevates the cookie’s flavor profile beautifully.
- Almond Extract – Offers a delightful hint of cherry; consider swapping with peppermint or lemon for a twist.
- All-Purpose Flour – Gives structure to cookies; avoid other flours for the ideal texture.
- Baking Powder – Ensures a light lift; a small amount helps prevent spreading.
- Salt – Balances the sweetness, making those flavors pop!
For Painting
- Food Coloring (Red, Yellow, Purple, Black) – Perfect for adding vibrant designs on your Hocus Pocus Cookies using egg yolk paint.
Step‑by‑Step Instructions for Hocus Pocus Cookies
Step 1: Prepare Dough
Begin by creaming 1 cup of softened unsalted butter and 1 ½ cups of granulated sugar in a large mixing bowl until the mixture is light and fluffy, about 2-3 minutes. Then, add 2 large room temperature eggs to the mixture one at a time, ensuring each egg is fully incorporated before adding the next. Stir in 2 teaspoons of vanilla extract and 1 teaspoon of almond extract for an enticing flavor.
Step 2: Combine Dry Ingredients
In a separate bowl, whisk together 4 cups of all-purpose flour, 1 teaspoon of baking powder, and ½ teaspoon of salt. Gradually add the dry mixture to the wet ingredients, mixing on low speed until a dough forms. Be careful not to overmix—stop as soon as the flour is incorporated to keep your Hocus Pocus Cookies tender. The dough will be slightly sticky but manageable.
Step 3: Roll and Cut
Once your dough is ready, transfer it to a lightly floured surface. Roll it out to about ¼ inch thickness, using a rolling pin to ensure even consistency. Use Halloween-themed cookie cutters to cut out shapes, such as ghosts or pumpkins, and carefully place them onto parchment-lined baking sheets, leaving at least an inch between each cookie for space while they bake.
Step 4: Chill Cookies
To maintain the shapes of your cut-out cookies during baking, place the baking sheets in the freezer for 5-10 minutes. This step helps prevent spreading, ensuring your Hocus Pocus Cookies keep their whimsical designs after they bake. As you wait, preheat your oven to 350°F (177°C) for optimal baking conditions.
Step 5: Bake
Once chilled, bake the cookies in your preheated oven for 12-16 minutes. Keep an eye on them! They are ready when the edges turn lightly golden, while the centers remain soft. Remove the cookies from the oven and allow them to cool on the baking sheets for a few minutes before transferring them to wire racks to cool completely. This will set the perfect base for your colorful decorations.
Step 6: Cool and Paint
After the cookies have cooled, it’s time to unleash your creativity! Prepare your edible paints by mixing egg yolks with food coloring in small bowls. Use vibrant colors like red, yellow, purple, and black to bring your Hocus Pocus Cookies to life with intricate designs. Paint your cookies as desired; the process is enjoyable and perfect for family activities.
Step 7: Chill Painted Cookies
Once painted, place the cookies back in the refrigerator for 15-30 minutes. This chill time allows the paint to set and prevents smearing during the final bake. When ready, you can transfer them back to the oven for about 5 minutes more to gently firm up the paint, ensuring your cookies not only look festive but taste delightful, too!

What to Serve with Hocus Pocus Cookies?
These delightful treats are just the sweet enchantment your Halloween gathering needs, especially when paired with enticing delights.
- Spiced Apple Cider: The warm, comforting flavors of spiced cider bring out the sweetness of the cookies while adding cozy vibes to your gathering.
- Pumpkin Soup: Creamy and savory, this soup complements the sugary treats perfectly, offering a delightful contrast to the sweet flavors.
- Candy Corn Milkshake: Fun and festive, this sweet shake mirrors the playful spirit of the season and makes a delicious pairing with your cookies.
- Cheese Platter: A charcuterie board with assorted cheeses balances the sweetness, letting the cookies shine while creating a fantastic taste experience.
- Chocolate Dipped Pretzels: The salty crunch of pretzels coated in chocolate provides a delightful texture that beautifully contrasts with the soft cookies.
- Halloween-themed Cupcakes: Soft, sweet cupcakes decorated with spooky designs make for an inviting dessert spread that heightens the festive atmosphere.
- Fruit Salad: A mix of seasonal fruits, such as pears and oranges, offers a fresh and fruity element, balancing the richness of the cookies quite perfectly.
- Hot Cocoa Bar: Set up a hot cocoa station with toppings like marshmallows and whipped cream for a warm, inviting treat that kids will adore alongside their cookies.
Make Ahead Options
These enchanting Hocus Pocus Cookies are perfect for meal prep, ensuring you save precious time during the busy Halloween season! You can prepare the cookie dough up to 3 days in advance; simply wrap it tightly in plastic wrap and refrigerate. For an even longer option, freeze the dough for up to 6 months. When you’re ready to bake, just thaw overnight in the refrigerator and roll out as instructed. Additionally, you can cut out the cookie shapes ahead and freeze them for up to 24 hours before baking, ensuring they hold their form perfectly. Once decorated, refrigerate the cookies for 15-30 minutes to set the paint before enjoying them at your spooky celebrations—just as delicious and visually stunning as freshly made!
Storage Tips for Hocus Pocus Cookies
Room Temperature: Store Hocus Pocus Cookies in an airtight container at room temperature for up to 3 days to maintain their softness and flavor.
Fridge: If you want to keep them fresh longer, refrigerate cookies in a sealed container for up to 1 week; they may harden, so let them sit out for a few minutes before enjoying.
Freezer: For extended storage, freeze the cookies in a single layer on a baking sheet before transferring them to an airtight container. They can last for up to 6 months without losing flavor.
Reheating: To enjoy them warm, reheat frozen cookies in a preheated oven at 350°F (177°C) for about 5-7 minutes or until warmed through.
Hocus Pocus Cookies: Customize Your Treats
Feel free to unleash your creativity and make these cookies uniquely yours with delightful variations!
- Flavor Swap: Swap almond extract for lemon or peppermint extract for a fresh twist. The choice is yours!
- Shapes Galore: Use various cookie cutters to create shapes like bats, witches, or spiders for added fun. Get the whole family involved!
- Chocolate Drizzle: Drizzle melted chocolate over cooled cookies for a rich flavor explosion. It adds a lovely touch and a dose of indulgence.
- Sprinkles Delight: Before baking, sprinkle colorful Halloween-themed sprinkles on top of the cookies for a festive crunch. The kids will love this visual boost!
- Gluten-Free Option: Substitute all-purpose flour with a gluten-free flour blend to cater to dietary needs while preserving that classic sugar cookie taste.
- Nut-Free Variation: Use sunflower seed butter instead of almond extract for a nut-free option that’s just as delicious. Experimenting can lead to new favorites!
- Decorating Ideas: Try painting with a blend of edible glitter and food coloring for a shimmering effect that casts a spell on watchful eyes.
- Batch Cooking: Double the batch to ensure there are plenty of cookies for all your Halloween gatherings! You can even share some with friends or neighbors.
For other delightful cookie inspiration, don’t miss out on my Cheesecake Stuffed Cookies or explore flavors with Oreo Cheesecake Cookies. Happy baking!
Helpful Tricks for Hocus Pocus Cookies
- Butter Temperature: Start with butter that’s just softened, not melted. If it’s too soft, your cookies may spread too much when baking.
- Room Temperature Eggs: Using eggs at room temperature helps them mix better in your dough, ensuring a smoother consistency for your Hocus Pocus Cookies.
- Don’t Overmix: After incorporating flour, mix just until combined. Overmixing can lead to tough cookies, ruining their tender, melt-in-your-mouth texture.
- Chill for Success: Always chill your cut-out cookies before baking to maintain their shapes. This step is crucial for achieving perfectly formed Halloween treats.
- Use Good Quality Paintbrushes: When painting your cookies, ensure you’re using food-grade brushes to keep everything safe and delightful for family enjoyment.

Hocus Pocus Cookies Recipe FAQs
What type of butter should I use for this recipe?
Absolutely use unsalted butter! It provides the richness and tenderness needed for the cookie’s texture. Just make sure it’s slightly softened; if it’s too soft, the cookies may spread too much during baking.
How long will the Hocus Pocus Cookies stay fresh?
These delightful cookies can be stored in an airtight container at room temperature for up to 3 days. If you prefer longer storage, refrigerate them in a sealed container for up to 1 week, but do let them sit out a bit before enjoying, as they may harden.
Can I freeze these cookies?
Very much! To freeze your Hocus Pocus Cookies, first, place the baked cookies in a single layer on a baking sheet. Once frozen solid, transfer them to an airtight container or freezer bag. They can stay fresh for up to 6 months. When you’re ready to enjoy, simply reheat in a preheated oven at 350°F (177°C) for about 5-7 minutes.
What if my cookies spread too much while baking?
Oh no! If that happens, it’s usually due to overly soft butter or not chilling the cut-out shapes. To troubleshoot, ensure your butter is just softened—not melted. Also, chilling the cut-out cookies in the freezer for 5-10 minutes before baking helps maintain their shape wonderfully!
Can I use different food coloring for painting?
Yes, the more the merrier! While the recipe suggests red, yellow, purple, and black, feel free to experiment with any colors you like. Just be sure to use food-safe coloring, and let your creative side shine while you paint your Halloween masterpiece!
Any dietary considerations for my pets or allergies?
Indeed! While these cookies are a delightful treat for humans, they are not suitable for pets, especially dogs. The sugar and certain extracts can be harmful to them. Always keep these cookies out of reach of your furry friends, and check for allergy issues with any guests—especially with the use of almond extract and food coloring.

Hocus Pocus Cookies: Magical Painted Treats for Halloween
Ingredients
Equipment
Method
- Cream the softened unsalted butter and granulated sugar until light and fluffy.
- Add eggs one at a time, then stir in vanilla and almond extracts.
- In another bowl, whisk together flour, baking powder, and salt; gradually add to wet ingredients.
- Roll out the dough and cut out shapes using Halloween-themed cookie cutters.
- Chill the cut-out cookies in the freezer for 5-10 minutes.
- Bake in a preheated oven at 350°F (177°C) for 12-16 minutes.
- Cool cookies on racks before painting with edible colors.
- Chill painted cookies for 15-30 minutes before the final bake.
