
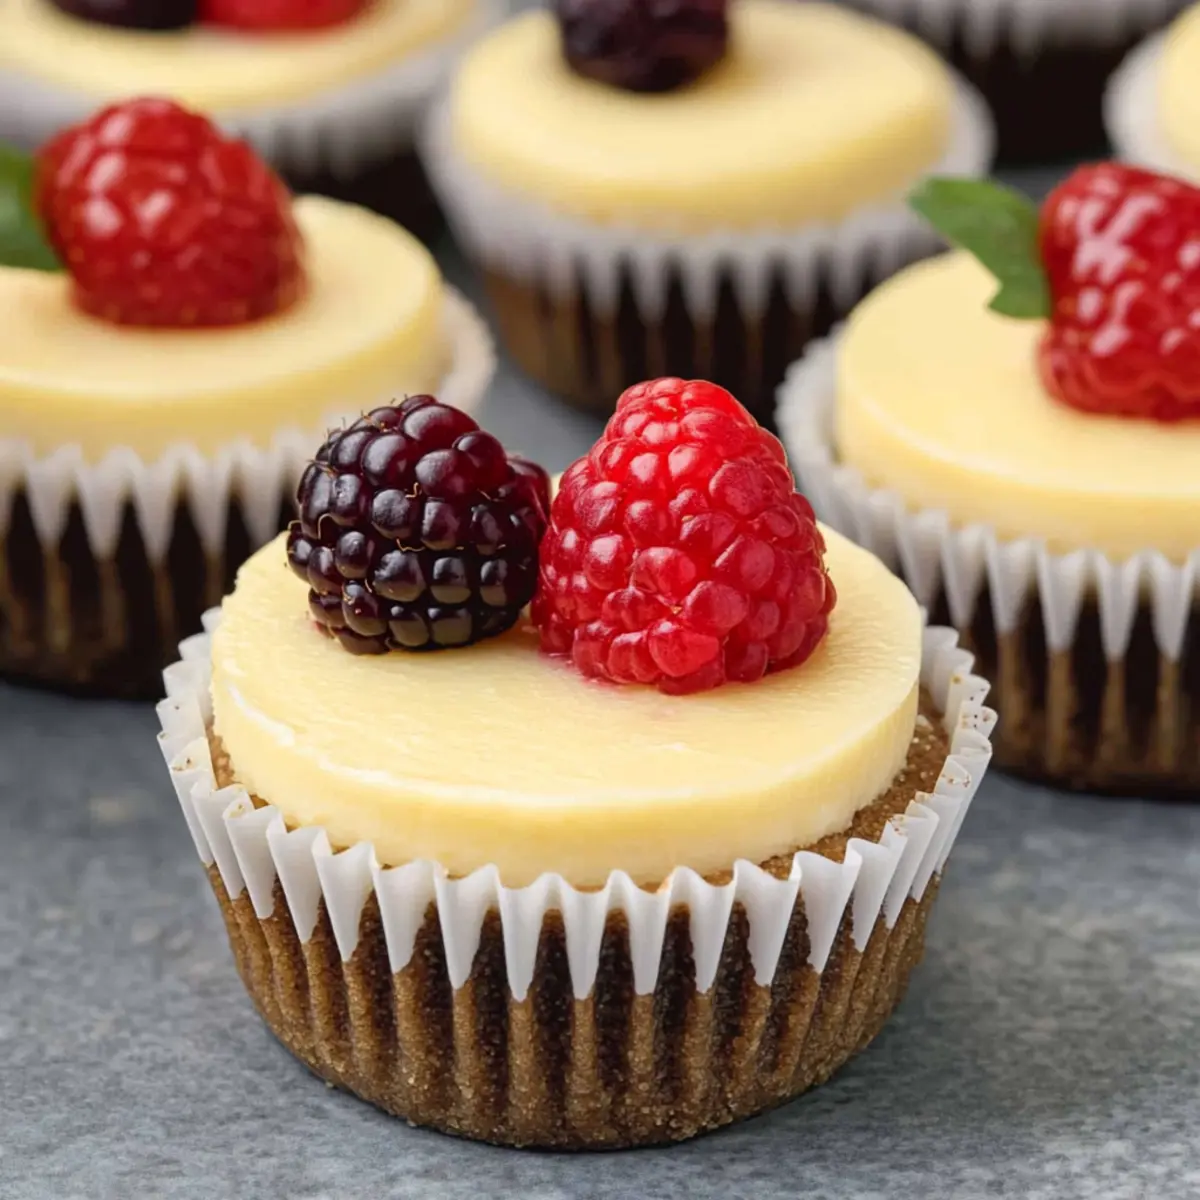
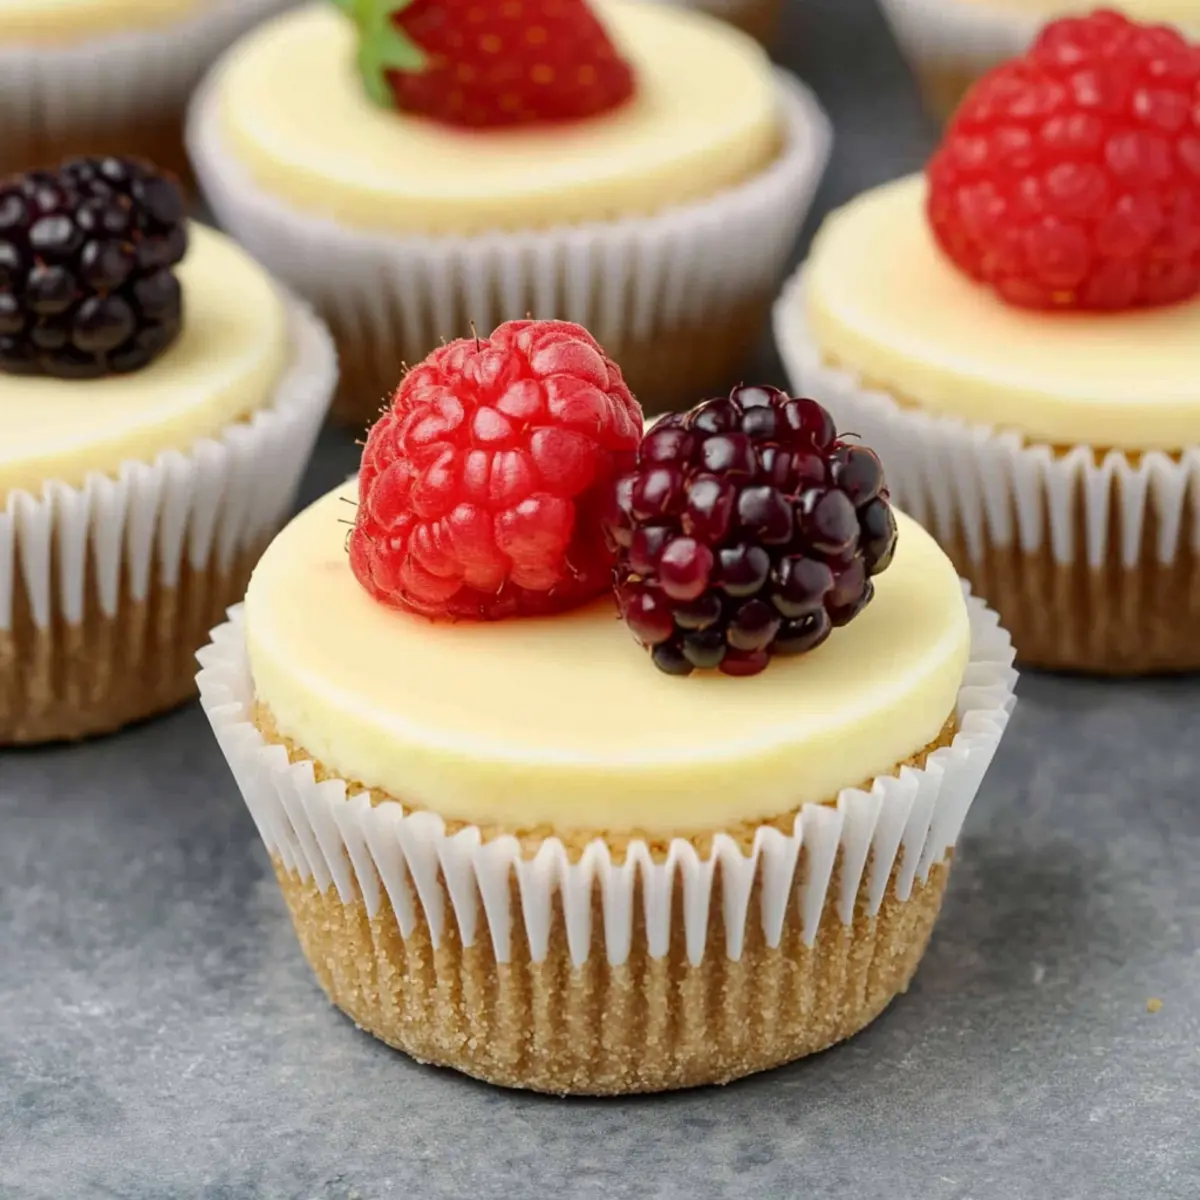
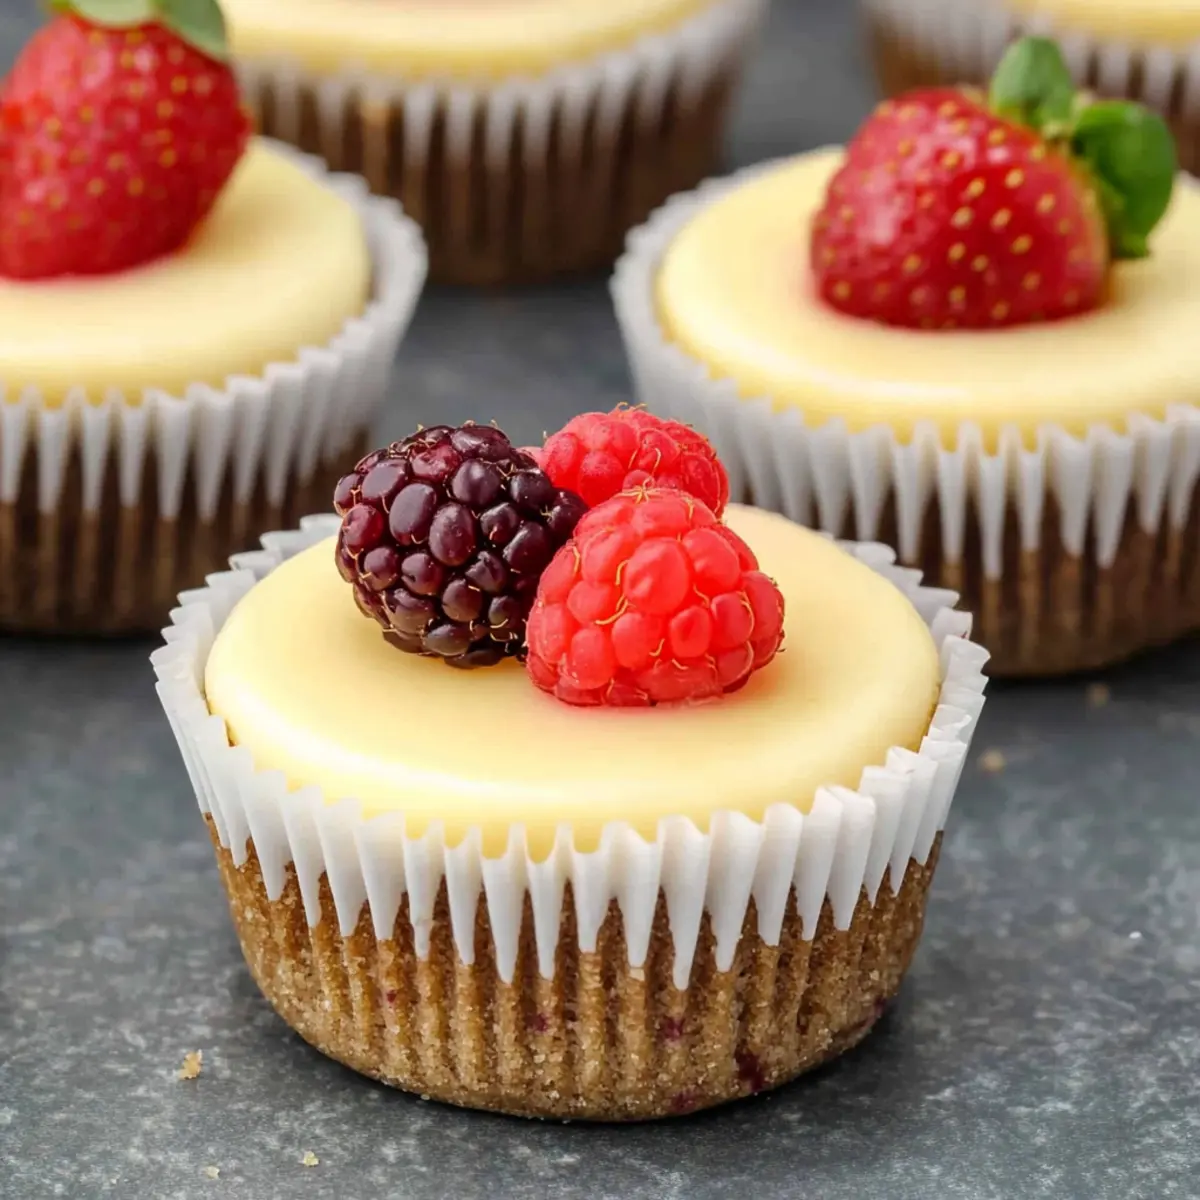
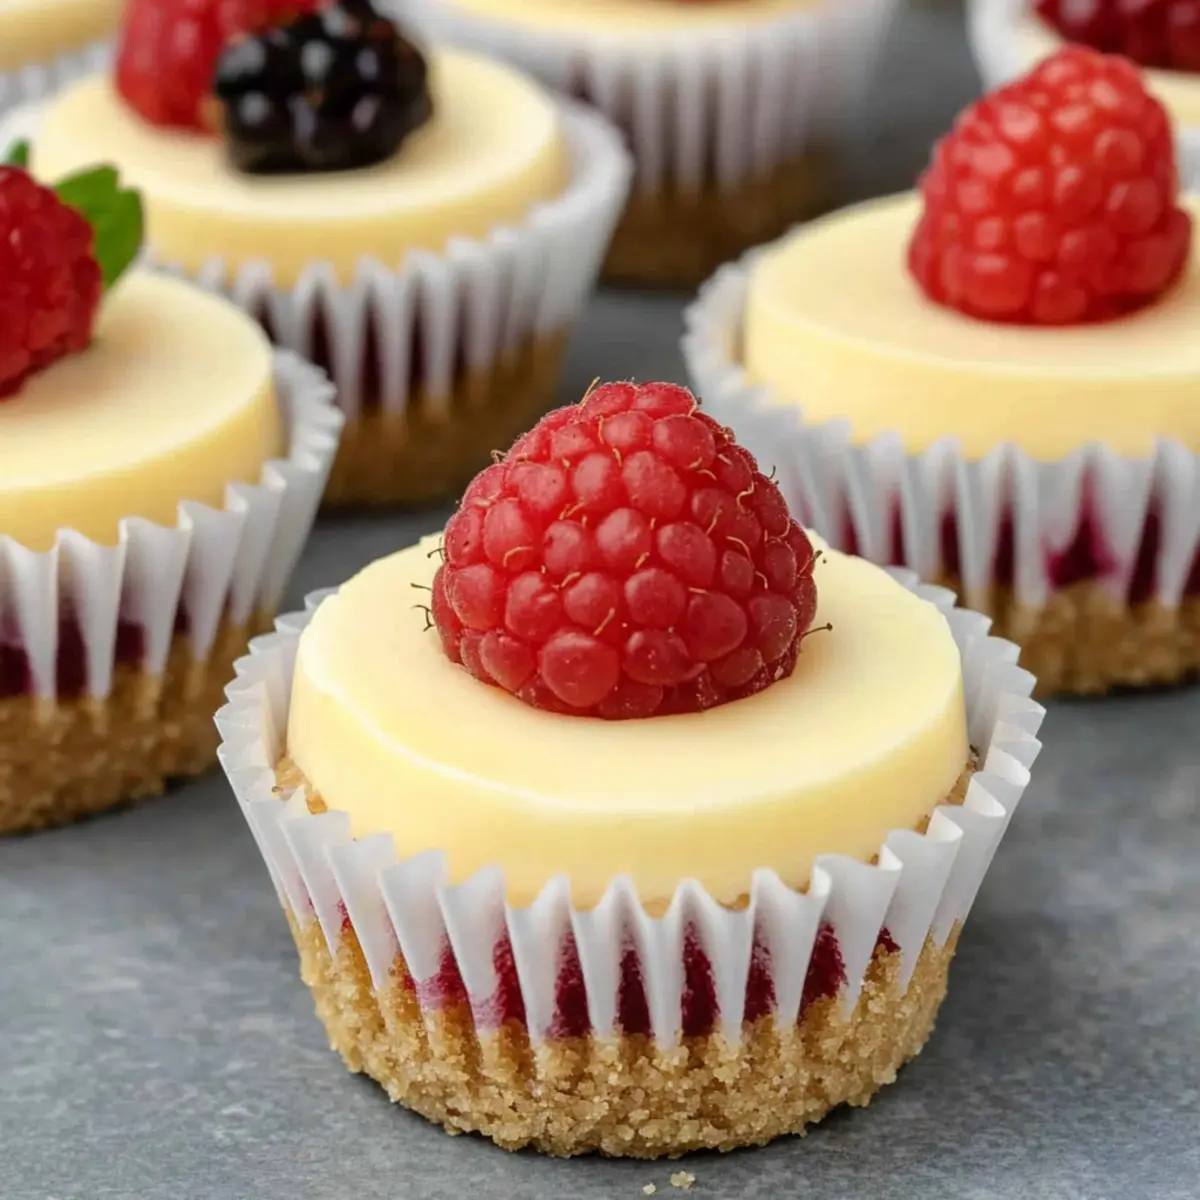
If you think delicious desserts require endless hours in the kitchen, let me introduce you to the magic of Easy Mini Cheesecakes! These little bites of creamy bliss are not only beginner-friendly but also come together in just 15 minutes, with no need for the dreaded water bath. Perfectly portioned for any occasion—from birthday celebrations to satisfying your sweet tooth—these mini cheesecakes won’t crack under pressure, thanks to a foolproof method I’m excited to share. The best part? You can customize each bite with a variety of delectable toppings like fresh berries, caramel, or even an elegant crème brûlée twist. Ready to impress your friends and family? Let’s dive into the delightful world of mini cheesecakes!
Why are mini cheesecakes a must-try?
Irresistibly Creamy: Every bite of these mini cheesecakes delivers a rich, velvety texture that melts in your mouth—everyone will be coming back for seconds!
Customizable Delights: Dress them up with various toppings like succulent berries or a chocolate drizzle to cater to every taste.
Quick and Easy: With just 15 minutes of prep, you’ll have delightful desserts ready to serve—perfect for spontaneous gatherings or a sweet weeknight treat!
No-Crack Guarantee: Say goodbye to messy, cracked surfaces; these cheesecakes bake beautifully with my foolproof method.
Perfectly Portioned: These mini treats are just the right size for satisfying cravings without overindulging. If you enjoy mini desserts, you might also like these Mini Key Lime and Mini Vegan Biscoff versions!
Mini Cheesecake Ingredients
• Dive into these delightful mini cheesecakes with all the essential ingredients to create a creamy masterpiece!
For the Crust
- Biscuits Crumbs – Provides structure for the crust; substitute with graham cracker crumbs or your favorite cookie for a unique flavor.
- Unsalted Butter (melted) – Binds the crust together; use salted butter if unsalted is what you have on hand.
For the Filling
- Full-fat Cream Cheese (room temperature) – The main ingredient for a creamy filling; ensure it’s softened to avoid lumps.
- Granulated Sugar – Sweetens the filling; can replace with a sugar alternative if you prefer a healthier option.
- Large Eggs (room temperature) – Helps bind the filling together, adding richness; stick with large eggs for consistent results.
- Vanilla Extract – Adds a delightful flavor; substitute with almond extract to switch things up.
- Lemon Juice – Enhances the cheesecake’s taste; lime juice can work too for a different citrus twist.
- All-purpose Flour – Helps set the filling; opt for gluten-free flour for a gluten-free variation.
- Full-fat Sour Cream (room temperature) – Adds creaminess and a tangy flavor; Greek yogurt makes a great substitute if needed.
Step‑by‑Step Instructions for Easy Mini Cheesecakes
Step 1: Preheat the Oven
Begin by preheating your oven to 320°F (160°C). This is the perfect temperature for baking mini cheesecakes to a lovely golden hue while ensuring the filling stays creamy. Preheating is essential, so give it around 10 minutes to come to temperature while you prepare the rest of your ingredients.
Step 2: Prepare Muffin Pan
Line a 12-cup muffin pan with paper liners, which will give your mini cheesecakes a beautiful presentation and make for easy removal. Ensure each liner fits well into the cups to create smooth edges. Having everything ready will make assembling your mini cheesecakes a breeze!
Step 3: Make Crust
In a mixing bowl, combine your preferred biscuit crumbs with melted butter, mixing until well combined. The mixture should resemble wet sand. Firmly press this mixture into the bottom of each muffin liner using your fingers or the back of a tablespoon, creating an even layer. Bake for about 5 minutes, until just set, and remove from the oven to cool slightly.
Step 4: Prepare Filling
In a large mixing bowl, beat room-temperature cream cheese until smooth and creamy, about 2 minutes. Gradually mix in granulated sugar, followed by adding the eggs one at a time. Be gentle while mixing to keep the filling light, aiming for a silky consistency that’s lump-free—this is the key for your mini cheesecakes’ creamy texture!
Step 5: Incorporate Flavors
Next, add vanilla extract, lemon juice, all-purpose flour, and room-temperature sour cream to the cream cheese mixture. Blend gently until everything is just combined and smooth. Avoid overmixing to prevent any cracks forming while baking your mini cheesecakes. This delightful filling should have a rich aroma and look wonderfully glossy.
Step 6: Fill Muffin Cups
Using a spoon or a small ladle, carefully fill each muffin cup with the cheesecake filling, ensuring even distribution across all liners. Leave a tiny bit of space at the top, as the filling will expand slightly during baking. This is the exciting part where you start to see your mini cheesecakes take shape!
Step 7: Bake
Place the filled muffin pan in the oven and bake for about 15 minutes, or until the edges appear set and the centers still jiggle slightly. This “just set” texture signals that your mini cheesecakes will be creamy and delicious. Keep an eye on them to avoid overbaking, which can lead to cracks.
Step 8: Cool and Chill
Once baked, remove the pan from the oven and allow the mini cheesecakes to cool in the pan for approximately 15 minutes. This gradual cooling helps prevent any sudden temperature changes. After they cool slightly, transfer them to the refrigerator and chill for at least 4 hours, preferably overnight. This the time for flavors to meld, ensuring perfect texture and taste before serving.
Make Ahead Options
These Easy Mini Cheesecakes are perfect for meal prep enthusiasts! You can prepare the crust and filling up to 24 hours in advance. For the crust, simply mix the biscuit crumbs with melted butter, press into muffin liners, and store them in an airtight container. For the filling, combine the ingredients (avoiding overmixing) and refrigerate in a covered bowl. When ready to bake, fill your prepared crusts with the chilling filling and bake as directed. This method not only saves time but ensures your cheesecakes are just as delicious! Serve with toppings of your choice just before enjoying for optimal freshness.
Storage Tips for Mini Cheesecakes
Fridge: Store mini cheesecakes in an airtight container in the refrigerator for up to 5 days to keep them fresh and creamy.
Freezer: For longer storage, mini cheesecakes can be frozen for up to 2 months. Place them in a freezer-safe container or wrap each one tightly in plastic wrap.
Thawing: When ready to enjoy, thaw the frozen mini cheesecakes overnight in the refrigerator for the best texture and flavor.
Reheating: If desired, you can serve them slightly chilled or at room temperature; there’s no need to heat these delightful desserts!
What to Serve with Easy Mini Cheesecakes
These delightful mini treats are perfect for creating a memorable meal experience that your loved ones will savor!
- Fresh Berries: Topping your mini cheesecakes with vibrant strawberries, blueberries, or raspberries adds brightness, sweetness, and a refreshing contrast to the creaminess.
- Chocolate Drizzle: A rich chocolate sauce intensifies the indulgence, creating a luxurious dessert experience that’s irresistibly satisfying. Pair with fresh fruit for an elegant touch!
- Whipped Cream: A dollop of light, airy whipped cream provides a delightful texture contrast and a touch of sweetness, making each bite even more heavenly.
- Coffee or Espresso: The deep flavors of a freshly brewed cup of coffee perfectly complement the sweetness of cheesecake, balancing richness with a warm kick.
- Caramel Sauce: Drizzling warm caramel over the mini cheesecakes creates a golden, gooey contrast that elevates every bite to sheer dessert perfection.
- Lemon Sorbet: The zesty, icy sweetness of lemon sorbet acts as a palate cleanser that refreshes the taste buds between bites of these decadent cheesecakes.
- Chocolate-Covered Almonds: For added crunch and a nutty contrast, serve chocolate-covered almonds on the side—they offer a delightful bite with each sweet cheesecake slice.
Mini Cheesecakes Variations & Substitutions
Feel free to customize your mini cheesecakes into a dreamy dessert masterpiece that suits your taste buds!
-
Dairy-Free: Use coconut cream in place of cream cheese and a dairy-free yogurt for a smooth, non-dairy delight.
-
Gluten-Free: Swap all-purpose flour with gluten-free flour and use gluten-free graham crackers for the crust to cater to gluten sensitivities.
-
Sugar-Free: Employ a suitable sugar alternative, like erythritol, to sweeten your filling without the calories.
-
Low-Carb: Consider using almond flour for the crust and avoiding sugar for a deliciously reduced-carb version.
-
Flavor Infusion: Mix in your favorite extracts, such as orange or peppermint, to give your filling a unique flavor twist. This is where creativity shines!
-
Fruit-Infused: Blend pureed strawberries or raspberries directly into the filling before baking for a fruity variation that adds both flavor and color.
-
Chocolate Bliss: Fold in melted dark chocolate into the filling or drizzle chocolate ganache on top for an indulgent cocoa treat.
-
Spicy Kick: Add a pinch of cinnamon or nutmeg to the crust for a warm and aromatic spice flavor, perfect for cozy gatherings.
With these variations, your mini cheesecakes will never be boring! If you’re looking for more inspiration, check out these delightful Mini Key Lime or High Protein Muffins to surprise and please your guests.
Expert Tips for Mini Cheesecakes
• Room Temperature Matters: Always use room-temperature ingredients, particularly cream cheese, to achieve a smooth texture and avoid lumps in your mini cheesecakes.
• Mix Gently: When incorporating eggs into the mixture, be cautious not to overmix; this prevents cracks and ensures a velvety texture.
• Watch the Bake: Pay attention to the baking time; the centers should jiggle slightly when you take them out. This “just set” stage is crucial for a creamy finish.
• Cool Slowly: Allow mini cheesecakes to cool in the pan for 15 minutes to avoid drastic temperature changes that could cause cracks.
• Chill for Best Flavor: Refrigerate your mini cheesecakes for at least 4 hours, or overnight if you can. Chilling allows the flavors to develop beautifully!
Mini Cheesecakes Recipe FAQs
How do I choose the right biscuits for the crust?
Absolutely! The type of biscuits you choose can greatly affect the flavor of your mini cheesecakes. Traditional graham cracker crumbs work beautifully, but feel free to experiment with chocolate sandwich cookies or even digestive biscuits for a unique twist. Aim for crumbs that hold together well when mixed with butter.
What’s the best way to store mini cheesecakes?
Storing your mini cheesecakes properly is essential for keeping them fresh. Place them in an airtight container in the refrigerator, where they’ll remain tasty for up to 5 days. Just make sure they’re covered to prevent any other odors from seeping in—trust me, nobody wants a cheesecakey surprise!
Can I freeze mini cheesecakes?
Yes, indeed! Mini cheesecakes freeze exceptionally well. For best results, wrap each cheesecake individually in plastic wrap and then place them in a freezer-safe container to prevent freezer burn. They can be frozen for up to 2 months. When you’re ready to indulge, effortlessly thaw them in the fridge overnight for a creamy dessert waiting just for you.
What if my mini cheesecakes crack while baking?
Don’t fret! Cracks can occur if the mixture is overmixed or the temperature changes too quickly. To avoid this, mix your ingredients gently, especially once the eggs are added. Also, watch them closely while baking; they should still jiggle slightly in the center when finished—this ensures a smooth texture once they cool!
Are these mini cheesecakes suitable for special diets?
Absolutely! If you’re looking to make these mini cheesecakes dairy-free, opt for plant-based cream cheese and sour cream. For gluten-free options, simply substitute the all-purpose flour and biscuit crumbs with gluten-free versions. Always check labels for allergens or dietary specifics to ensure they meet your needs. Enjoy customizing for everyone!
Decadent Mini Cheesecakes: No-Crack, Easy & Satisfying
Ingredients
Equipment
Method
- Preheat your oven to 320°F (160°C).
- Line a 12-cup muffin pan with paper liners.
- Combine biscuit crumbs with melted butter, mix well, and press into the muffin liner bottoms.
- Beat cream cheese in a bowl until smooth, then add granulated sugar and eggs one at a time.
- Add vanilla extract, lemon juice, flour, and sour cream to the mixture and blend gently.
- Fill each muffin cup with the cheesecake filling, leaving a little space at the top.
- Bake for 15 minutes or until edges appear set but centers jiggle slightly.
- Remove from oven and cool for 15 minutes, then refrigerate for at least 4 hours.