
Walking through my kitchen, an irresistible aroma wafts through the air, instantly transporting me to a bustling taco stand in Mexico. Today, I’m excited to share my Oven-Baked Cheesy Tacos (Crispy & Loaded), a delightful recipe that marries crunch with gooey goodness, perfect for those hectic weeknights. These crispy shells, stuffed with your choice of savory protein—beef, turkey, or even plant-based options—come together in just 30 minutes, making them a fantastic time-saving meal. Not only do they satisfy all your taco cravings, but they’re also fully customizable with vibrant toppings to please everyone at the table. Are you ready to elevate your taco game and impress your loved ones with minimal effort? Let’s dive in!
Why Are Oven-Baked Tacos So Beloved?
Quick Meal: In just 30 minutes, you can whip up a delicious dinner that doesn’t compromise on flavor.
Endless Customization: Personalize each taco with your favorite toppings—think fresh lettuce, zesty salsa, or creamy guacamole.
Family-Friendly: Everyone loves tacos! Their fun, interactive nature makes mealtime exciting for kids and adults alike.
Versatile Proteins: Swap out the ground beef for turkey or a plant-based option to suit various dietary preferences, as seen in our Cheesy Loaded Meatloaf for creative meal ideas.
Satisfying Crunch: With crispy shells and gooey cheese, every bite offers a heavenly contrast in textures that’s truly irresistible.
These Oven-Baked Cheesy Tacos are not just easy to make; they’re comforting classics that can even brighten up your next dinner party!
Oven-Baked Cheesy Tacos Ingredients
Get ready to savor every bite!
For the Filling
- Ground Beef – Provides the savory protein base; feel free to swap for turkey, chicken, or plant-based proteins for a different flavor.
- Onion – Adds sweetness and depth; use yellow, white, or red onion, or omit for simplicity.
- Minced Garlic – Enhances flavor; fresh garlic is a great choice, but garlic powder can be used in a pinch.
- Taco Seasoning – Offers a convenient spice blend; try homemade seasoning for a personal touch.
- Tomato Sauce/Salsa – Contributes moisture and tanginess; choose your favorite type—salsa can add a delightful kick!
For the Shells
- Hard Taco Shells – Create the much-loved crunchy exterior; remember, gluten-free options are available for your dietary needs.
For the Topping
- Shredded Cheese – Melts beautifully; consider cheddar, Monterey Jack, or a dairy-free alternative for a guilt-free indulgence.
- Fresh Toppings (Lettuce, Tomatoes, Red Onion, Cilantro) – Adds freshness and crunch; customize based on your taste preferences.
With these ingredients, you’ll be well on your way to mastering Oven-Baked Cheesy Tacos that are crispy, loaded, and irresistibly delicious!
Step‑by‑Step Instructions for Oven-Baked Cheesy Tacos
Step 1: Preheat the Oven
Start by preheating your oven to 400°F (200°C), allowing it to reach the perfect temperature for baking. This step ensures that your Oven-Baked Cheesy Tacos will crisp up beautifully and achieve that golden finish. While the oven warms up, you can begin preparing the flavorful filling.
Step 2: Cook the Beef and Onion
In a large skillet over medium heat, add your ground beef along with diced onion, stirring frequently until the meat is browned and the onion is translucent, about 5-7 minutes. Make sure to drain any excess fat to keep your tacos from becoming greasy. These initial steps set the foundation for the savory goodness that will fill your taco shells.
Step 3: Season and Add Garlic
Once the beef and onion mixture is browned, stir in the minced garlic and taco seasoning. Cook for an additional minute, allowing the spices to bloom and infuse your filling with rich flavors. This step adds depth to your Oven-Baked Cheesy Tacos, making each bite a burst of savory delight.
Step 4: Incorporate Tomato Sauce
Add your choice of tomato sauce or salsa to the skillet and let the mixture simmer for about 5 minutes. Stir occasionally, allowing the flavors to meld beautifully. The sauce will bring moisture to your filling, enhancing the overall taste and texture of your crispy tacos as they bake.
Step 5: Fill the Taco Shells
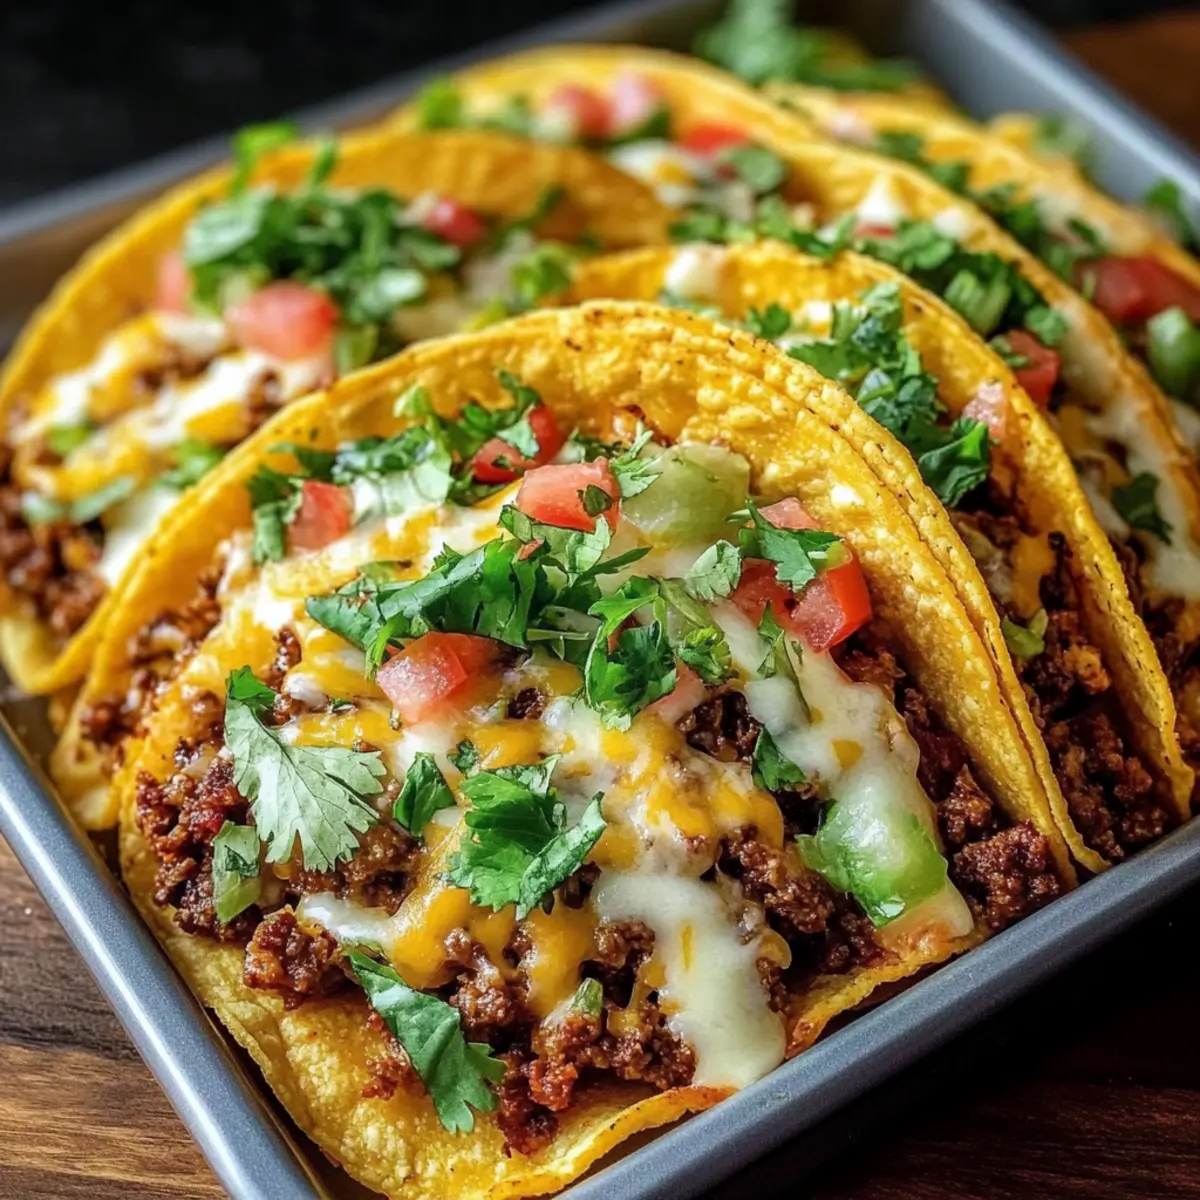
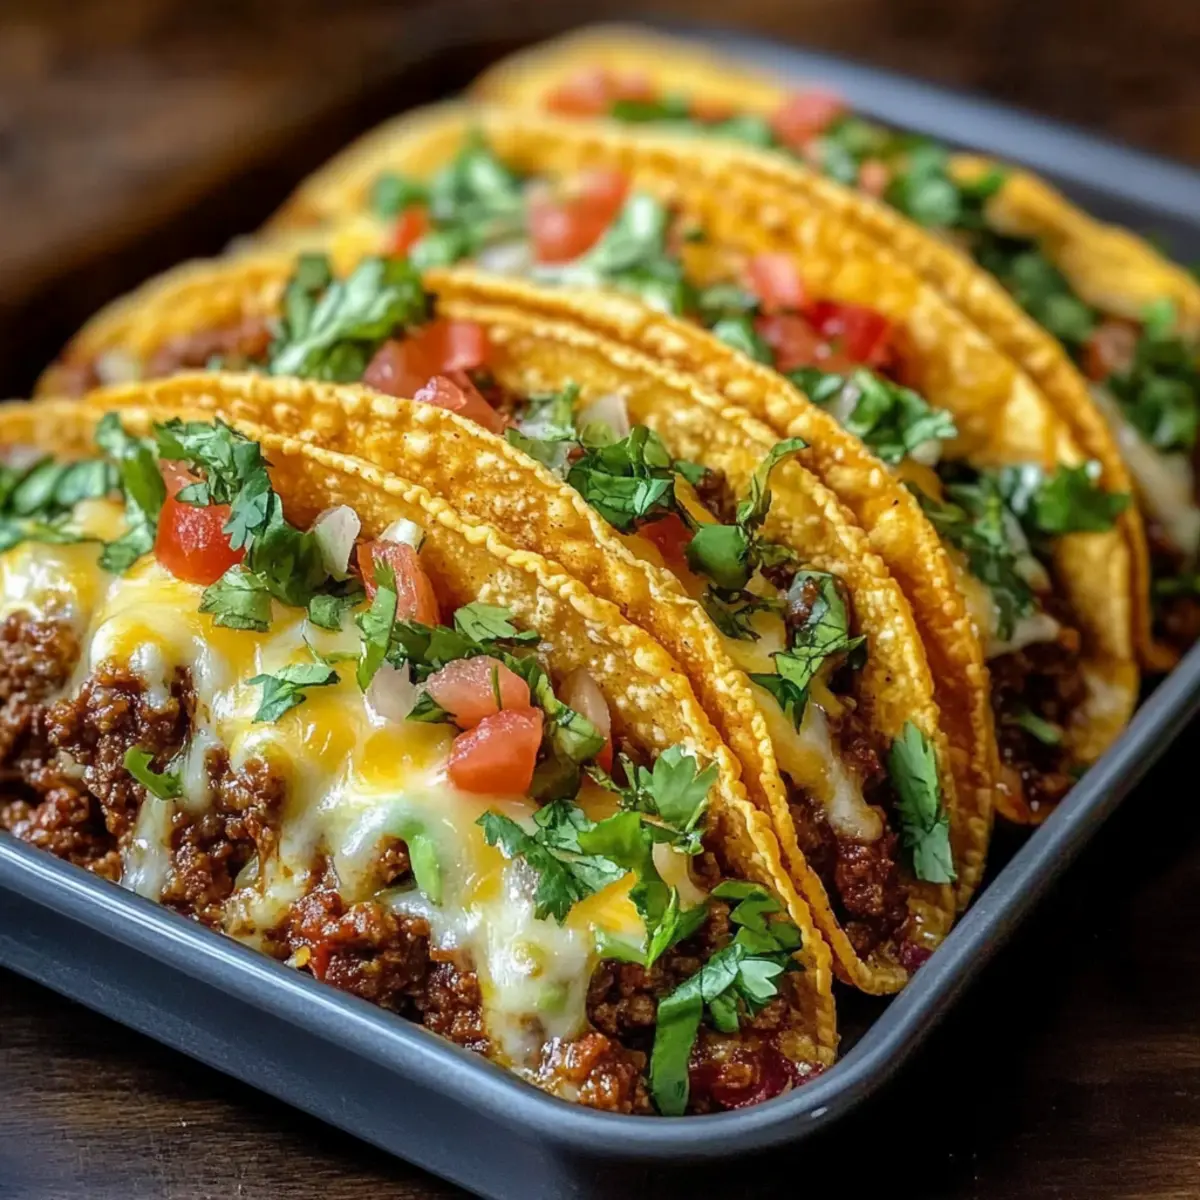
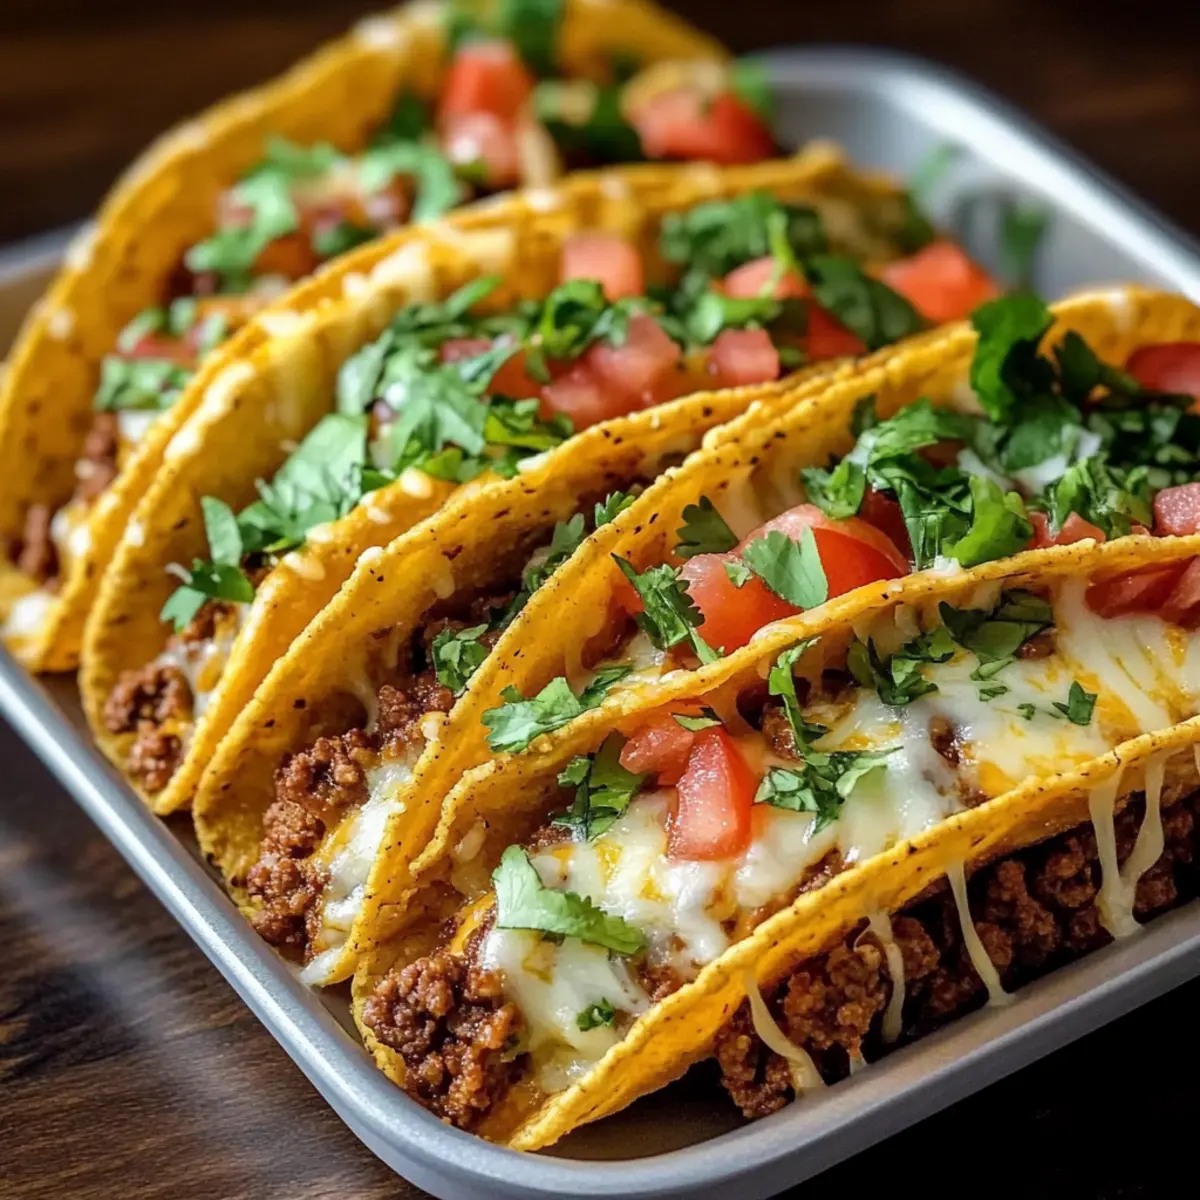
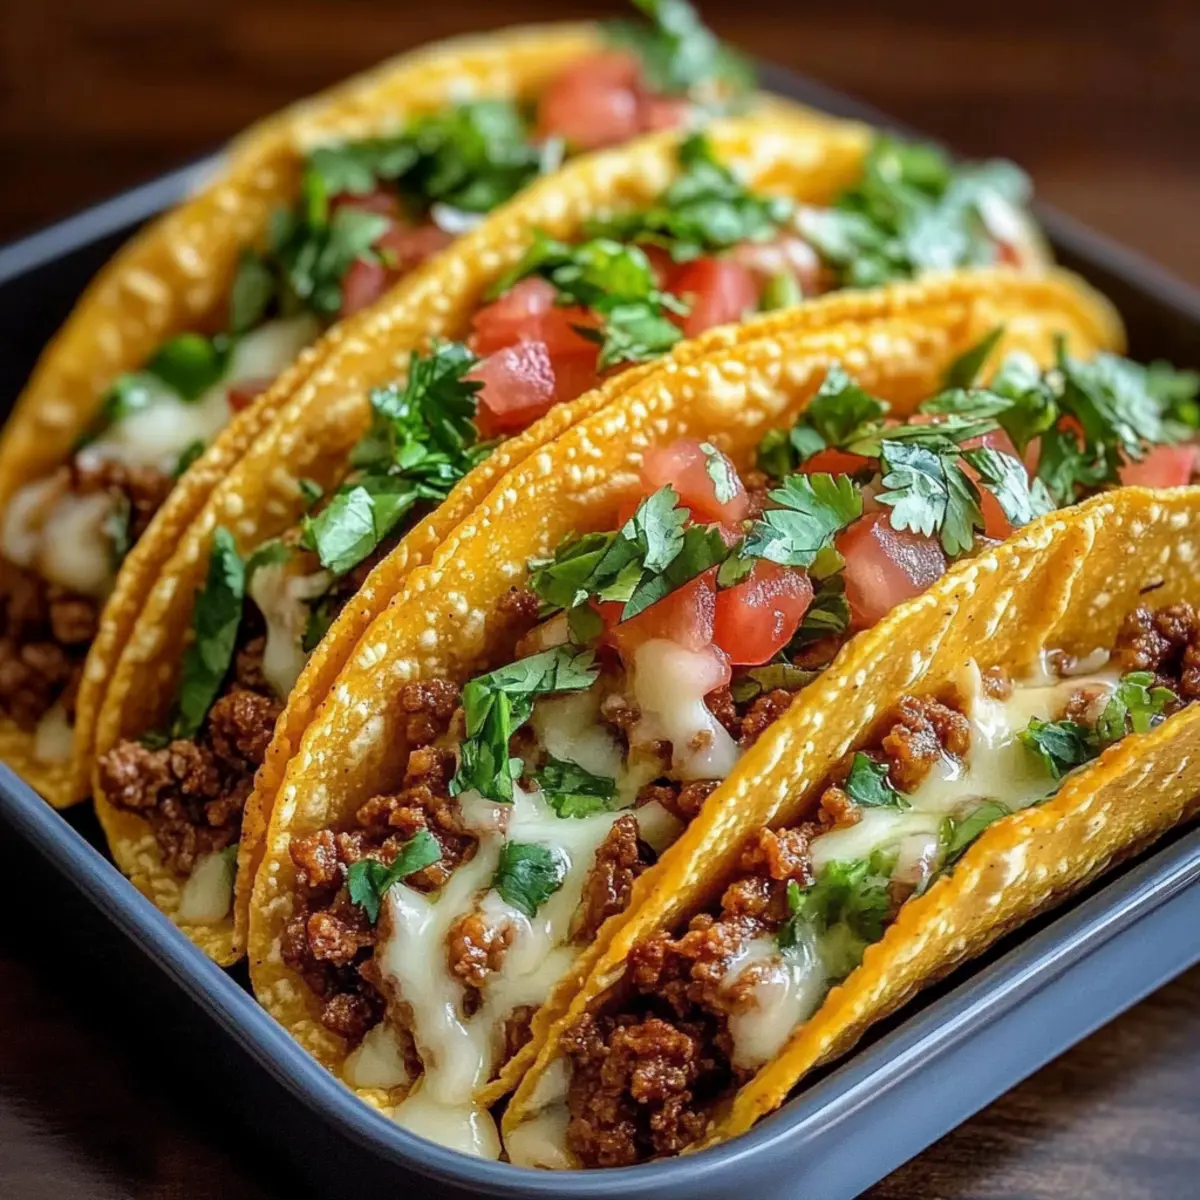
Carefully fill each hard taco shell with the beef mixture, ensuring they are generously packed. Top each taco with a hearty sprinkle of shredded cheese, which will melt into gooey perfection while baking. This step is key to achieving that iconic combination of crunchy and cheesy in your Oven-Baked Cheesy Tacos.
Step 6: Bake to Perfection
Place the filled taco shells on a baking sheet and bake in your preheated oven for 10-15 minutes. Keep an eye on them; you’ll know they’re ready when the cheese is bubbly and the shells are golden brown. This baking step transforms your ingredients into a delicious, cohesive dish that will tantalize your family and friends.
Step 7: Add Fresh Toppings
Once out of the oven, let your Oven-Baked Cheesy Tacos cool for a minute before adding fresh toppings like lettuce, diced tomatoes, red onion, and cilantro. These fresh elements provide a vibrant contrast to the savory filling, enhancing both flavor and presentation. Serve them immediately, allowing every bite to shine with deliciousness!
Oven-Baked Cheesy Tacos Variations
Feel free to explore these delightful twists on your Oven-Baked Cheesy Tacos that will tantalize your taste buds!
-
Protein Swap: Replace ground beef with ground turkey, chicken, or plant-based proteins like lentils or black beans for a lighter, yet just as delicious meal. Each swap brings its own unique flavor profile!
-
Cheese Alternatives: Experiment with different cheese varieties, such as pepper jack for a spicy kick or a dairy-free cheese for a vegan-friendly option. Cheese not only binds the filling together but also adds creaminess to your taco experience.
-
Extra Heat: Spice things up by adding jalapeños or red pepper flakes to the filling. For those who crave an extra layer of heat, consider sprinkling some cayenne pepper into the taco seasoning!
-
Crunch Factor: Swap hard taco shells for soft tortillas or lettuce wraps for a gluten-free or low-carb option. This simple change can transform the entire texture of your meal.
-
Flavor Boosts: Enhance the filling with black olives, corn, or diced bell peppers for added texture and taste. A little creativity here brings a burst of color and taste that everyone will love.
-
Sweet Twist: Include a touch of sweetness by adding diced pineapple or mango into the filling mix for a tropical flair. This unexpected addition can elevate your tacos to new heights!
-
Herb Infusion: Add fresh herbs like parsley, cilantro, or green onions into the beef mixture or as a topping for extra freshness and flavor. These herbs not only enhance the taste but also brighten up your dish visually!
For more delicious comfort food ideas, be sure to check out our Cheesy Hamburger Rice and indulge in our sweet Cookie Dough Tacos for a delightful dessert experience!
What to Serve with Oven-Baked Cheesy Tacos?
Indulge in a delightful culinary experience by pairing these savory tacos with enticing sides that enhance their flavors.
- Creamy Guacamole: This rich dip adds a creamy texture and fresh flavor, perfectly balancing the crunch of the tacos.
- Zesty Corn Salad: A refreshing mix of corn, lime, and cilantro that brings a sweet, tangy element to your meal, uplifting every bite.
- Crispy Nachos: Load up tortilla chips with melted cheese and toppings for a fun, shareable appetizer that complements the taco feast.
- Spicy Mexican Rice: Fluffy rice mixed with spices, beans, and vegetables gives a hearty addition that pairs beautifully with the cheesy tacos.
- Sour Cream: A classic topping that cools down the spice in the tacos, enhancing their flavor with a smooth, tangy finish.
- Margaritas: Sip on this classic drink for a refreshing, citrusy complement that adds a festive flair to your taco night!
For a complete dining experience, each of these pairings brings together textures and flavors that will make your evening deliciously memorable. Enjoy!
Expert Tips for Oven-Baked Cheesy Tacos
-
Preheat Plea: Make sure to always preheat your oven; it’s crucial for achieving that perfect golden crunch in your Oven-Baked Cheesy Tacos.
-
Grease-Free Filling: Don’t forget to drain the ground beef well to avoid greasy tacos. A dry filling keeps the shells crispy and delightful!
-
Stuff ’Em Right: Fill the taco shells generously for maximum flavor. Don’t be shy—each mouthful should burst with your savory filling!
-
Bake with Precision: Keep a close eye on the baking time. Overbaking can lead to dry, burnt edges while underbaking can make the shells chewy.
-
Get Creative: Explore variations by mixing different proteins or cheeses. Personalize your Oven-Baked Cheesy Tacos for even more deliciousness!
Storage Tips for Oven-Baked Cheesy Tacos
-
Room Temperature: Allow leftover Oven-Baked Cheesy Tacos to cool completely before storing them. They can be left out for up to 2 hours but should not stay unrefrigerated longer.
-
Fridge: Store any leftover tacos in an airtight container in the refrigerator for up to 3 days. This helps maintain their flavor and keeps them fresh for your next meal.
-
Freezer: If you’re looking to save some for later, wrap individual tacos tightly in plastic wrap or aluminum foil, then place them in a freezer-safe bag. They can last up to 2 months in the freezer.
-
Reheating: To reheating, place frozen tacos in the oven at 350°F (175°C) for about 20-25 minutes. If refrigerated, reheat them at the same temperature for about 10-15 minutes, ensuring they are heated through while retaining their crispy texture.
Make Ahead Options
These Oven-Baked Cheesy Tacos are perfect for busy home cooks looking to save time during the week! You can prepare the beef filling and store it in an airtight container in the refrigerator for up to 3 days. To do this, simply follow the steps of cooking the beef, onion, garlic, and seasoning, then let it cool before sealing it away. When you’re ready to enjoy a quick and delightful meal, fill the taco shells with the prepped mixture, sprinkle with shredded cheese, and bake them in the oven as instructed—giving you delicious, crispy tacos in no time. Just remember, assemble them fresh to maintain that irresistible crunch!
Oven-Baked Cheesy Tacos Recipe FAQs
What type of taco shells should I use for Oven-Baked Cheesy Tacos?
You can use hard taco shells for that satisfying crunch! If you are gluten-sensitive, look for gluten-free taco shells available in most grocery stores. I often opt for a brand that holds up well in the oven and doesn’t crumble when filled!
How long can I store leftover Oven-Baked Cheesy Tacos?
Leftover tacos should be placed in an airtight container and can be stored in the refrigerator for up to 3 days. To keep them at their best, I recommend allowing them to cool completely before sealing them away.
Can I freeze Oven-Baked Cheesy Tacos?
Absolutely! To freeze, wrap each individual taco tightly in plastic wrap or aluminum foil, then place them all in a freezer-safe bag. These tasty treats can be frozen for up to 2 months. When you’re ready to enjoy them, bake from frozen at 350°F (175°C) for about 20-25 minutes.
What if my taco shells are getting soggy after baking?
This can happen if they are overfilled or if the filling is too wet. To combat this, make sure to drain any excess liquid from the meat mixture well and fill the shells moderately. If you do find them soggy, try reheating the tacos in the oven at 350°F for a few extra minutes to regain some crispiness.
Are there any dietary considerations for this recipe if I have allergies?
Yes! The recipe can be easily modified to accommodate various dietary needs. You can use ground turkey or a plant-based protein for a lighter or vegetarian option. For those with cheese allergies, options like nutritional yeast or dairy-free cheese can be great substitutes without sacrificing flavor. Always make sure to check ingredients if you have specific allergies.
How can I customize my Oven-Baked Cheesy Tacos?
Customization is key! Feel free to switch the protein to chicken or a plant-based alternative, and change up the toppings based on your preferences. Consider adding fresh jalapeños for heat, or guacamole and sour cream for extra creaminess. The more the merrier when it comes to personalizing your tacos!
Crispy Oven-Baked Cheesy Tacos Loaded with Flavor
Ingredients
Equipment
Method
- Preheat your oven to 400°F (200°C).
- In a large skillet over medium heat, cook the ground beef and onion until browned and translucent.
- Stir in the minced garlic and taco seasoning. Cook for another minute.
- Add the tomato sauce or salsa and simmer for 5 minutes.
- Fill each hard taco shell with the beef mixture and sprinkle with shredded cheese.
- Bake in your preheated oven for 10-15 minutes until the cheese is bubbly and the shells are golden brown.
- Let cool for a minute, then add fresh toppings before serving.